Configuring Twitter Authenticator
The Twitter authenticator is configured as a federated authenticator in WSO2 Identity Server to authenticate Twitter users to log in to your organization’s applications. Twitter is a free social networking microblogging service that allows registered members to broadcast short posts called tweets.
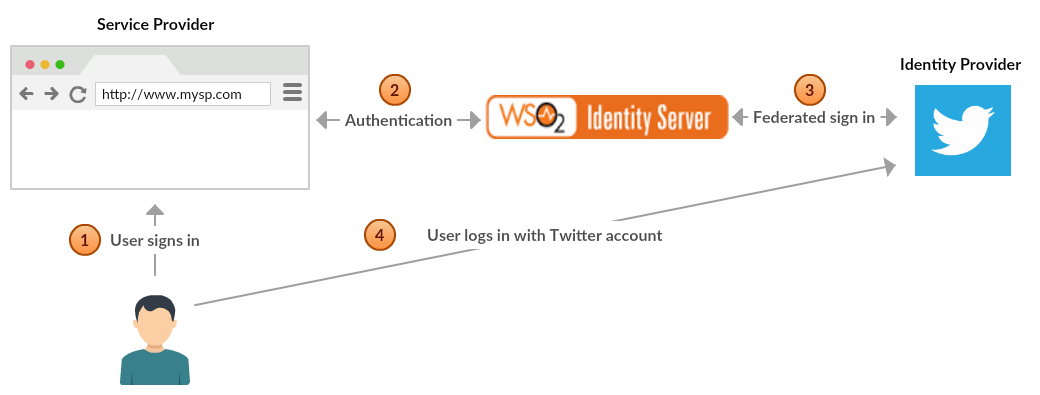
The diagram below illustrates the flow of the Twitter federated authenticator.
This page provides instructions on how to configure the Twitter authenticator and Identity Server using a sample app. You can find more information in the following sections.
Info
This is tested with the Twitter API version 1.1 which uses OAuth 1.0a. Twitter Authenticator is supported by Identity Server 5.1.0 upwards.
Deploying Twitter artifacts
-
Download the WSO2 Identity Server from here.
-
Place the Twitter authenticator .jar file (
org.wso2.carbon.extension.identity.authenticator.twitter.connector-X.X.X.jar) into the<IS_HOME>/repository/components/dropinsdirectory. This can be downloaded from the WSO2 Store .Note
If you want to upgrade the Twitter Authenticator in your existing IS pack, please refer upgrade instructions.
Configuring the Twitter App
- Create an account at https://twitter.com and log in.
-
Navigate to https://apps.twitter.com/ and click Create New App.
- Provide an application name and description.
- For this tutorial, enter
https://127.0.0.1as the website URL. It is used as a placeholder since application used for the tutorial is not publicly available. -
Give the Callback URL as
https://<HOST_NAME_OF_IS>:9443/commonauth. For example:https://apps.customhost.com:9443/commonauth.Note
If the Identity Server is running on your local machine, add an entry as mentioned below and use this host name (here
apps.customhost.com) in your twitter callback url.127.0.0.1 apps.customhost.com -
Click Create your Twitter application.

Note
Callback URL is the URL to which the browser should be redirected after the authentication is successful. It should have this format:
https://(host-name):(port)/acs. Here ACS URL (Assertion Consumer URL) is the endpoint in WSO2 Identity Server which accepts the response sent by Google. -
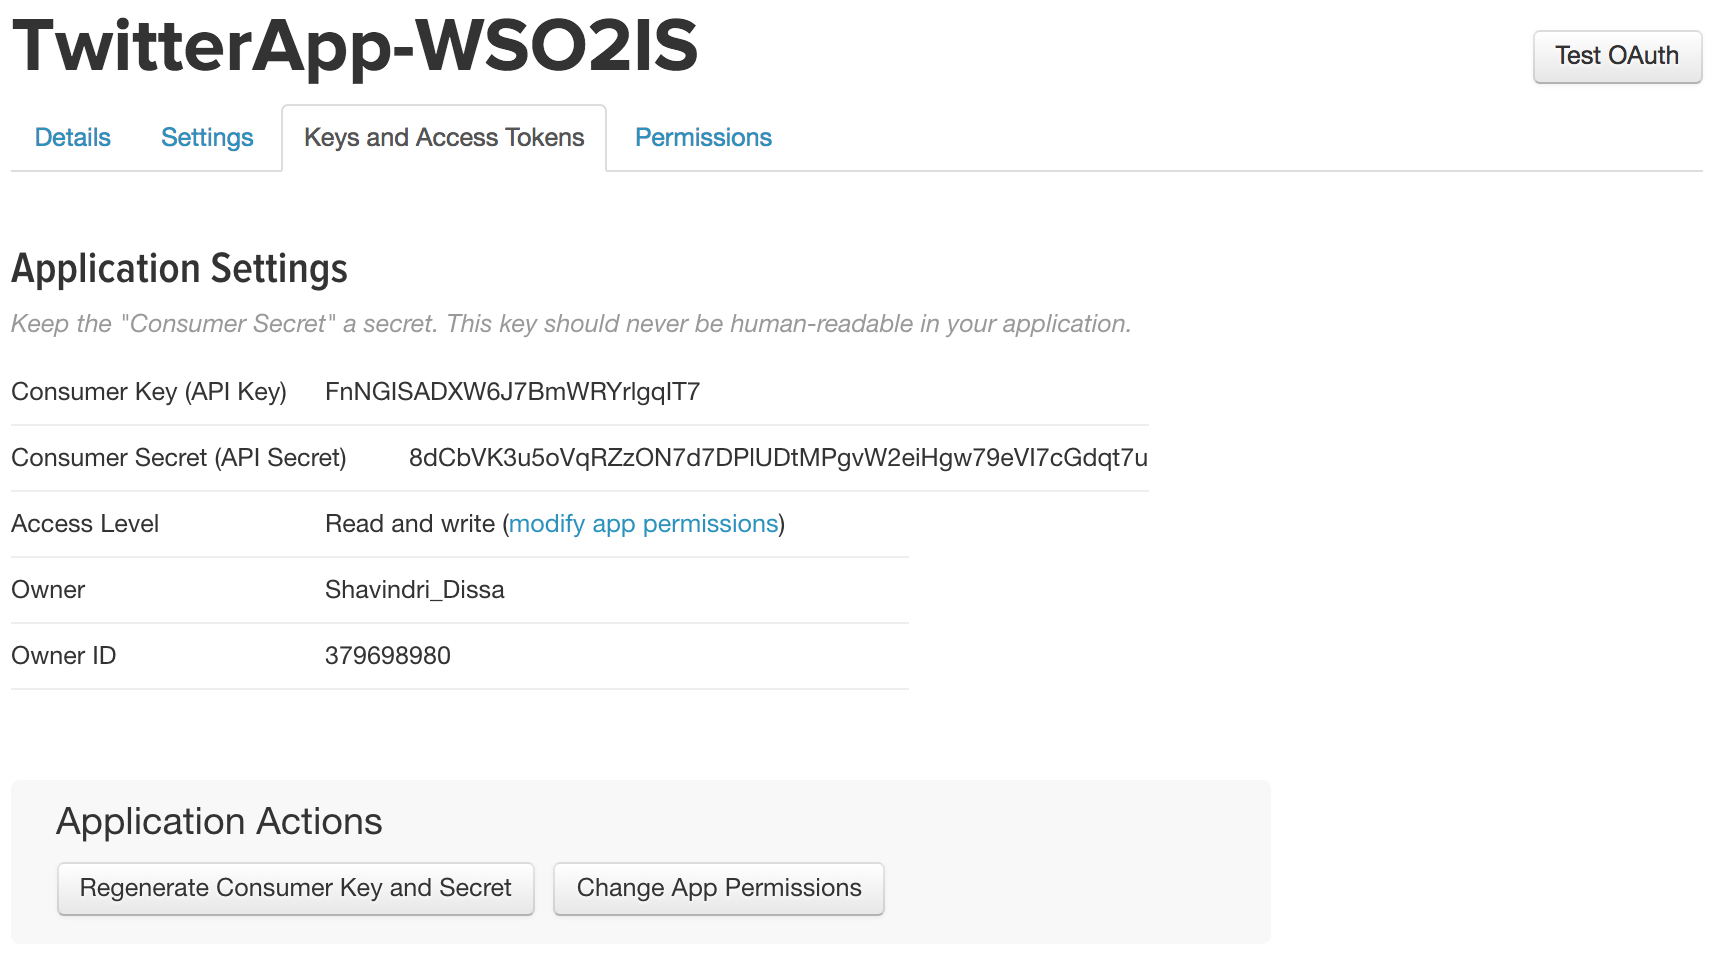
After creating the app, go to the Keys and Access Tokens tab to get the API Key and API Secret. These are the Consumer Key and Consumer Secret values shown.
Example:
Deploying travelocity sample application
The next step is to deploy and configure travelocity application. See deploy the sample app for more information on configuring travelocity application.
Once this is done, the next step is to configure the WSO2 Identity Server by adding an identity provider and service provider as shown below.
Configuring the identity provider
Now you have to configure WSO2 Identity Server by adding a new identity provider. For more information about the Identity Providers, see Configuring an Identity Provider .
-
Log in to the management console as an administrator.
- In the Identity Providers section under the Main tab of the management console, click Add.
-
Give a suitable name for Identity Provider Name. Expand Federated Authenticators and expand TwitterAuthenticator Configuration.
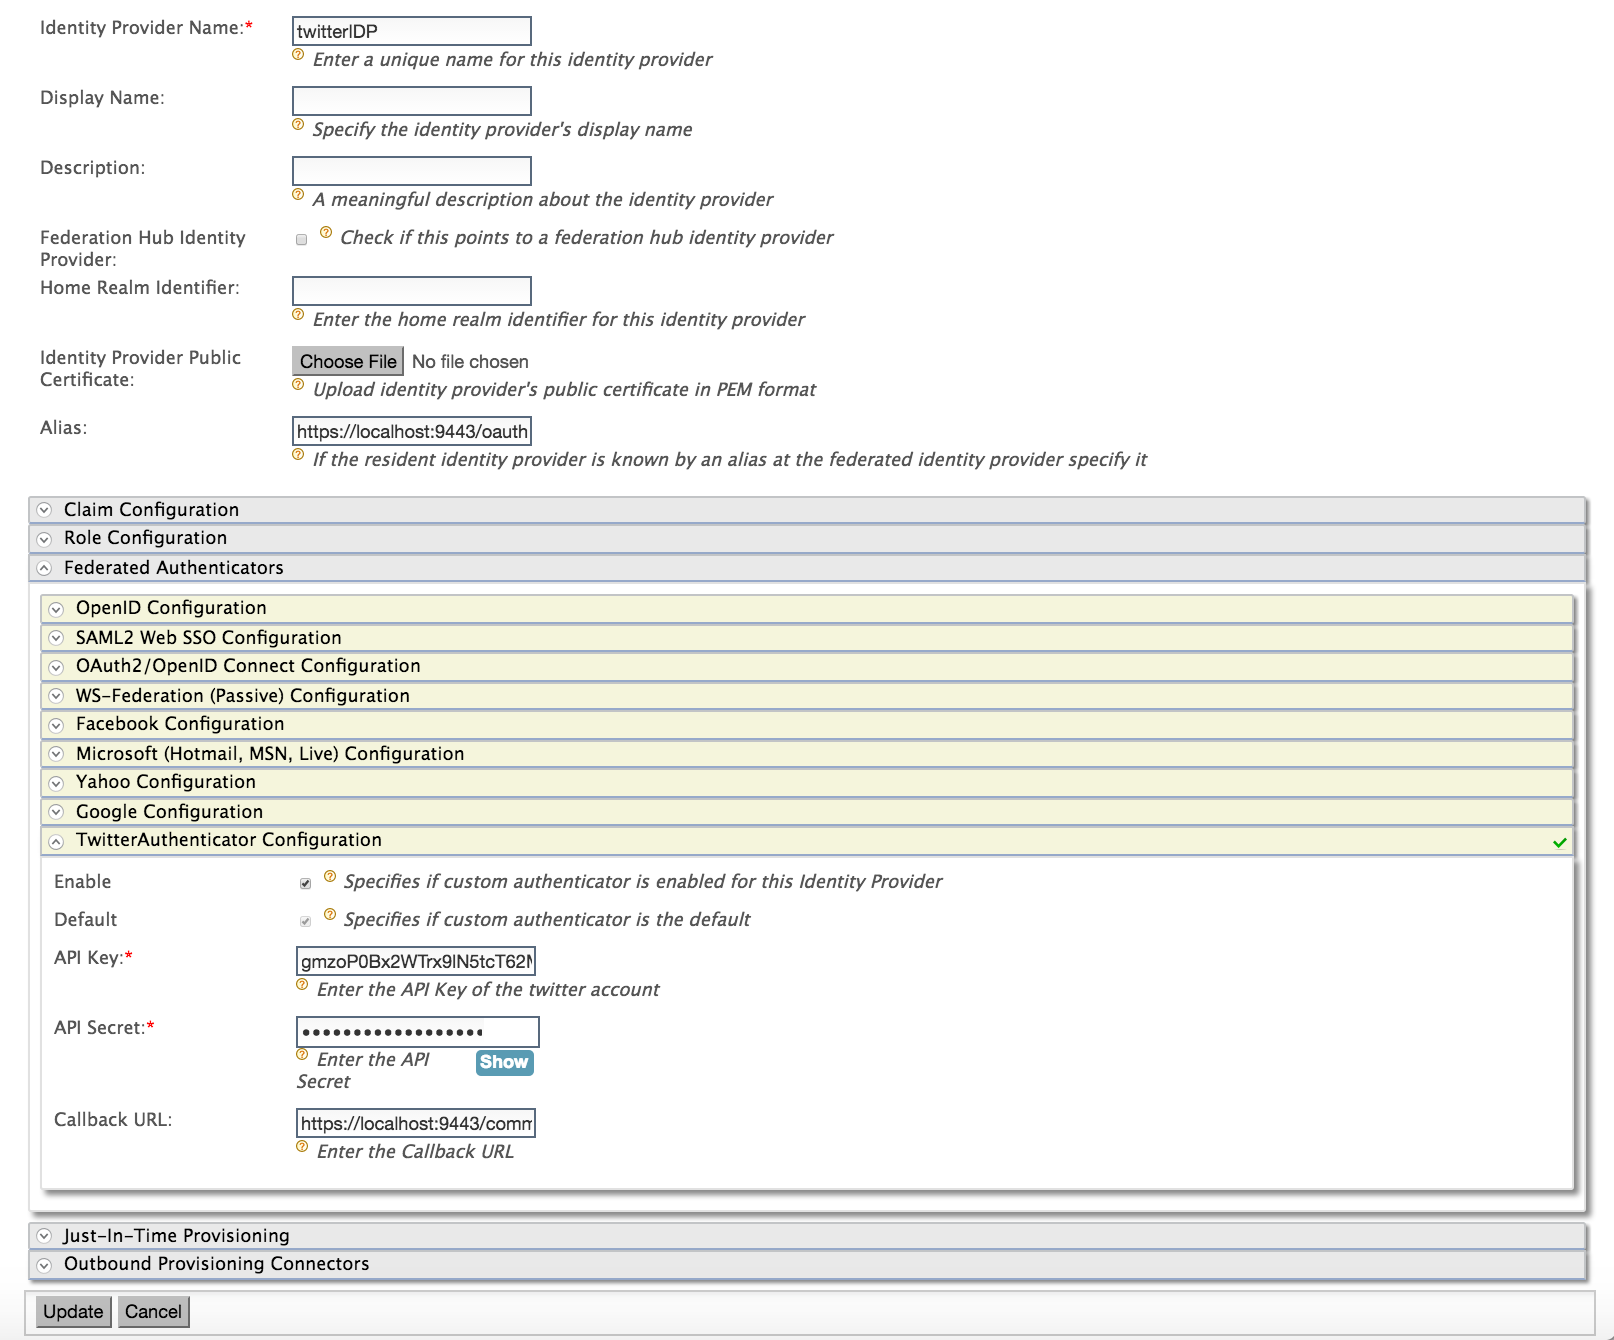
Enter the values as given when you created the twitter application. - Select both checkboxes to Enable the Twitter authenticator** and make it the Default.
- API Key : Consumer Key for your app. - API Secret : Consumer Secret for your app. - Callback URL : Service Provider's URL where code needs to be sent (e.g., https://apps.customhost.com:9443/commonauth ) -
Click Register.
You have now added the identity provider.
Configuring the service provider
The next step is to configure the service provider.
-
In the previous section of this guide you have deployed and registered the
travelocity.comwebapp. Let's edit the same service provider to configuretwitteras the identity provider. -
Locate the "travelocity.com" service provider and navigate to the Local and Outbound Authentication Configuration section.
-
Select the identity provider you created from the dropdown list under Federated Authentication.

-
Ensure that the Federated Authentication radio button is selected and click Update to save the changes.
You have now added and configured the service provider.
Testing the sample
-
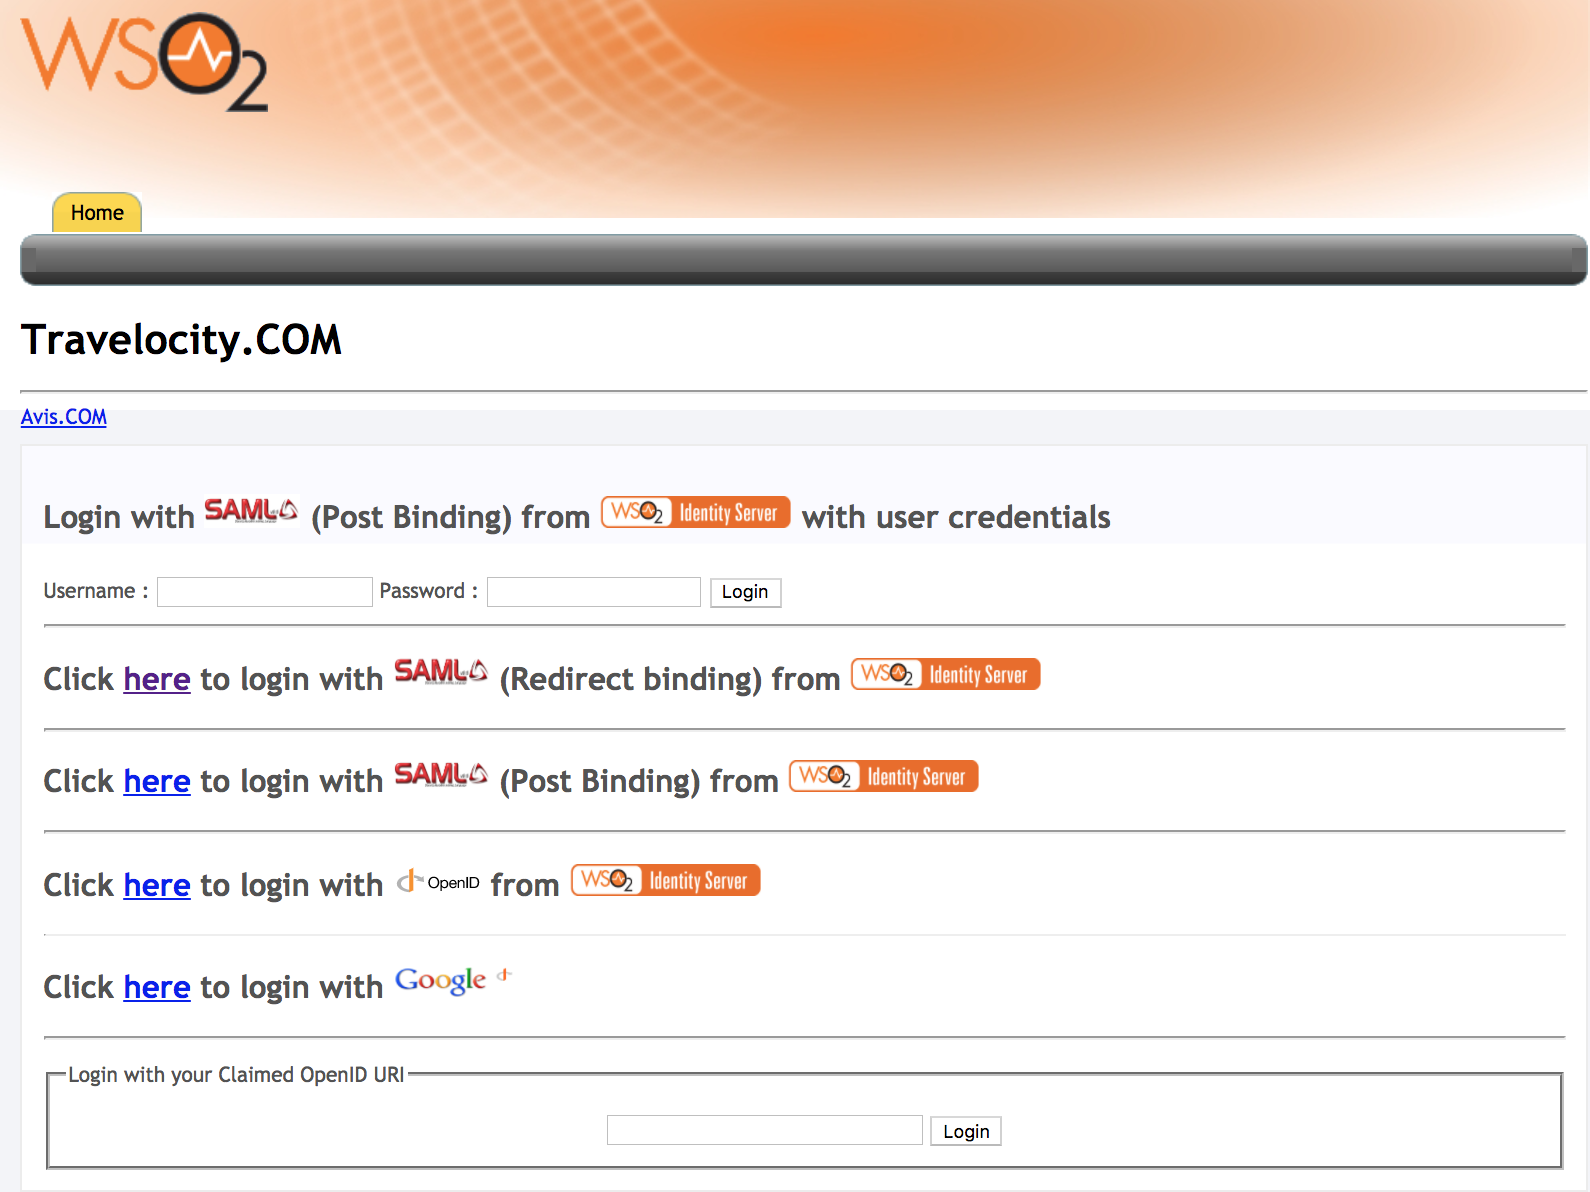
To test the sample, go to the following URL:
http://<TOMCAT_HOST>:<TOMCAT_PORT>/travelocity.com/index.jsp. ex:http://wso2is.local:8080/travelocity.com -
Click the option available to log in with SAML from the WSO2 Identity Server.
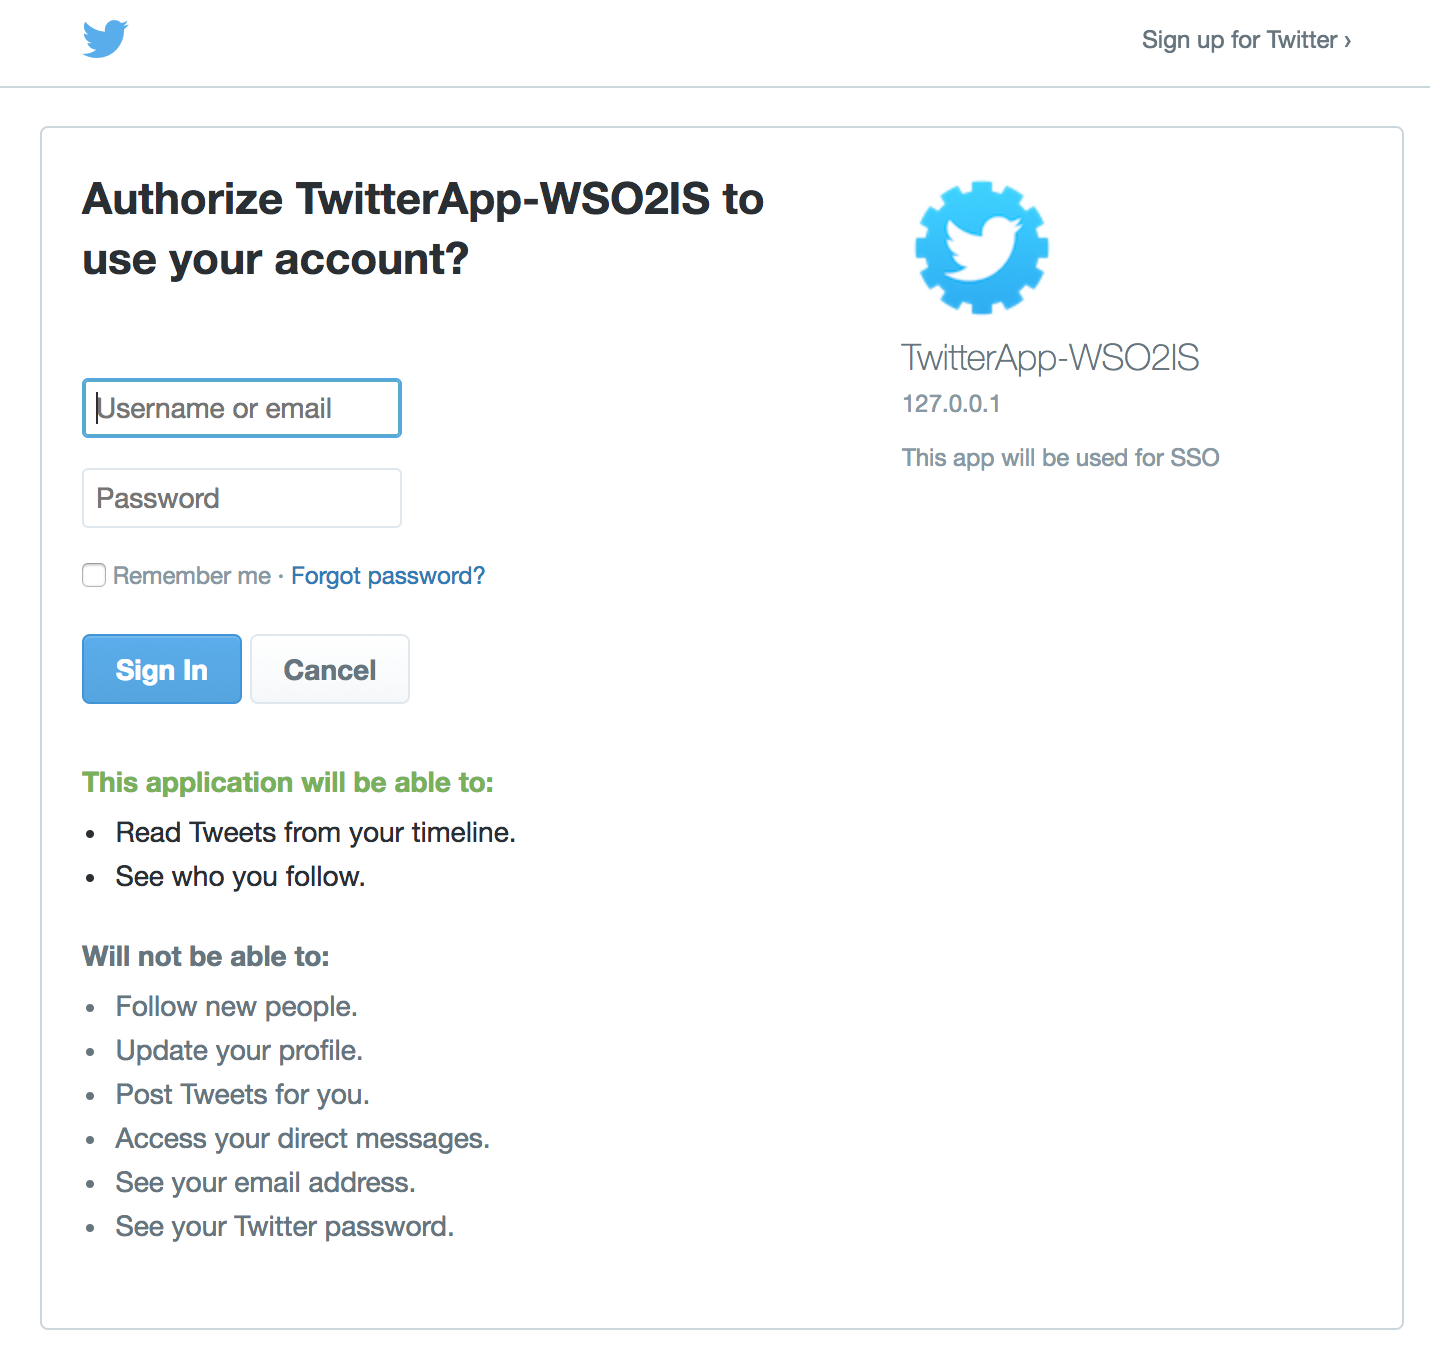
You are navigated to the Twitter application. Enter the username and password of your Twitter account to log in.
Example:
-
Once the authentication is complete, you will be taken to the home page of the travelocity.com app.
Example:
