Self Registration
This page guides you through setting up self-registration for users to onboard themselves to WSO2 Identity Server.
Follow the steps given below to register users for the super tenant, carbon.super.
Prerequisites
-
If you have migrated from a previous IS version, ensure that the
IdentityMgtEventListenerwith theorderId=50is set to false and that the Identity Listeners withorderId=95andorderId=97are set to true in the<IS_HOME>/repository/conf/deployment.tomlfile.Note
You can skip this configuration if there are no such entries for
event.default_listener.xxxindeployment.toml.[event.default_listener.identity_mgt] priority= "50" enable = false [event.default_listener.governance_identity_mgt] priority= "95" enable = true [event.default_listener.governance_identity_store] priority= "97" enable = true -
Enable the email sending configurations of the WSO2 Identity Server.
Tip
Typically, the AccountConfirmation template is used to send email notifications.
You can edit and customize the email template. For more information on how to do this, see Customizing Automated Emails.
Enable self-registration
Enable self-registration for a specific tenant
-
Log in to the Management Console (
https://<IS_HOST>:<IS_PORT>/carbon)
!!! note If your IS is already running, make sure to stop and start to apply configurations. -
Navigate to Main > Identity.
-
Select the Identity Providers -> Resident -> User Onboarding section.
-
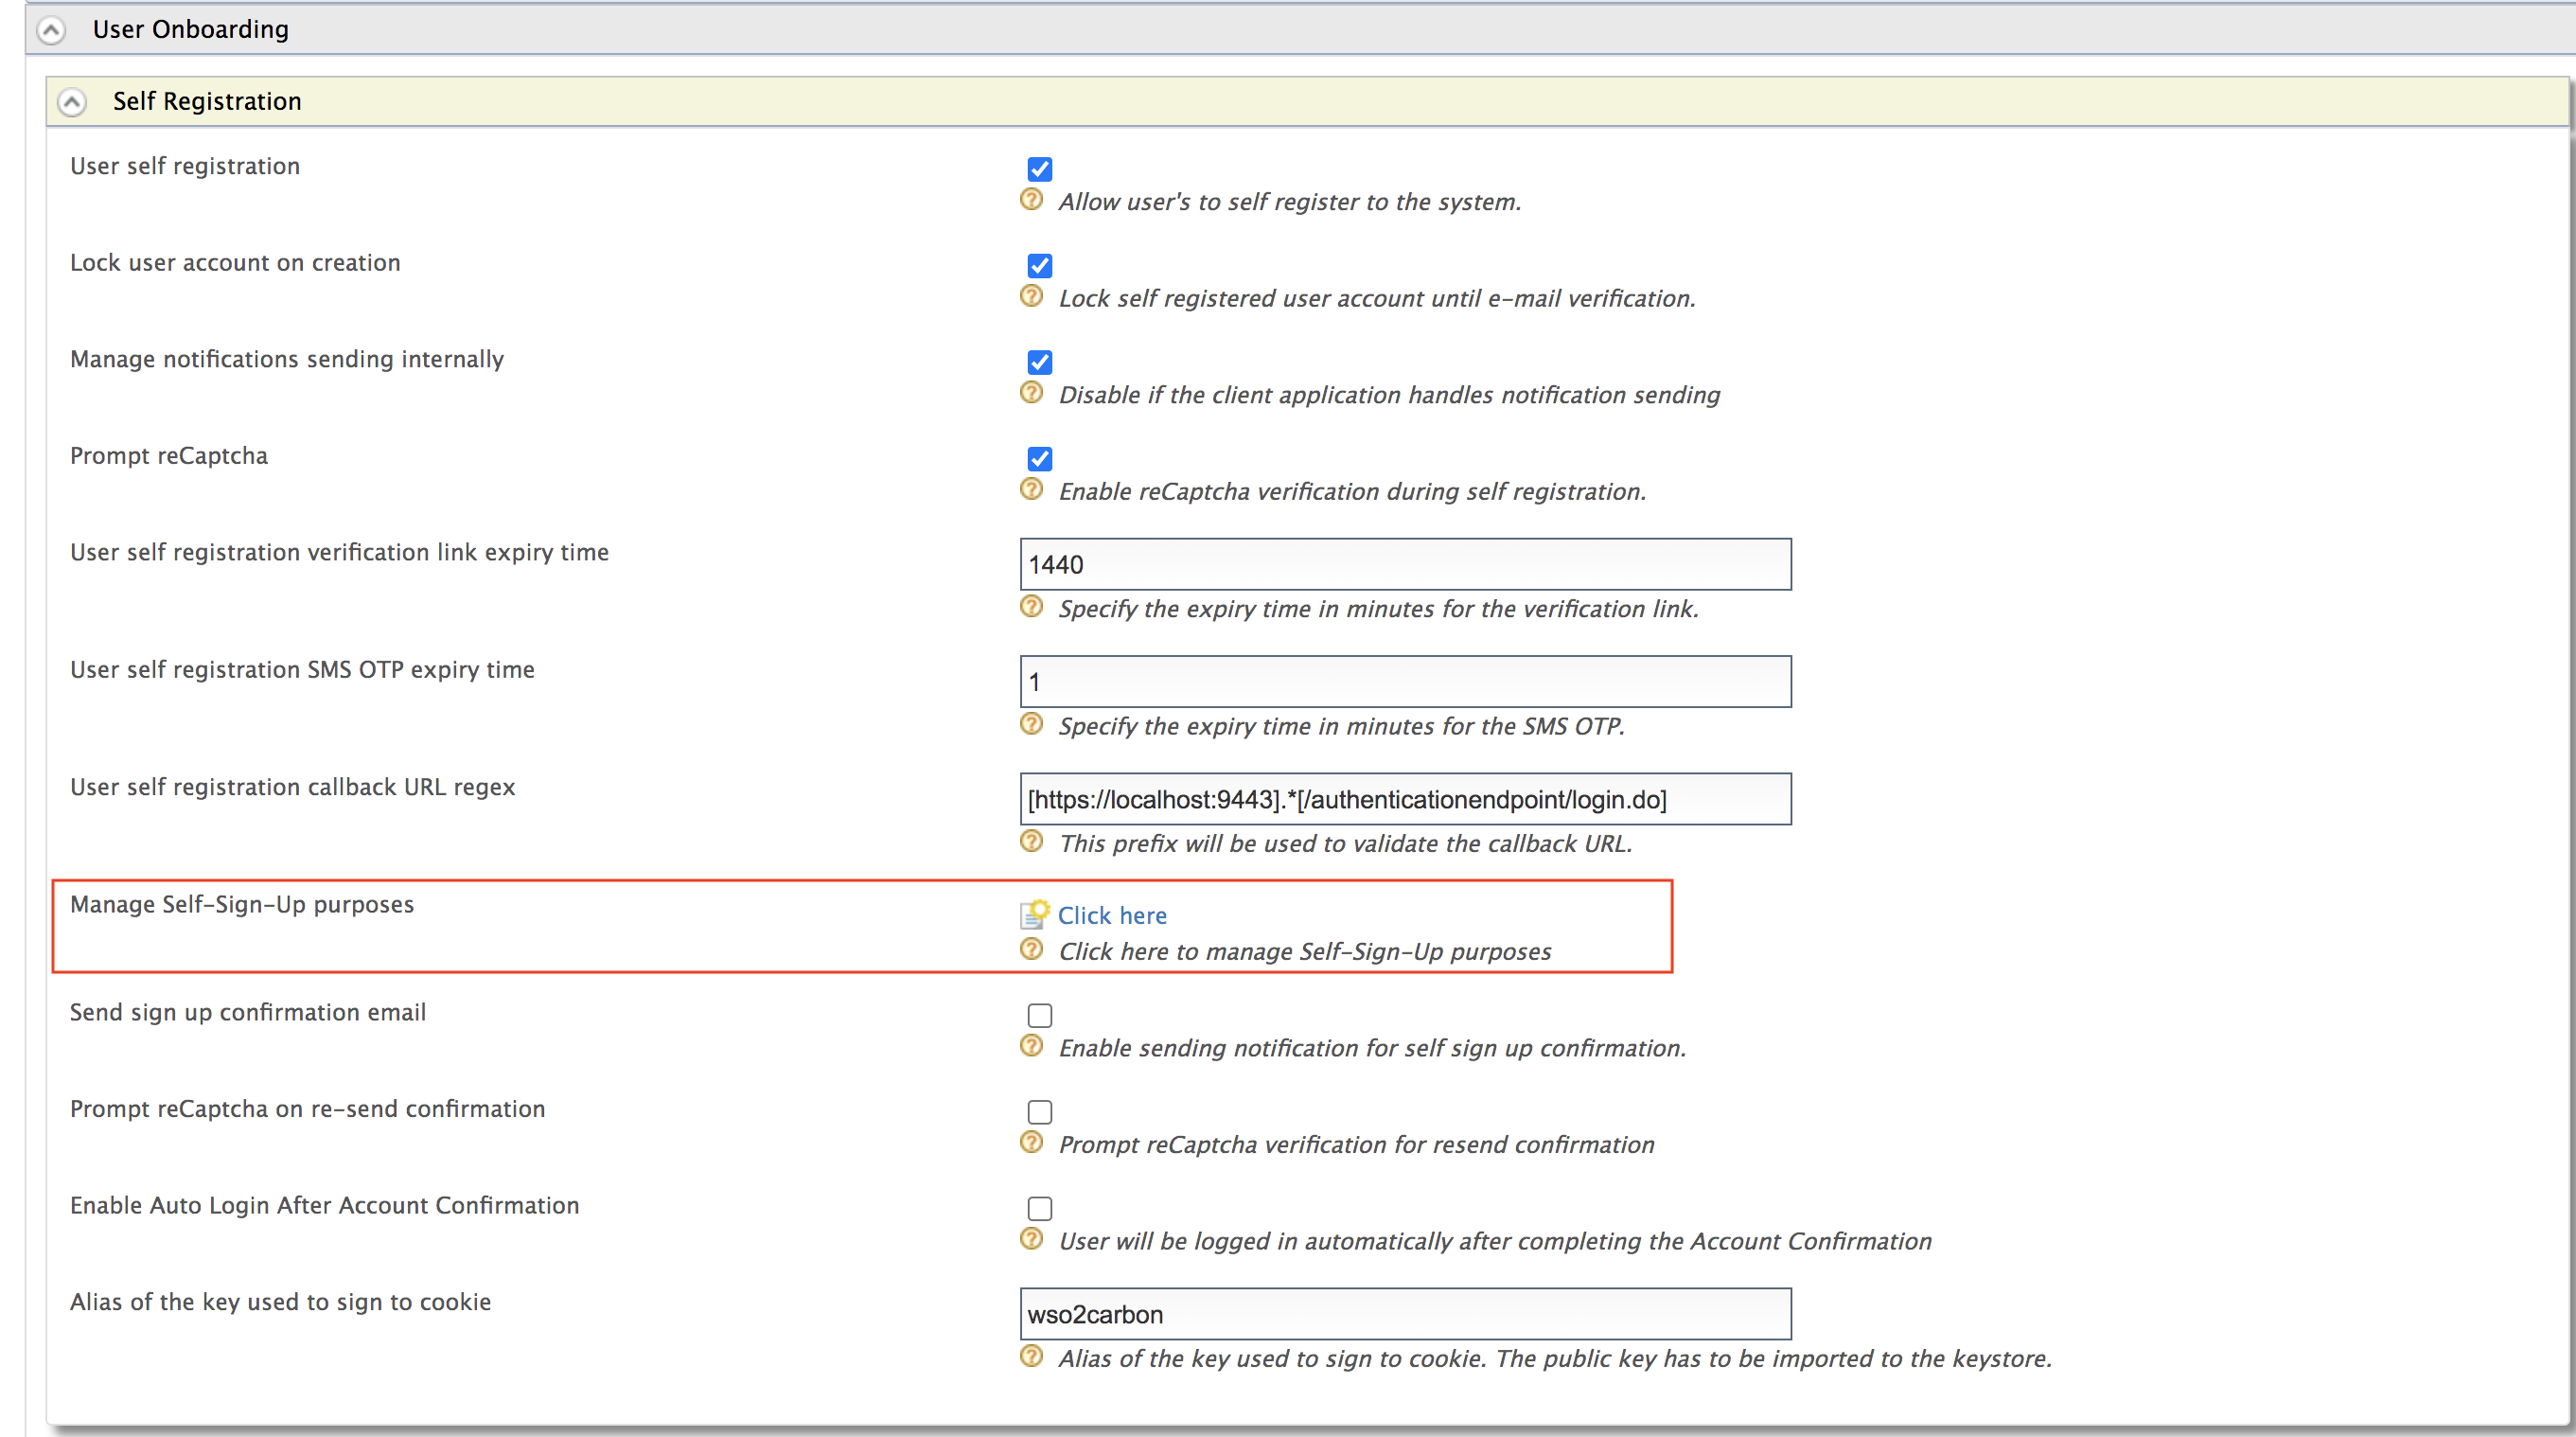
Expand the Self Registration section and configure the following properties.
Field Description User self registration Enable self registration. Lock user account on creation Enable account lock during self-registration. The account will be unclocked upon confirmation. Manage notifications sending internally Enable the Identity server to send confirmation emails to the user. If the client application handles notification sending already, unselect it.
Prompt reCaptcha Select to enable reCAPTCHA for self-registration. See Setting Up reCAPTCHA for more information. User self registration verification link expiry time Number of minutes that the confirmation link would be valid. The confirmation link will expire after the specified time has elapsed.
Prompt reCaptcha on re-send confirmation Select to enable reCAPTCHA for re-sending confirmation email.
User self registration callback URL regex The regex pattern used to validate the callback URL you are adding as the recovery flow callback URL. Note
The sample User self registration callback URL regex to use when testing the product is
^https:\/\/localhost:9443\/.*. However, users should modify it to meet their requirements when they deploy the product.
Now you have set up self-registration. Next, let's see how you can configure self-registration consent purposes via the management console of WSO2 Identity Server.
Tip
For information on the REST APIs for self-registration, see Self-Registration Using REST APIs.
Enable self-registration globally
To enable self-registration globally:
-
Navigate to the
<IS_HOME>/repository/conf/deployment.tomlfile and add the following configurations.Tip
To avoid configuration issues, do this before starting the WSO2 Identity Server product instance.
[identity_mgt.user_self_registration]
allow_self_registration=true
lock_on_creation=true
enable_recaptcha=true
verification_email_validity="1440"
callback_url="[${carbon.protocol}://${carbon.host}:${carbon.management.port}].*[/authenticationendpoint/login.do]*"
enable_resend_confirmation_recaptcha=true

[identity_mgt.user_self_registration.notification]
manage_internally=true
The following table lists more information about these configurations.
Configuration Description allow_self_registrationSet this to trueto enable this configuration at a global level.lock_on_creationSetting this to true ensures that the user's account is locked on creation. manage_internallySetting this value to trueensures the internal email sending module is enabled. However, setting this tofalseensures that the email-sending data is available to the application via a web service. The application can send the email using its email sender.enable_recaptchaSet this to trueto enable reCAPTCHA for self-registration globally. See Setting Up reCAPTCHA for more information.verification_email_validityThe validity period of the email is in minutes. callback_urlRegEx pattern to validate the callback URL sent in the email. Note
The sample User self registration callback URL regex to use when testing the product is
^https:\/\/localhost:9443\/.*. However, users should modify it to meet their requirements when they deploy the product.enable_resend_confirmation_recaptchaSet this to trueto enable reCAPTCHA for resending confirmation email. -
Some listeners must be enabled for this to work when the operations are invoked.
Tip
These are usually set by default in the product unless you have made any changes.
[event.default_listener.identity_mgt] priority="50" enable=false [event.default_listener.governance_identity_store] priority="97" enable=true [event.default_listener.scim] priority="90" enable=true -
Save the configuration changes and restart the server.
Configure consent purposes
Follow the instructions below to configure self-registration consent purposes and appropriate user attributes:
-
Access the management console. (
https://<IS_HOST>:<IS_PORT>/carbon). -
Navigate to Main -> Identity -> Identity Providers -> Resident ->User Onboarding -> Self Registration section.
-
Select Click here to configure self-registration consent purposes. This displays the Consent Purposes: SELF-SIGNUP screen that allows you to add consent purposes.
-
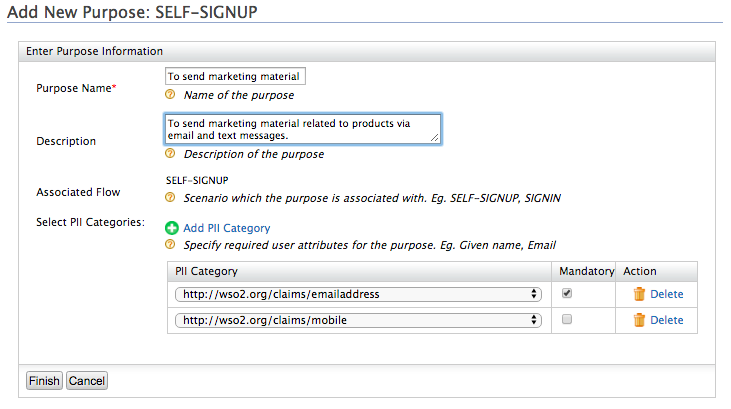
Click Add New Purpose.
-
Specify appropriate values for the Purpose and Description fields, and then click Add PII Category to add user attributes required to obtain user consent.
Tip
You can add one or more user attributes to obtain consent for a particular purpose.
-
If you want consent on a specific user attribute to be mandatory, select the Mandatory check box for that attribute.
Tip
- When you configure consent purposes for self-registration, the attributes that you specify for a particular purpose are the only attributes for which users are prompted to provide consent.
- If a user attribute is set as Mandatory, a user has to provide consent for that attribute to proceed with self-registration.
- If a user does not consent to any non-mandatory attributes, WSO2 Identity Server will not store those attributes.
-
Click Finish.
-
Depending on your requirement, you can either add another new purpose and related user attributes or click Finish if you have added all the purposes you want.
-
Click Update.
Now you have configured the required self-registration purposes and user attributes for which you require user consent.
Next, you can try out self-registration.
Try it out
Use the My Account portal
-
Access the WSO2 Identity Server My Account (
https://<IS_HOST>:<PORT>/myaccount/).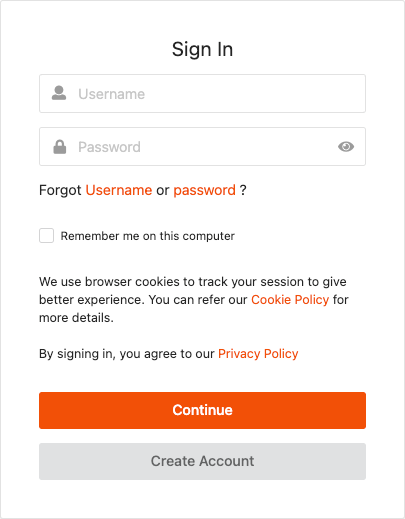
-
Click Create Account and then enter the new user's username.
Register Users for a Tenant
If you want to self-register to a specific tenant, you need to provide the Username in the following format:
<USERNAME>@<TENAND_DOMAIN>For example, if you have a tenant domain as
foo.com, the username needs to be[email protected]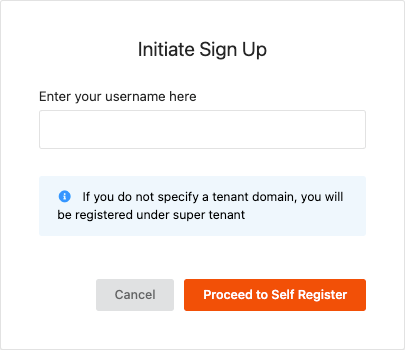
-
Fill in the user details, provide consent to share the requested information, and then click Register.
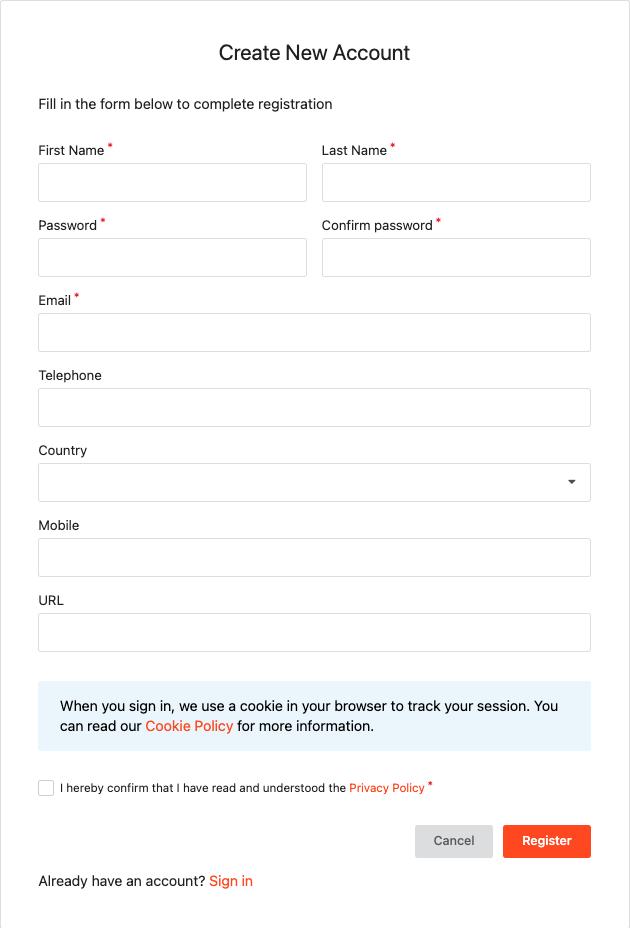
Click to see steps on configuring requested attributes for self registration.
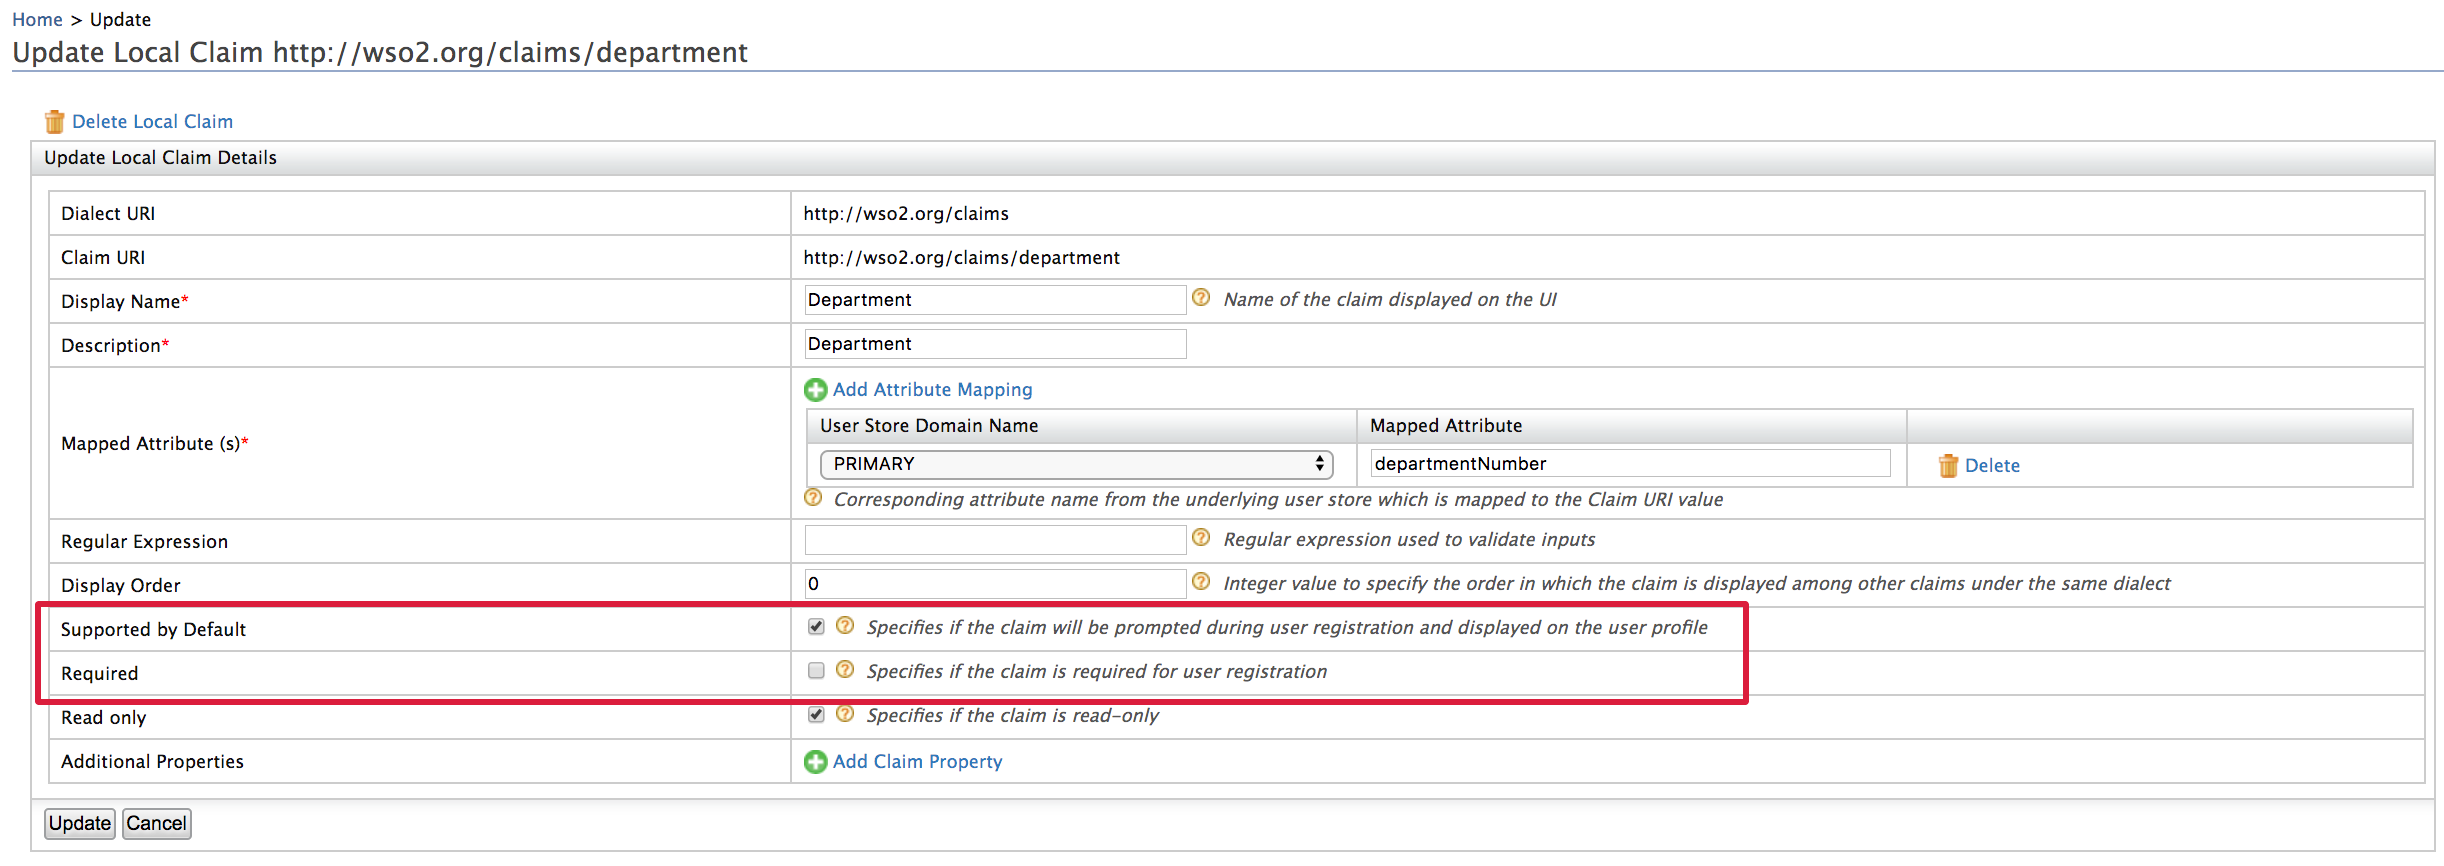
- The attributes that show up on the self sign-up page are WSO2 local dialect claims that have the Supported by Default configuration enabled.
- Access the Management Console (
https://<IS_HOST>:<PORT>/carbon) and navigate to Main > Identity. - Click List under Claims and select the http://wso2.org/claims dialect. Expand any claim to view the configuration.
- Mandatory attributes of the self-sign-up page are the claims to have enabled the Required configuration.
- For example, see below the configurations of the department claim.
-
Once the user has registered, they will receive a confirmation mail.
-
Click Confirm Registration in the email or copy the link in the email to your browser to confirm the account. Once you confirm the account, the account will be unlocked.
Want to resend the confirmation email?
Follow the steps given below to resend the confirmation email.
-
Access the WSO2 Identity Server My Account (
https://<IS_HOST>:<PORT>/myaccount/) and try to log in with the user you just registered. The user account should not be activated for the user, which means you should not have confirmed the account. -
Click on the Resend link to resend the email.

Tip
The email template used to resend the confirmation email notification is the ResendAccountConfirmation template.
You can edit and customize the email template. For more information on how to do this, see Customizing Automated Emails.
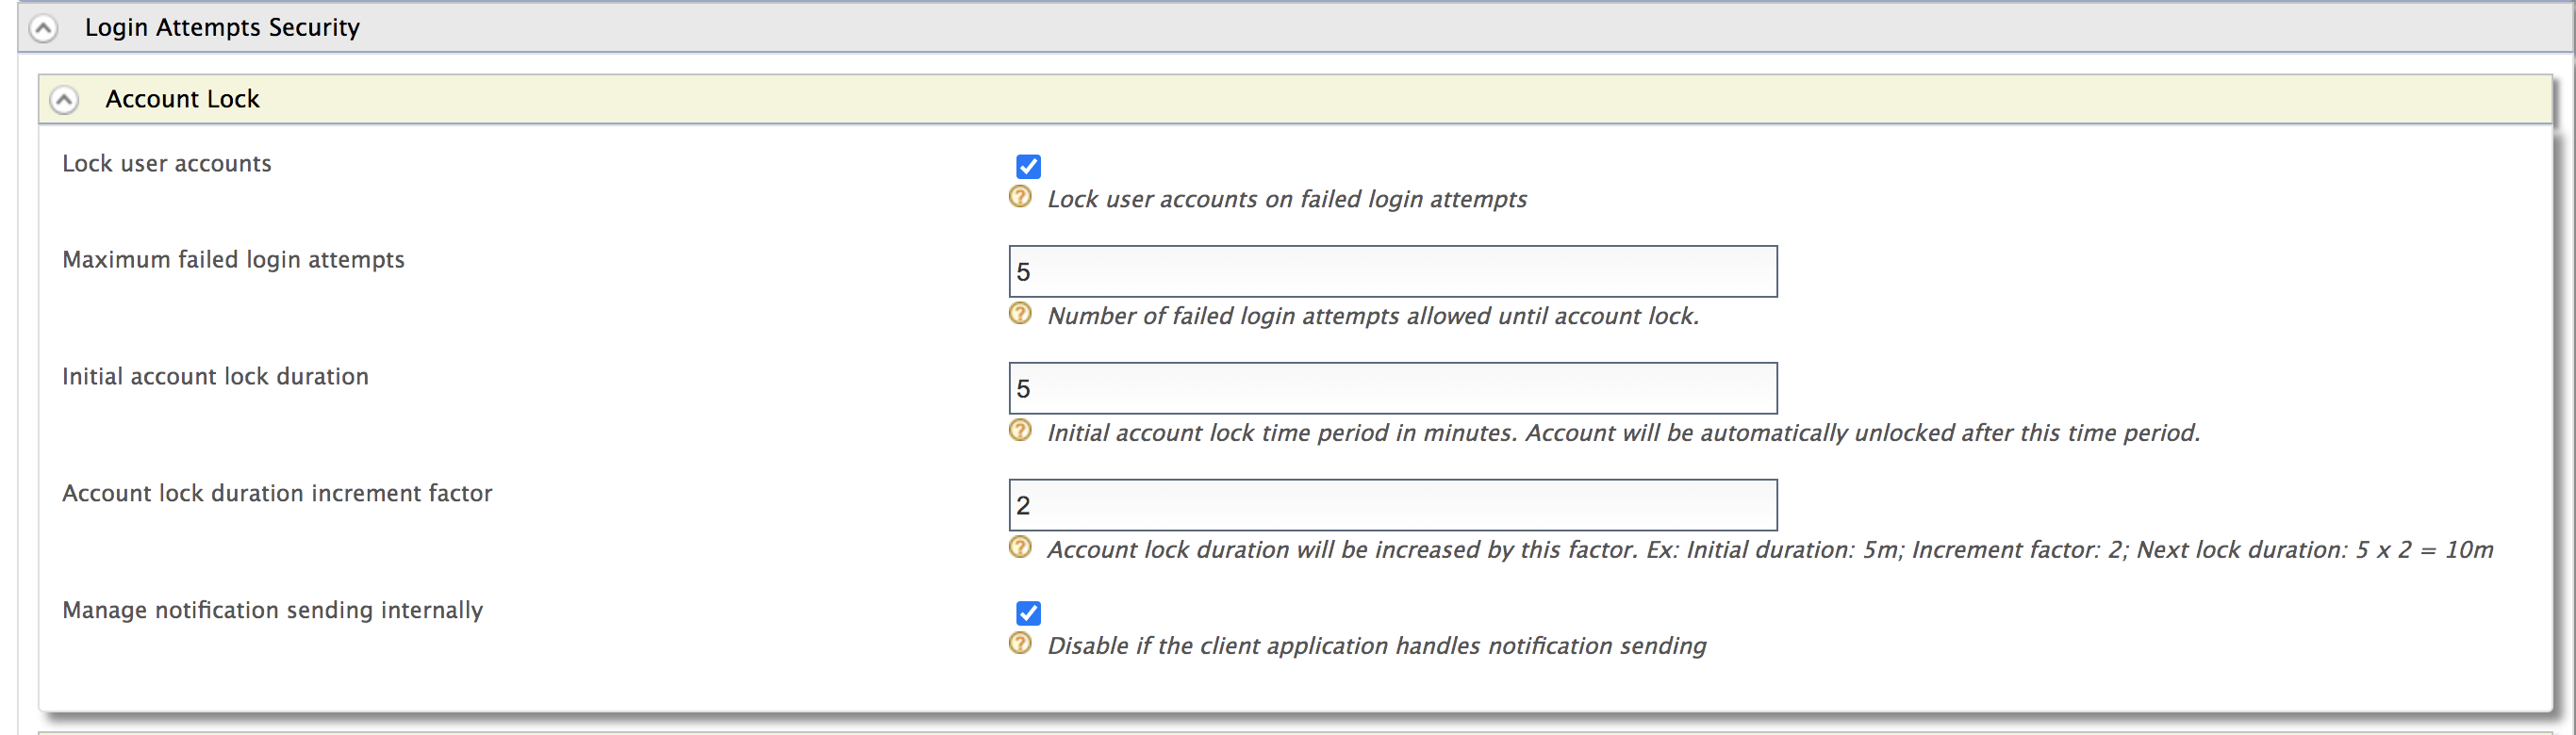
Note
Do the following configurations if you wish to send an unlocked account email upon account confirmation.
- Navigate to Main > Identity > Identity Providers > Resident.
- Expand the Login Attempts Security -> Account Lock and select Lock user accounts.
Once the user activates the account via the confirmation email, the Identity server will send an Account Unlocked email.
For more information about account locking, see Account Locking.
Use the REST API
You can use the following CURL command to self-register.
Request
curl -X POST -H "Authorization: Basic <Base64Encoded_username:password>" -H "Content-Type: application/json" -d '{"user": {"username": "<username>","realm": "<user_store>", "password": "<password>","claims": [{"uri": "<claim_URI>","value": "<claim_value>" },{"uri": "<claim_URI2>","value": "<claim_value2>"},{"uri": "<claim_URI3>","value": "<claim_value3>"},{"uri": "<claim_URI4>","value": "<claim_value4>"} ] },"properties": []}' "https://localhost:9443/api/identity/user/v1.0/me"Sample Request
curl -X POST -H "Authorization: Basic YWRtaW46YWRtaW4=" -H "Content-Type: application/json" -d '{"user": {"username": "kim","realm": "PRIMARY", "password": "Password12!","claims": [{"uri": "http://wso2.org/claims/givenname","value": "kim" },{"uri": "http://wso2.org/claims/emailaddress","value": "[email protected]"},{"uri": "http://wso2.org/claims/lastname","value": "Anderson"},{"uri": "http://wso2.org/claims/mobile","value": "+947721584558"} ] },"properties": [{"key":"callback","value": "https://localhost:9443/authenticationendpoint/login.do"}]}' "https://localhost:9443/api/identity/user/v1.0/me"Sample Response
"HTTP/1.1 201 Created"Related topics