Configure On-Demand Provisioning with Azure AD
This tutorial guides you through creating a new user and provisoning them to the Azure Active Directory at the point of authentication.
Prerequisites
-
Configure SAML2 authentication for Office365 with WSO2 IS.
Tip
The tutorial linked above uses SAML2 for identity federation.
To configure Office365 with WSO2 IS using WS-Federation instead, see Configuring Office365 WS-Federation with WSO2 IS. -
Configure a WSO2 IS instance with the Office 365 Outbound provisioning Connector.
-
If you are using the default H2 database in WSO2 Identity Server and not an Active Directory user store, expand the section below and follow the steps.
Click here to expand...
- Log in to the management console using admin/admin credentials.
- Click List under Claims and select the http://wso2.org/claims dialect.
- Find the following claims, click Edit, and update mapped attribute in each of the claims according to the following table.
Claim Mapped Attribute ObjectGuid scimid UserPrincipalName mail d. Click Update after updating each claim.
Configure adaptive authentication for Office365
- Create a new user named "Alex". Do not assign any roles to the user.
- Click List under Users and Roles and click Users.
- Click User Profile to edit Alex's user profile. Enter values for the following fields.
- Click List under Service Providers and edit the service provider named "Office365" which you created previously as instructed in the Configuring the service provider section.
-
Expand Local and Outbound Configuration and click Advanced Configuration.
-
Click on Templates on the right side of the Script Based Adaptive Authentication field and then click Office365-Based. This adds basic authentication as the first authentication step and configures the Office-365-Based authentication script.
-
Click Ok. The authentication script assigns the role “office365Role” to all successfully authenticated users who attempt to log in to Microsoft Online.
Tip
If the role you added is not named "office365Role" and you have used a different name for the role, edit the authentication script accordingly.
-
Click Update to save the configurations.
Try it out
-
Access the Microsoft login page URL: https://login.microsoftonline.com .
-
Enter
alex@<Your_Federated_Domain>and click Next. Replace the<Your_Federated_Domain>placeholder with the domain which is configured as federated in Azure AD.

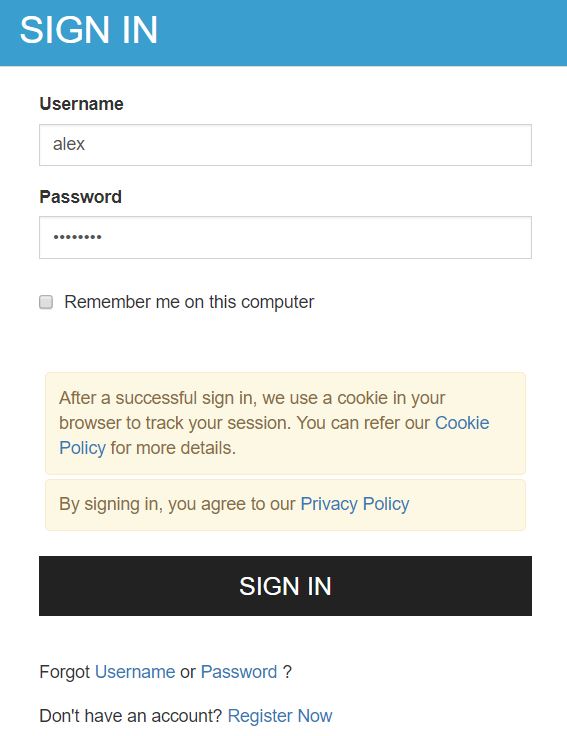
- The browser is redirected to the WSO2 IS login page. Enter
credentials for the user Alex and click Sign in.
-
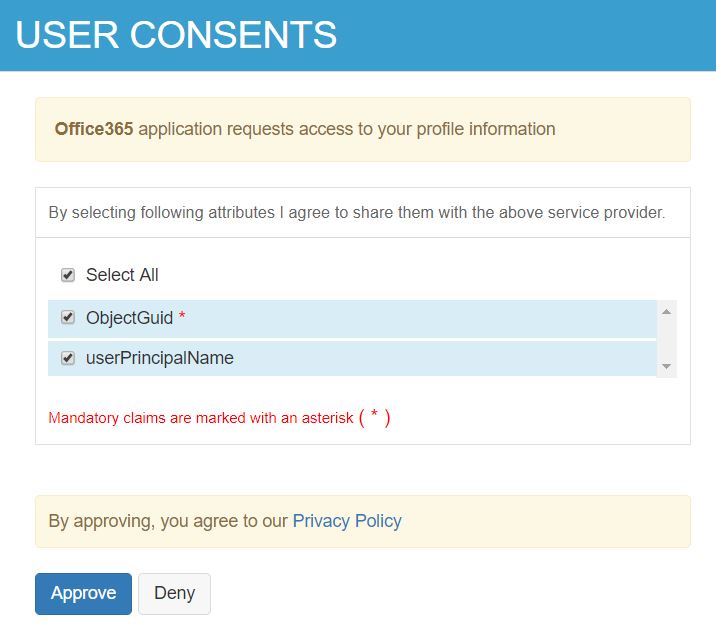
You are prompted to provide user consent. Click Select All and then Approve.
-
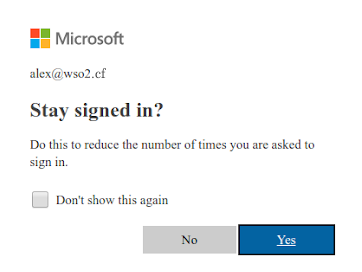
Click Yes to enable single sign-on on the next page. If this page does not appear, wait a few minutes until the user " Alex" is provisioned in Azure AD and repeat step 10 and 11.
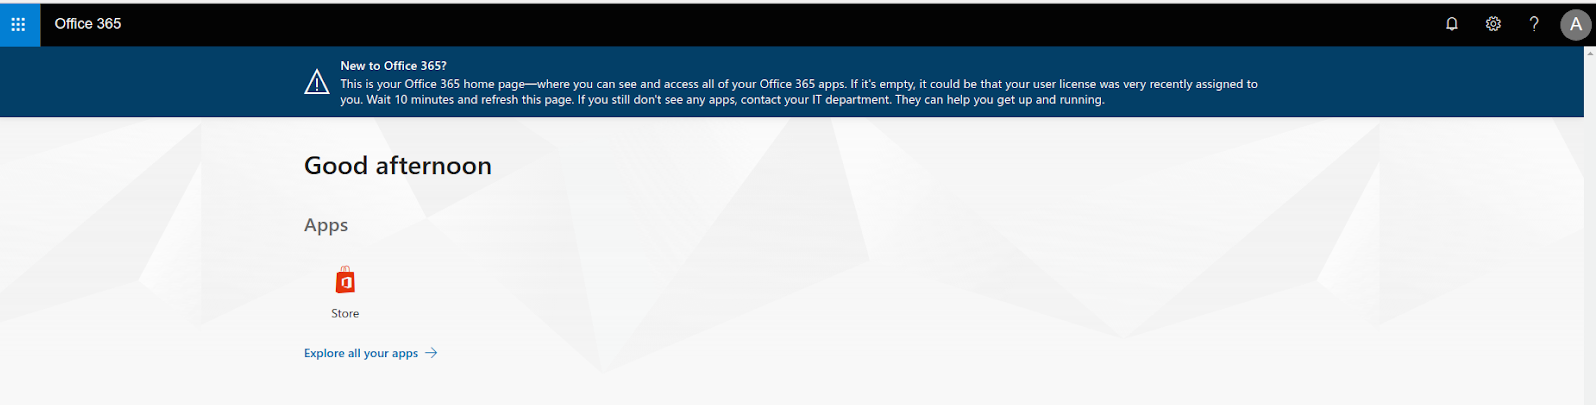
- You are now successfully logged in to the Office 365. The user
"Alex" has been provisioned to the Azure AD after successful
authentication.