Invite new users
This section is about the user on-boarding flows initiated by administrators from an invitation to the user's email which allow respective end users to decide their own passwords or verify the accounts created by administrators.
Set up notifications
-
Enable the email sending configurations of the WSO2 Identity Server.
Tip
The email template used to send this email notification is the AskPassword template.
You can edit and customize the email template. For more information on how to do this, see Customizing Automated Emails.
-
If you have migrated from a previous IS version, ensure that the
IdentityMgtEventListenerwith theorderId=50is set to false and that the Identity Listeners withorderId=95andorderId=97are set to true in the<IS_HOME>/repository/conf/deployment.tomlfile.Note
If there are no such entries for
event.default_listener.xxxindeployment.toml, you can skip this configuration.[event.default_listener.identity_mgt] priority= "50" enable = false [event.default_listener.governance_identity_mgt] priority= "95" enable = true [event.default_listener.governance_identity_store] priority= "97" enable = true
Enable the invitation flow
Use the management console
Before you begin
If you are adding users via the management console, to
enable "Ask password" option in the
Management Console the following property needs to be added to the <IS_HOME>/repository/conf/deployment-toml file.
[identity_mgt.user_onboarding]
ask_password_from_user= true-
Log in to the Management Console (
https://<IS_HOST>:<PORT>/carbon). -
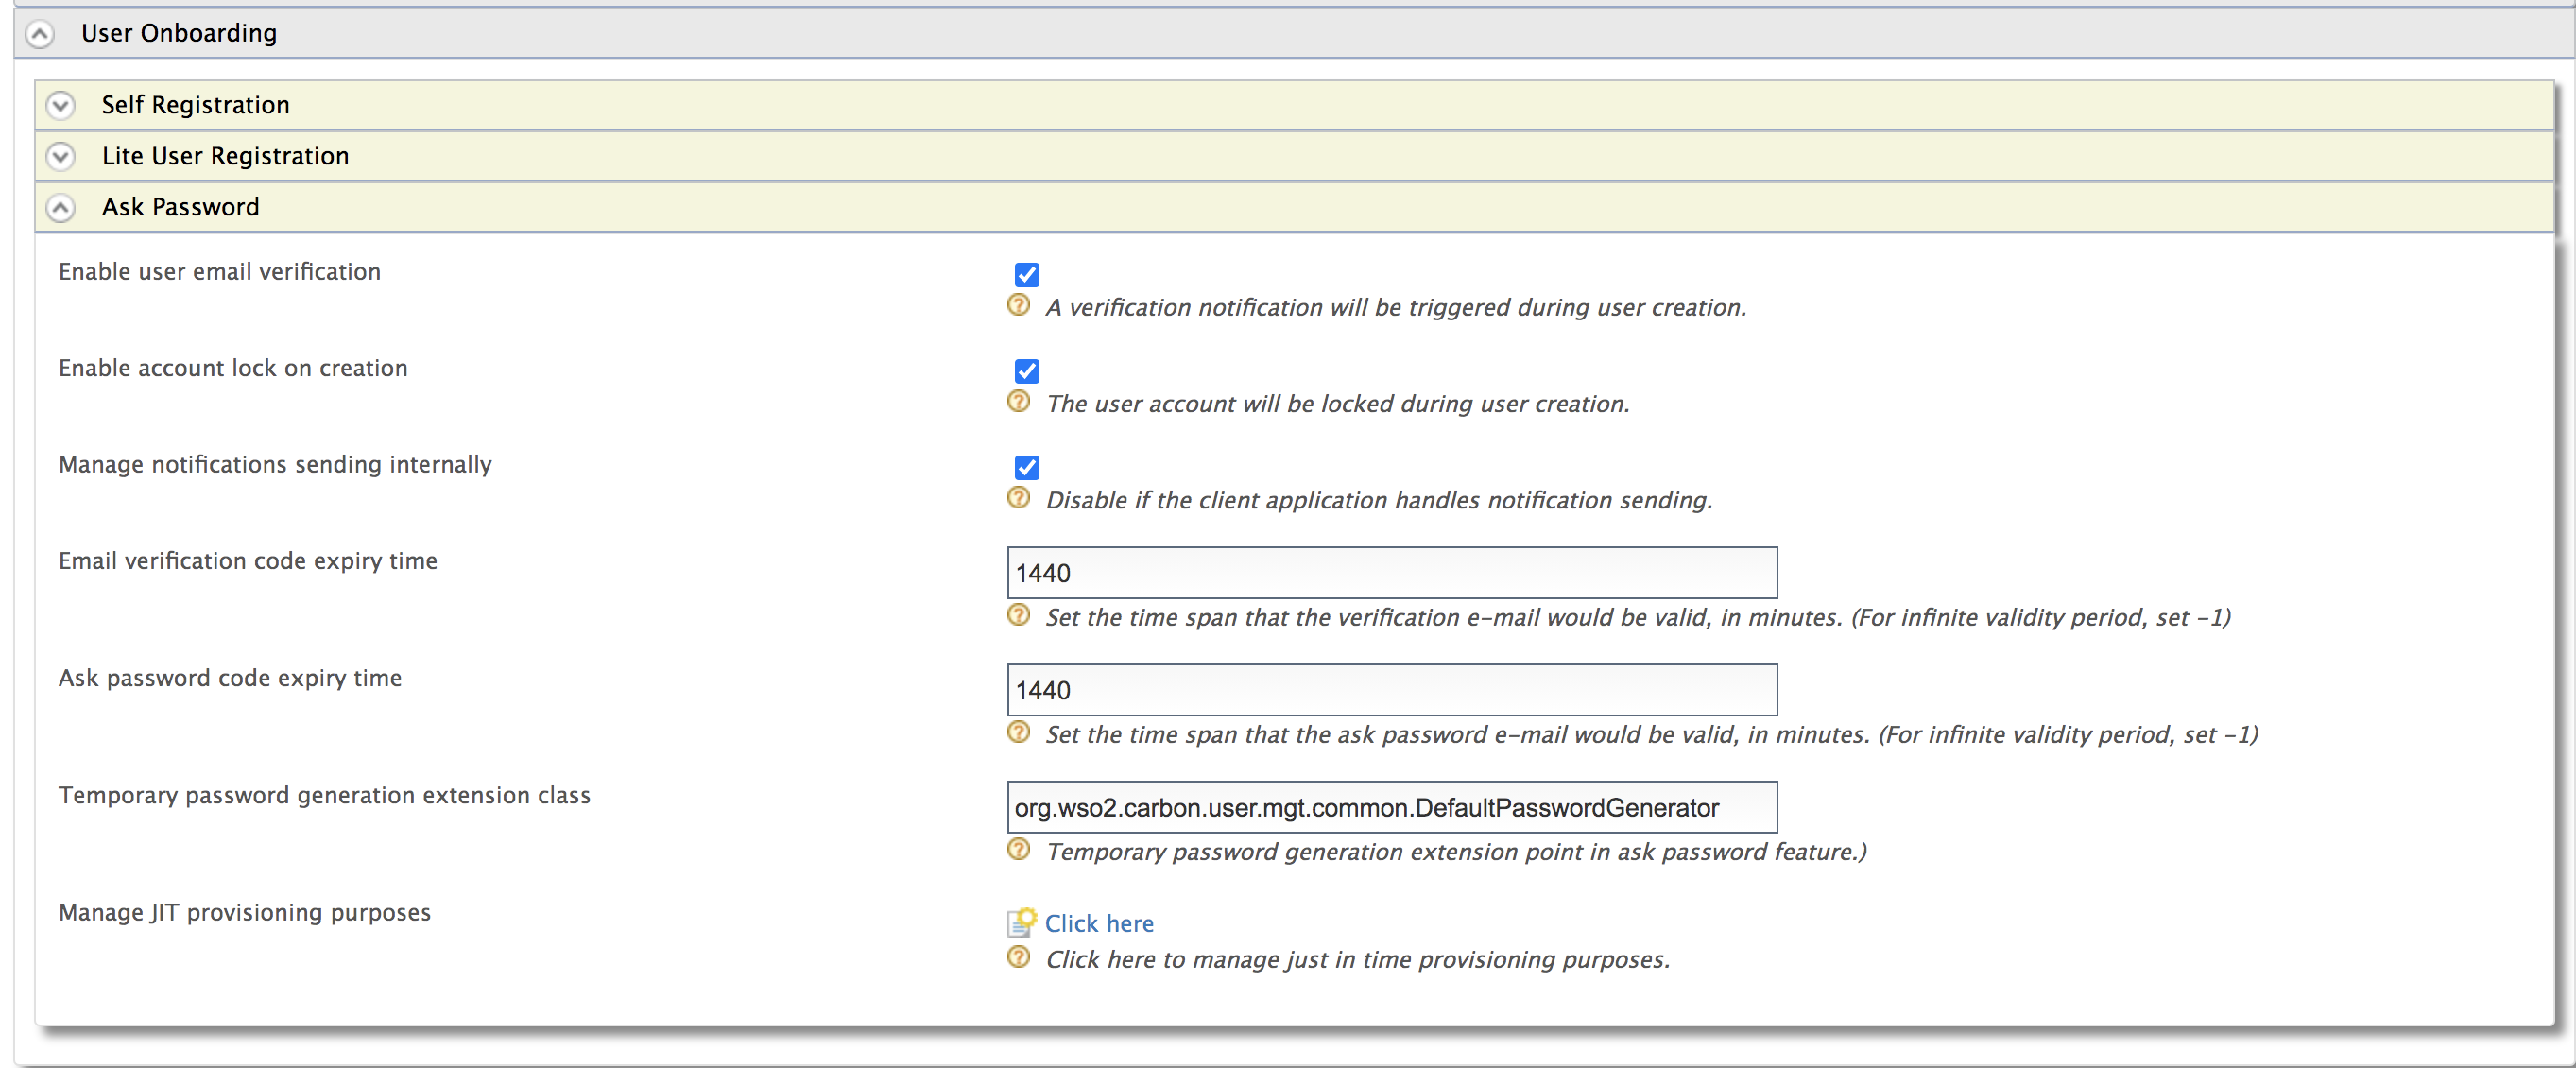
Click Resident under Identity Providers on Main > Identity and expand the User Onboarding tab.
-
Expand Ask Password and configure the Ask password code expiry time field.
-
Also, select Enable User Email Verification. Click Update to save changes.
Use the configuration file
You can also configure the above configurations via the configuration files.
Make sure the following configuration is added
to the <IS_HOME>/repository/conf/deployment.toml file to set the
confirmation URL valid time period in minutes.
The confirmation link that is provided to the user to set the
password is invalid after the time specified here has elapsed.
[identity_mgt.user_onboarding]
enable_email_verification = true
verification_email_validity = "1440"
lock_on_creation=true
ask_password_email_validity = "1440"
password_generator = "org.wso2.carbon.user.mgt.common.DefaultPasswordGenerator"
[identity_mgt]
email_sender= "internal"
Configure Ask Password Feature for tenants
These properties can be enabled for each tenant at tenant creation by
adding the corresponding configuration to the <IS_HOME>/repository/conf/deployment.toml file as explained in the previous section.
Optionally, you can log in to the Management Console as a tenant admin and change the Resident IDP configurations accordingly to enable this feature for a specific tenant.
Use the SCIM2 API
You can use both the Ask Password and Verify Email features when creating a user using SCIM 2.0.
Before you begin
If you are adding users via the SCIM2 REST API, note that WSO2 Identity Server sets a random value for the password if the askPassword claim is present in the request.
If you want to disable setting a random value and instead keep the password that is sent in the request, add the following configuration to the <IS_HOME>/repository/conf/deployment.toml file.
[identity_mgt.user_onboarding]
disable_random_value_for_credentials= true-
Set the askPassword attribute under the
urn:ietf:params:scim:schemas:extension:enterprise:2.0:Userschema to true in the SCIM2 user create request."urn:ietf:params:scim:schemas:extension:enterprise:2.0:User":{askPassword:"true"}A sample curl command is given below:
curl -v -k --user admin:admin --data '{"schemas":[],"name":{"familyName":"Smith","givenName":"Paul"},"userName":"Paul","password":"password","emails":[{"primary":true,"value":"[email protected]"}],"urn:ietf:params:scim:schemas:extension:enterprise:2.0:User":{askPassword:"true"}}'}}' --header "Content-Type:application/json" https://localhost:9443/scim2/Users -
Set the verifyEmail attribute under the
urn:ietf:params:scim:schemas:extension:enterprise:2.0:Userschema to true in the SCIM2 user create request."urn:ietf:params:scim:schemas:extension:enterprise:2.0:User":{verifyEmail:"true"}A sample curl command is given below:
curl -v -k --user admin:admin --data '{"schemas":[],"name":{"familyName":"Smith","givenName":"Peter"},"userName":"Peter","password":"password","emails":[{"primary":true,"value":"[email protected]"}],"urn:ietf:params:scim:schemas:extension:enterprise:2.0:User":{verifyEmail:"true"}}'}}' --header "Content-Type:application/json" https://localhost:9443/scim2/Users
Try it out
Follow the steps below to test the account creation using the password option.
-
Log in to the WSO2 Identity Server Management Console (
https://<IS_HOST>:<PORT>/carbon) using administrator credentials (admin:admin). -
Navigate to Main > Identity > Users and Roles > Add.
-
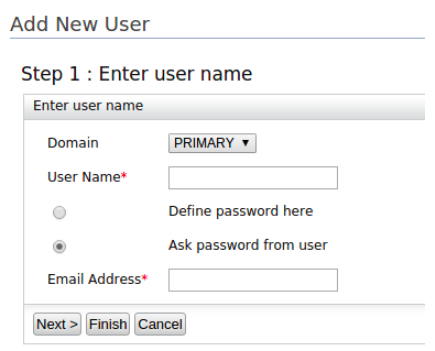
Click Add New User.
-
Fill in the form:
- Select the userstore where you want to create this user account
from the drop-down as the Domain.
This includes the list of userstores you configured. See Configuring userstores for more information. -
Enter a unique User Name that is used by the user to log in.
-
Allow users to enter their own password by selecting the Ask password from user option.
-
Enter a valid Email Address and click Finish.
Using special characters in the email address
If you are using special characters such as
$in your email address, see Configuring Emails with Special Characters.
- Select the userstore where you want to create this user account
from the drop-down as the Domain.
-
The Identity Server sends an email to the email address provided. The email contains a redirect URL that directs the users to a screen where they must provide their own password.
Related topics