Manage WSO2 Identity Server Console access
The WSO2 Identity Server Console is a pivotal point for managing identity and access within your organization. It provides a comprehensive interface for configuring and managing users, groups, roles, and various identity services. To ensure a secure and efficient management process, it is crucial to configure access to the console appropriately. This section outlines the steps to access the console and how to manage access based on user roles.
Accessing the WSO2 Identity Server Console
To access the WSO2 Identity Server Console, you need to have the required permissions and the URL of the Console. This can be achieved by navigating to the console through a web browser using the following URL format:
For example, if you are using the default host and port, the URL will be https://localhost:9443/console.
Upon navigating to this URL, you will be presented by the login screen of the WSO2 Identity Server. Use your credentials to log in to the Console.
Note
The default credentials for an administrative user is as follows. It is crucial to change these default credentials before deploying the server in any production environment. Using default login information can pose a significant security risk, making the system vulnerable to unauthorized access. Learn more about changing the super admin password
Configure Console login
Just like any other application registered in WSO2 Identity Server, you can customize the login flow of the Console using any configured connection.
Note
Learn about the connections supported in WSO2 Identity Server and how to configure them in the Authentication section.
To customize login for the Console,
-
Sign in to the WSO2 Identity Server Console and click Console Settings.
-
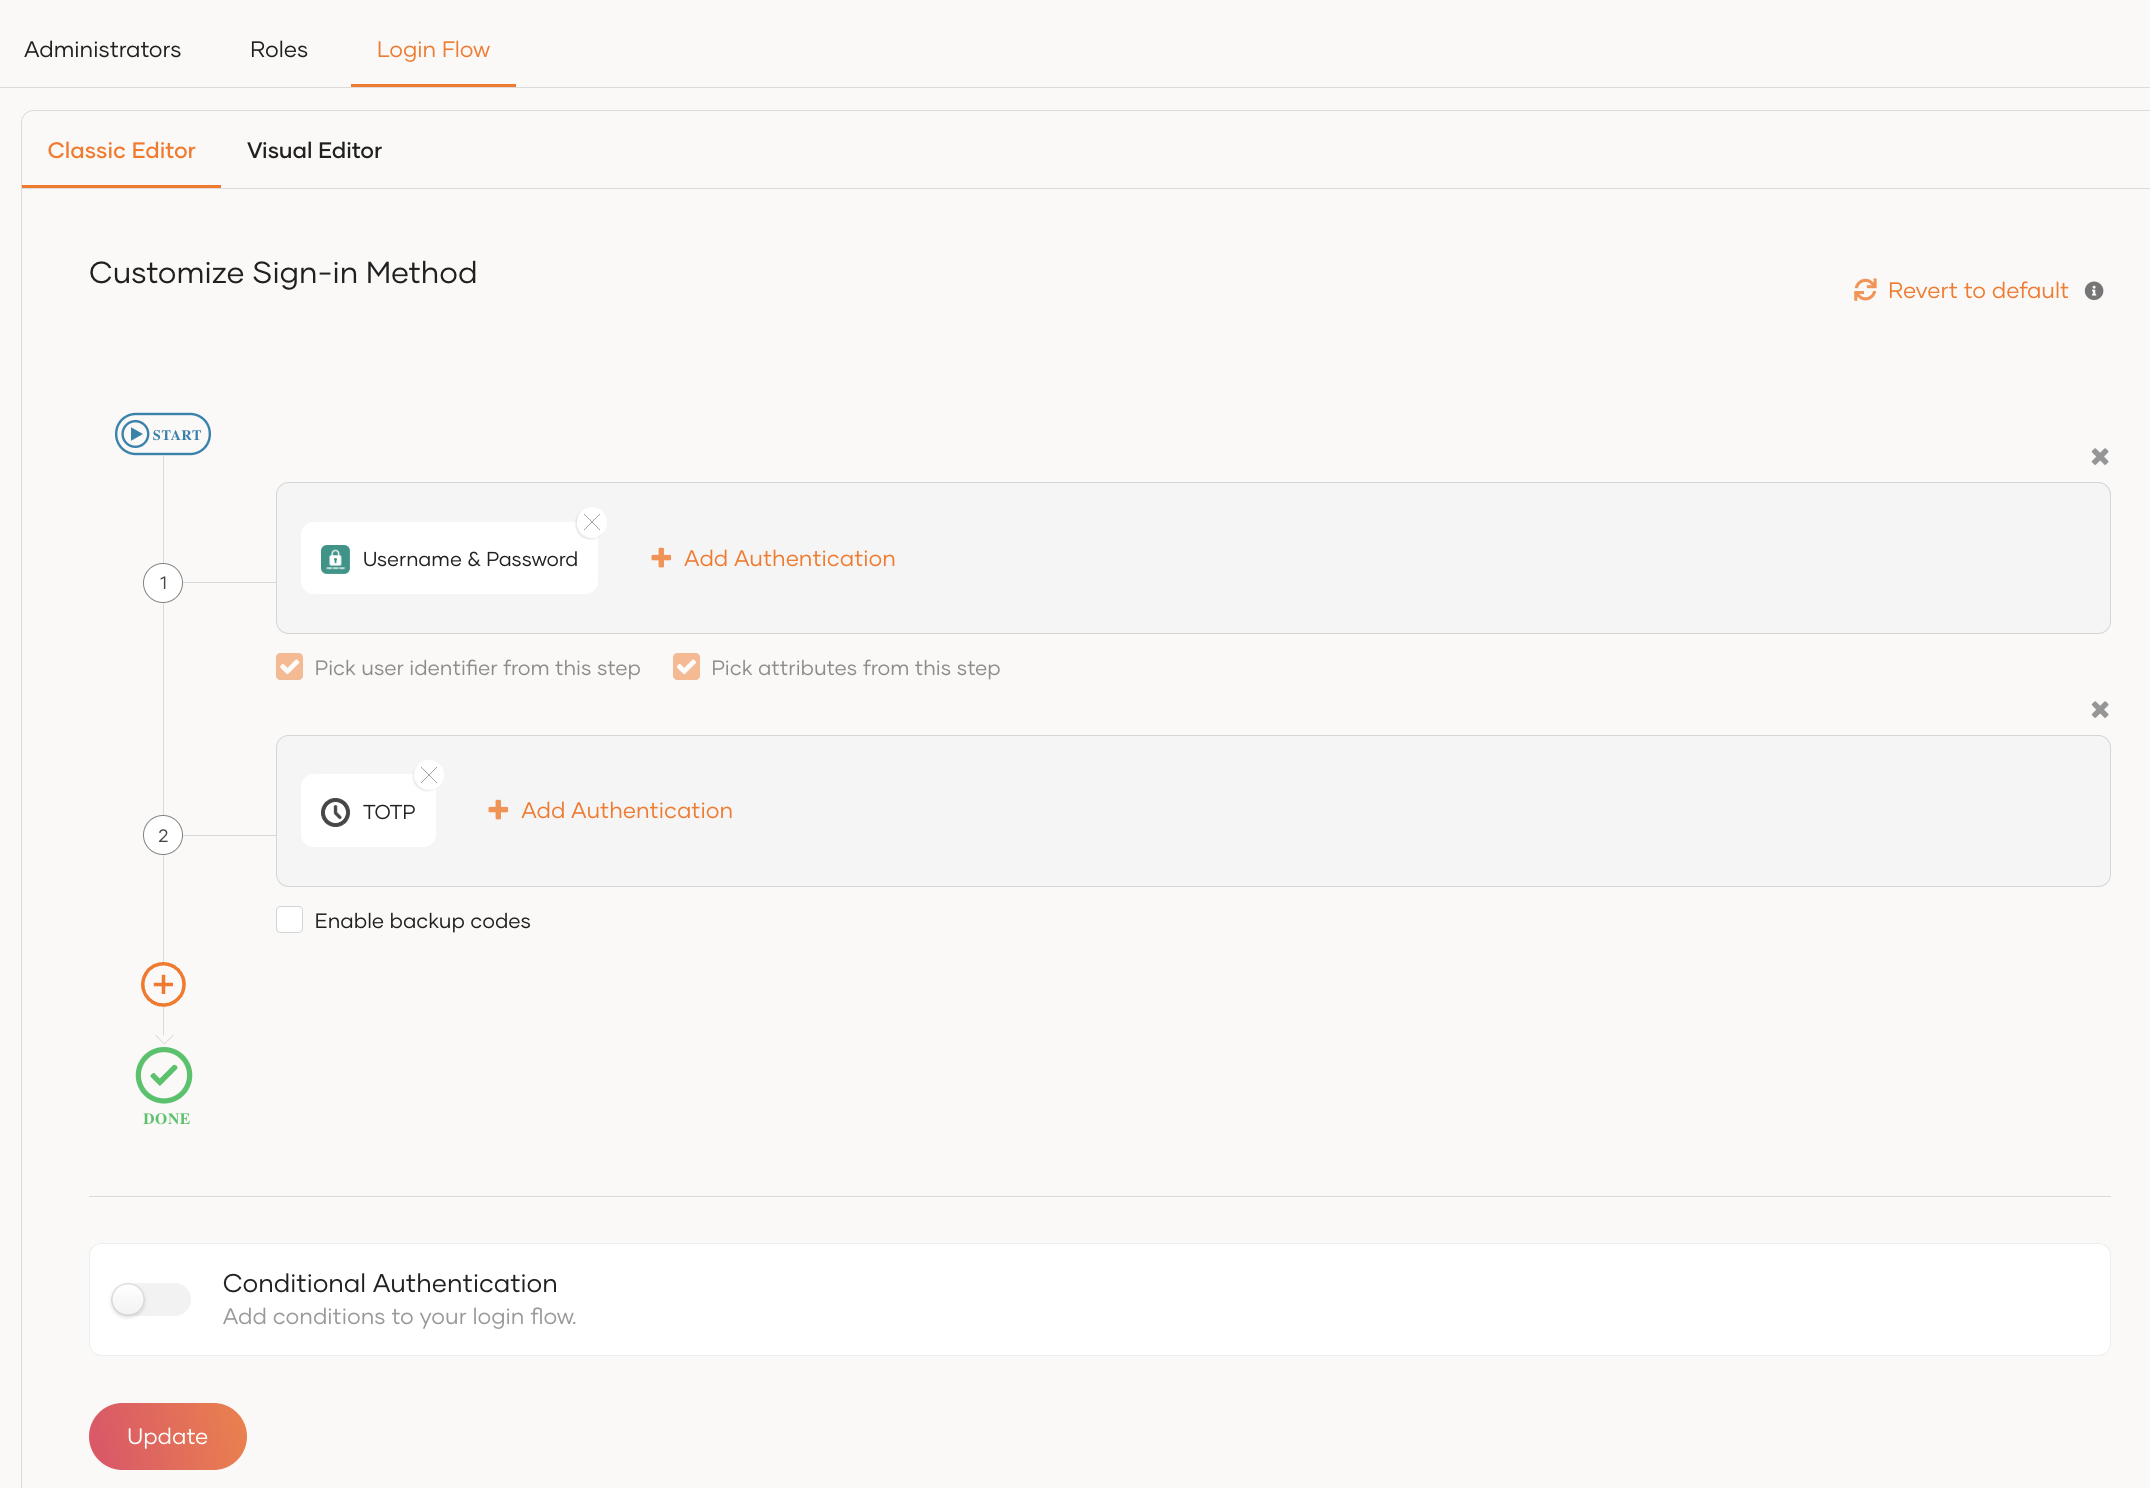
Go to the Login Flow tab and configure the login flow from your preferred editor:
-
Click Add Authentication on a step, select a connection from the list and click Add. You can add multiple connections to the same step.
-
Click the + icon on the login flow if you wish to add an additional authentication step and repeat the above.
-
Turn on the Conditional Authentication toggle if you wish to customize authentication using a script.
Note
Refer to Add conditional authentication to learn more about conditional authentication scripts.
-
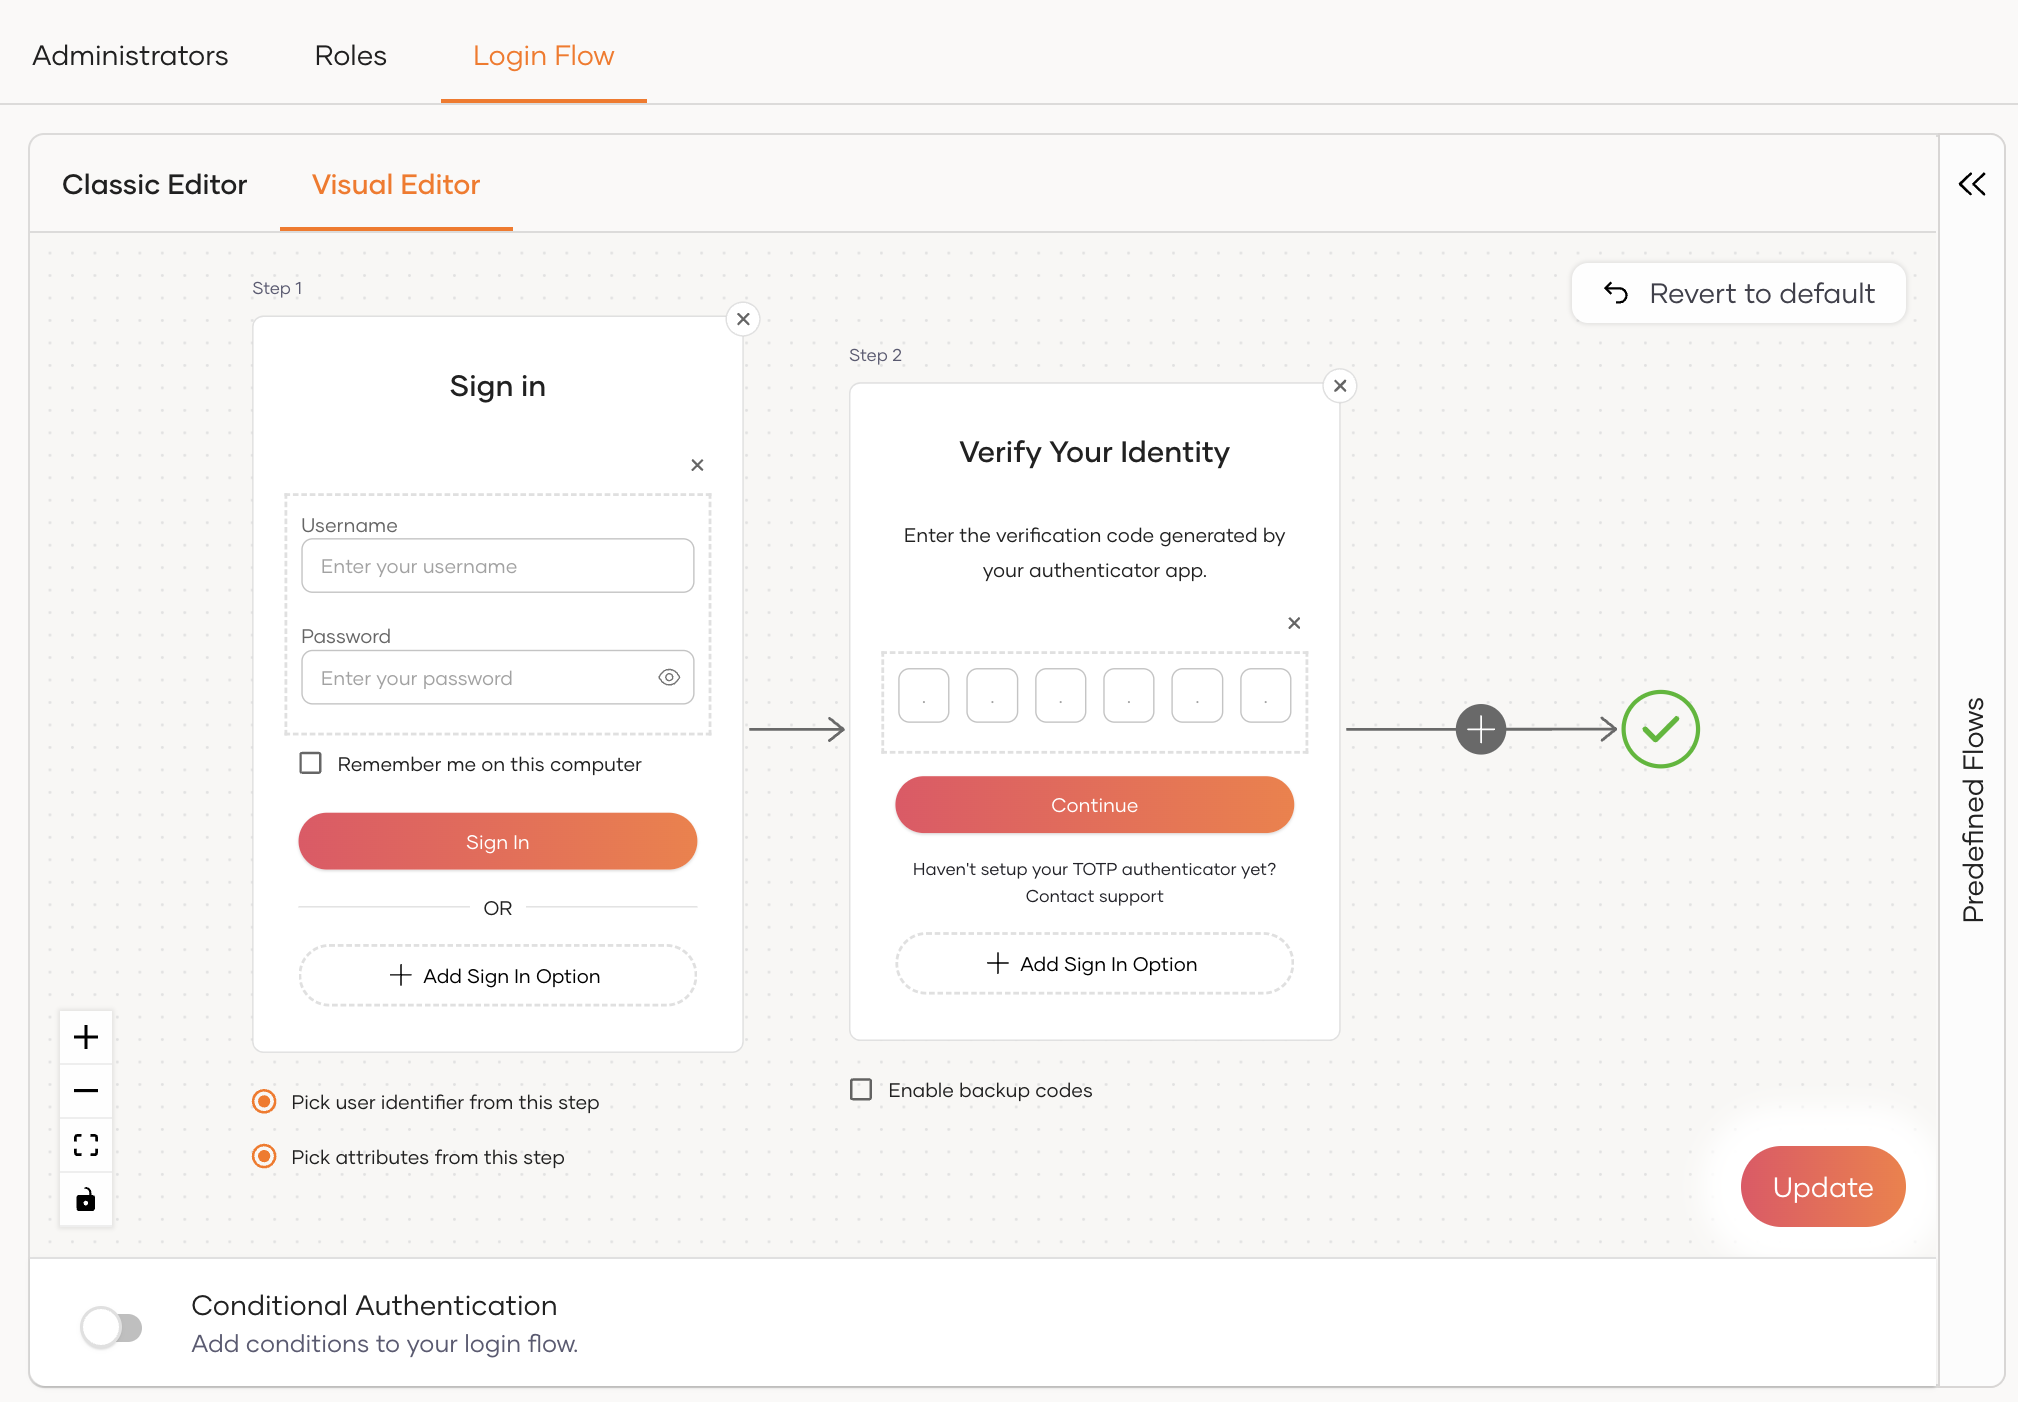
Switch to the Visual Editor tab.
-
Click Add Sign In Option, select a connection from the list and click Add. You can add multiple authentication methods to the same step. (Alternatively, go to Predefined Flows > Basic Flows to quickly add a login flow.)
-
Click the + icon on the login flow if you wish to add an additional authentication step and repeat the above.
-
Turn on the Conditional Authentication toggle if you wish to customize authentication using a script.
Note
Refer to Add conditional authentication to learn more about conditional authentication scripts.
-
-
Click Update to save the changes.
Manage Console roles
Roles are a collection of permissions. You can create roles and assign users and groups to them so that they gain limited access to Console features. Follow the sections below to learn about managing Console roles.
Console role permissions
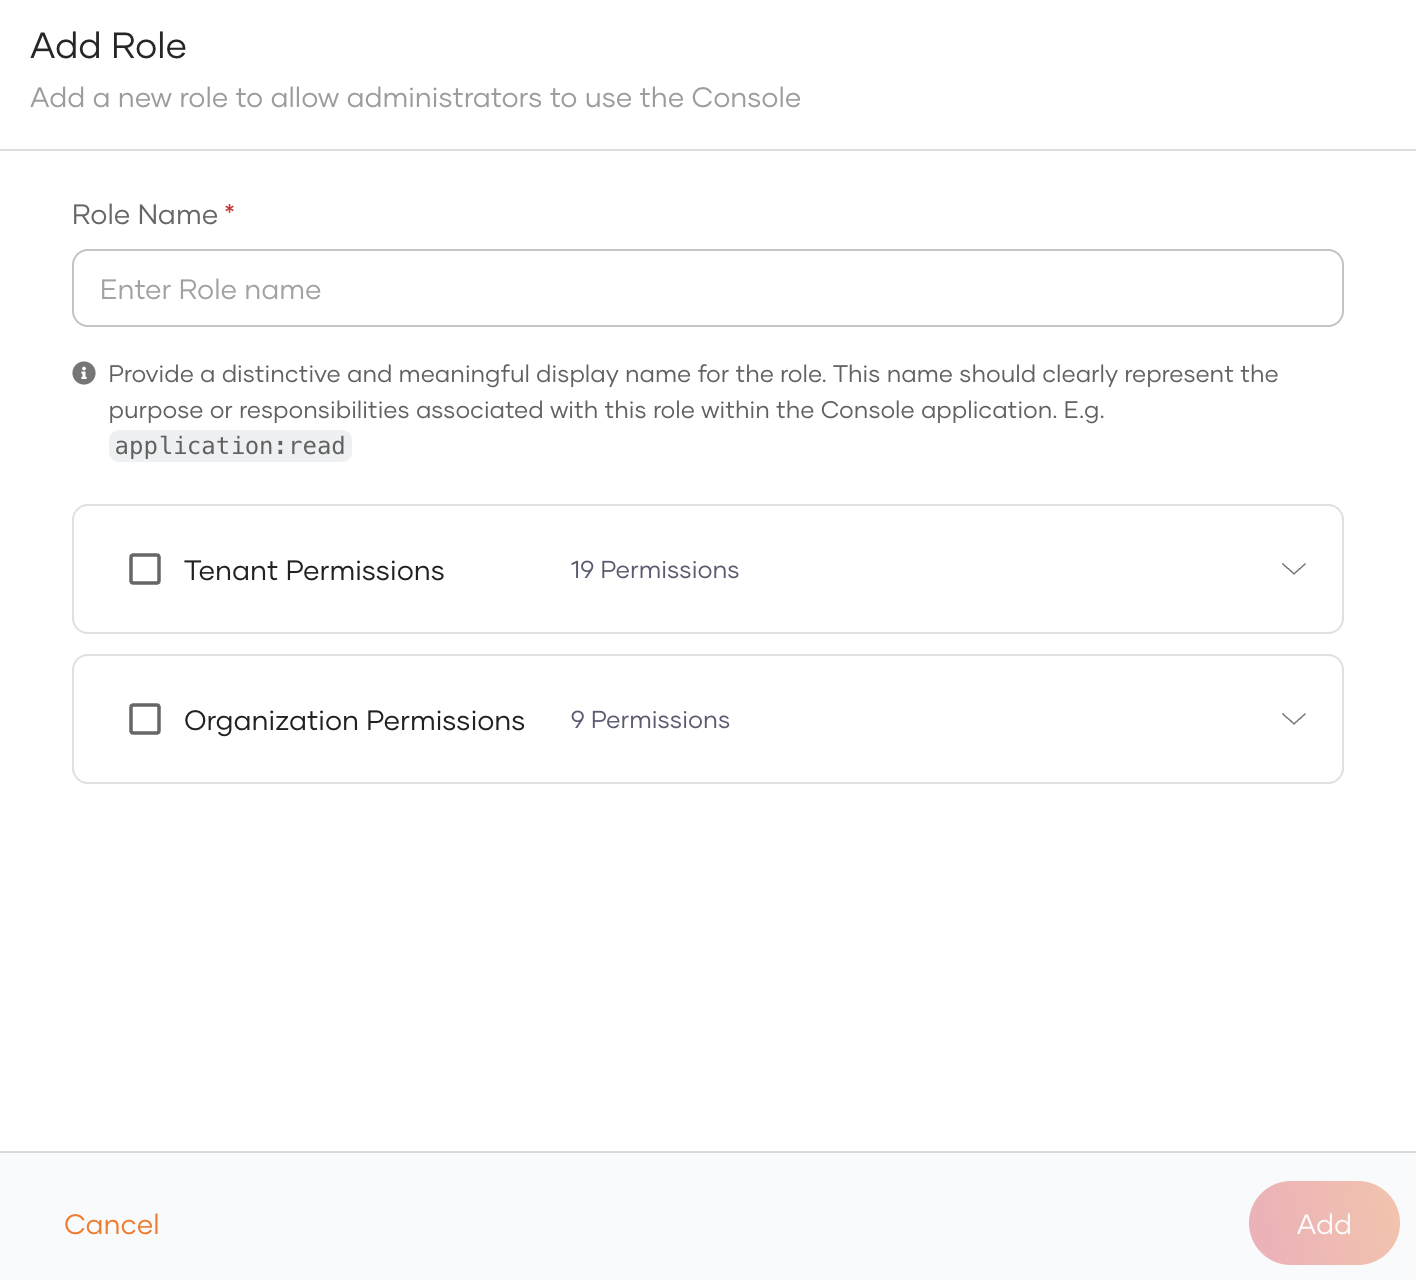
When you create a Console role, you grant it access to one or more Console components — features such as Applications, Connections, Users, Groups, and Roles. You assign these permissions at two levels:
| Tenant Permissions | The permissions the role has for the root organization. |
| Organization Permissions | The permissions the role has for the child organizations. |
Permission levels
By default, you can assign each Console component one of the following permission levels:
| View | Assigns read permissions for the component. |
| Edit | Assigns read, create, update, and delete permissions for the component. |
Note
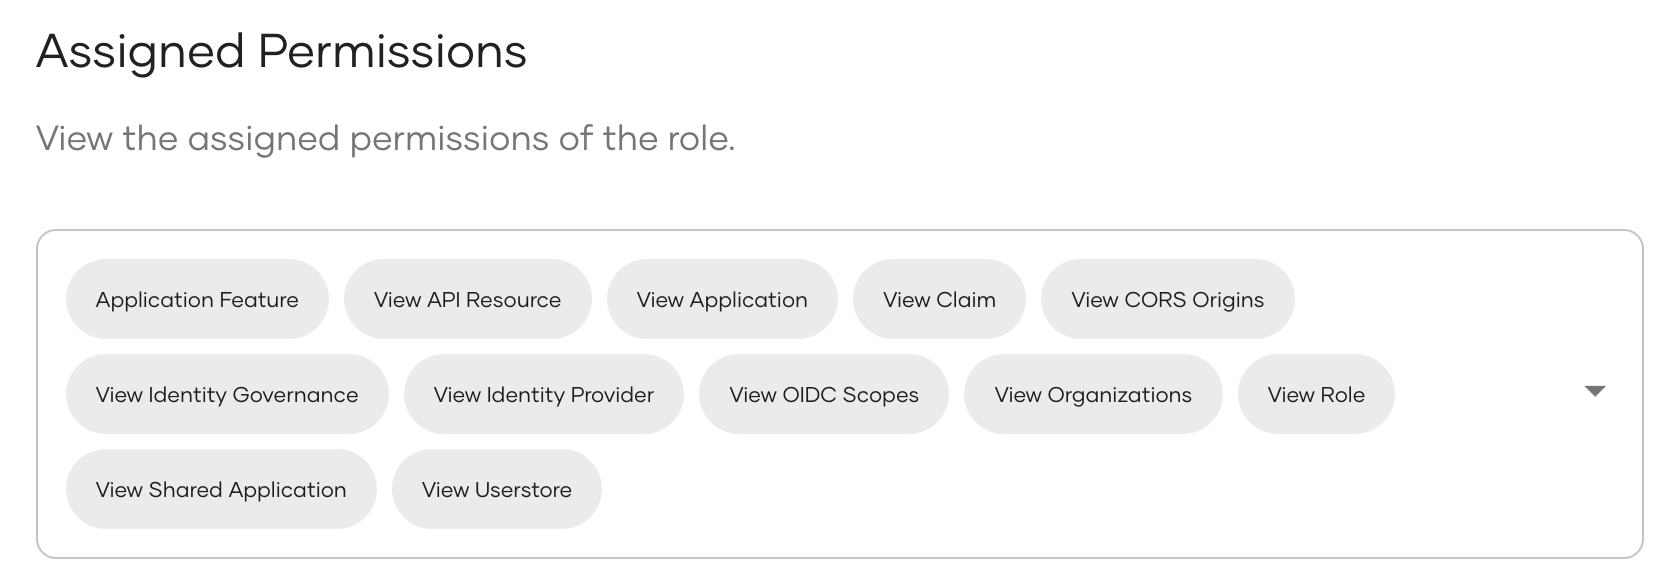
Selecting View or Edit for a given Console component assigns the role several scopes pertaining to it. For example, if you select Applications and assign the View permission, the role is assigned the following scopes.
Granular console permissions
Note
Granular console permissions are available from update level 7.1.0.73 onwards. See the instructions on updating WSO2 products.
By default, Console roles use the combined View and Edit permission model described above, where Edit grants Create, Update, and Delete access together.
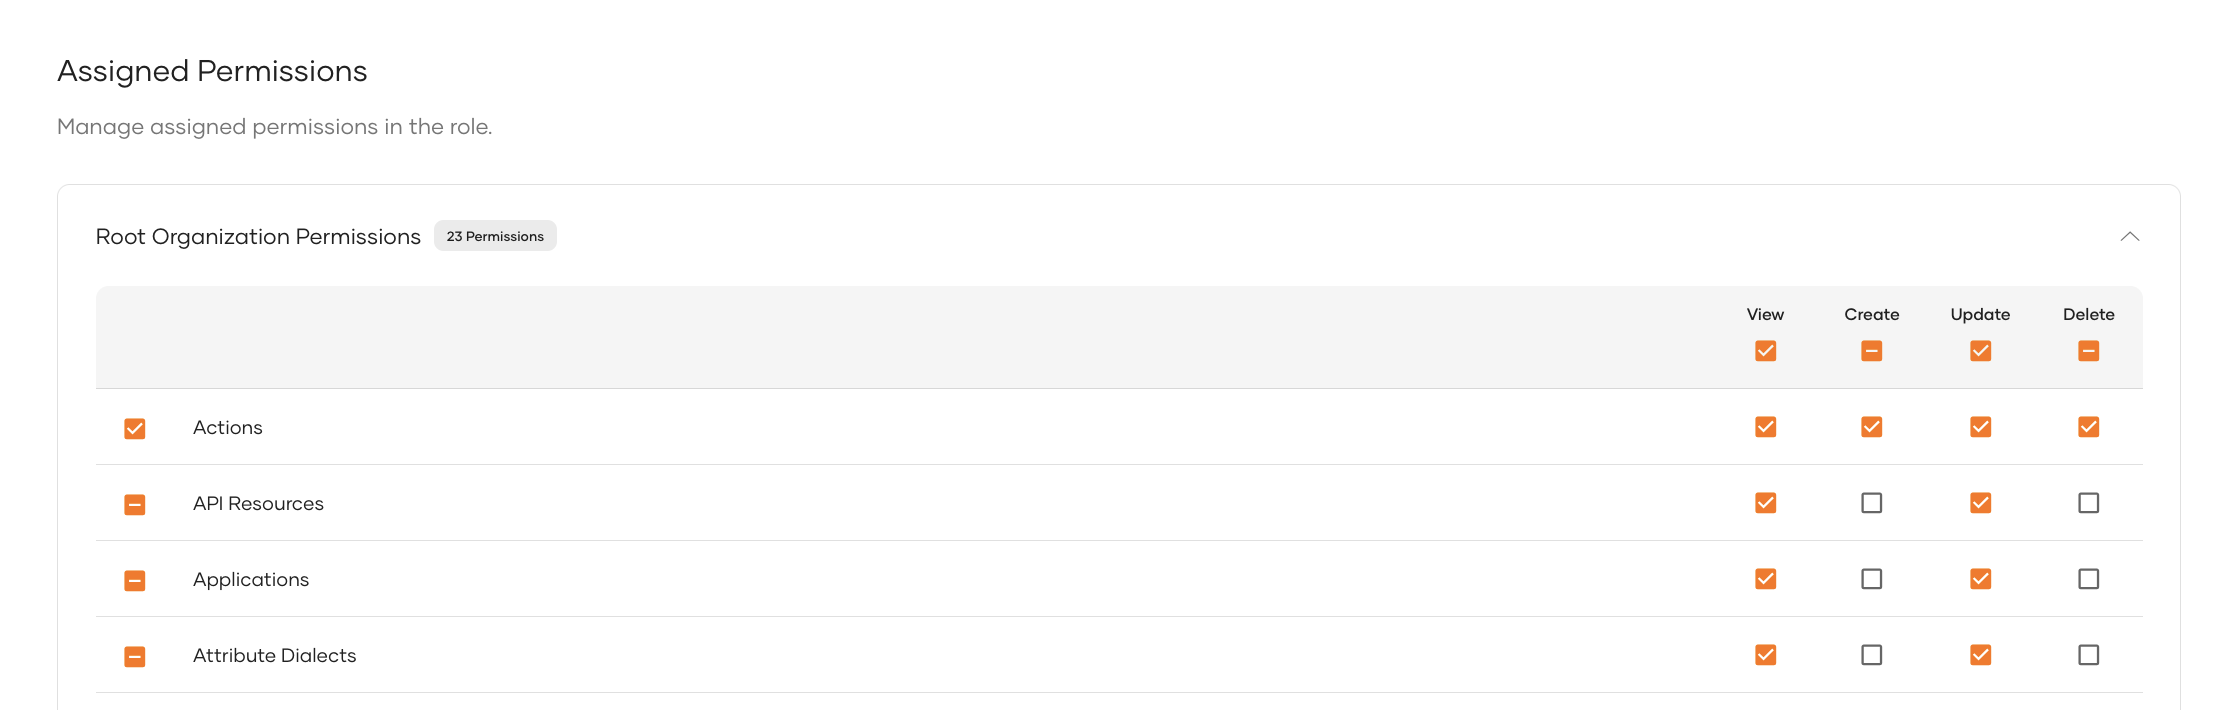
You can optionally enable a more granular permission model that lets you assign Create, Update, and Delete permissions independently for each Console component in both tenant and organization permissions. For example, you can allow a role to create users without allowing it to update or delete existing users.
This model assigns the corresponding granular Console scopes for the selected actions. It's controlled by the use_granular_console_permissions setting, which is false by default. Enable it only when you need this level of control over Console permissions. To do so, add the following configuration to the deployment.toml file and restart the server.
Once enabled, you can assign each Console component the following permission levels:
| View | Assigns read permissions for the component. |
| Create | Assigns read and create permissions for the component. |
| Update | Assigns read and update permissions for the component. |
| Delete | Assigns read and delete permissions for the component. |
Note
View is required whenever Create, Update, or Delete is selected for a component, and it cannot be turned off while any of those write permissions remain active.
Compatibility with existing roles
Console roles created earlier with the combined Edit permission continue to work when the granular model is enabled. Edit grants Create, Update, and Delete together.
Switching back to the default model
If you enable granular Console permissions and create roles with granular Create, Update, or Delete permissions, those role permissions will not work after you switch back to the default View and Edit permission model. Keep granular Console permissions enabled for roles created with the granular model, or review and update those roles before disabling it.
Create a role
Important
Roles created here are roles for the Console application which are solely for the purpose of limiting features of the Console. You can define organization level roles and roles for other applications in User Management > Roles. Refer to Manage roles to learn more.
To create a role for the Console,
-
Sign in to the WSO2 Identity Server Console as an administrator and click Console Settings.
-
Select the Roles tab and click New Role.
-
Provide the following details for the role.
-
Click Add to save the role.
Assign users/groups to a role
To assign a user or a group to a role,
-
On the WSO2 Identity Server Console, click Console Settings.
-
Go to the Roles tab and select the role you wish to assign.
-
Do one of the following:
-
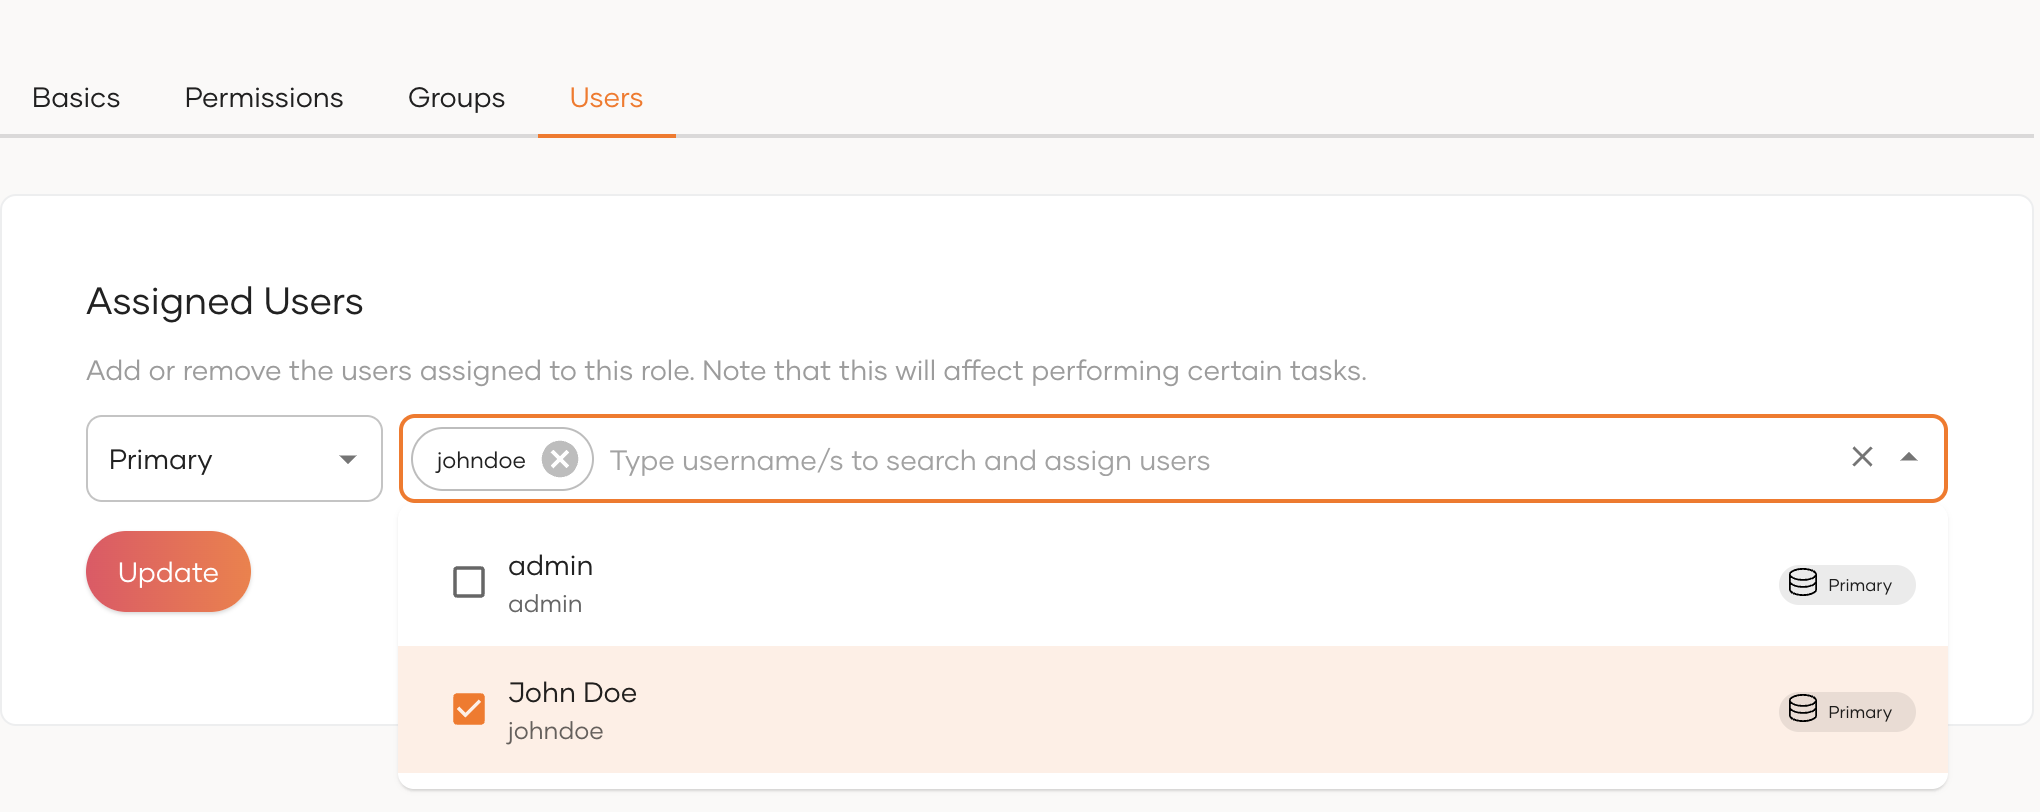
To assign a user:
-
Go to the Users tab and click Assign Users
-
Choose a user store and select the relevant user.
-
Click Update to assign the user.
-
-
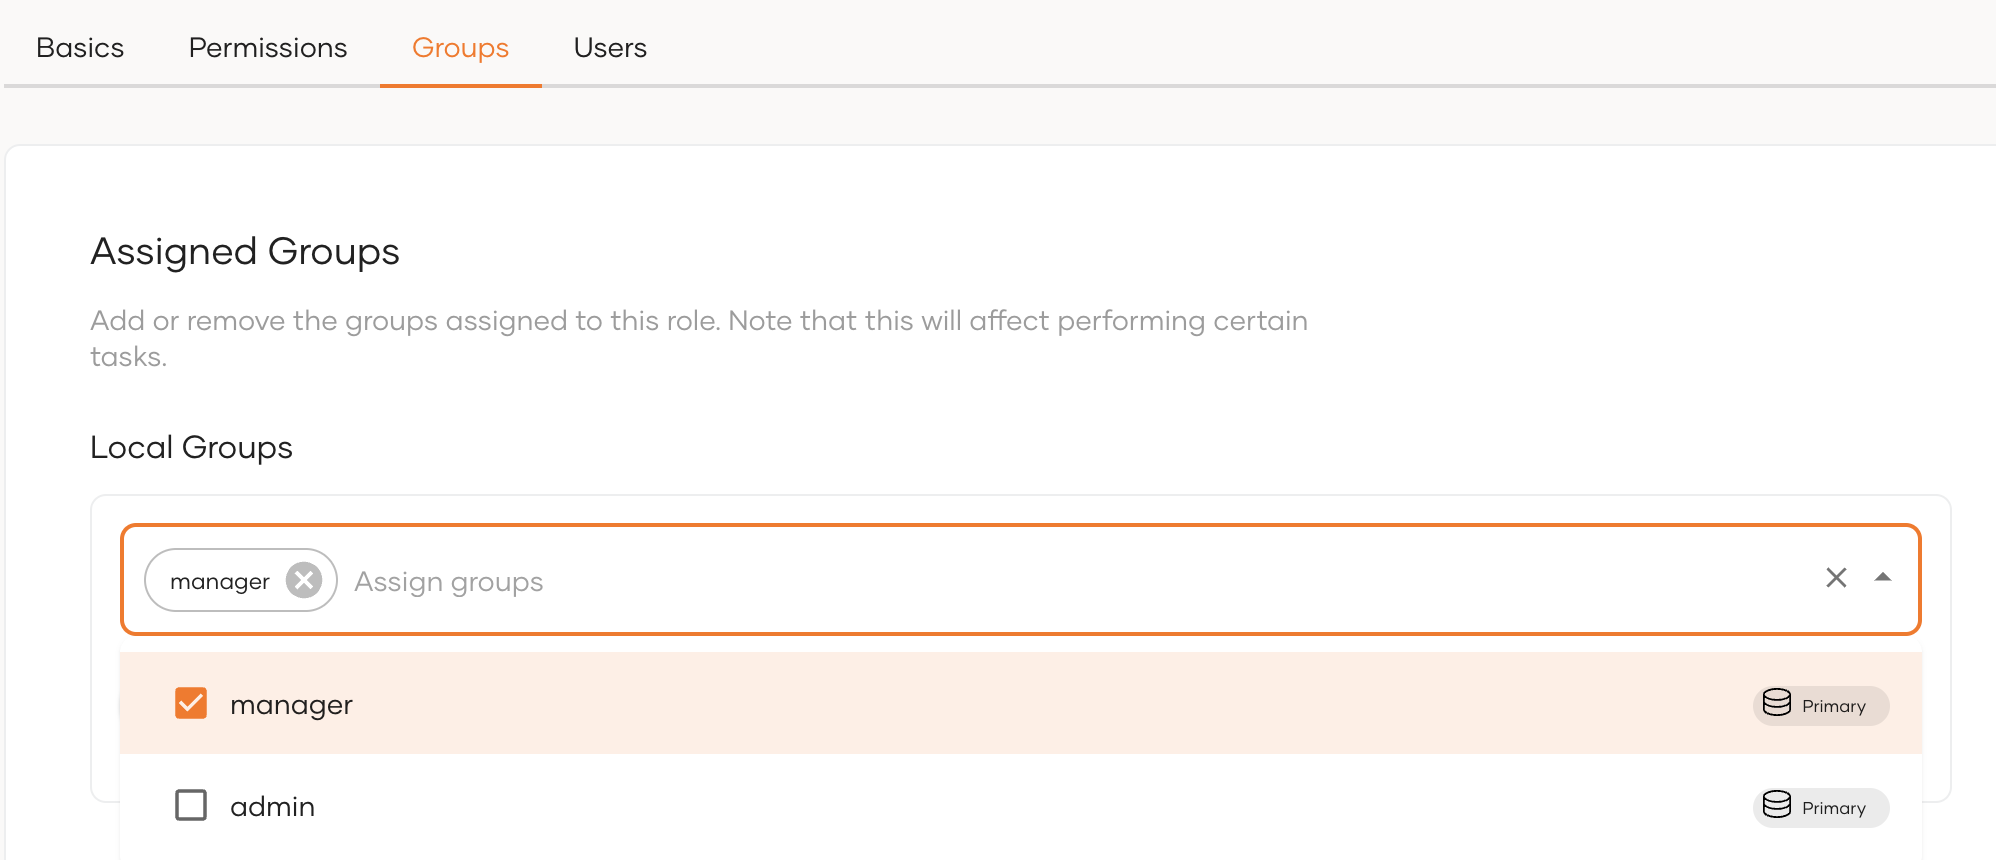
To assign a group:
-
Go to the Groups tab.
-
Select a relevant local group.
-
Click Update to assign the group.
-
-
Delete a role
To delete a role:
-
On the WSO2 Identity Server Console, go to Console Settings > Roles.
-
Click the trash icon next to the role you wish to delete.
-
Select the checkbox and confirm your action.
Manage administrators
Users who are assigned to one or more Console roles created above, are listed under the Administrators tab in Console Settings. For instructions on managing administrators, refer to manage administrators.