Register a SAML web app
To integrate your web application with WSO2 Identity Server using SAML, you need to first register your application as a SAML application in WSO2 Identity Server.
There are two ways to provide your SAML application configurations to WSO2 Identity Server during registration:
- Use a SAML SP metadata file
- Add SAML SP configurations manually
Follow the instructions given below.
Register the app
To register the app:
-
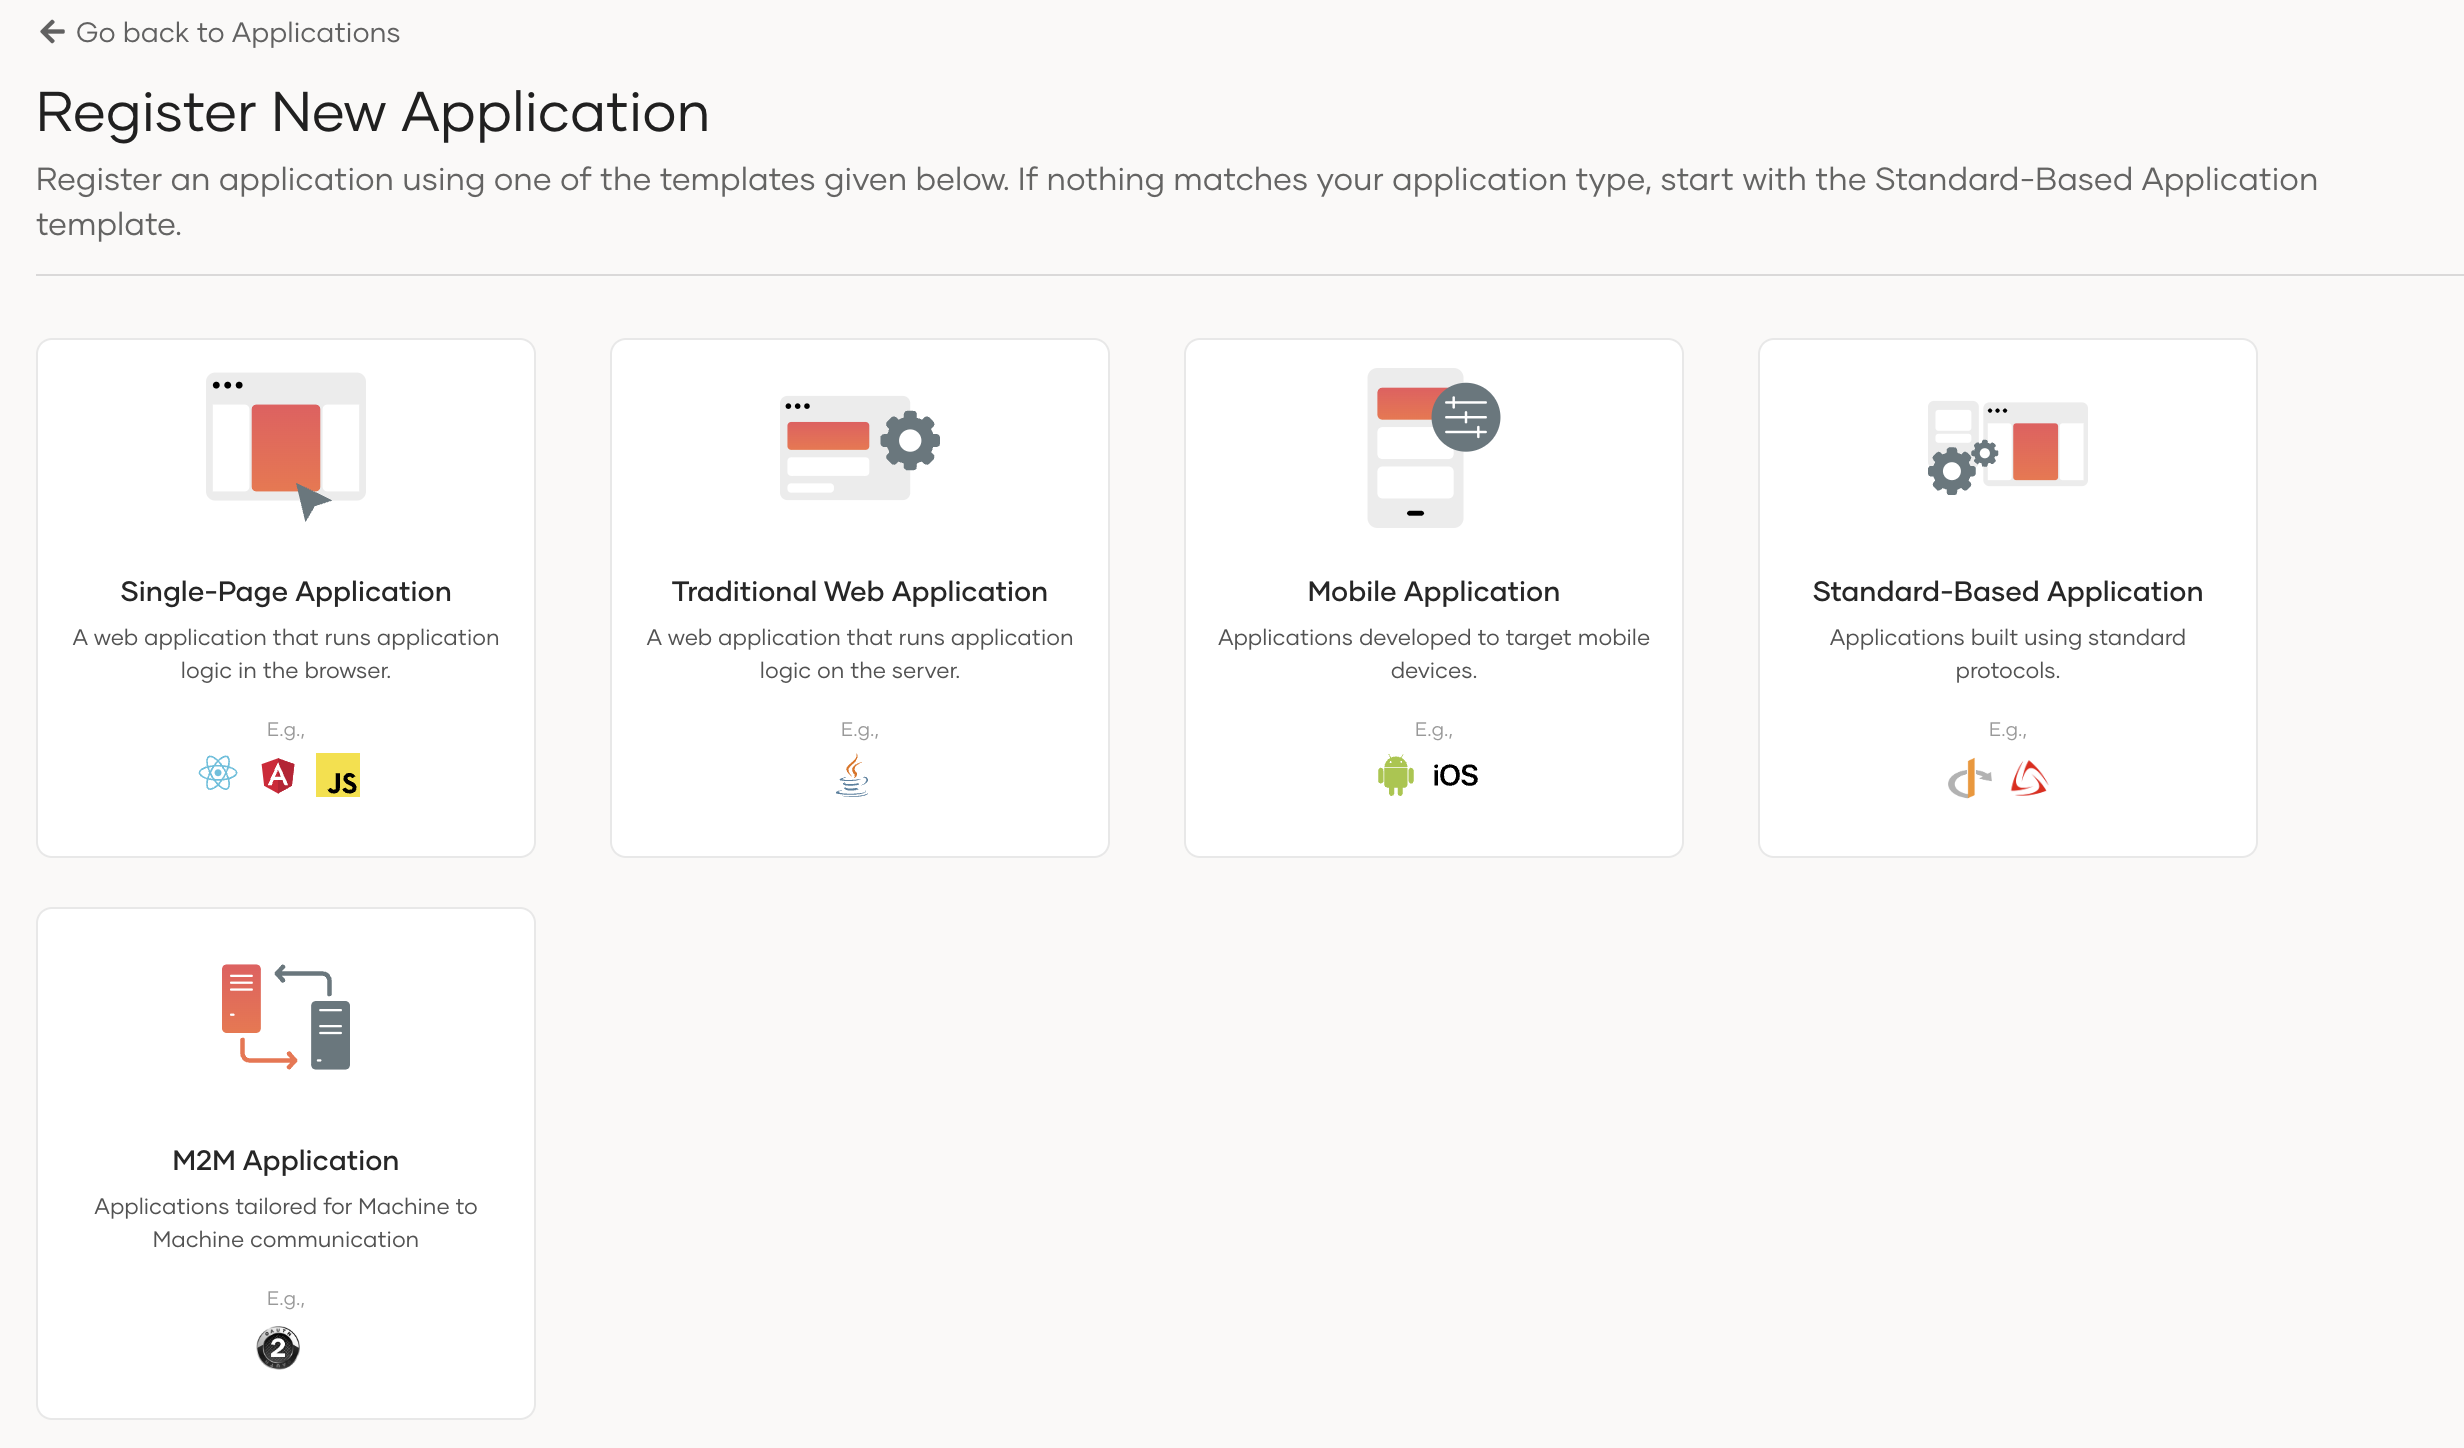
On the WSO2 Identity Server Console, click Applications.
-
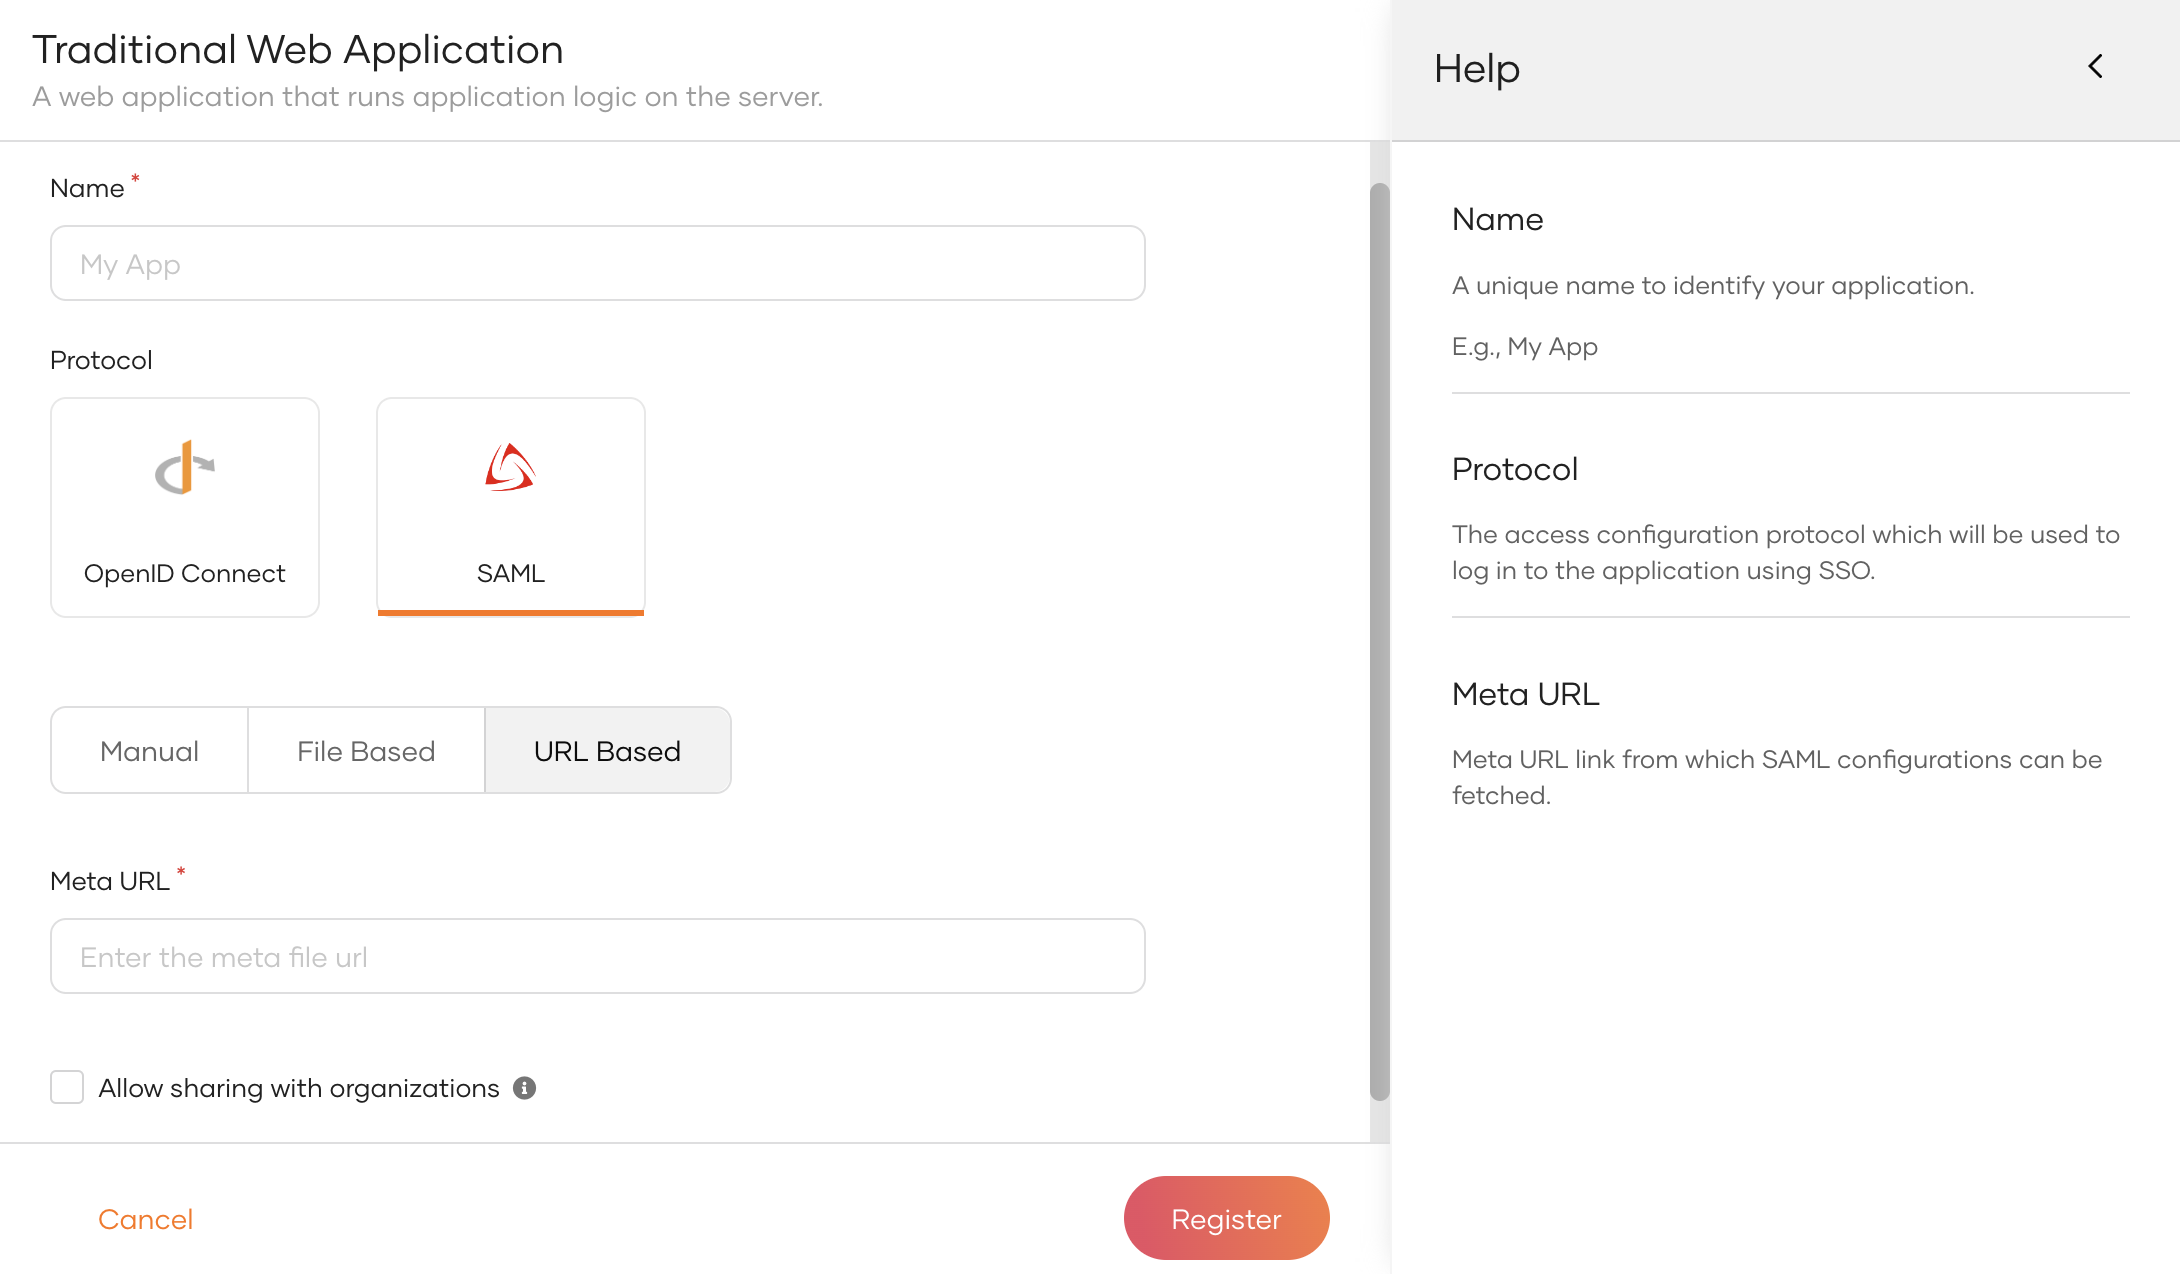
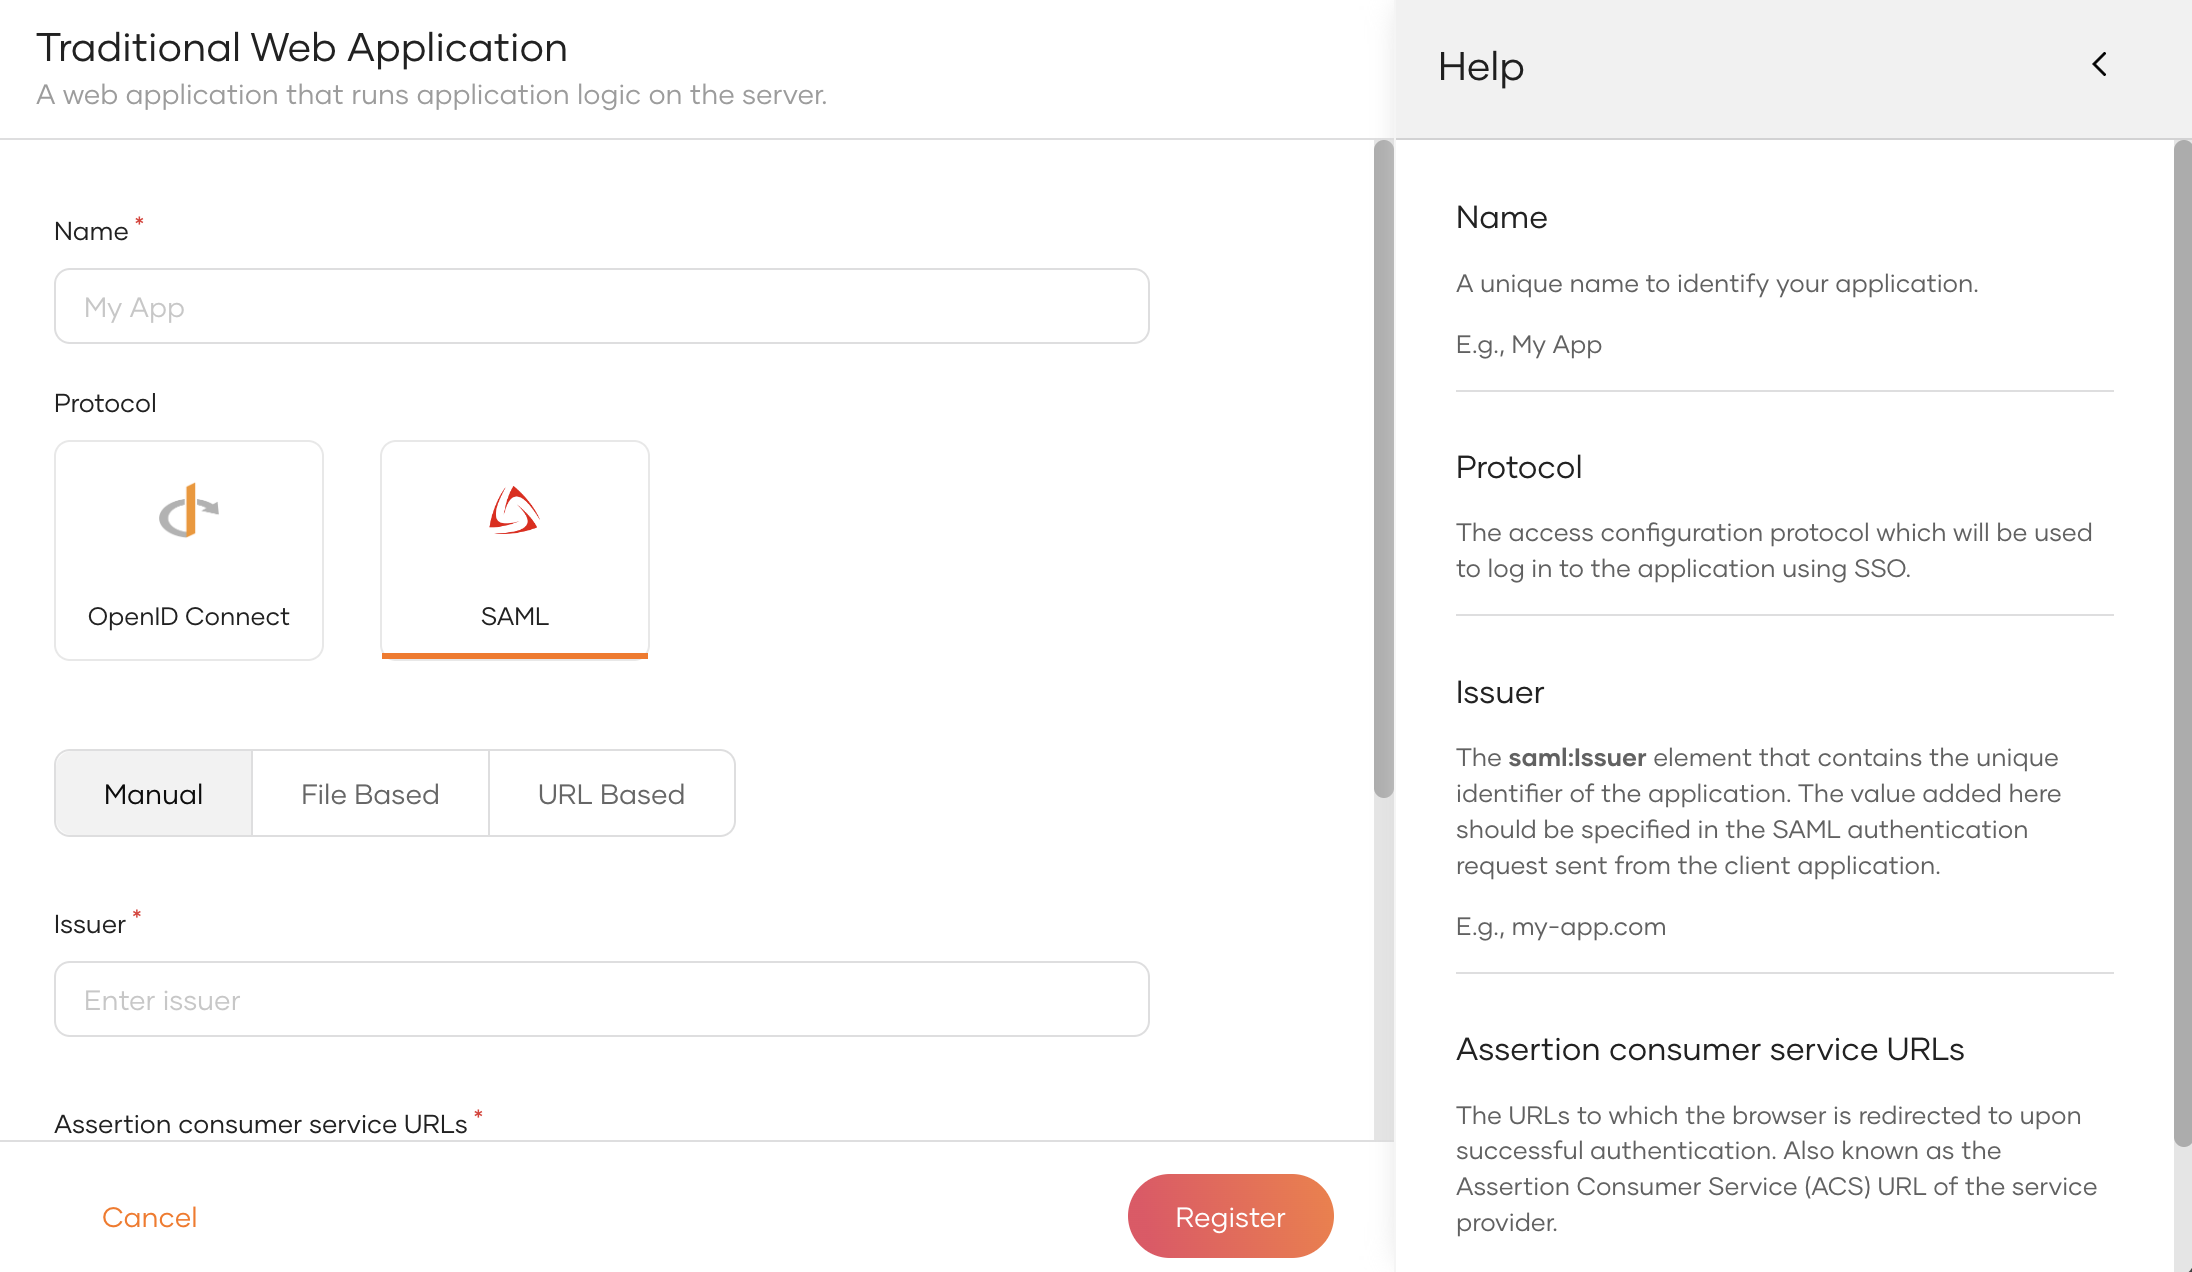
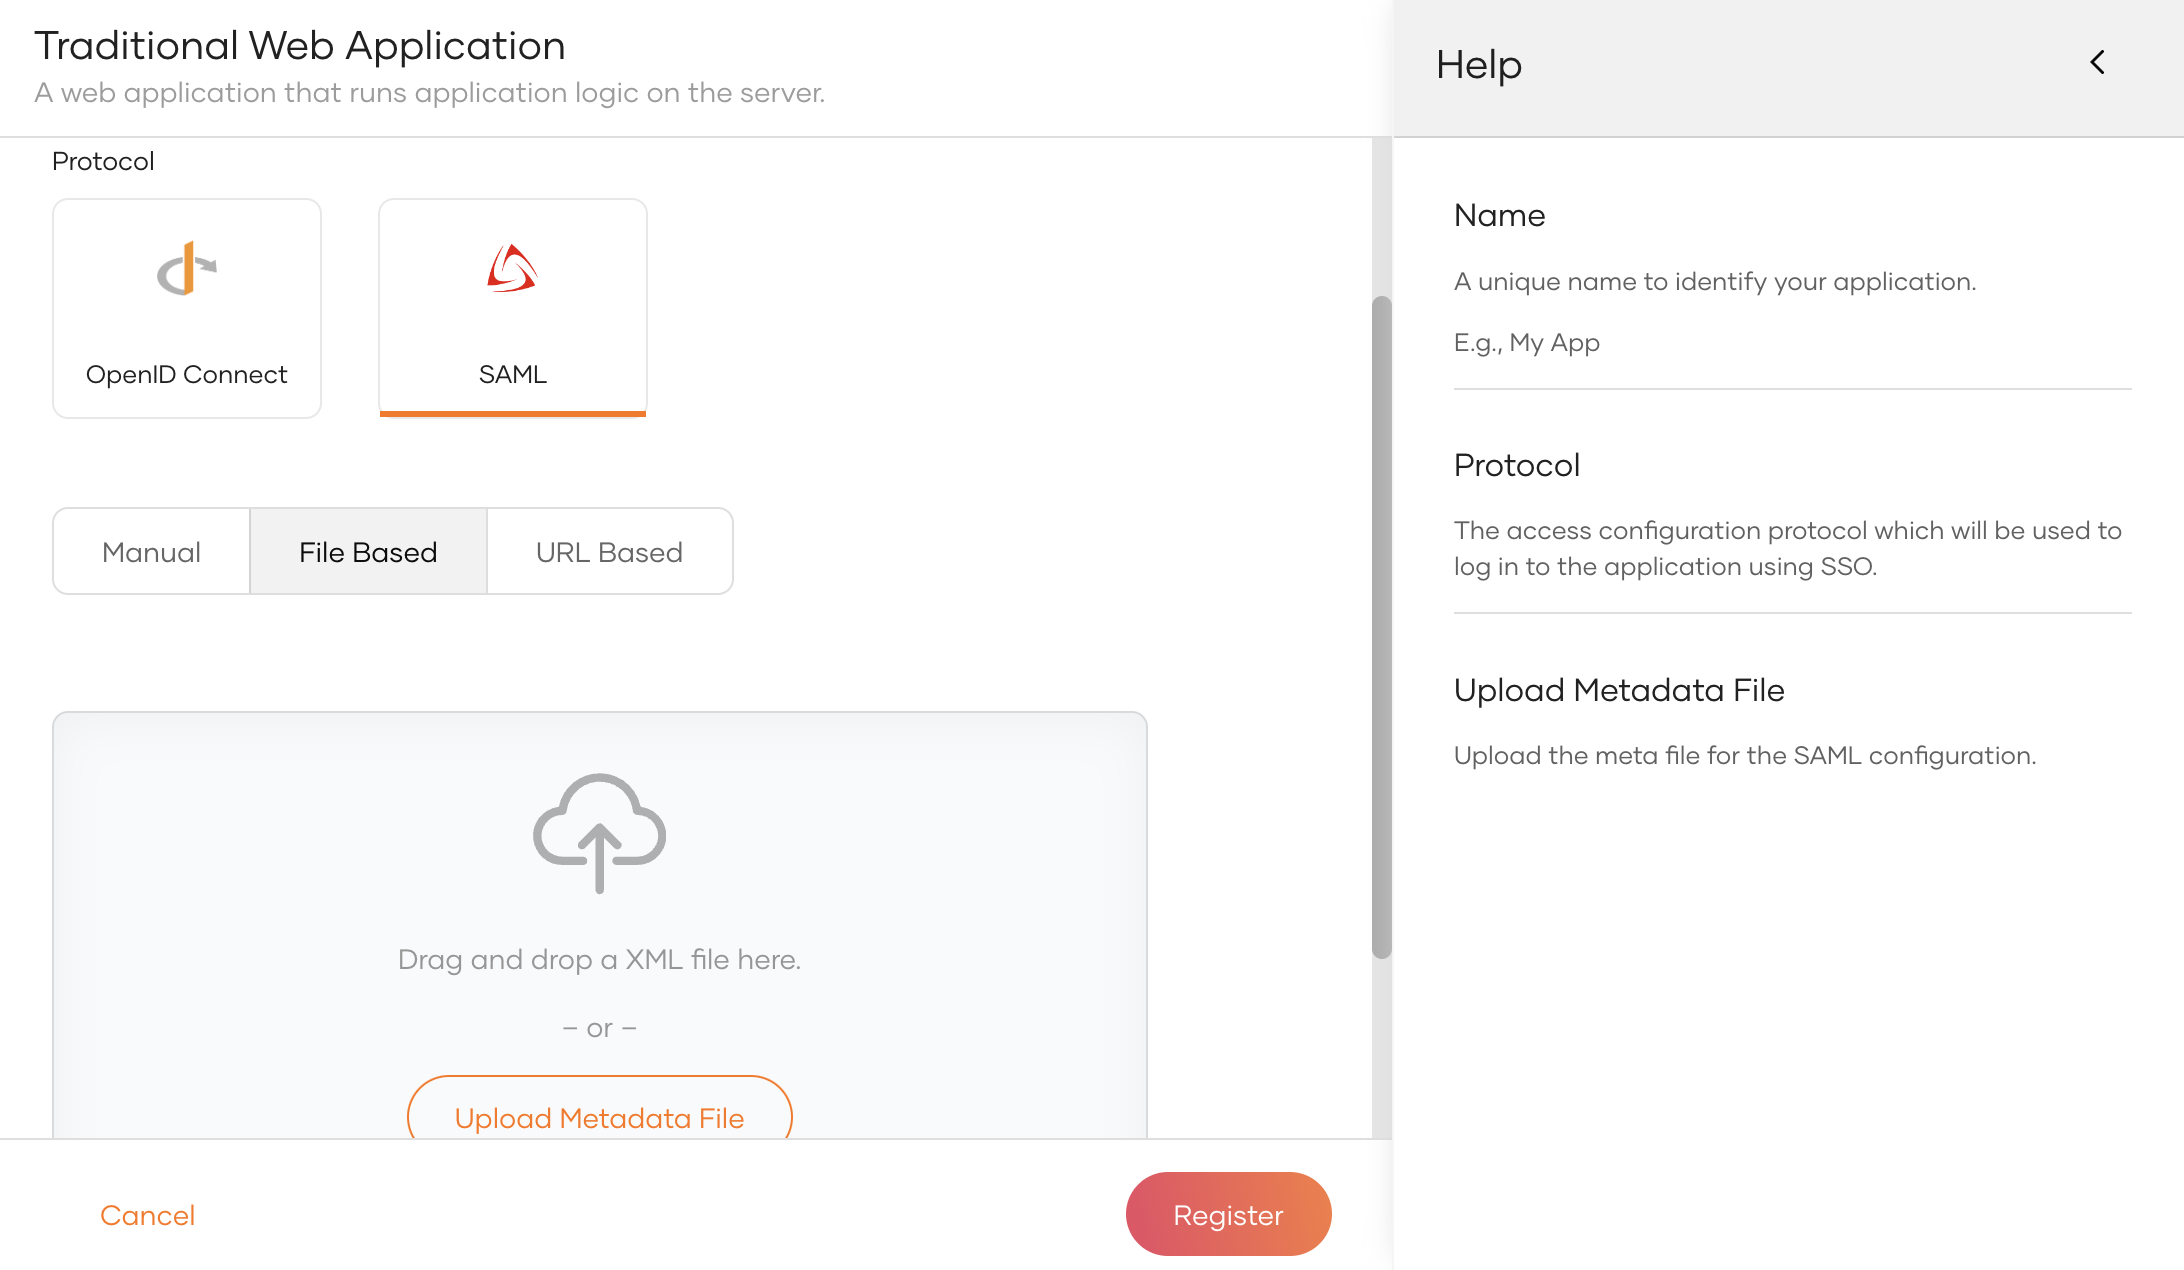
Click New Application and select Traditional Web Application.
- In the Name field, enter a unique name to identify your application.
- Select the SAML protocol.
-
Select one of the following methods and add the SAML configurations:
Method Description Manual Use this option to manually specify the required SAML configurations.
See Add SAML configs manually.File Based Upload a SAML metadata file with the required configurations.
See Use a SAML metadata file.URL Based Point to the endpoint with the SAML metadata.
See Use a SAML metadata file. -
[Optional] Enable Allow sharing with organizations to share the new application with all or any selected organizations that belong to your organization.
-
Click Register to complete the registration.
Sharing with selected organizations
If you have enabled Allow sharing with organizations while registering the application, you will see a popup window with the following options.
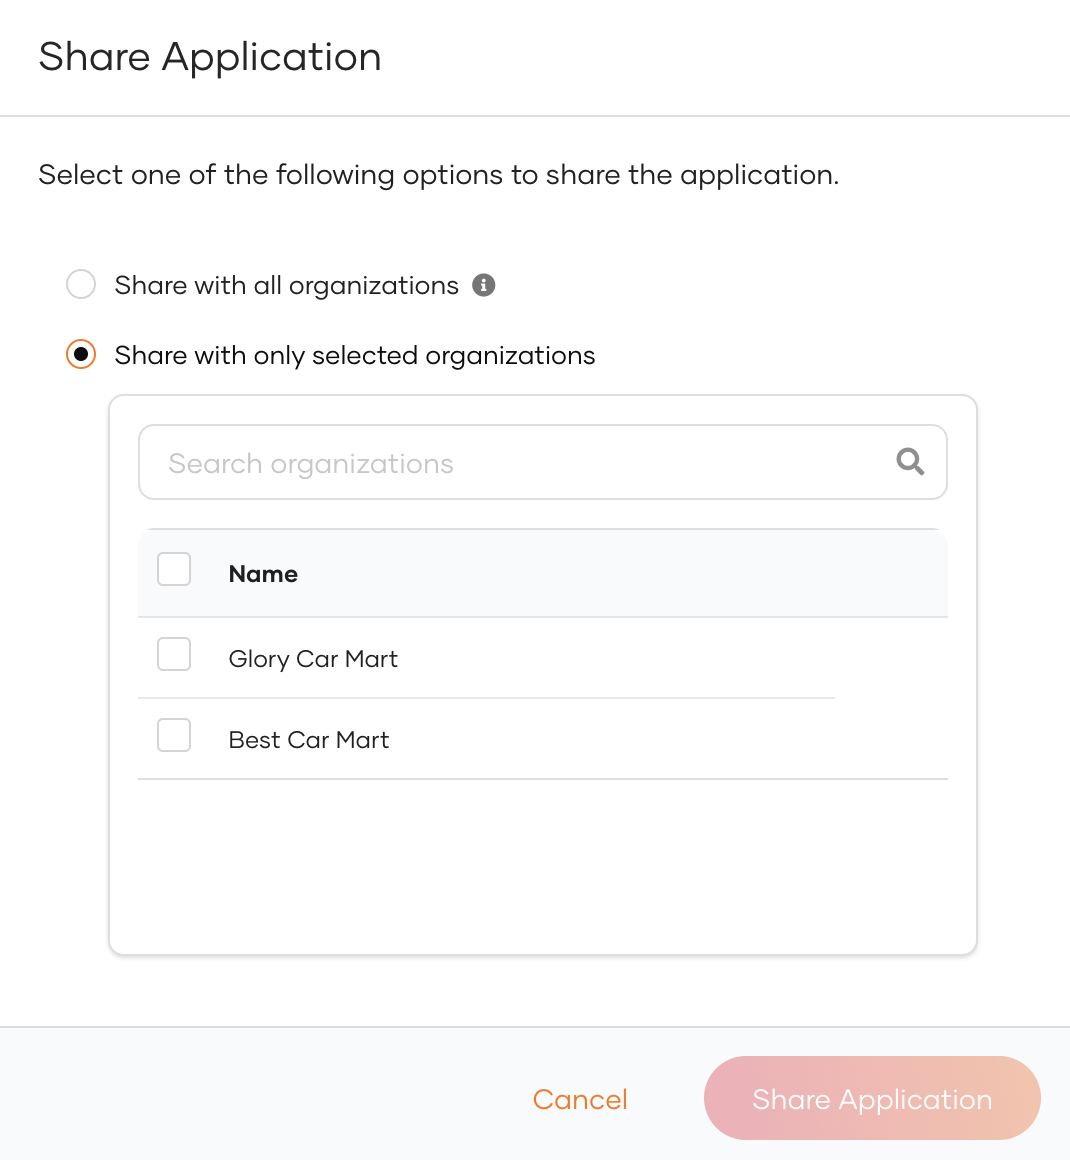
Option Description Share with all organizations If selected, the application will be shared with all existing organizations and any new organizations you may create in the future. Share with only selected organizations If selected, you can select the organizations you wish to share the application with. -
Enable the application when it is ready for use.
Add SAML configs manually
If you selected Manual in the previous step, you can manually specify the SAML configurations as follows:
| Parameter | Description |
|---|---|
| Issuer | The unique identifier of the application. The value added here should be specified in the SAML authentication request as saml:Issuer element sent from the client application. You can't change this issuer configuration after you register the app. |
| Assertion consumer service URLs | The URLs to which the browser is redirected upon successful authentication. This receives the SAML response. |
Use a SAML metadata file
An SP metadata XML file contains the following:
- SP certificate
- The entity ID (also known as issuer)
- Assertion Consumer Service URLs (ACS URLs)
- Single Logout Service URLs
There are two ways to use a SAML metadata file during application registration:
-
Select the File Based option and upload the SAML SP metadata file.
-
Select the URL Based option and specify the SAML meta URL, which refers to the endpoint that hosts the SAML metadata file.