Manage roles
A role is simply a collection of permissions. As roles facilitate adding, removing and updating permissions collectively, it is a convenient way of managing permissions rather than doing it individually for each user. You can assign users and groups to one or many roles. When a group is assigned to a role, all group members inherit the permissions of the role.
In WSO2 Identity Server, roles play a crucial role in controlling access to APIs and applications. Based on the audience, you can define the following two types of roles.
-
Application level - Roles tailored to a specific application. Used to control access to API resources authorized for the application.
-
Organization level - Roles that are available throughout the organization and used to control access to API resources of an organization. Suited for organizations having multiple applications sharing the same login, registration and authorization requirements (such as applications with both a web and a mobile component).
Note
-
API resources of an organization consist of management APIs, organization APIs and registered APIs.
-
Applications can be set to work with application roles or organization roles. Learn how to select the role audience for an application.
-
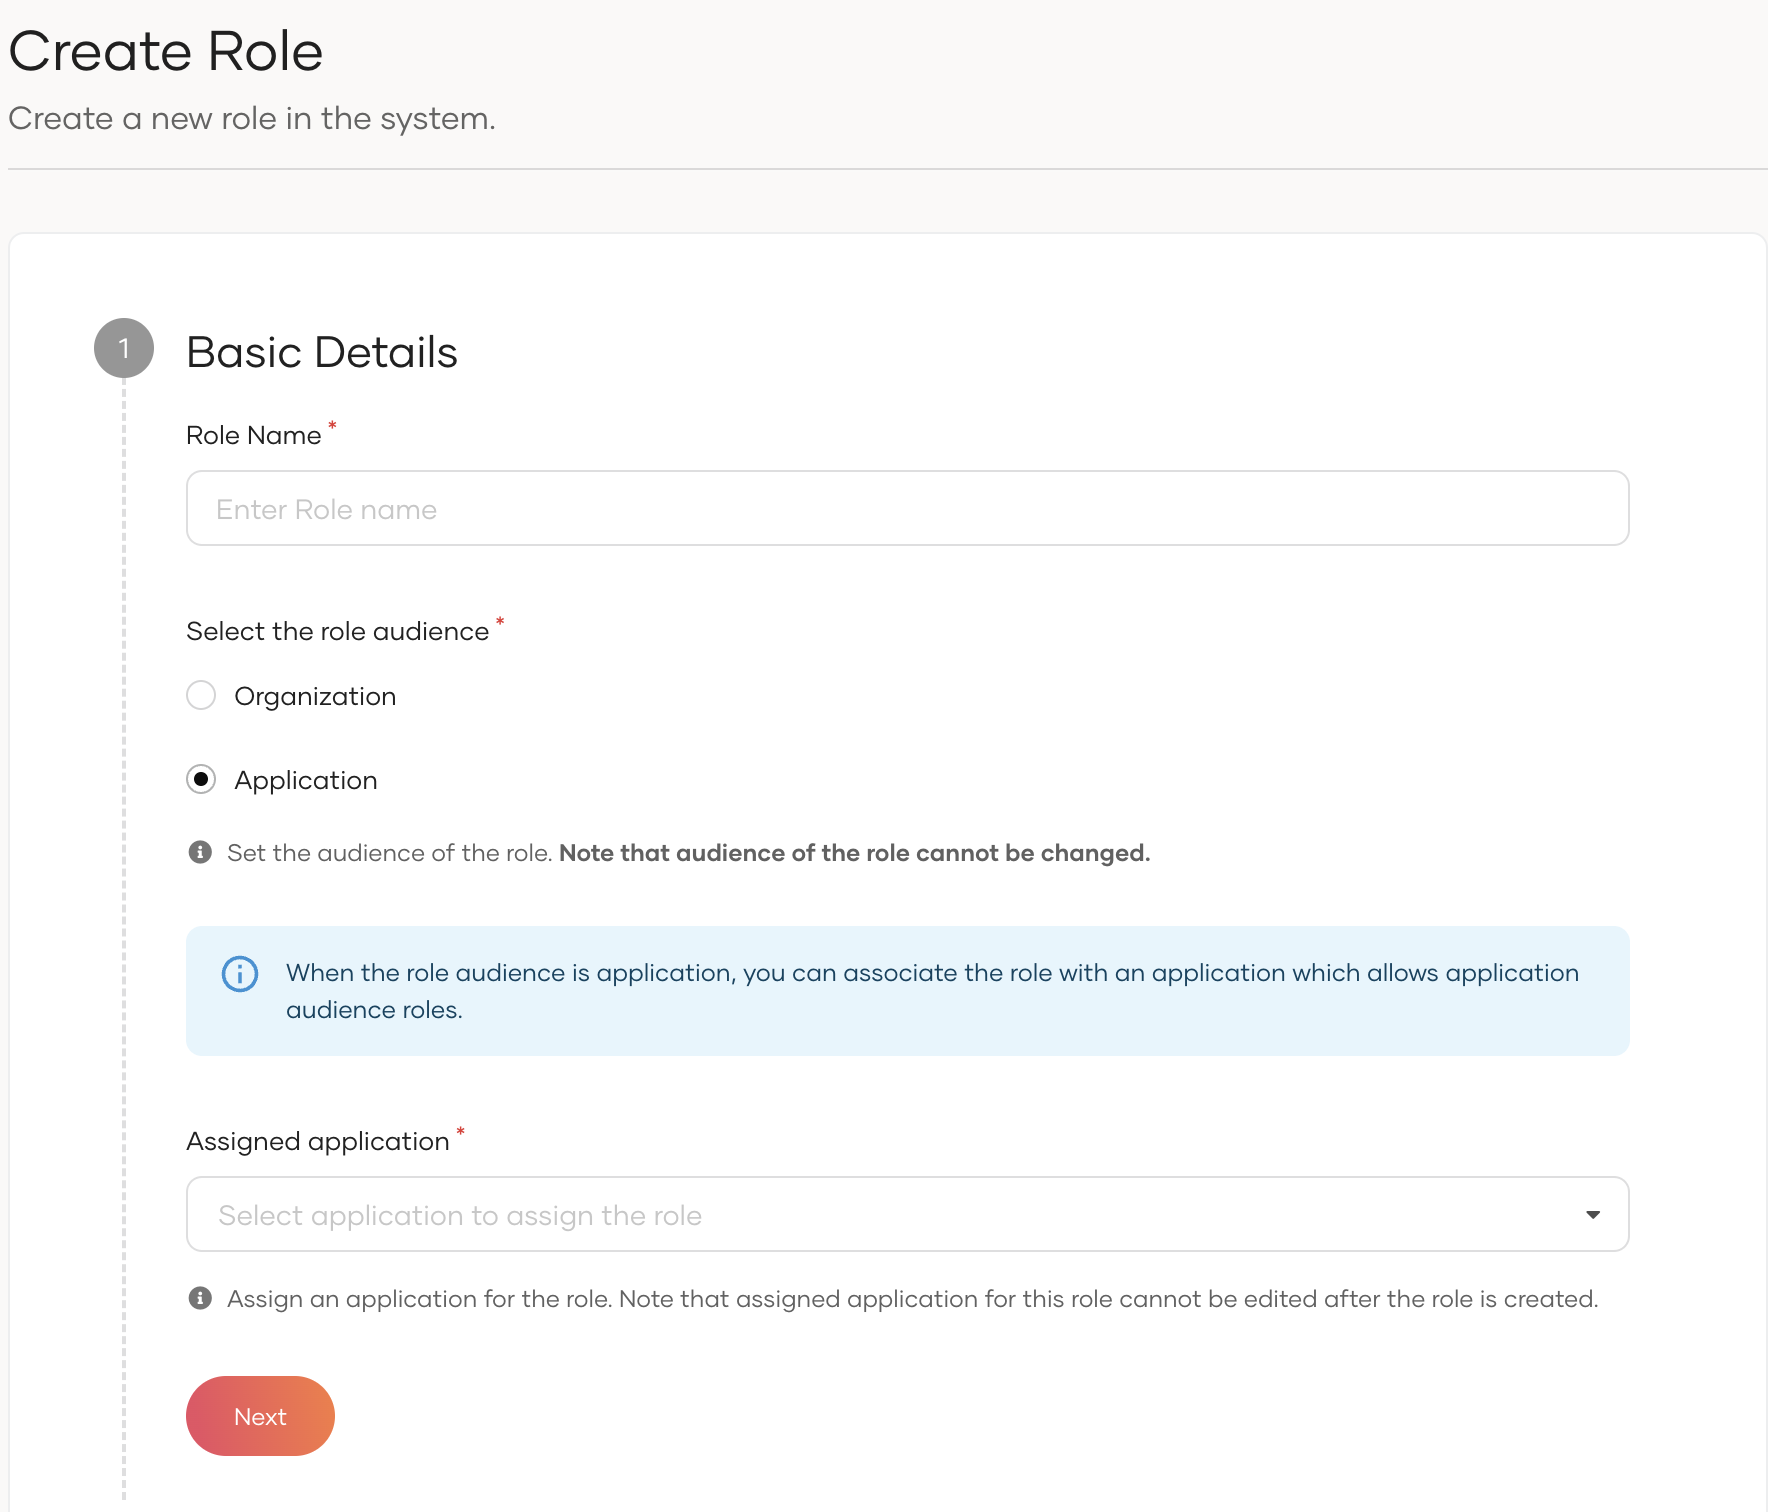
Create a role
To create a role and assign permissions to it:
-
On the WSO2 Identity Server Console, go to User Management > Roles.
-
Click New Role and provide a name that is unique to the specified audience.
-
Select the role audience. Choose,
-
Application if the role is meant for a single application and select the relevant application from the dropdown.
-
Organization if the role is intended for multiple applications.
Warning
Once a role is created, you cannot modify the selected audience.
-
-
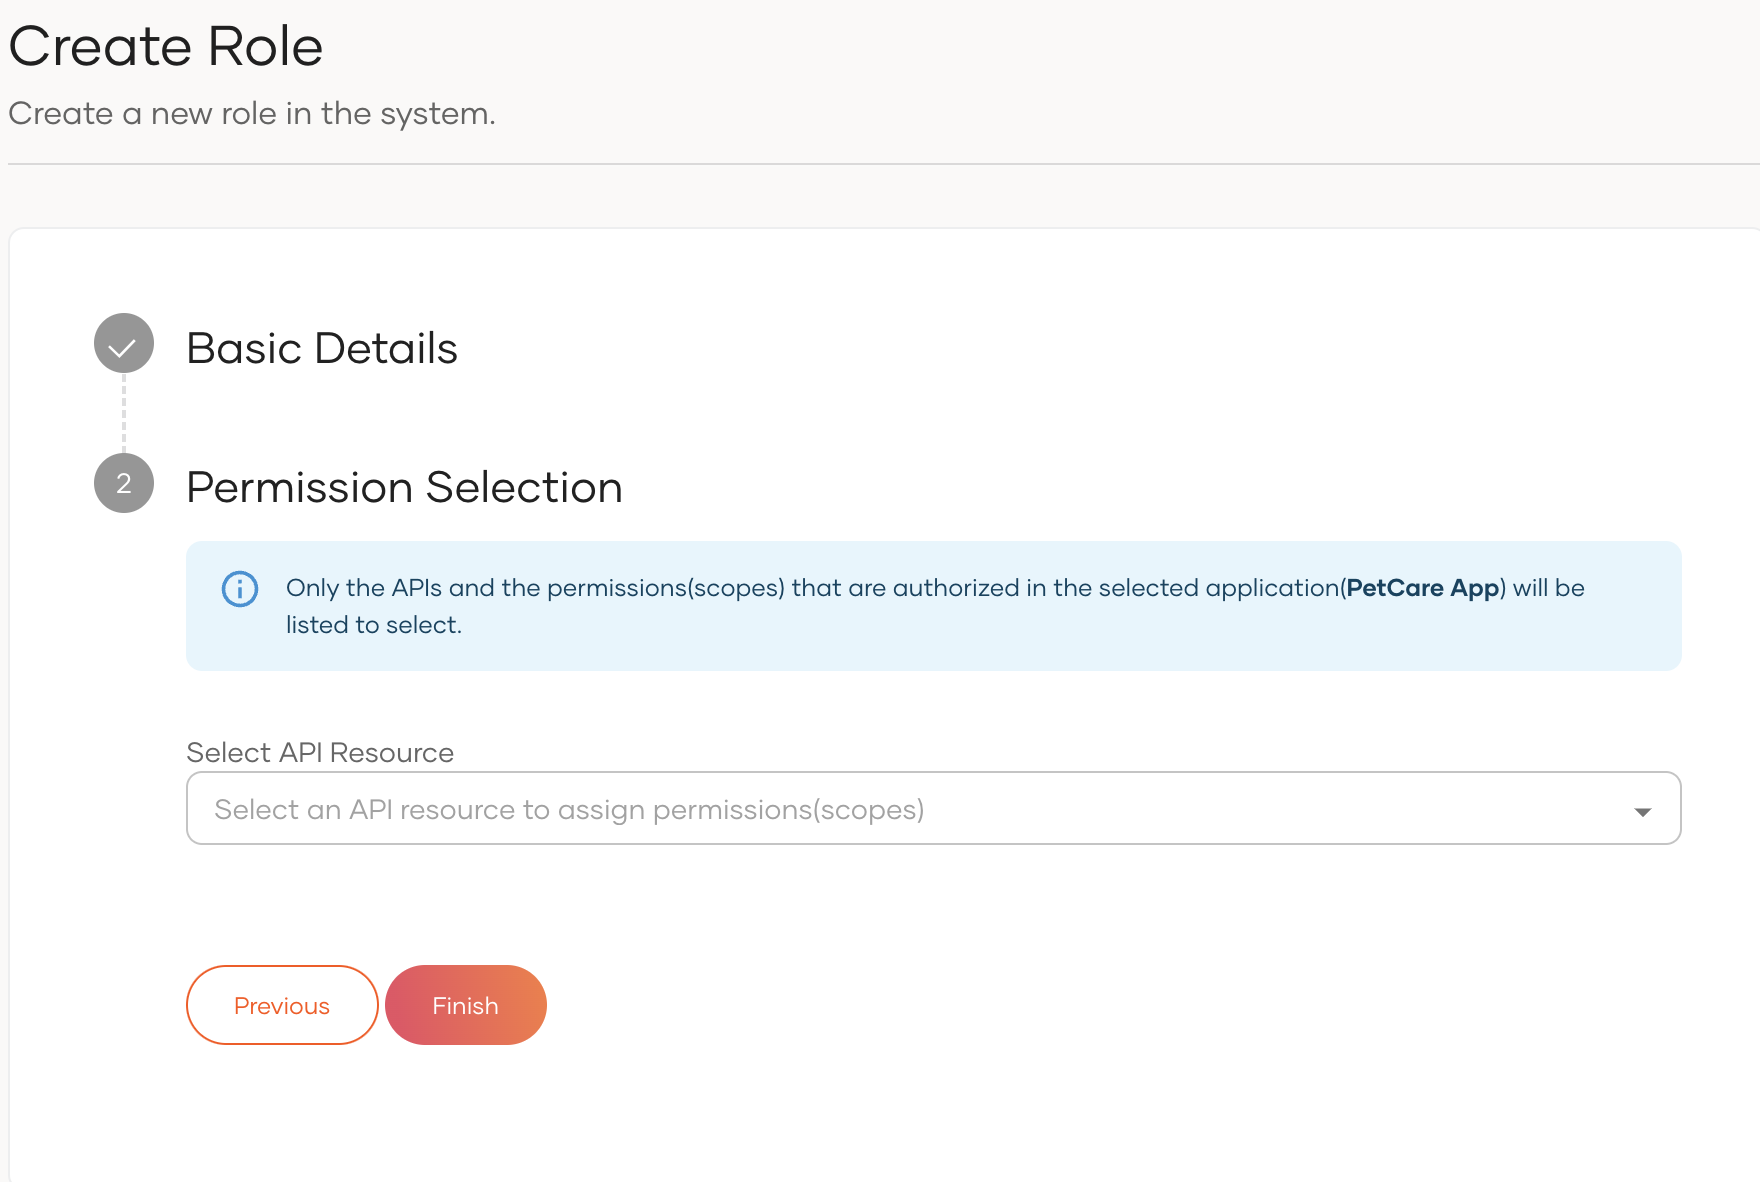
Click Next.
-
Select one or more API resources from the dropdown.
-
If the audience is Application, select from the API resources authorized for the application.
-
If the audience is Organization, select from your organization's API resources.
-
-
Under each API resource, select the check box to grant all permissions or use the dropdown to grant limited permissions.
-
Click Finish.
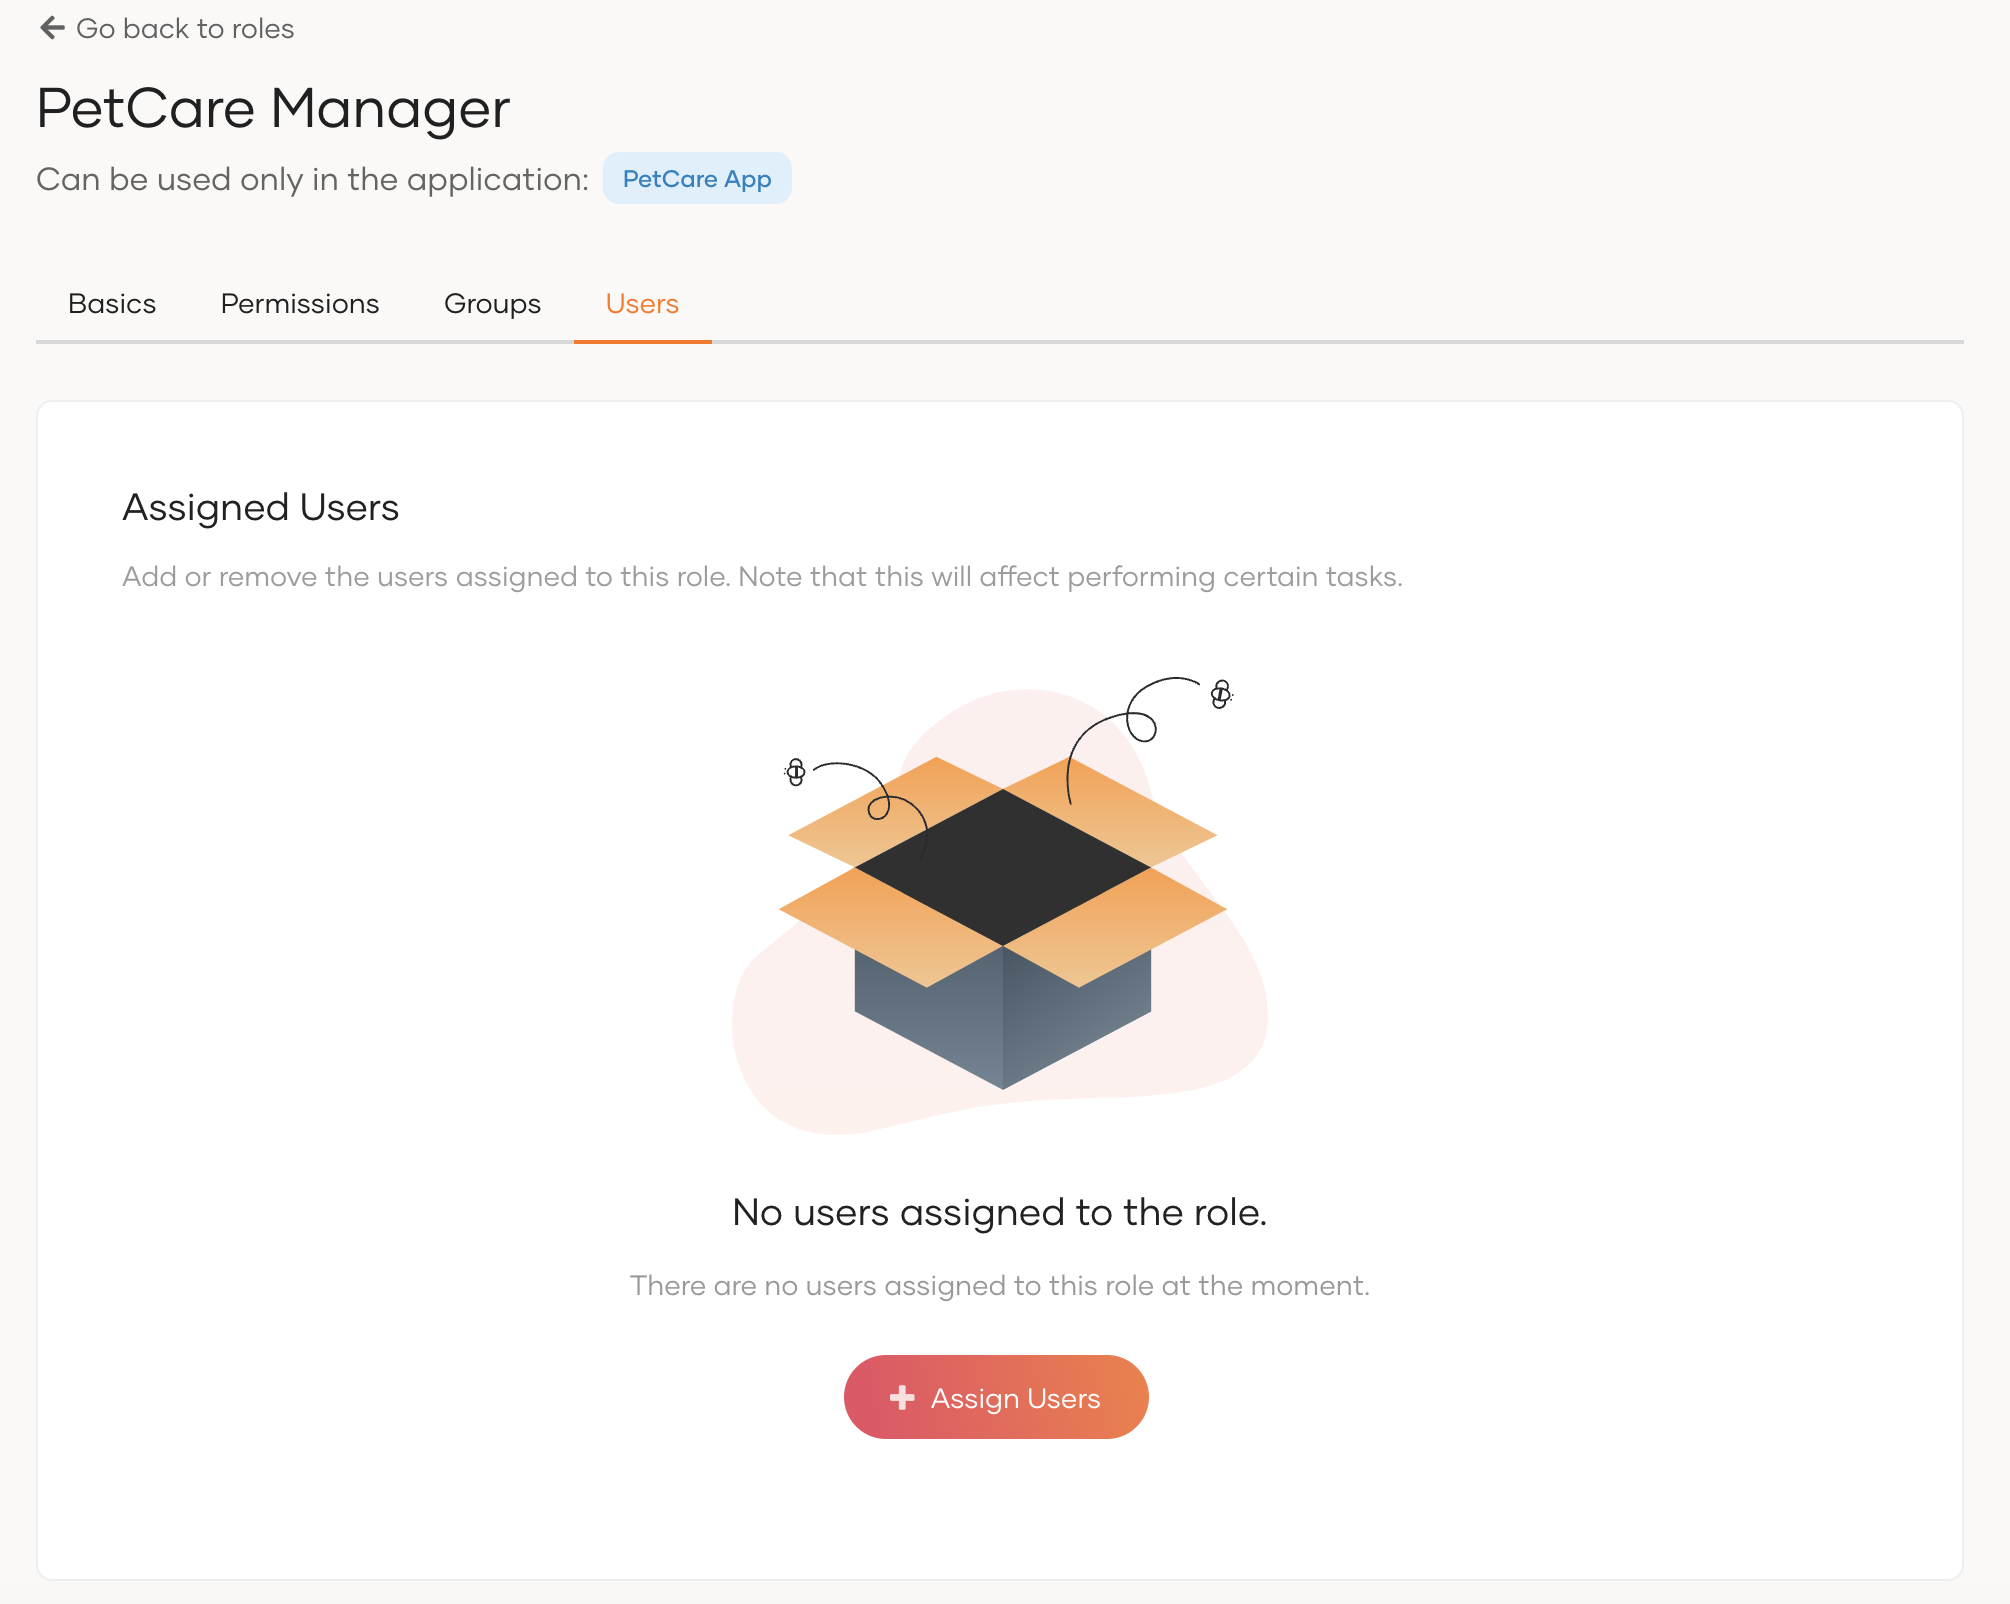
Assign users to a role
To assign users to a role:
-
On the WSO2 Identity Server Console, go to User Management > Roles.
-
Select the role to which you wish to assign users.
-
Navigate to its Users tab.
-
Click Assign User and select users to add to the role.
-
Click Update.
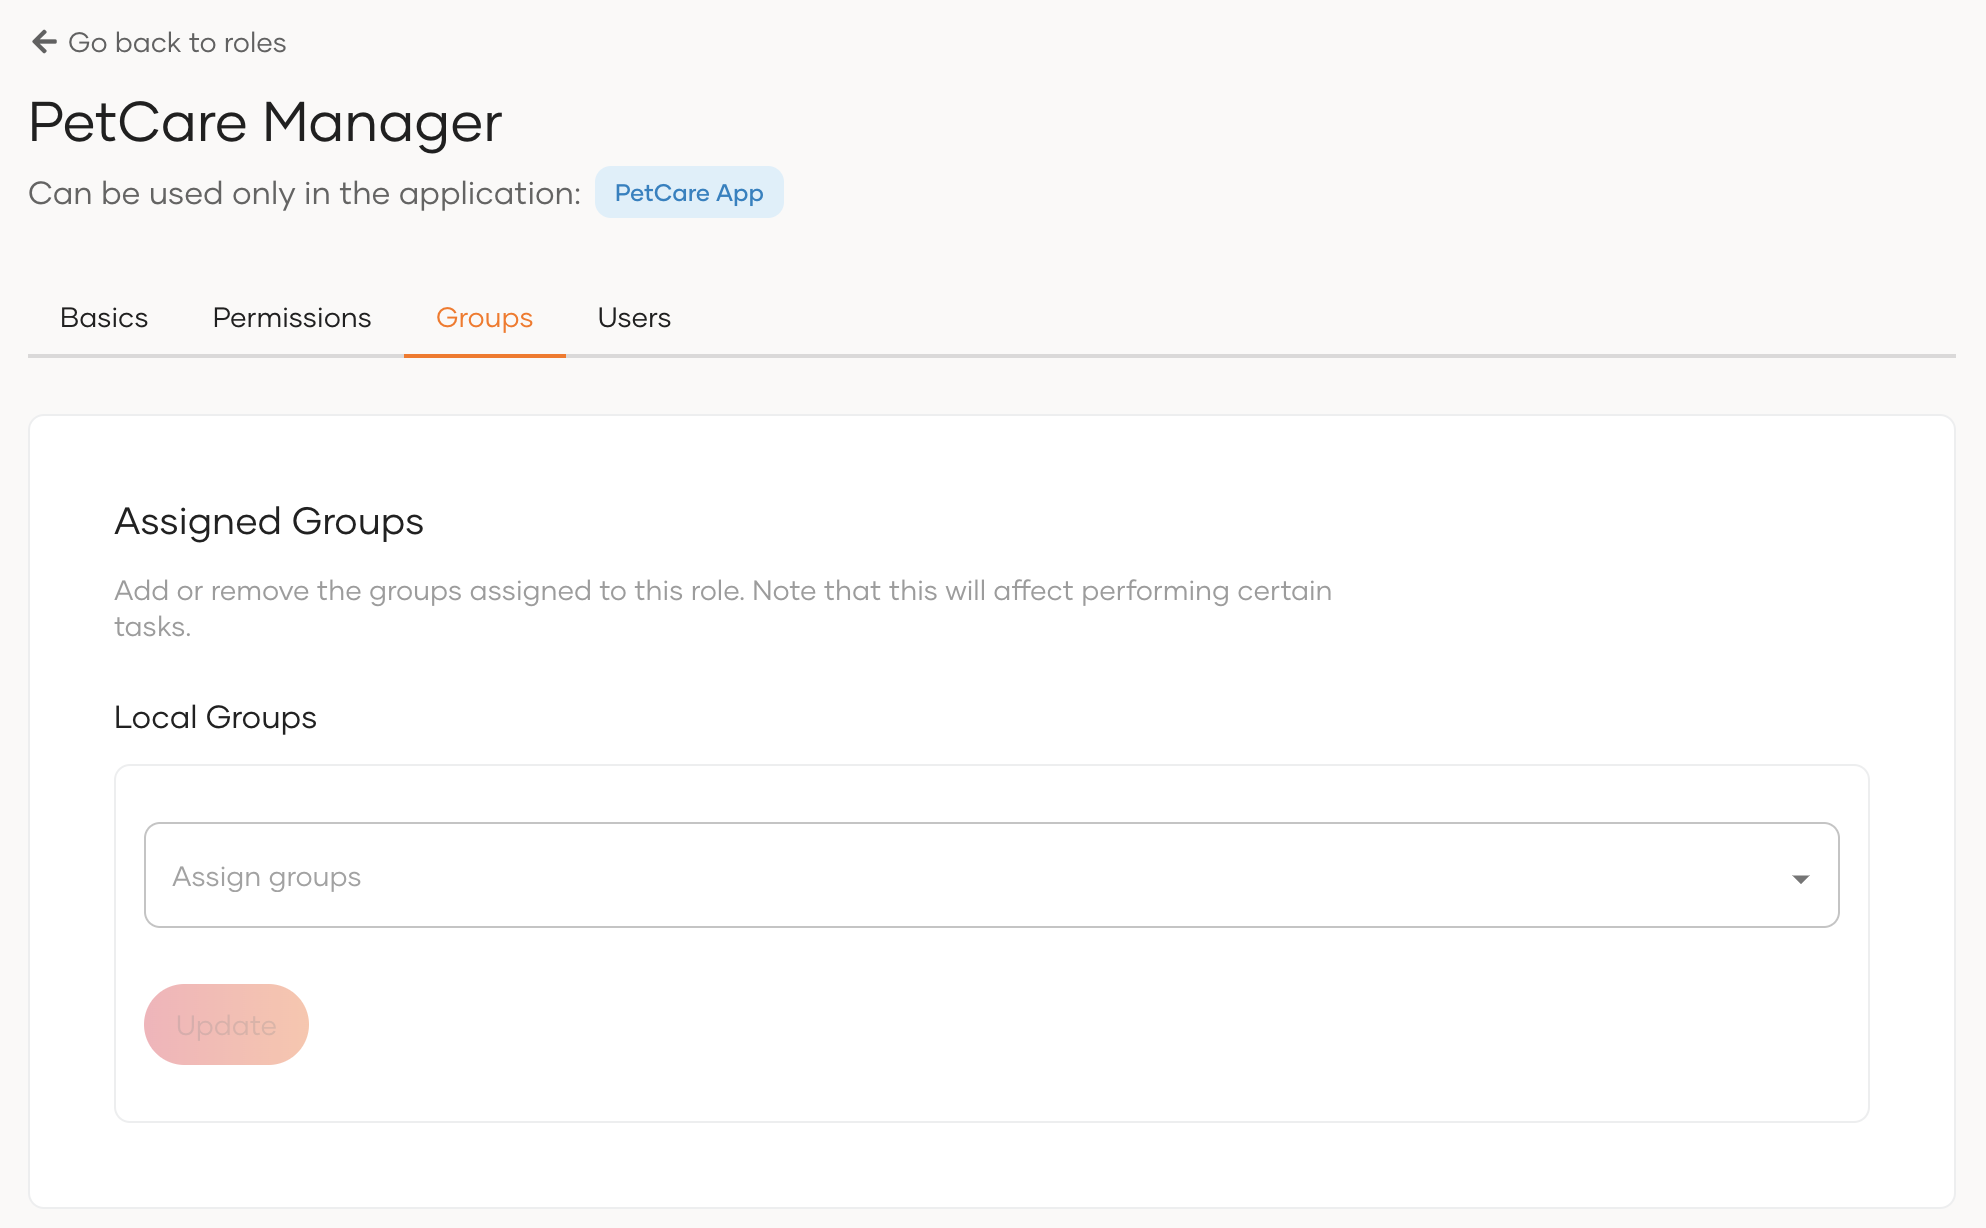
Assign groups to a role
To assign groups to a role:
-
On the WSO2 Identity Server Console, go to User Management > Roles.
-
Select the role to which you wish to assign user groups.
-
Navigate to its Groups tab.
-
Select the groups you wish to add from the dropdown under Local Groups.
-
Click Update.
Assign external groups to a role
You can assign groups of an external Identity Provider (IdP) to an application role by following the steps below.
Prerequisites
- Enable application users to login with an external IdP. Learn more in Add standard-based login
- Configure groups for the IdP.
To assign external groups to an application role:
-
On the WSO2 Identity Server Console, go to User Management > Roles.
-
Select the role to which you wish to assign IdP groups.
-
Navigate to its Groups tab.
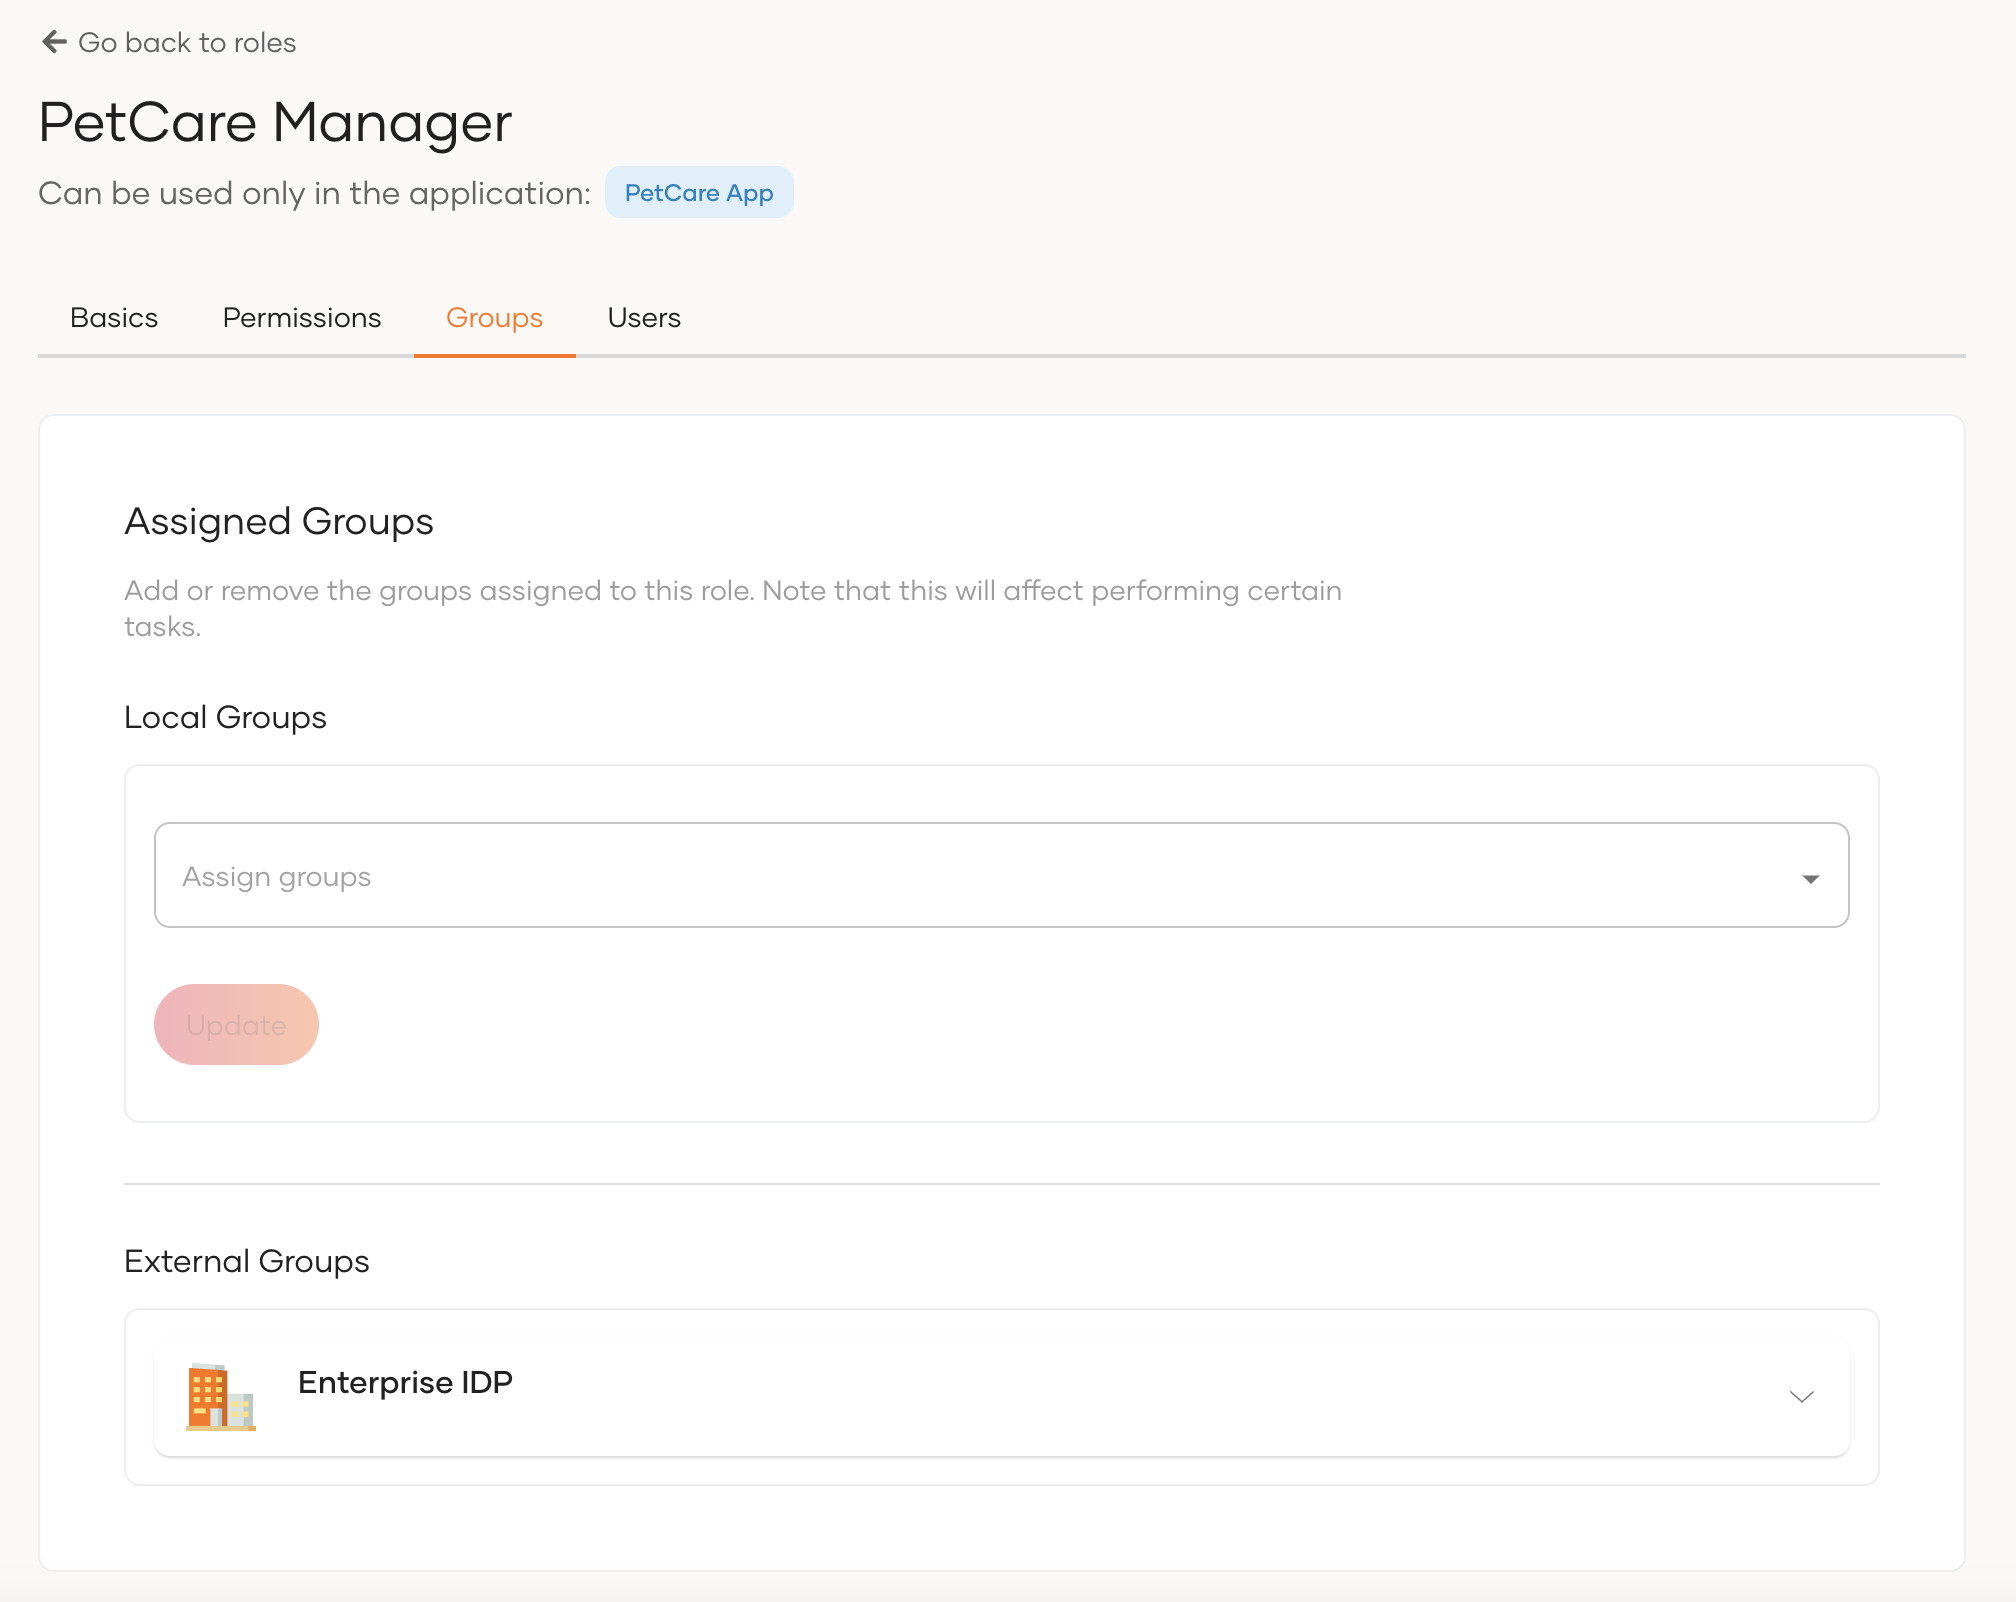
-
Select the relevant IdP under External Groups and select the groups from the dropdown.
-
Click Update.
Edit permissions of a role
To edit permissions of a role:
-
On the WSO2 Identity Server Console, go to User Management > Roles.
-
Select the role for which you wish to edit permissions.
-
Navigate to its Permissions tab and make the following changes as necessary.
-
Add a new API:
-
Select the API resource from the dropdown.
-
For the selected API resource, select the checkbox to grant all permissions or use the dropdown to select limited permissions.
-
-
Remove an API:
- click the cross icon next to the API name.
-
Add new permissions to a selected API:
- select permissions from the dropdown of the selected API.
-
Remove permissions from a selected API:
- click the X icon next to the permission listed under the API.
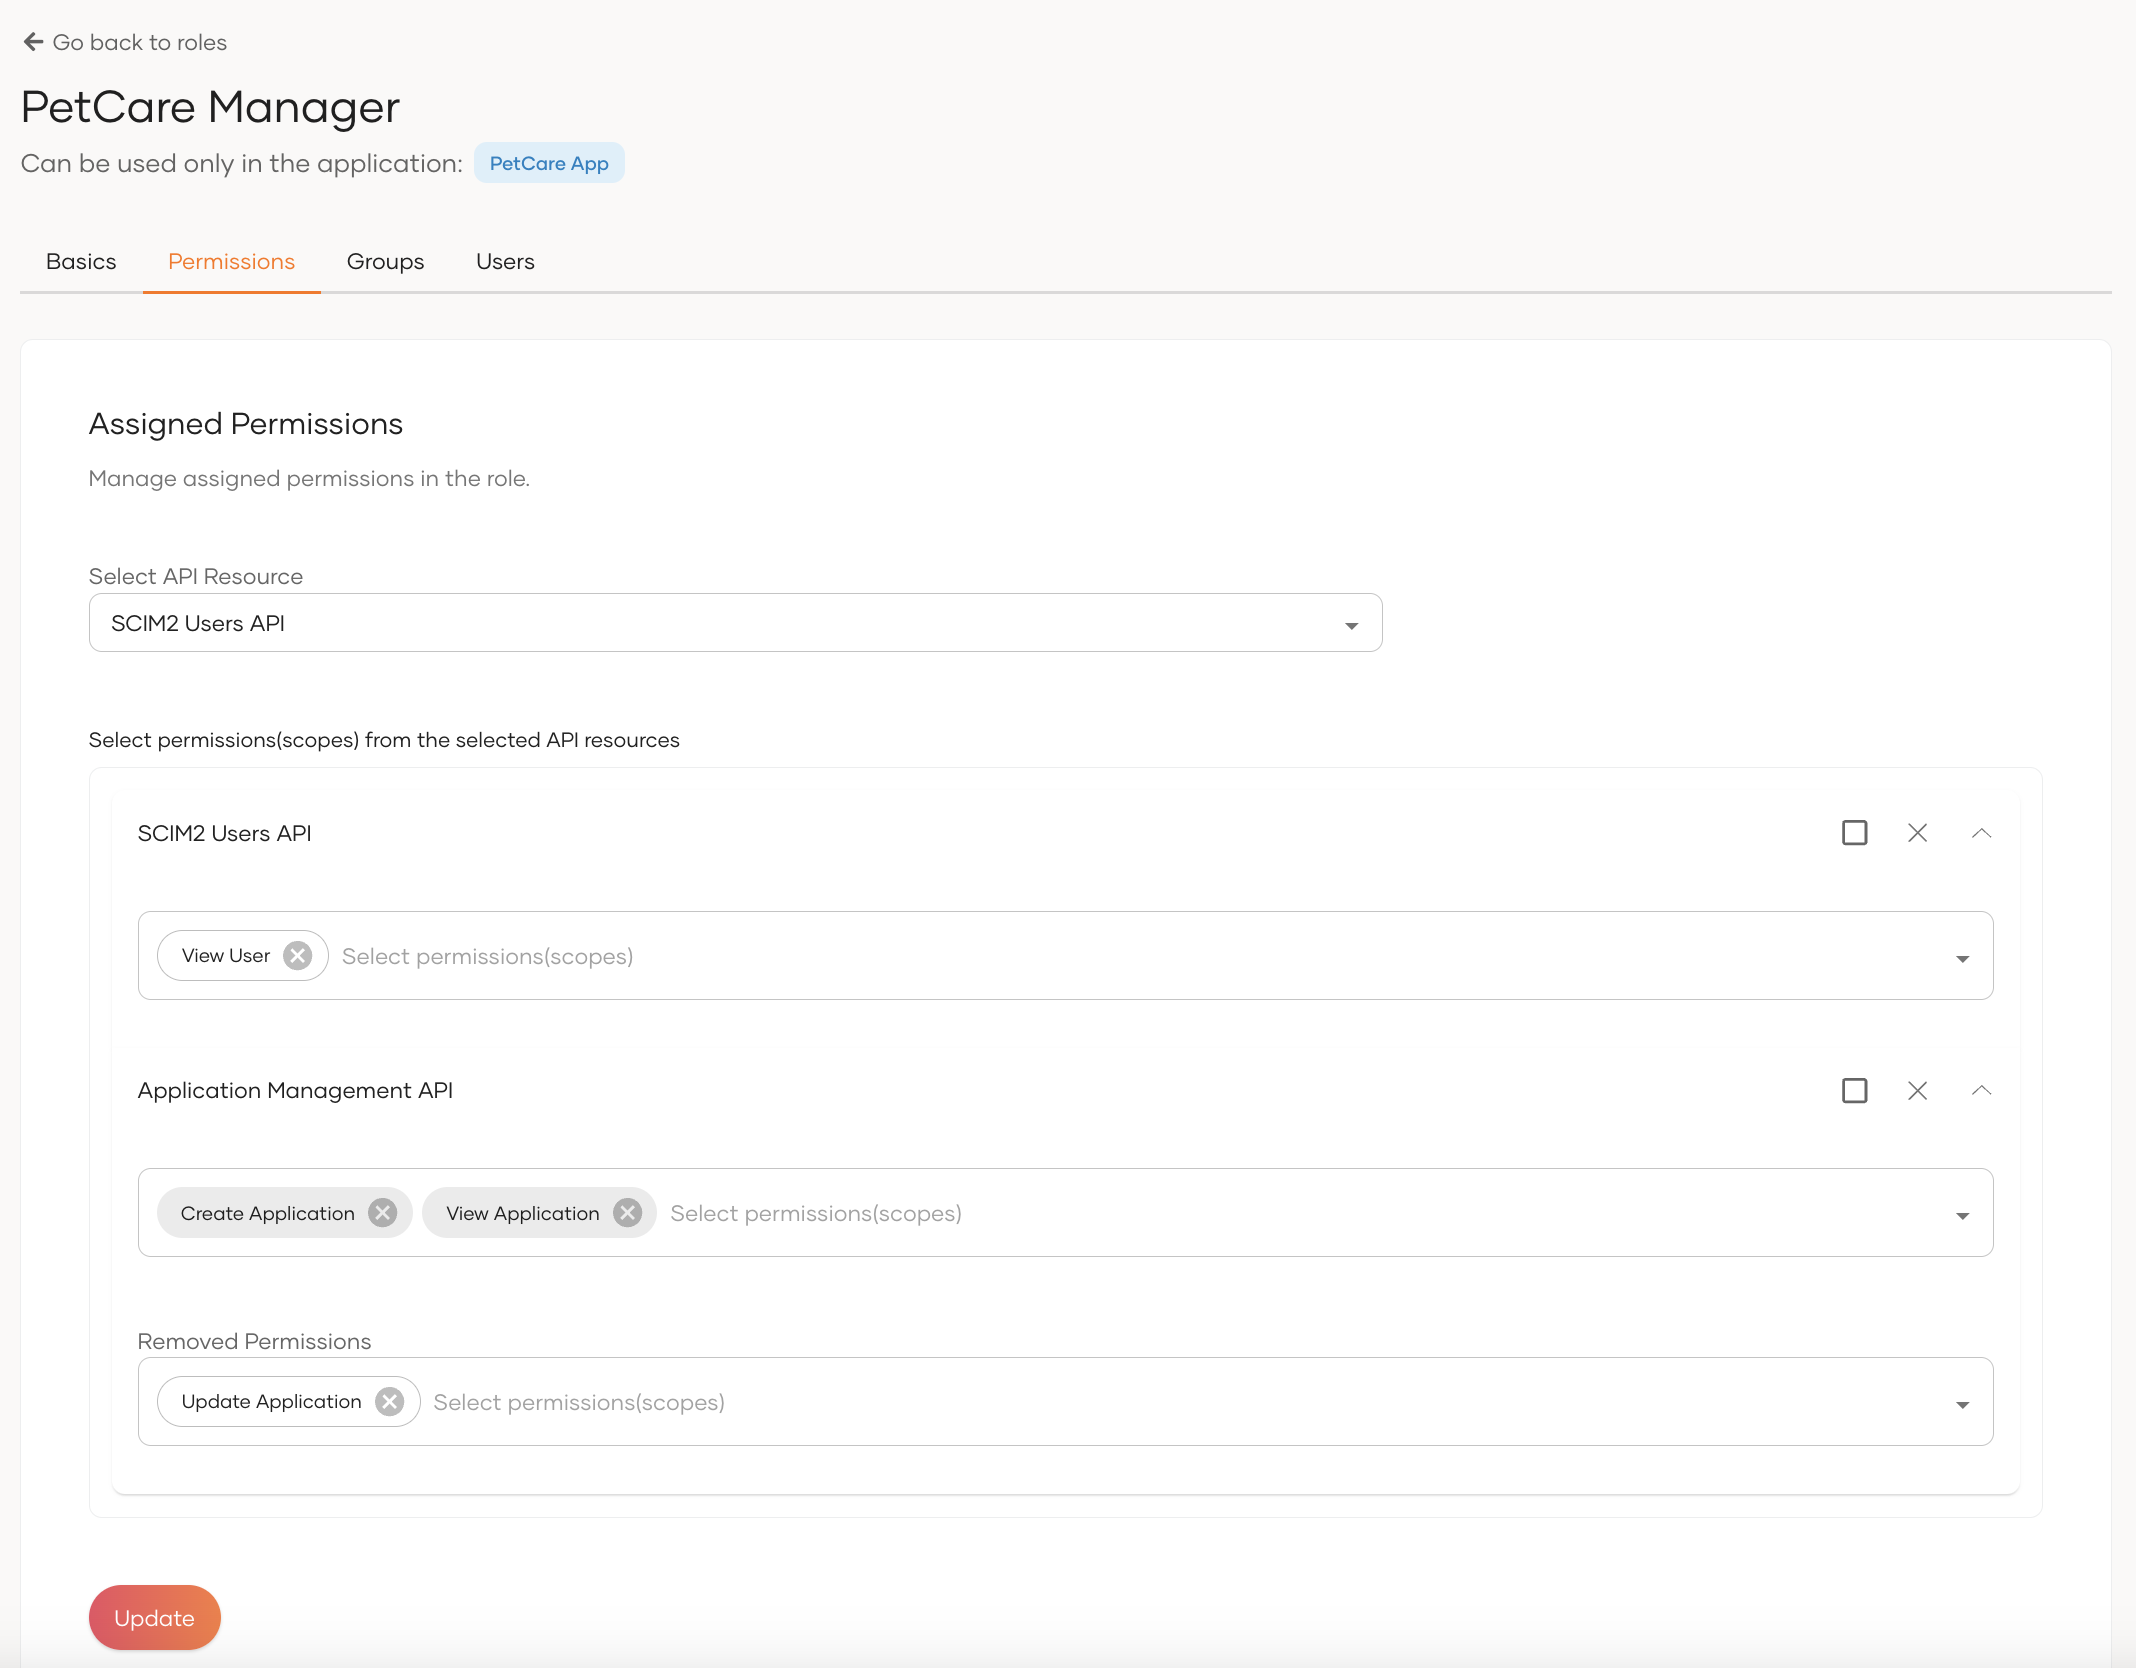
-
-
Click Update.
Remove users from a role
To remove users from a role:
-
On the WSO2 Identity Server Console, go to User Management > Roles.
-
Select the role from which you wish to remove users.
-
Navigate to its Users tab.
-
Move the relevant users to Removing users by clicking the X icon next to their usernames.
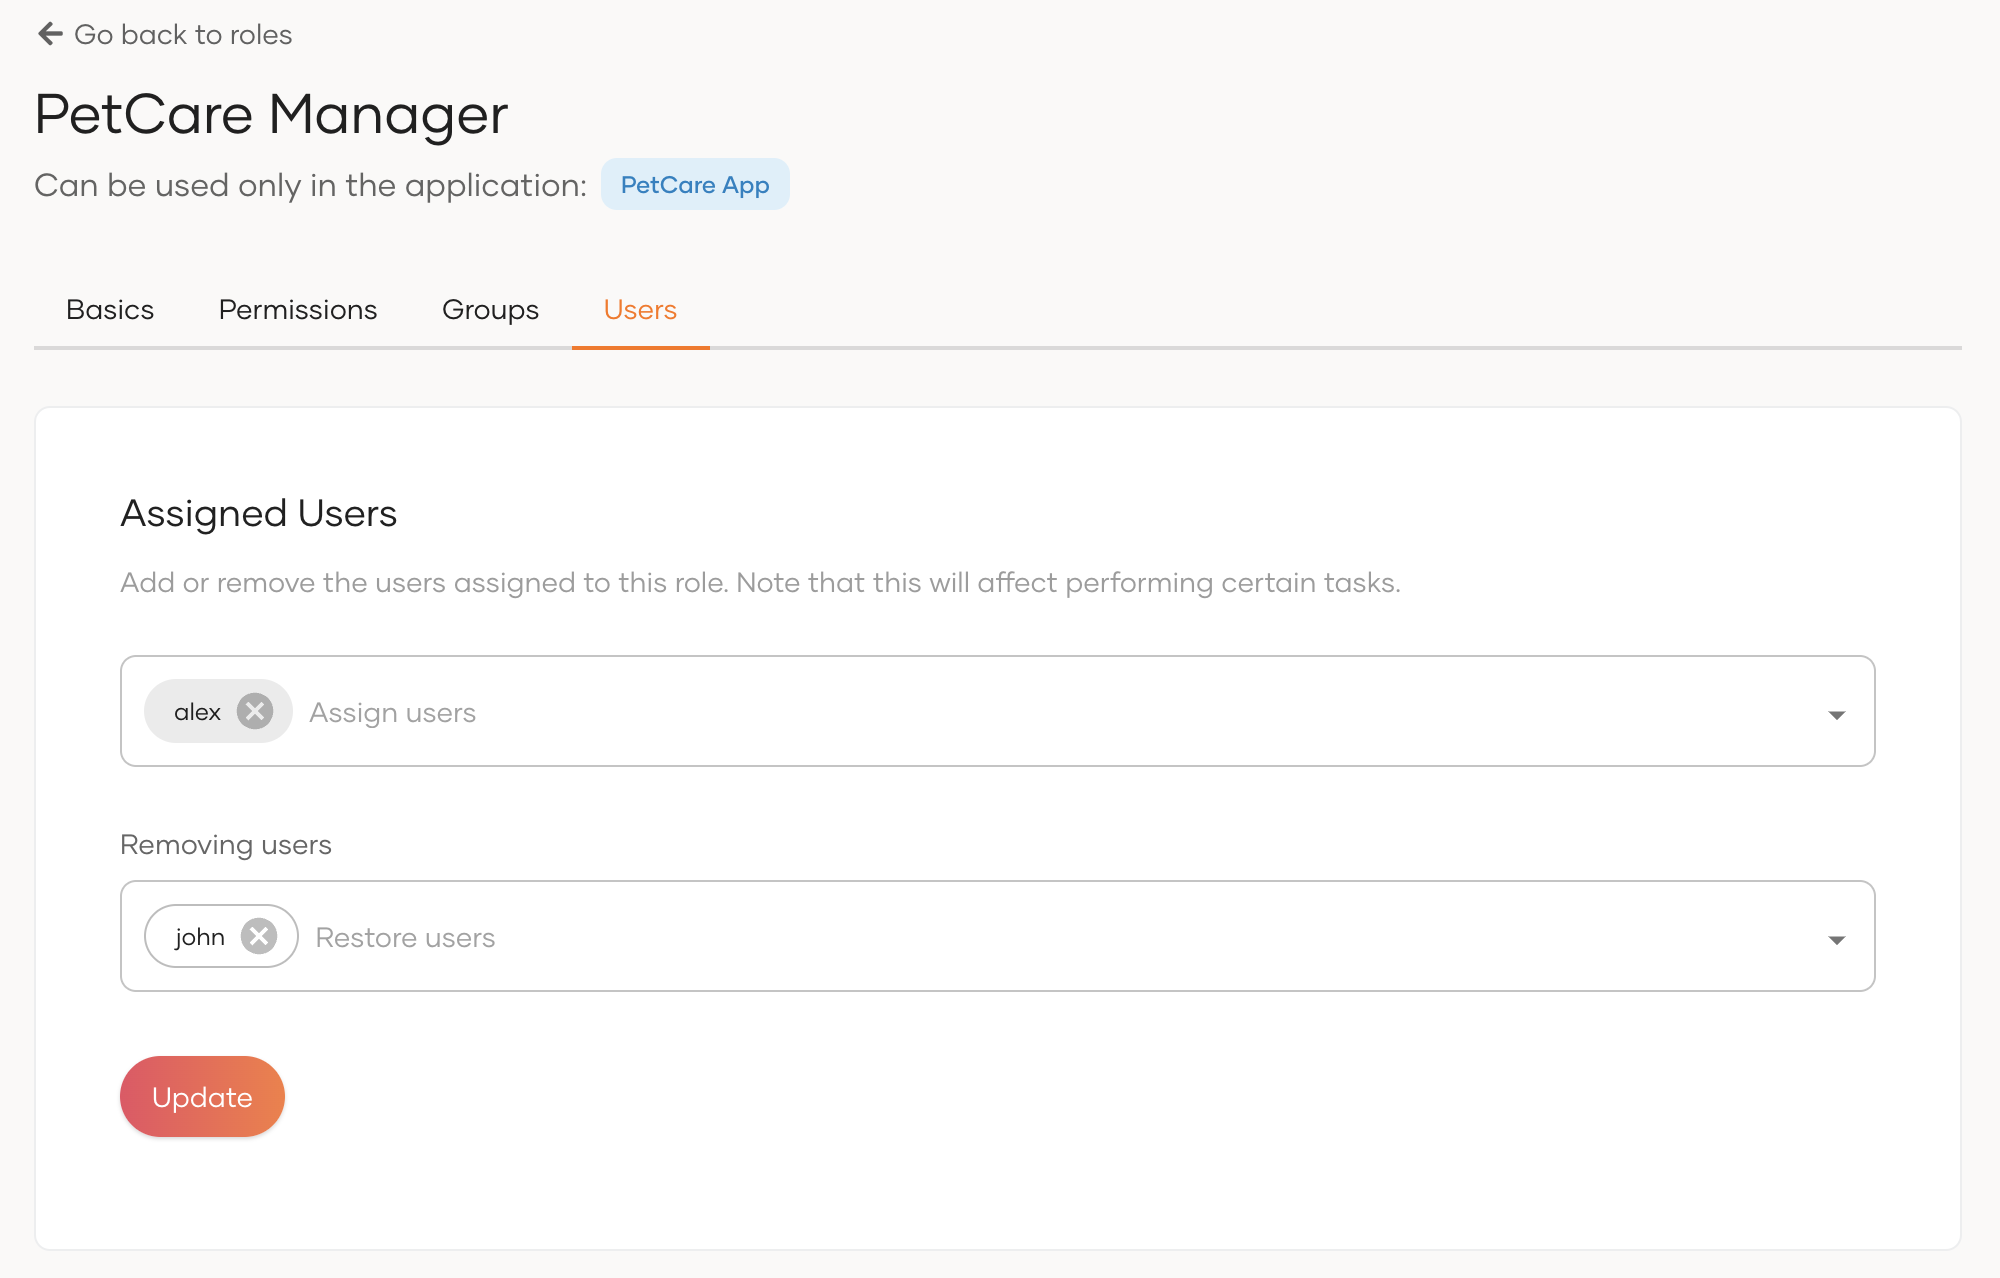
-
Click Update.
Remove groups from a role
To remove local/external user groups from a role:
-
On the WSO2 Identity Server Console, go to User Management > Roles.
-
Select the role from which you wish to remove user groups.
-
Navigate to its Groups tab.
-
Move the relevant groups to Removing groups by clicking the X icon next to their names.
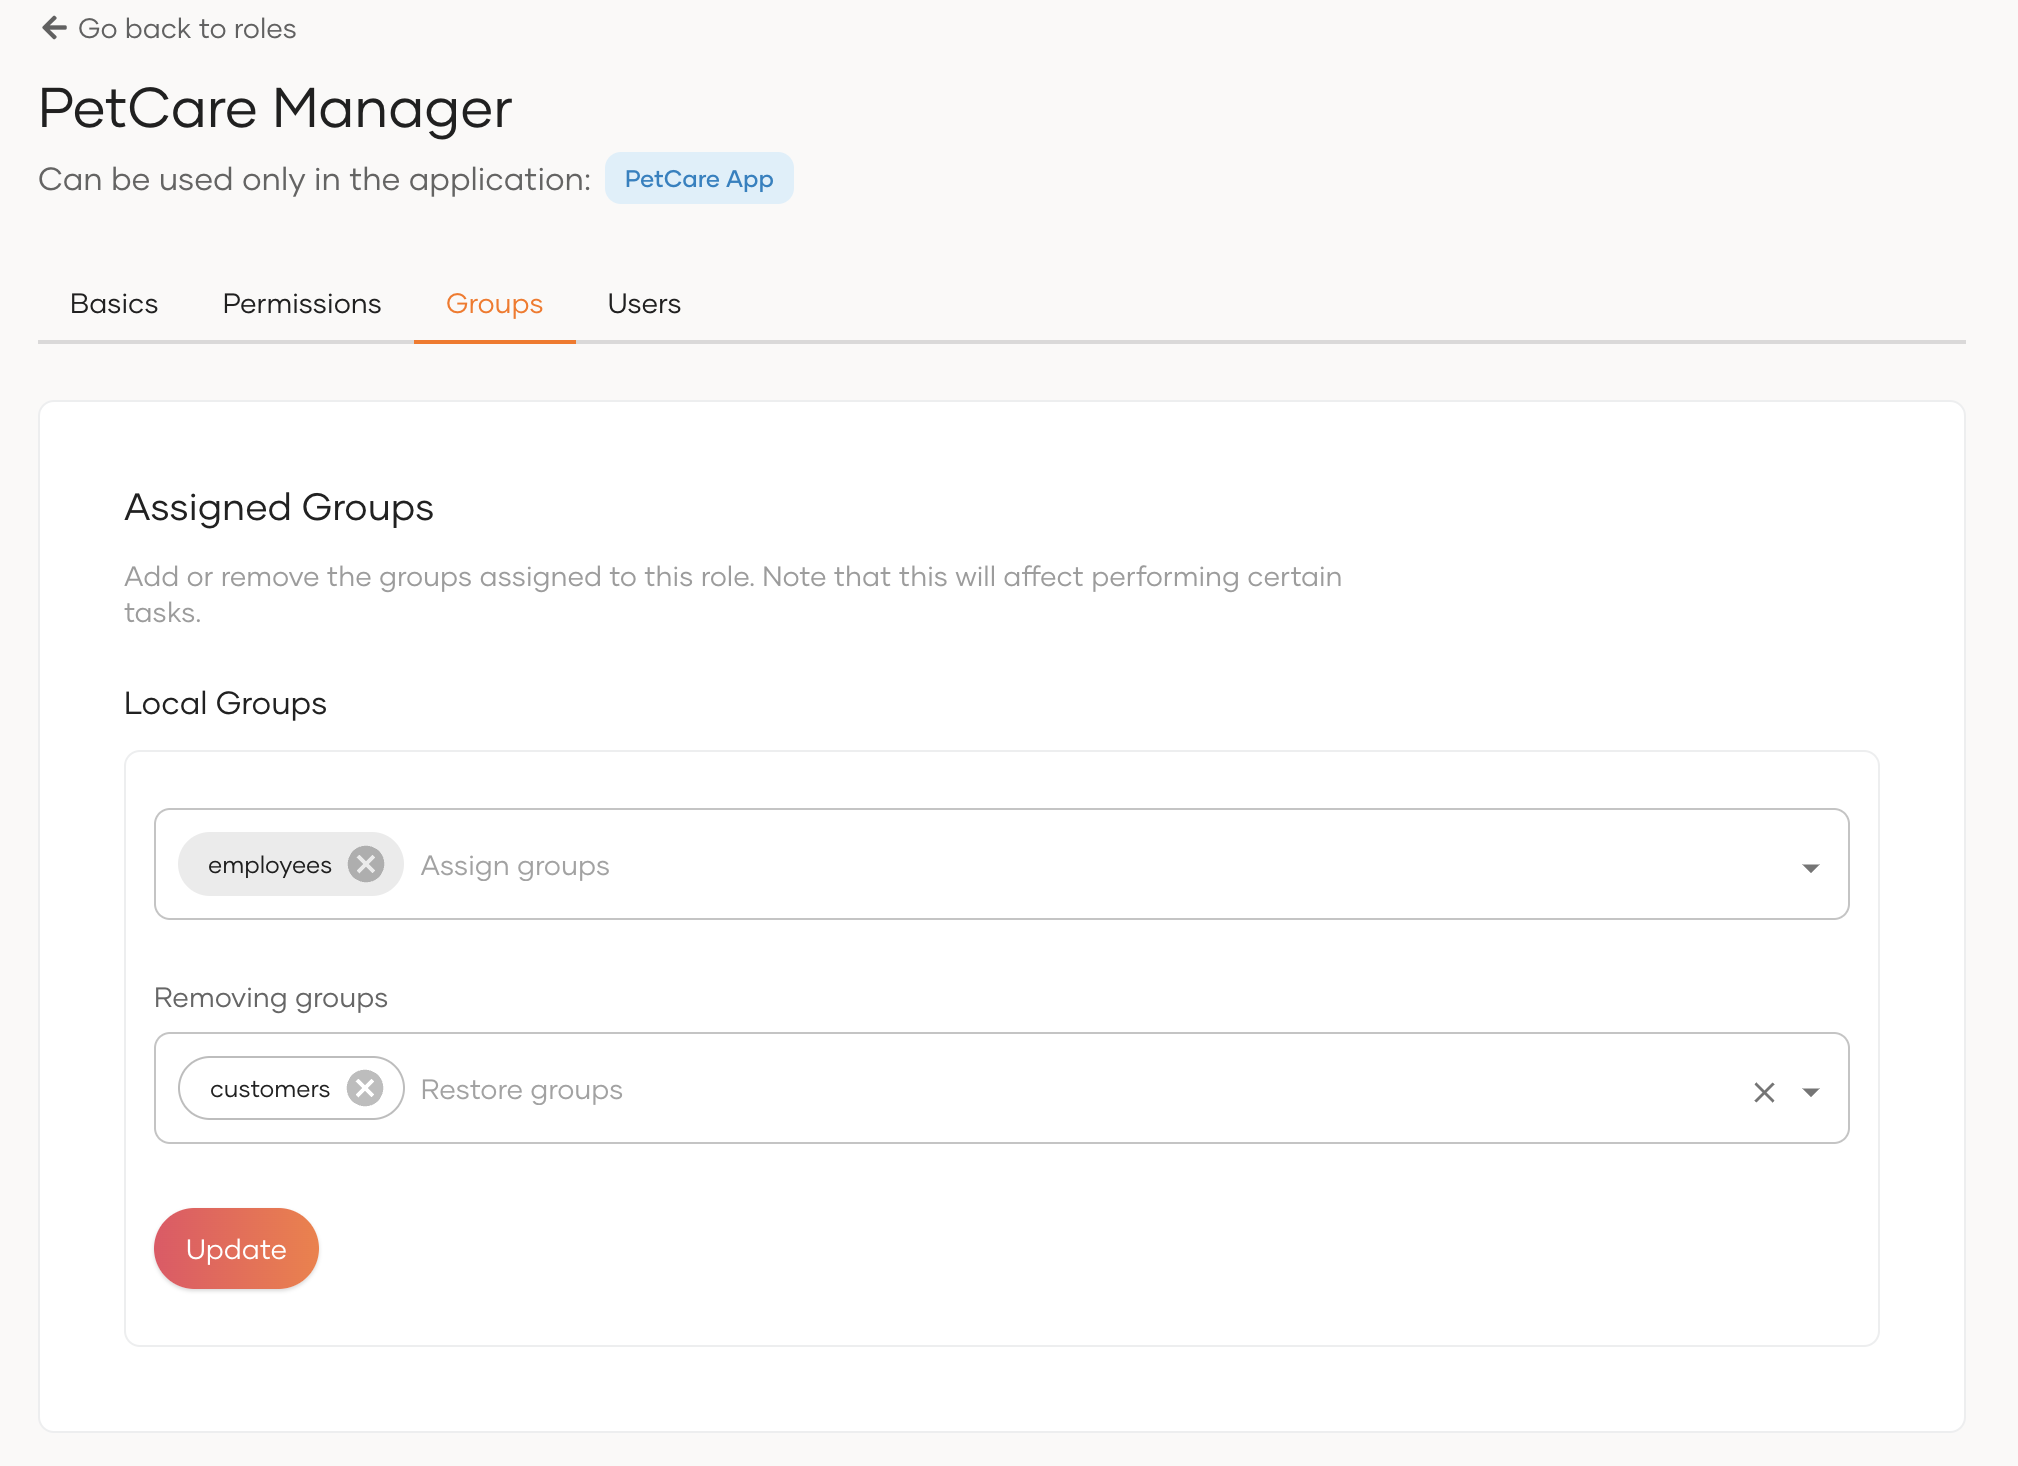
-
They will be added to Removing groups section.
- Click Update.
Delete a role
To delete a role:
-
On the WSO2 Identity Server Console, go to User Management > Roles.
-
Click the trash icon next to the role you wish to delete.
Note
Deleting an application role also removes the association it has with the respective application.
-
Select the checkbox and confirm your action.
What's next?
Learn how you may use roles to implement Role-based Access Control (RBAC).