Authorize applications to API resources
Organizations inherit the following API resources from the root organization:
- Default organization API resources defined by WSO2 Identity Server.
- API resources created in the root organization.
For your applications to access these API resources, you need to authorize the applications to the required API resources. To do so:
- On the WSO2 Identity Server Console, go to Organizations and switch to your desired organization.
- In the organization, go to Applications and select your desired application.
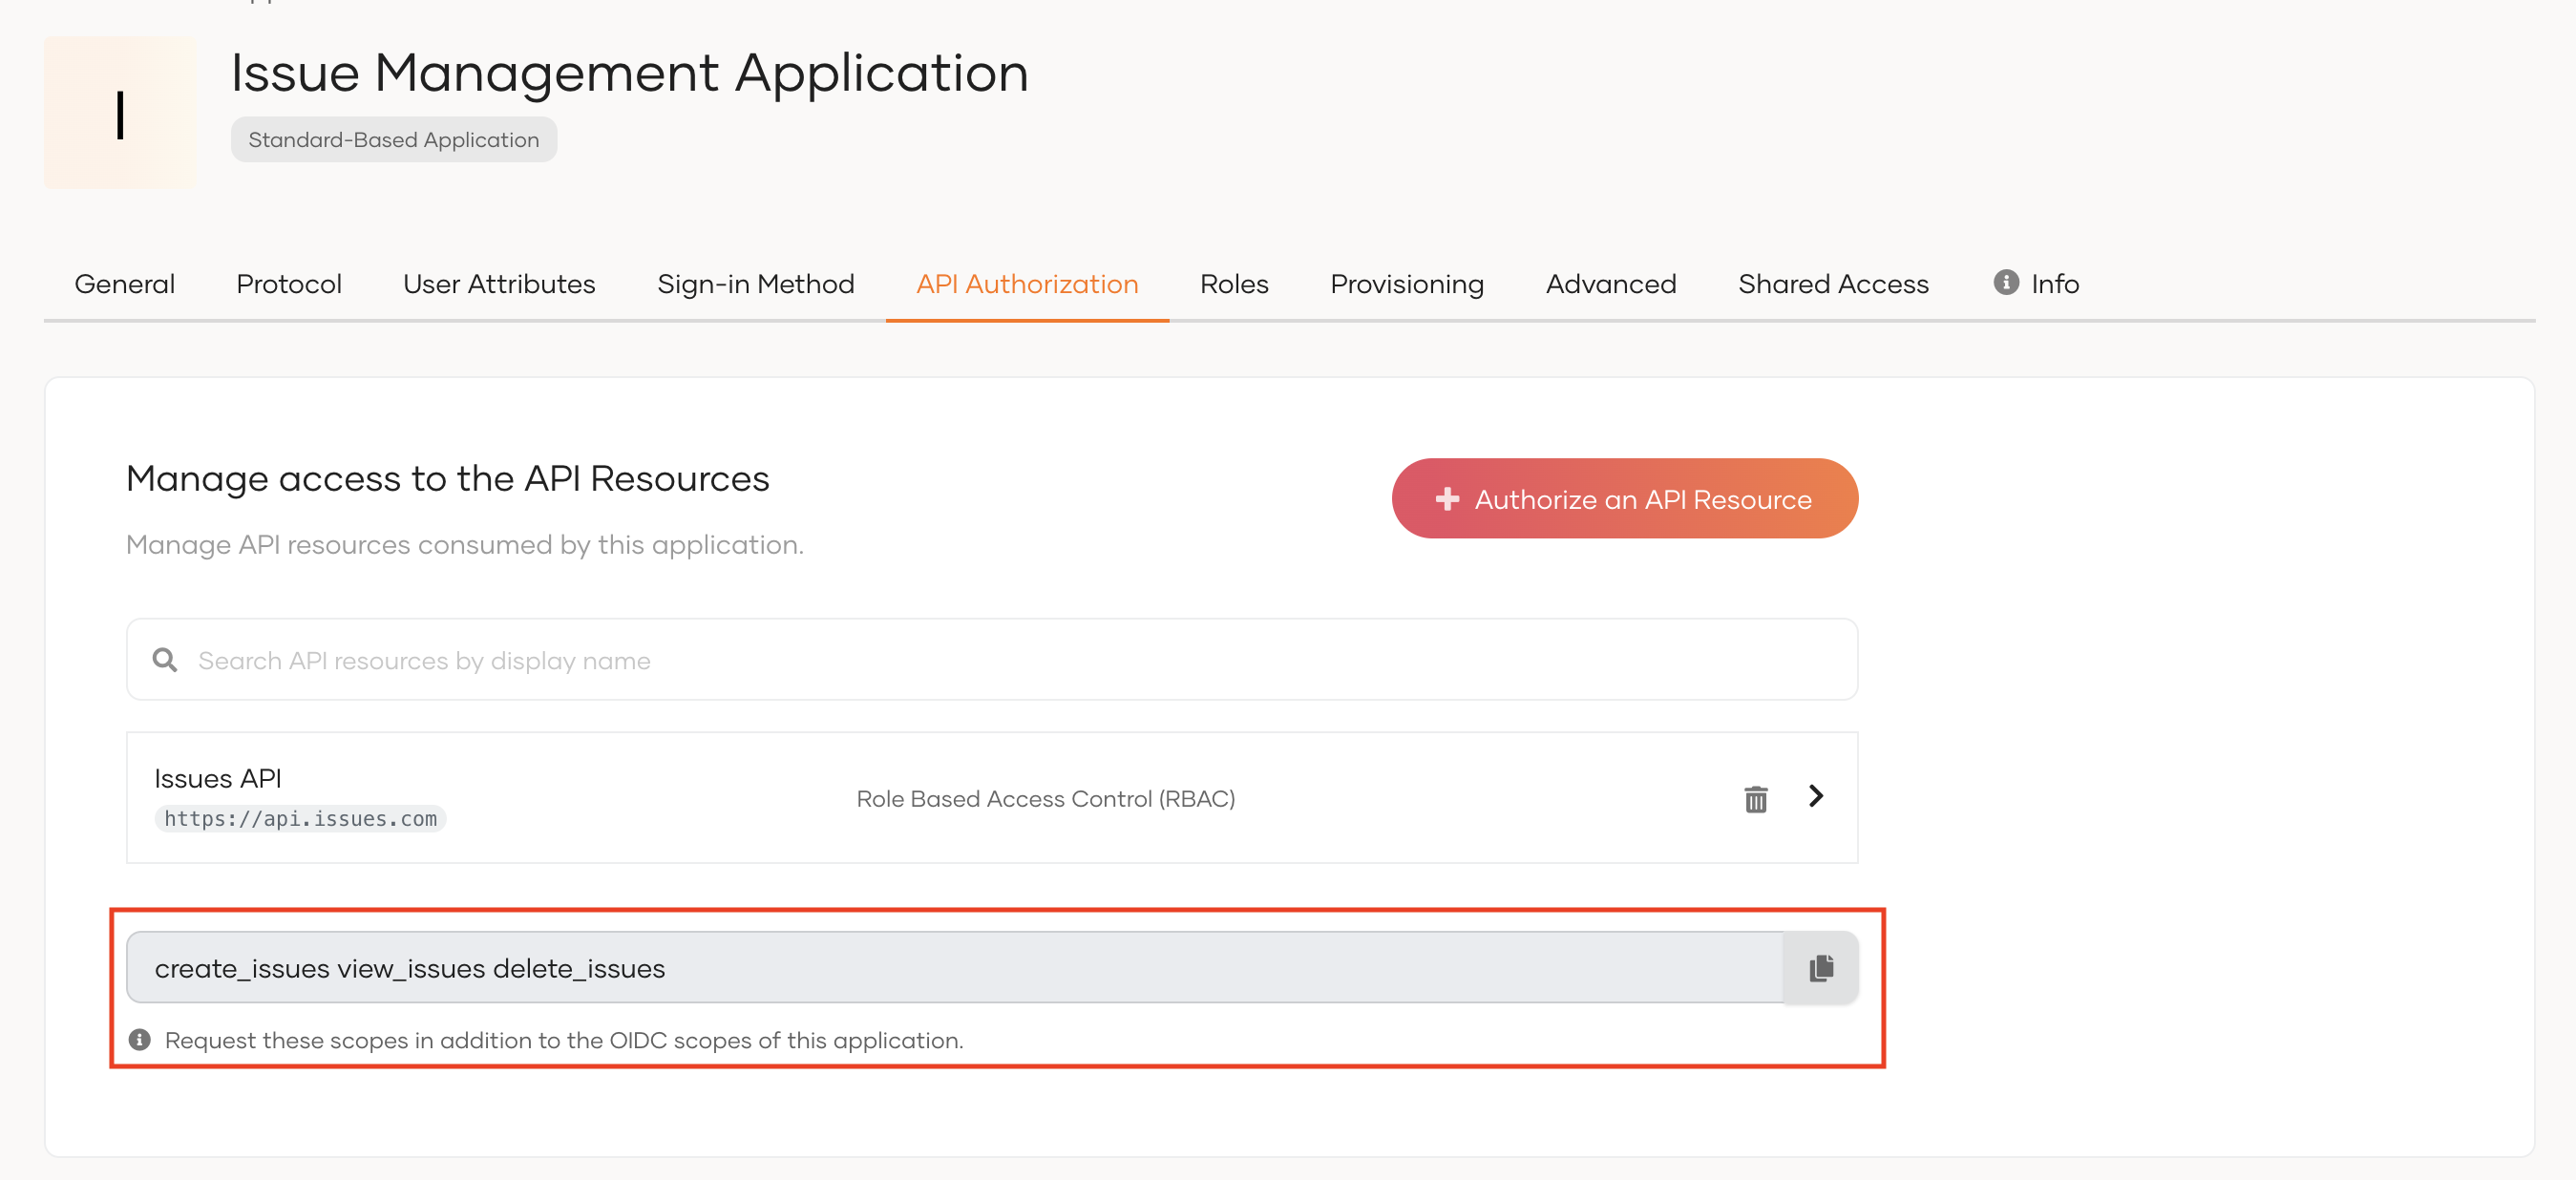
- Go to the API Authorization tab and click Authorize API Resources.
- Authorize the required API resources to the application.
Try it out
Follow the steps given below to try out the RBAC flow:
Note
Note that we are using WSO2 Identity Server's B2B Guardio insurance application for this scenario.
To request scopes for the user:
-
Add the new scopes to the
APIScopeparameter of theconfig.jsfile of the sample application. You need to request these new scopes in addition to the OIDC scopes of your application.To get the scopes:
- On the WSO2 Identity Server Console, log in to the organization(root).
- Go to Applications and select your application.
-
Copy the scopes listed at the end of the API Authorization section.
Tip
When you add scopes to the configuration file, add them as comma-separated values.
-
Access the application URL.
-
Try to log in as a user with a group and permission to access the API resource.
If you have disabled
Skip login consentin your application's settings, upon successful login, you will see the permission (scopes) allowed for the user on the user consent page. Click Allow. You will now be redirected to the application. -
You will be able to see the assigned permissions on the
allowedScopesparameter of the authentication response.
If you are switching organizations
If the user switches organization to another organization, the scopes will be updated according to the roles assigned to the user in the switched organization.