Enable user attributes for OpenID Connect apps
User attributes are pieces of information about the identity of a user such as an email address, birth date or the user's country etc.. Applications may request user attributes from the identity provider to personalize the experience of the logged in user.
The following guides explain how you can configure OpenID Connect applications to request attributes from WSO2 Identity Server.
Configure user attributes
Follow the steps given below to configure the user attributes from the WSO2 Identity Server Console and share them with the application.
Select user attributes
You can specify the necessary user attributes for an application. This ensures that when a user logs in, the application is only granted access to the user information associated with these attributes.
The user attributes are grouped by their specific scopes to ease the user attribute configuration process. You can add user attributes individually or all the attributes in the scope at once.
To add user attributes to the app:
- On the WSO2 Identity Server console, go to Applications.
-
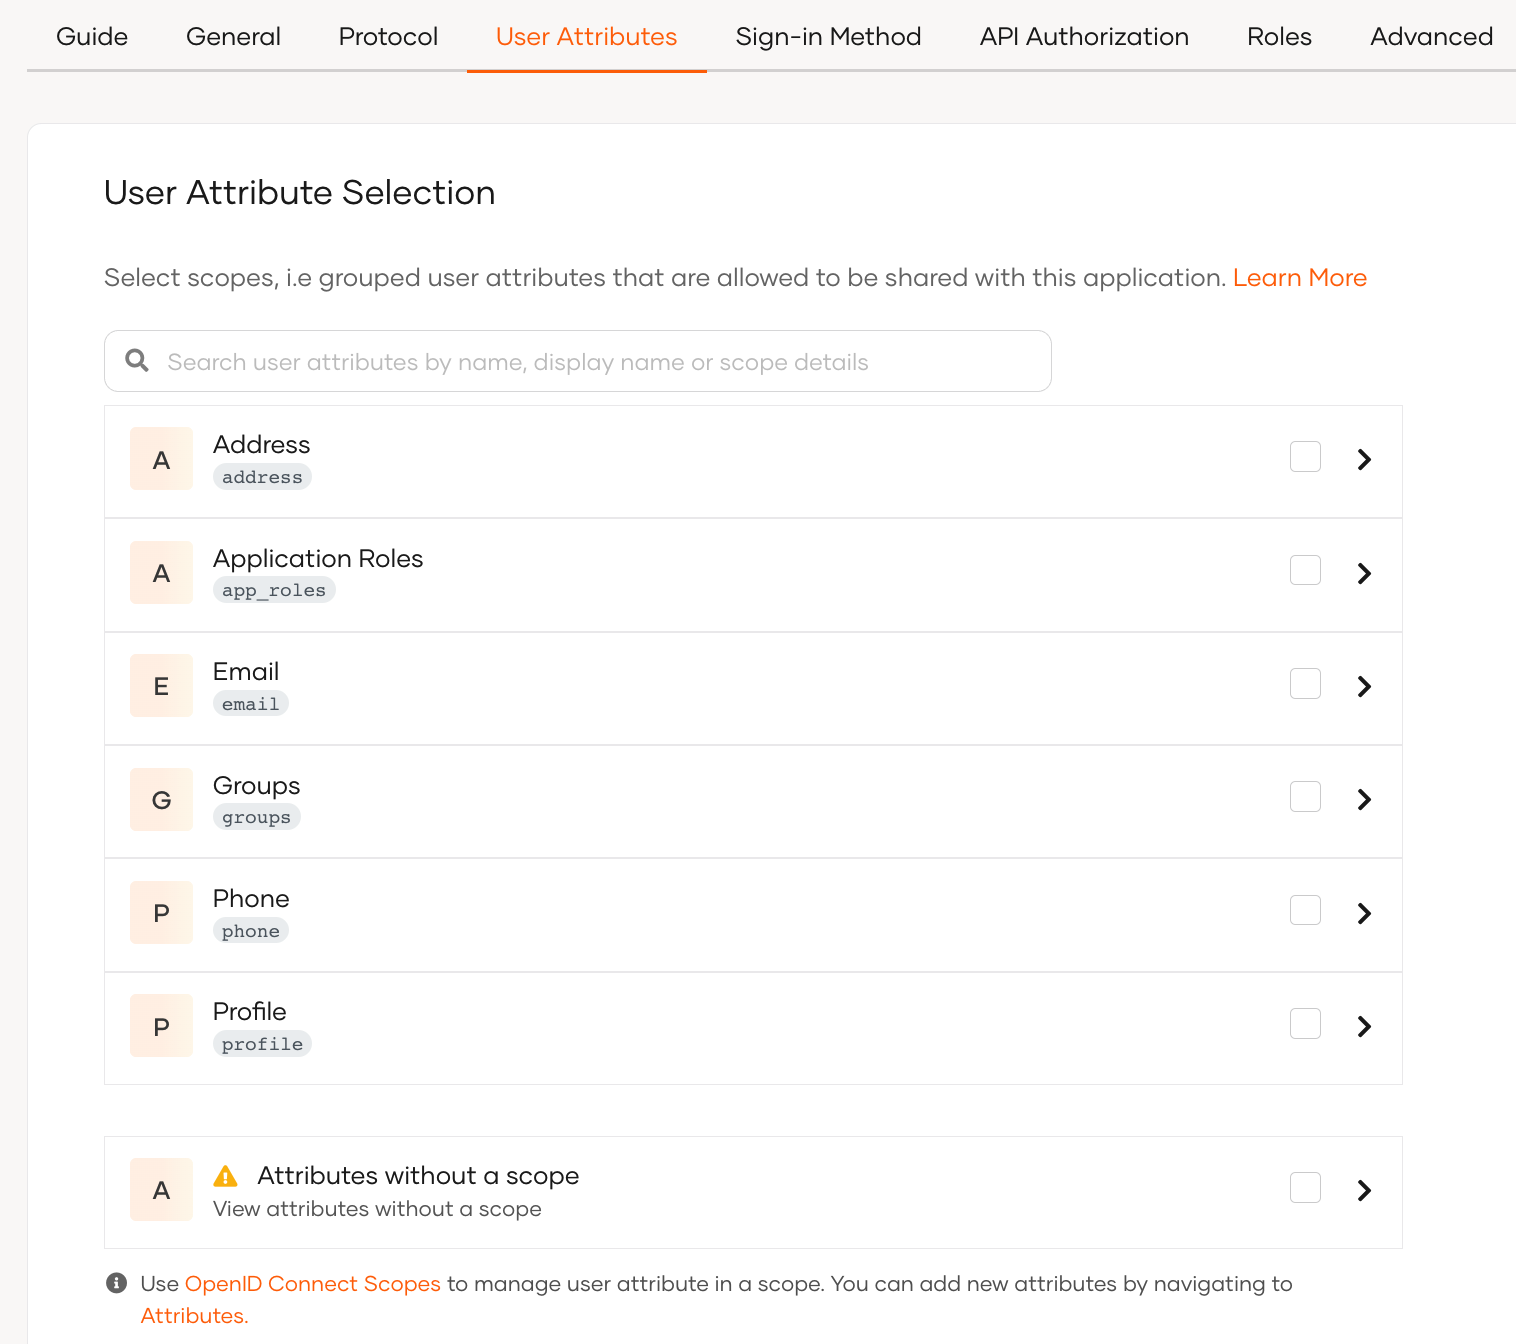
Select your application and go to its User Attributes tab. The most common user attributes are listed according to the relevant scope.
-
You can select user attributes using the following methods:
-
Add all user attributes for a given scope by selecting the checkbox in front of that scope.

-
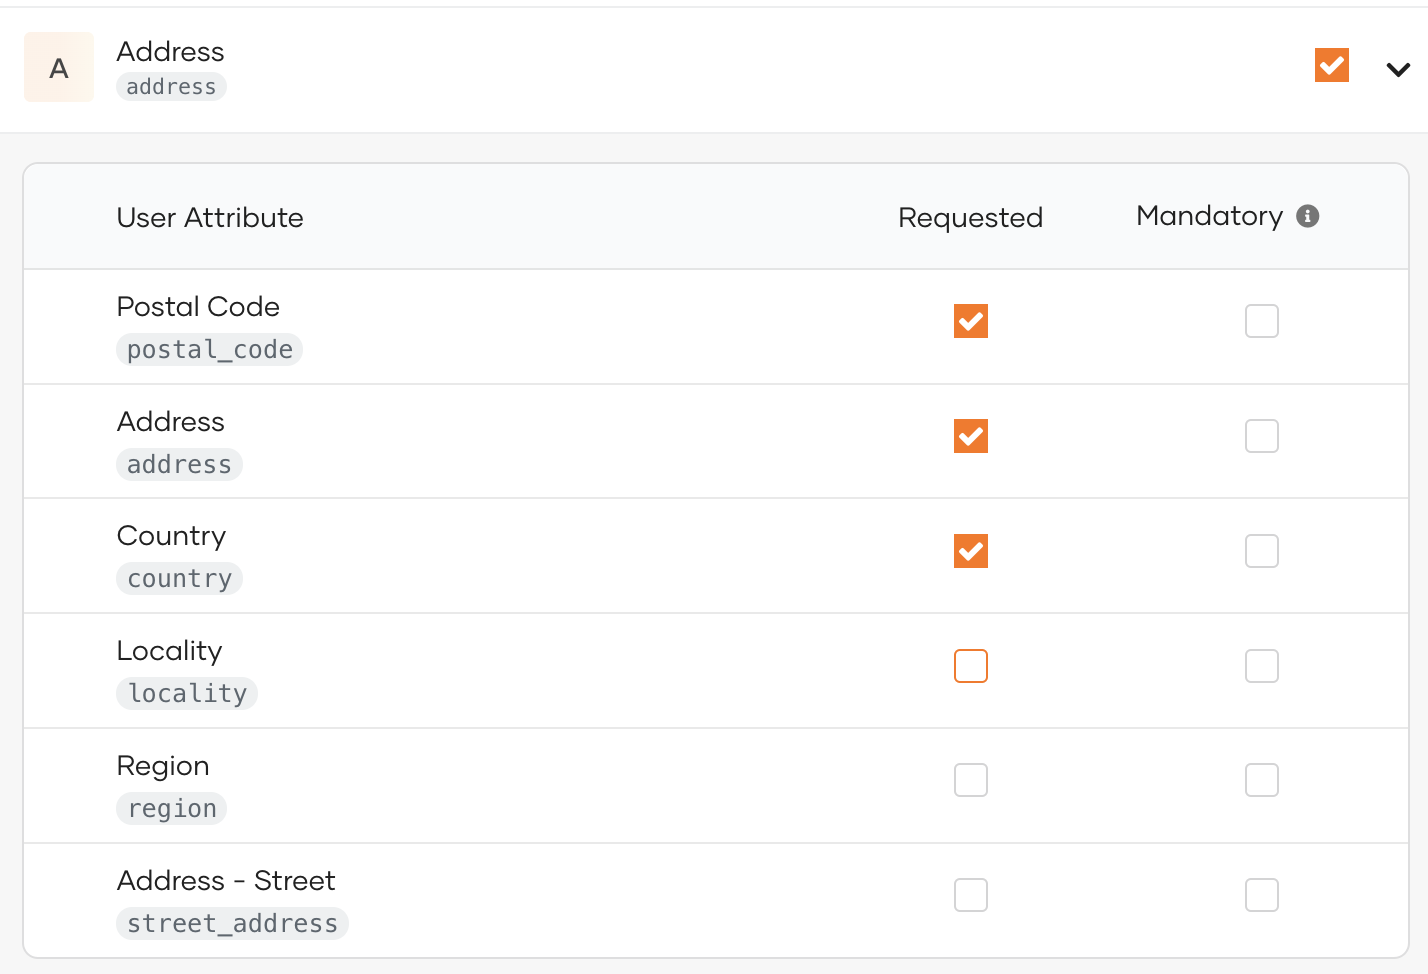
Add user attributes by expanding a scope and selecting only the necessary user attributes.
-
-
Click Update once you are done.
Select an alternate subject attribute
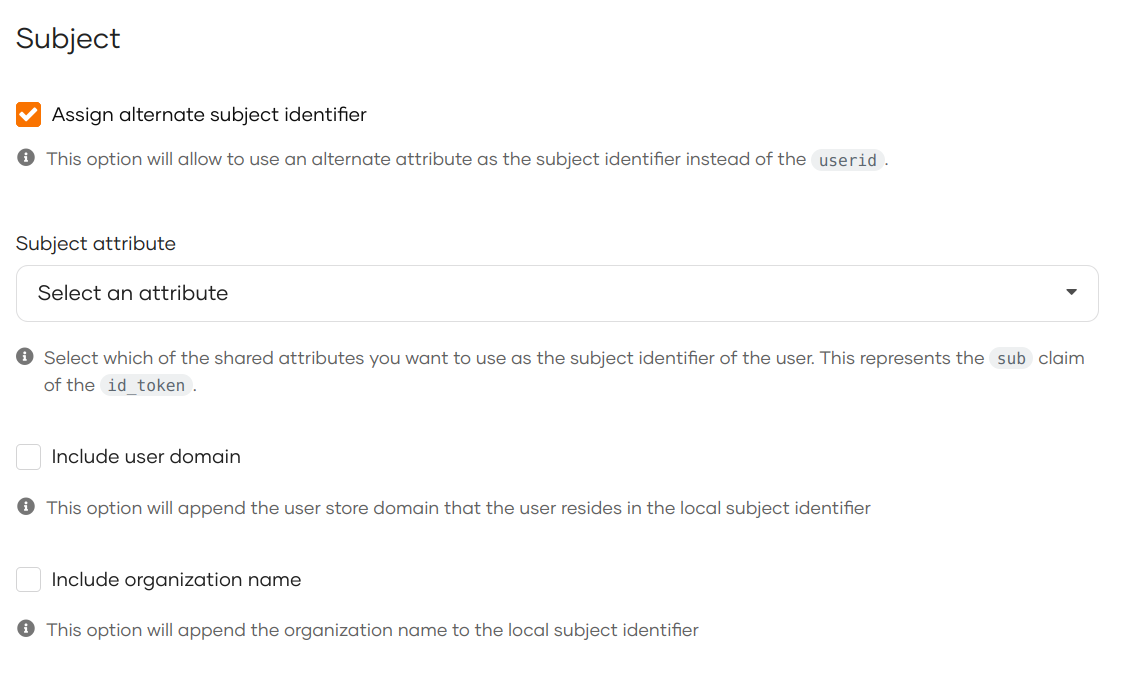
The subject attribute (sub) in the ID token uniquely identifies a user. By default, WSO2 Identity Server sets sub to the User ID, but you can configure it to use any other user attribute as the subject.
To define a different attribute as the subject:
-
In the Subject section of the User Attributes tab, enable Assign alternate subject identifier.
Note
According to the OIDC specification, is not recommended to change the default subject identifier.
-
Select an attribute as the subject from the Subject attribute list.
-
Click Update.
UserInfo sub and token reissue, for alternate subject identifiers
When an alternate subject identifier is configured, the sub value returned by the userinfo endpoint is determined when the access token is issued and remains unchanged for the lifetime of that token.
If the underlying attribute changes later, for example, if the user updates their email address, and the same valid access token is reused, the newly issued ID token reflects the updated value. However, the userinfo response continues to return the sub value associated with the access token when it was originally issued.
To have the userinfo endpoint recompute sub from the attribute's current value on every request, enable the following deployment.toml configuration and restart the server:
This setting is disabled by default. When enabled, a client that requires matching sub values in the ID token and userinfo response must request a new access token after the attribute used as the subject changes.
Previously issued ID tokens are not updated retroactively because they are signed and immutable.
This setting applies only to applications configured with an alternate subject identifier. It has no effect on other applications.
Deprecated sub attribute behavior in application access tokens
Application access tokens are tokens generated to represent the application rather than an individual user. Such tokens are generated during grant types such as client_credential.
Previously, the sub attribute of application access tokens contained the userid of the application owner. With the latest updates, the sub value will contain the client_id of the application. If your application's access tokens still return the userid in the sub attribute, it is likely that your application is out-of-date. If so, update your application through the WSO2 Identity Server Console by navigating to the relevant application under the Applications section.
Once updated, the sub attribute will return the client_id. Therefore, before updating, ensure that your application does not rely on the sub attribute and remove any such dependencies.
Define mandatory user attributes
If your application needs certain attributes for the successful function of the application, you can make them mandatory attributes. Users logging into the application should then have the mandatory attributes either pre-filled in their profiles or provide the required information when prompted during the login flow.
To make an attribute mandatory:
-
On the WSO2 Identity Server console, go to Applications.
-
Select the application and go to its User attributes tab.
-
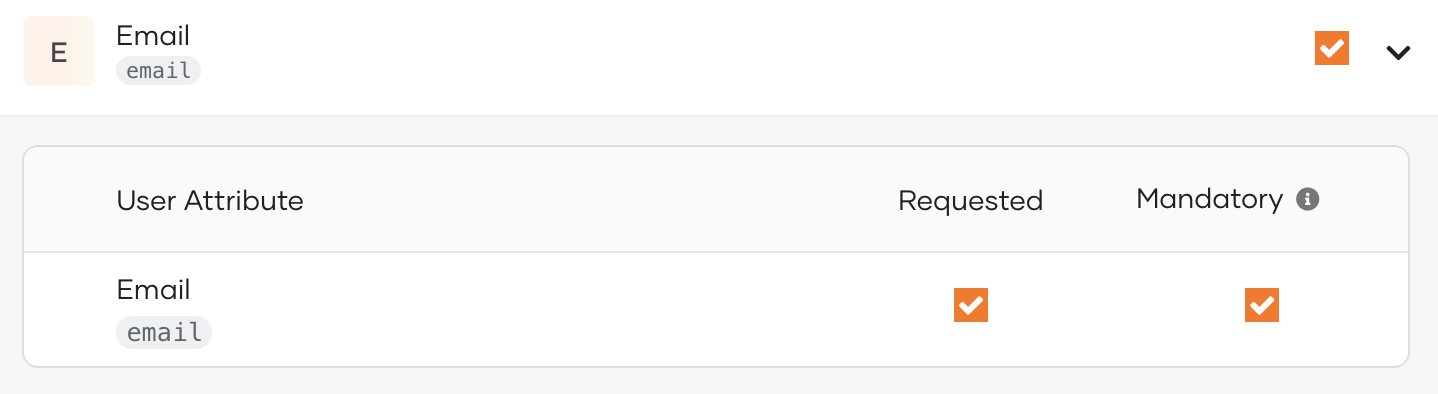
Expand the relevant scope and out of the selected attributes for the application, select the mandatory attributes by selecting the Mandatory checkbox next to them.
Configure the subject identifier
WSO2 Identity Server uses a subject attribute to uniquely identify users logging into OIDC applications. This is set to be the user ID of the user which can be found in the user's profile in User Management > Users.
However, having a single subject identifier for multiple applications may enable external entities to track the activity of a user across applications based on a single attribute.
You can opt for a pairwise subject identifier to mitigate this issue. With a pairwise subject identifier, WSO2 Identity Server generates a unique pseudonymous ID for each user-application pair protecting the user's identity when accessing multiple applications.
Follow the steps below to configure the subject identifier type:
-
On the WSO2 Identity Server Console, go to Applications.
-
Select the application and go to its User Attributes tab.
-
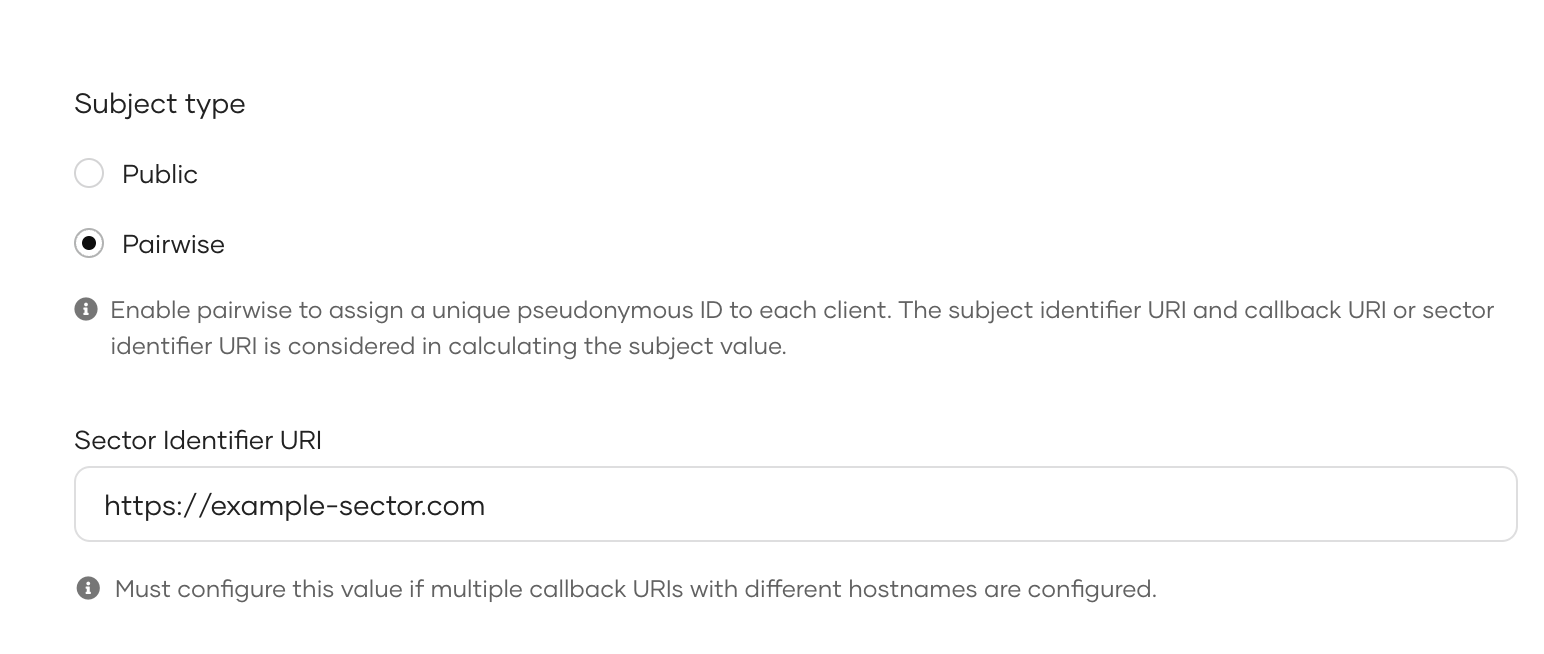
Under Subject type, select Pairwise.
-
Enter a Sector Identifier URI.
Info
The sector identifier URI is used to group clients belonging to the same security domain so that the same pairwise identifier is used for a given user accessing these clients.
-
Click Update to save the changes.
How it works
The following diagram depicts the process WSO2 Identity Server implements when a user tries to log in to an application.
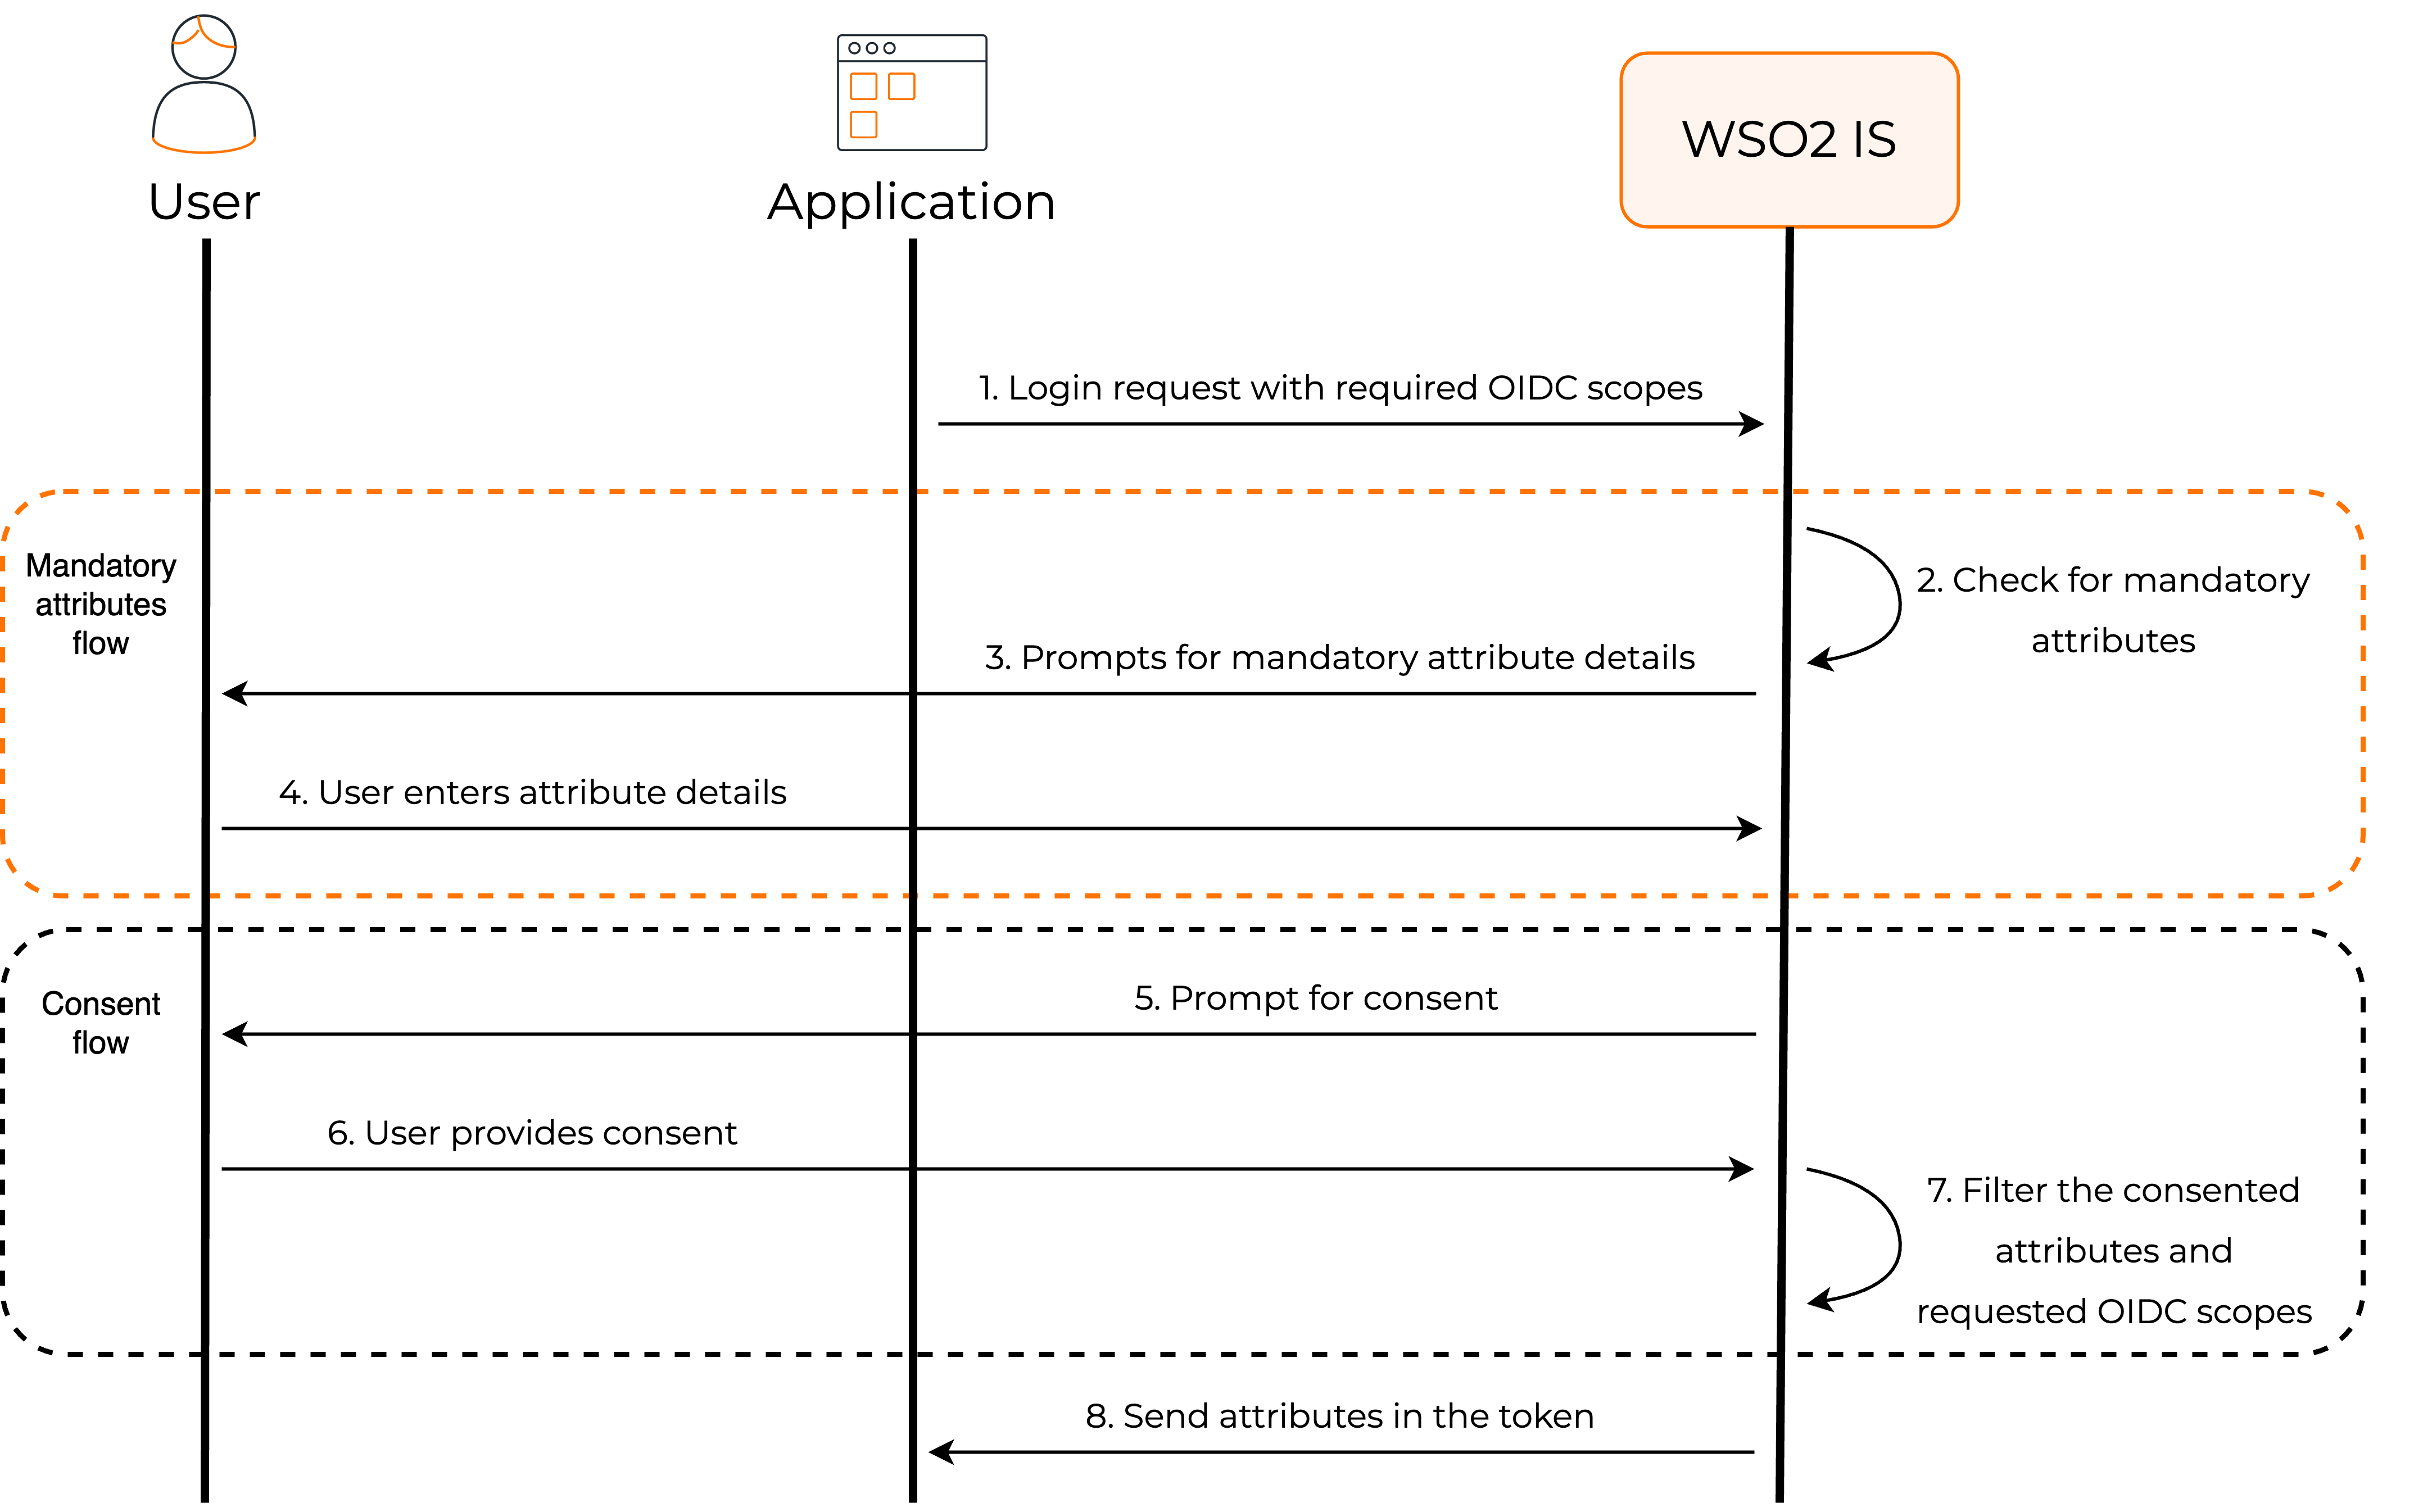
Application requests attributes
When the user logs in to the app, a request is sent to WSO2 Identity Server with the relevant scopes.
Applications can use scopes to request access to a group of user attributes.
Note
Learn more about managing scopes in WSO2 Identity Server.
WSO2 Identity Server checks for mandatory attributes
WSO2 Identity Server verifies whether the user's profile has values for all the mandatory attributes that are requested by the application. If there are missing values, WSO2 Identity Server will prompt the user to enter the missing values.
Requests user consent
By default, WSO2 Identity Server requests the user's consent to share the user attributes with the application.
Note
Learn more about managing user consent.
Shares attributes with the app
If the user consents to share attributes with the application, WSO2 Identity Server returns the requested user attributes as well as the subject attribute to the application in the ID token.
Subject Attribute
The subject attribute is the unique identifier for a user. The application receives this value via the sub parameter in the ID token. In WSO2 Identity Server, the user ID is used as the subject attribute.
ID token
Once the application calls the token endpoint, WSO2 Identity Server sends the ID token in the response.
All the user attributes that are requested by scopes are returned as claims in the ID token. The application can decode the ID token to view the claims.
A sample ID token is given below:
{
  "isk": "69b37037a2349763dc48e2a30a62c3feebf0b5823cf869e149352737ddc0ca63",
  "at_hash": "7qgloEmkz3kGBTtH7RI4qw",
  "sub": "e46ffa67-100d-4329-9460-b8251d446518",
  "amr": [
    "BasicAuthenticator"
  ],
  "iss": "https://localhost:9443/oauth2/token",
  "given_name": "alice",
  "sid": "5580be2b-a12d-43a4-823a-9d1352b88269",
  "aud": "UEP40cZTZfxJfGdDWFmTrwqluxoa",
  "c_hash": "VlKxb3UhuYtFEG_VftAa0g",
  "nbf": 1625557031,
  "azp": "UEP40cZTZfxJfGdDWFmTrwqluxoa",
  "nickname": "nick",
  "exp": 1625560631,
  "iat": 1625557031,
  "family_name": "john"
}
Userinfo response
In addition to getting attributes from the ID token, the application can invoke the userinfo endpoint and get user attributes along with the subject attribute.
A sample userinfo response is given below:
{
"sub": "e46ffa67-100d-4329-9460-b8251d446518",
"nickname": "nick",
"given_name": "alice",
"family_name": "john"
}
Prioritize sharing local attributes
In a scenario where a user with a local account in WSO2 Identity Server, logs in using federated authentication, you may want to prioritize sharing local user attributes with the application over those provided by the external identity provider. Follow the steps below to set this priority for sharing user attributes.
- On the WSO2 Identity Server Console, go to Applications.
-
Select your application and go to its User Attributes tab.
-
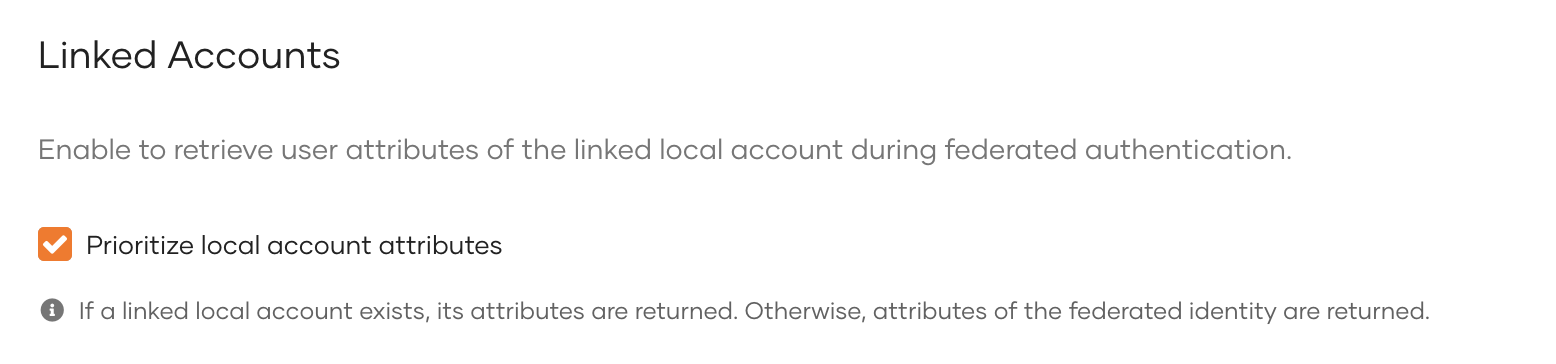
Scroll down and under Linked Accounts, select Prioritize local account attributes.
-
Click Update to save the changes.
When enabled, WSO2 Identity Server looks for a linked local user account based on the subject claim provided by the external identity provider. If a local user account is found, the local attributes will be shared with the application. If a local account is not found, user attributes obtained from the external identity provider will be shared with the application.
Note
When JIT provisioning is enabled for the external identity provider, WSO2 Identity Server ensures that the attributes of the associated local account synchronize with the external identity provider upon each federated login.
If you want to preserve attribute values set in the local user account, you need to disable JIT provisioning