Configuring WS-Trust Security Token Service
WSO2 Identity Server uses the security token service (STS) as the WS-Trust implementation.
The STS is capable of issuing SAML 1.1 and 2.0 security tokens and has a SOAP/XML API for token issuance.
Download the STS connector
WS-Trust authentication is no longer supported by default from IS 5.11.0 upwards and has been introduced as a connector. In order to use WS-Trust authentication, first, you should download the connector from the WSO2 Connector Store.
To download and install the WS-Trust connector:
- Download the WS-Trust Authenticator from the WSO2 connector store.
- Copy and paste the downloaded
.zipfile to the home directory of your WSO2 Identity Server and extract the.zipfile. - Open a terminal, navigate to the home of the extracted directory and execute the following commands.
The connector is successfully installed. Now you can delete the extracted directory.
chmod u+r+x setup_sts.sh
./setup_sts.sh
Secure the Security Token Service
According to the trust-brokering model defined in the WS-Trust specification, the users should authenticate themselves to the STS before obtaining a token. STS may use this authentication information when constructing the security token.
For example, STS may populate the required claims based on the username provided by the user. Therefore, the STS service needs to be secured.
To secure the Security Token Service:
-
On the Management Console, go to Identity Providers > Resident.
-
Enter the required values as given below.
Field Description Sample Value Home Realm Identifier This is the domain name of the identity provider. If you do not enter a value here, the user will be prompted to specify a domain, when an authentication request comes to WSO2 Identity Server. You can enter multiple identifiers as a comma-separated list. localhostIdle Session Time Out This is the duration in minutes for which an SSO session can be idle. If WSO2 Identity Server receives no SSO authentication requests for the given duration, a session time-out occurs. The default value is 15.15Remember Me Period This is the duration in weeks for which WSO2 Identity Server should remember an SSO session given that the Remember Me option is selected in the WSO2 Identity Server login screen.
The default value is
2weeks.2 -
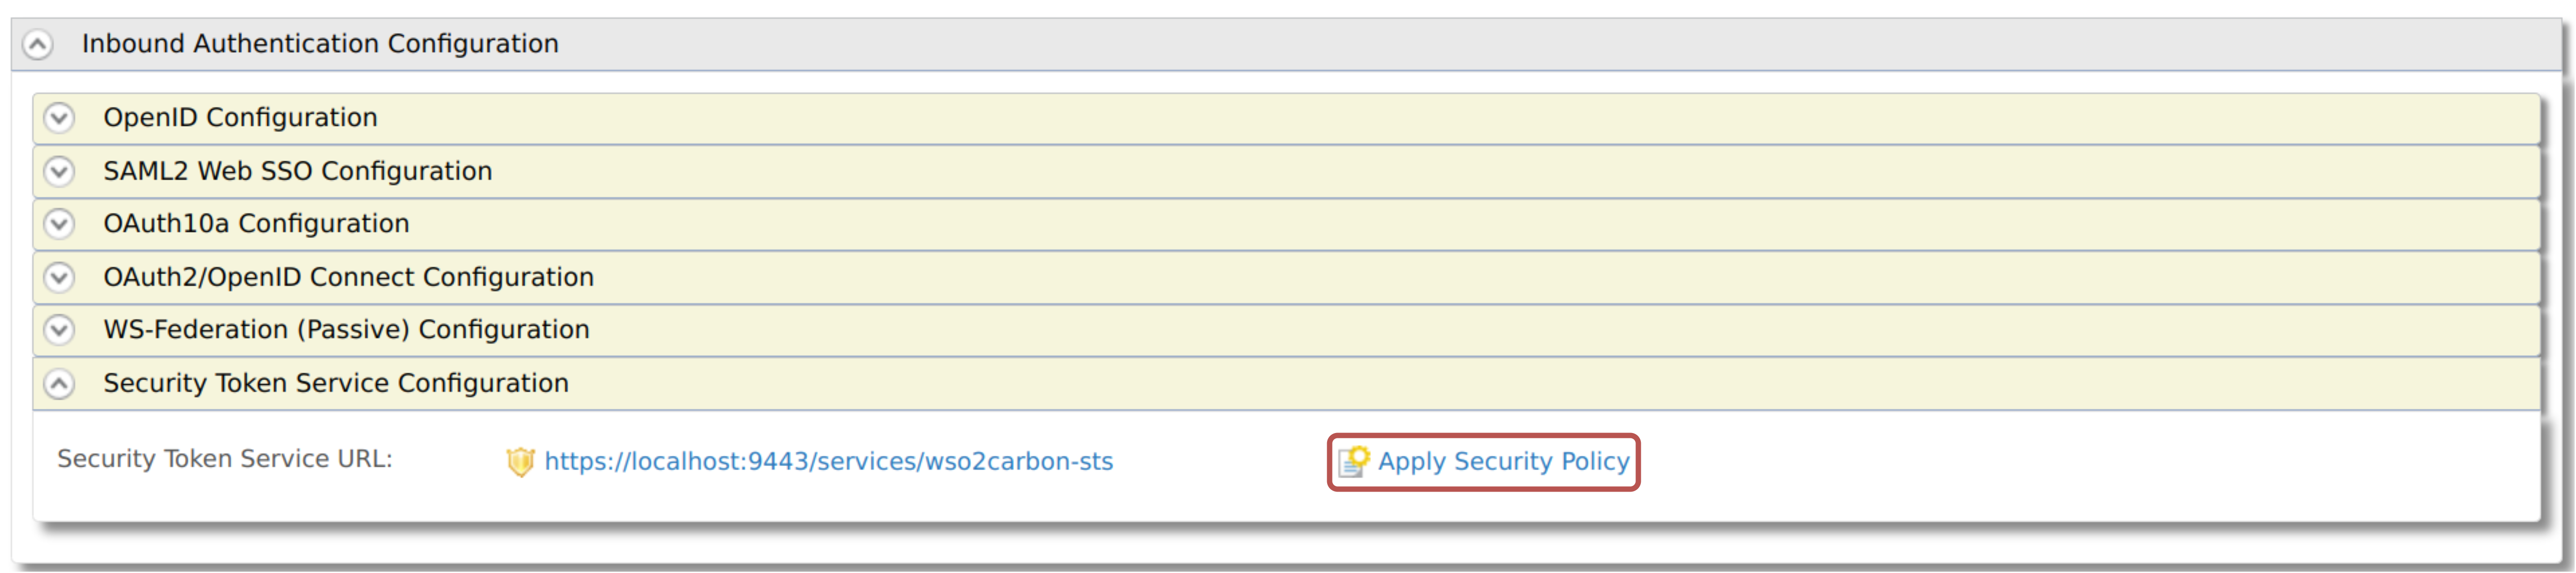
Expand Inbound Authentication Configuration > Security Token Service Configuration and click Apply Security Policy.
-
Select Yes from the Enable Security? list and select a pre-configured security scenario according to your requirements. We will be using
UsernameTokenunder the Basic Scenarios section for this tutorial.Note
You can find further details about security policy scenarios from the view scenario option.

-
Click Next and provide the required details as follows:
Info
The next steps may vary according to the security scenario you have chosen under point (5) above. Given below are the steps for the UsernameToken scenario.
- Select ALL-USER-STORE-DOMAINS as the domain.
-
Select the role you created to grant permission to access a secured service. In this example, the
adminrole is used.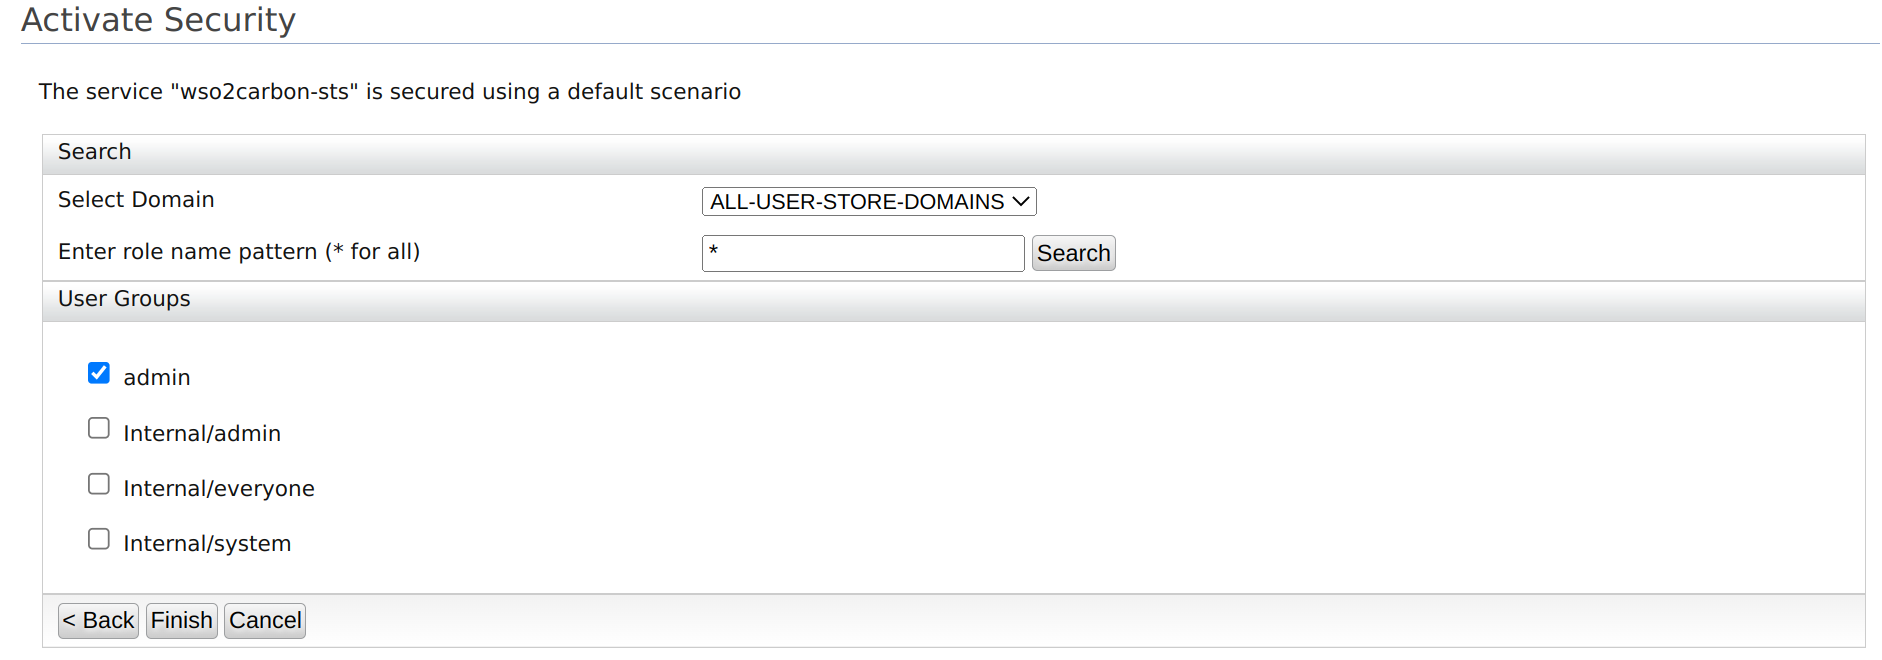
Note
The Select Domain list provides the available domains. The listed User Groups can vary depending on the domain selected.
-
Click Finish.
- Click Ok on the confirmation dialog window that appears.
- Click Update to save and complete the process.
Now STS is configured and secured with a username and password. Only users with the Admin role can consume the service.
The next step is to add a service provider to consume the STS.
Configure the service provider
The steps in this section should be followed if you are using Holder-of-Key as the subject confirmation method.
Before you begin
You must first register a service provider.
- On the Management Console, go to Service Providers > List and select your service provider.
- Expand Inbound Authentication Configuration > WS-Trust Security Token Service Configuration and click Configure.
-
Enter the required details as given below.
Field Description Sample Value Endpoint Address Enter the trusted relying party's endpoint address, which is the endpoint address of the Security Token Service.The endpoint must be used as the service URL to which the token gets delivered by the STS client. Then select the public certificate imported. Tokens issued are encrypted using the public certificate of the trusted relying party. Therefore, the consumer who obtains this token to invoke the RP service will not be able to see the token.
Note
Make sure to upload the certificate of the relying party to the trust store. For instructions, see adding CA-signed certificates to keystores.
https://localhost:9444/services/echoCertificate Alias This is the alias of the certificate. wso2carbon
-
Click Update to save your changes.
Run a sample STS Client
The following sample demonstrates the steps to run a Security Token Service (STS) client. The STS issues a security token to authenticate a user for your client application using WS-Trust protocols.
Before you begin
You need to configure WS-Trust for WSO2 Identity Server.
To run the STS client:
-
Clone the Identity Server samples repository.
-
In the cloned directory, navigate to the
SAMPLES-IS/sts/sts-clientdirectory to build the STS client.Info
The sts-client sample sends the username and password defined in the
SAMPLES-IS/sts/sts-client/src/main/resources/client.propertiesfile. WSO2 Identity Server authenticates if the user is in the system, and if the user is in the system, a token is sent to the requesting party, which is the sts-client application in this case.The default username and password defined are that of the default super administrator, and you can change it accordingly.
ut.username=admin ut.password=admin -
Build the client using
mvn install. -
Once the client is built successfully, run the
sts-client.shfile in Unix or thests-client.batfile in Windows.
You can see that the SAML token issued from the STS is being printed by the client.
Note
The connection refused error occurs when the STS client attempts to send the received SAML token to a service that is not running in this case.