Configuring claims for a service provider
A service provider may need access to specific user claims to be able to provide its services to users. You can allow this by enabling the required claims for your service provider configuration in WSO2 Identity Server.
Info
See the Identity Server Architecture for more information on how claim mapping fits into the overall scheme.
Listed below are the types of claims you will set up for the service provider.
| Claim type | Description |
|---|---|
| Local Claim | This list includes a set of standard claim values local to the WSO2 Identity Server. When adding a service provider, it is necessary to map the values of the claims local to the service provider with those provided in this drop-down list local to the Identity Server. This should be done for all values in the service provider unless they use the same claim name. |
| Requested Claim | If the requested claim option is configured on a custom claim, the Identity Server sends this claim to the service provider. However, the user will not be prompted to enter the values if the identity provider cannot provide the Requested Claim values. Requested Claims are helpful mainly in cases where there are hundreds of claims, and only specific ones need to be sent to the service provider. |
| Mandatory Claim | This ensures that WSO2 IS will send a value for this claim to the service provider. When a user logs in to this service provider, if the identity provider does not provide a value for any of the mandatory claims, the user will be prompted to provide them at the time of login. |
Prerequisites
You need to register a service provider on the Management Console.
Configure claims
You can configure claims using the following methods:
Use local claim dialect
To configure local claims for a service provider:
- On the Management Console, go to Main > Identity > Service Providers.
- Click List, select the service provider you want to configure, and click on the corresponding Edit link.
- Expand the Claim Configuration section and enable the claims required by the service provider.
-
Select Use Local Claim Dialect, click Add Claim URI, and specify the following details:
Field name Description Local Claim Select the local claim from the list. Mandatory Claim Enable this if the claim should be mandatory for the service provider. 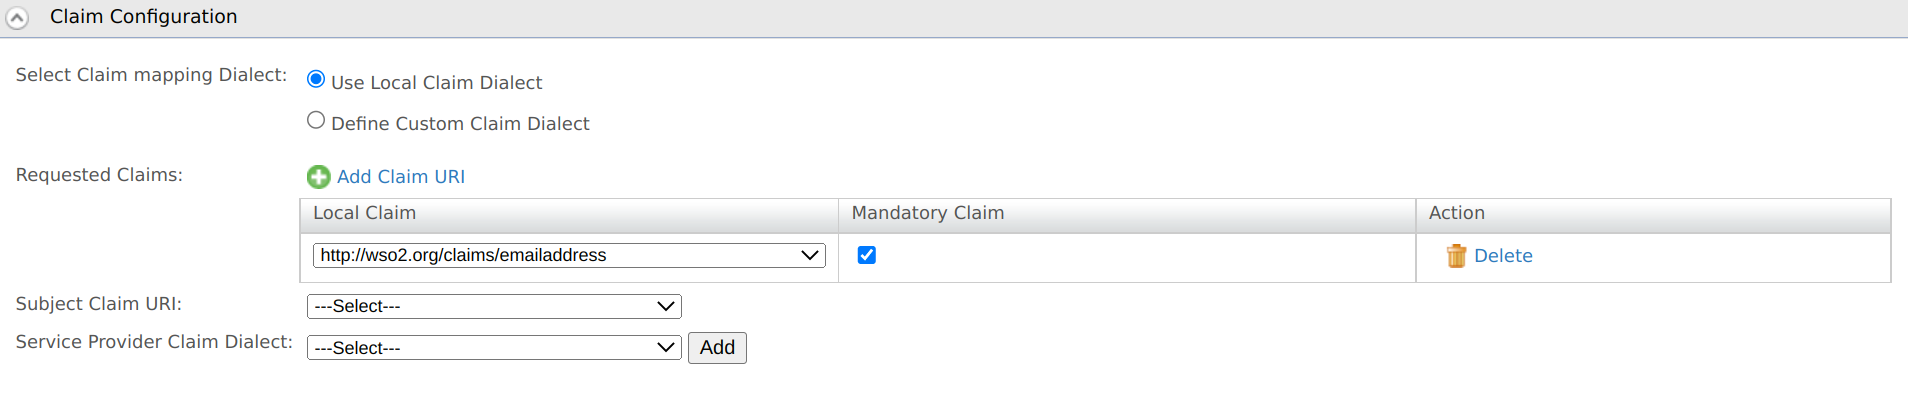
-
Select the Subject Claim URI from the list.
Info
This is the authenticated user identifier, which will return the authentication response to the service provider.
-
Click Update to save the configurations.
Use custom claim dialect
To define custom claims and enable them for the service provider:
- On the Management Console, go to Main > Identity > Service Providers.
- Click List, select the service provider you want to configure, and click on the corresponding Edit link.
- Expand the Claim Configuration section and enable the claims required by the service provider.
-
Select Define Custom Claim Dialect, click Add Claim URI, and specify the following details:
Field name Description Service Provider Claim Name of the service provider claim. Local Claim Choose the local claim corresponding to the SP claim from the list. Requested Claim Enable this if you want to allow the new claim to be shared with the service provider. Mandatory Claim Enable this if the claim should be mandatory for the service provider 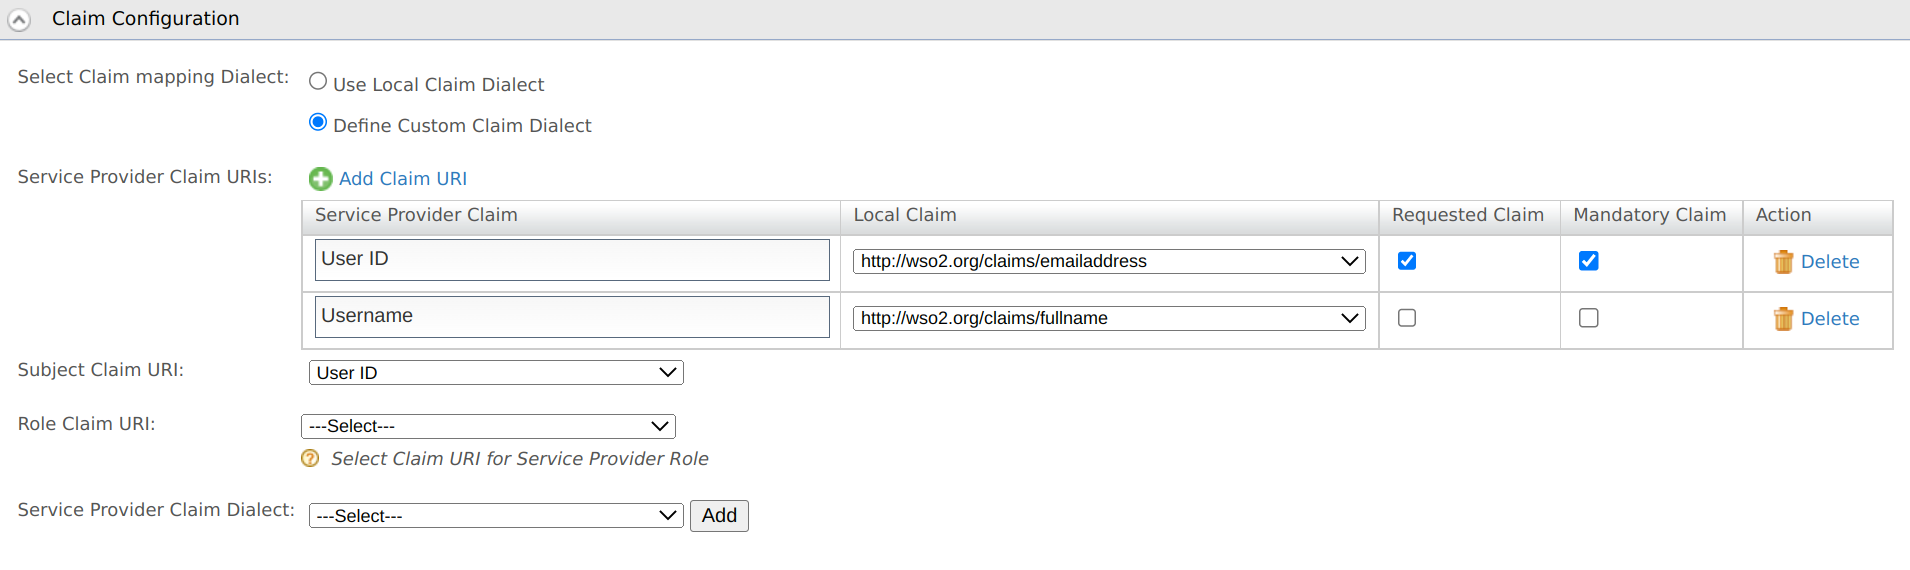
-
Select the Subject Claim URI from the list.
Info
This is the authenticated user identifier, which will return the authentication response to the service provider.
-
Select the Role Claim URI from the list of claims you mapped.
-
Click Update to save the configurations.
Custom claims for an OIDC service provider
When mapping custom claims for a service provider configured with OpenID Connect, map the custom claims in the SP configuration and add the custom claims to a scope value in the oidc file.
Learn about mapping oidc scopes and claims
Custom claims for a SAML2 service provider
When mapping custom claims for a SAML2 service provider, select both Enable Attribute Profile and Include Attributes in the Response Always from the SAML2 service provider configuration.
(Select the application and go to Inbound Authentication Configuration > SAML2 Web SSO Configurations > Configure to find this configuration.)

This is required since Identity Server only includes user claims in the SAML2 response if the SAML2 attribute profile is enabled.
Cache service provider claims
Add the following configuration to the
[cache.manager]
name = "LocalClaimInvalidationCache"
timeout = "300"
capacity = "5000"
Here, you need to specify values as follows:
timeout: The cache timeout value in seconds.capacity: The maximum cache size.
Get user consent to share claims
When a user attempts to log in to the service provider, they will be prompted for consent to share the claims configured for the service provider.
The user will not be able to proceed with the authentication without providing consent. Learn more about managing user consent.
Related Topics
See Logging into Salesforce with Facebook for a sample of claim mapping for a service provider.