Try Device Authorization Grant
The Device Authorization Grant is a grant type in the OAuth 2.0 specification.
Info
For more information, see Device Authorization Grant.
Follow the topics given below to try out the Device Authorization grant type.
(Optional) Configure WSO2 Identity Server
Info
This change is optional unless you want to change the default values of the properties mentioned below.
Open the deployment.toml file (stored in the <IS_HOME>/repository/conf folder), add the following configuration, and change the values of the properties below:
[oauth.grant_type.device_code]
key_length = 7
expiry_time = "10m"
polling_interval = "5s"
key_set = "BCDFGHJKLMNPQRSTVWXYZbcdfghjklmnpqrstvwxyz23456789"
The parameters in this configuration are explained below.
| Name | Description | Parameter |
|---|---|---|
|
Key length |
The length of the user code. |
key_length |
|
Expiry time |
The expiry time of the user code and the device code. |
expiry_time |
|
Polling interval |
The minimum delay of the client between each polling request to the token endpoint. |
polling_interval |
|
Key set |
The set of characters that is used to generate the user code. |
key_set |
Enable the Device Authorization grant
Follow the steps given below to enable the Device Authorization grant for your application (service provider).
-
Sign in to the Management Console.
-
Go to Main > Identity > Service Providers and click Add.
-
Give a name for your service provider and click Register.
-
On the screen that follows, expand Inbound Authentication Configuration > OAuth/OpenID Connect Configuration and click Configure.
-
Select
urn:ietf:params:oauth:grant-type:device_codeto enable the device flow grant type.Info
Since these are public clients, ensure that Allow authentication without the client secret is checked.
-
Click Add to save the service provider configurations.
Info
Note of the generated OAuth client key and client secret. When configuring your device, use the client ID as your OAuth client-key.
Try it out
Let's try out the device flow.
-
Open a terminal and run the following command to send a request to the
device_authorizeendpoint.Info
The client (the device) initiates this request to the authorization server. In the response, the client receives a device code, a user code, and a verification URI. The client starts polling the /token endpoint of the authorization server using the device_code at an interval as specified in the response.
Request Response -
From a device with no input constraints, access the
verification_uriand enter the user code.Info
You can alternatively access the
verification_uri_completelink obtained in the response.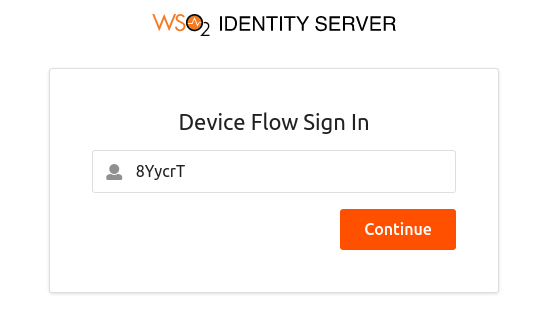
-
Click Continue to proceed.
Info
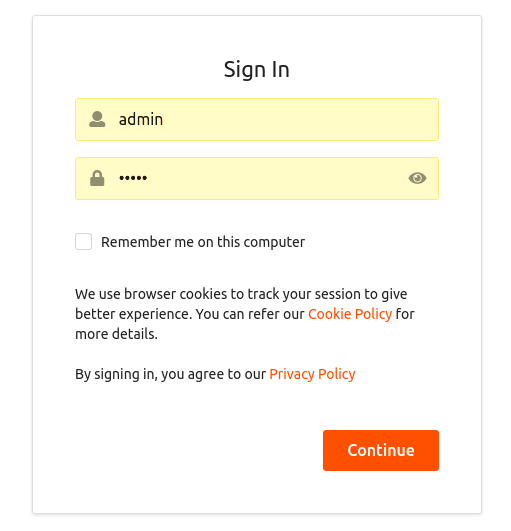
- If the user code is correct, you are prompted to enter your credentials.
- Note that the user code is for one-time use only. If your code is expired or if you have entered a wrong user code, get a new user code by following the previous steps.
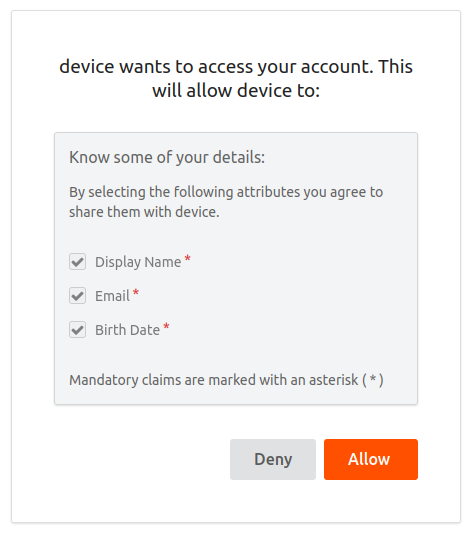
-
Once you log in successfully, you are redirected to the configured callback URL of the service provider.
The client, who has been polling the /token endpoint, receives the access token and the refresh token.
-
Open a terminal window and send the following token request to the authorization server.
Request Response -
To validate the token that you received, use the introspection endpoint.