Use Certificates with Applications
Follow the steps given below to configure your application to use a public certificate instead of the default JWKS endpoint. This configuration is required to follow the scenarios mentioned below.
- OIDC Token Encryption
- Request Object flow
Configure the public certificate
The following steps describe how to configure a service provider public certificate.
-
Create a new keystore.
keytool -genkey -alias wso2carbon -keyalg RSA -keysize 2048 -keystore testkeystore.jks -dname "CN=*.test.com,OU=test,O=test,L=MPL,ST=MPL,C=FR" -storepass wso2carbon -keypass wso2carbon -validity 10950 -
Create a file and name it as the client ID of the OAuth application service provider. Export the public key of the new keystore to the file you created.
keytool -export -alias wso2carbon -file <client-id> -keystore testkeystore.jks -
Get the cert in X509 format.
keytool -printcert -rfc -file <client-id>You will see the public certificate in X509 format in the console.
-
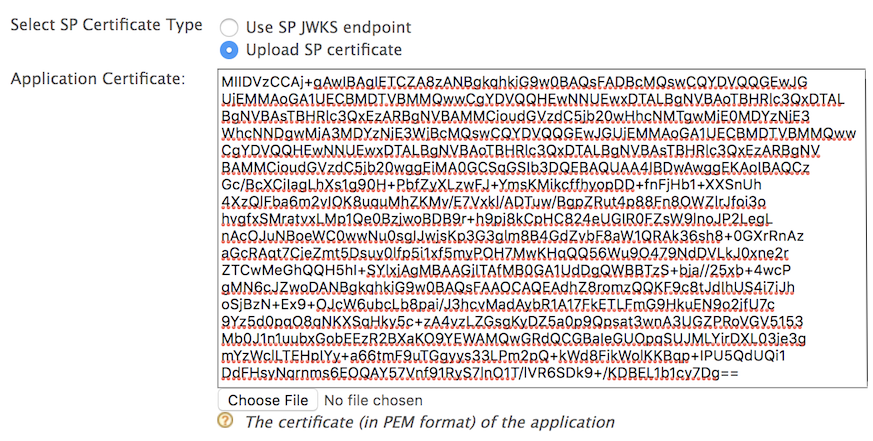
Copy the content of the certificate. A sample output is shown below.
-----BEGIN CERTIFICATE----- MIIDVzCCAj+gAwIBAgIETCZA8zANBgkqhkiG9w0BAQsFADBcMQswCQYDVQQGEwJG UjEMMAoGA1UECBMDTVBMMQwwCgYDVQQHEwNNUEwxDTALBgNVBAoTBHRlc3QxDTAL BgNVBAsTBHRlc3QxEzARBgNVBAMMCioudGVzdC5jb20wHhcNMTgwMjE0MDYzNjE3 WhcNNDgwMjA3MDYzNjE3WjBcMQswCQYDVQQGEwJGUjEMMAoGA1UECBMDTVBMMQww CgYDVQQHEwNNUEwxDTALBgNVBAoTBHRlc3QxDTALBgNVBAsTBHRlc3QxEzARBgNV BAMMCioudGVzdC5jb20wggEiMA0GCSqGSIb3DQEBAQUAA4IBDwAwggEKAoIBAQCz Gc/BcXCiIagLhXs1g90H+PbfZyXLzwFJ+YmsKMikcffhyopDD+fnFjHb1+XXSnUh 4XzQlFba6m2vIOK8uquMhZKMv/E7Vxkl/ADTuw/BgpZRut4p88Fn8OWZlrJfoi3o hvgfxSMratvxLMp1Qe0BzjwoBDB9r+h9pj8kCpHC824eUGIR0FZsW9lnoJP2LegL nAcOJuNBoeWC0wwNu0sgIJwjsKp3G3glm8B4GdZvbF8aW1QRAk36sh8+0GXrRnAz aGcRAqt7CjeZmt5Dsuy0lfp5i1xf5myPOH7MwKHqQQ56Wu9O479NdDVLkJ0xne2r ZTCwMeGhQQH5hI+SYlxjAgMBAAGjITAfMB0GA1UdDgQWBBTzS+bja//25xb+4wcP gMN6cJZwoDANBgkqhkiG9w0BAQsFAAOCAQEAdhZ8romzQQKF9c8tJdIhUS4i7iJh oSjBzN+Ex9+OJcW6ubcLb8pai/J3hcvMadAybR1A17FkETLFmG9HkuEN9o2jfU7c 9Yz5d0pqO8qNKXSqHky5c+zA4vzLZGsgKyDZ5a0p9Qpsat3wnA3UGZPRoVGV5153 Mb0J1n1uubxGobEEzR2BXaKO9YEWAMQwGRdQCGBaIeGUOpqSUJMLYirDXL03je3g mYzWclLTEHpIYy+a66tmF9uTGgyys33LPm2pQ+kWd8FikWolKKBqp+IPU5QdUQi1 DdFHsyNqrnms6EOQAY57Vnf91RyS7lnO1T/lVR6SDk9+/KDBEL1b1cy7Dg== -----END CERTIFICATE----- -
Click Service Providers > List and Edit the service provider you created.
-
Select Upload SP Certificate under Select SP Certificate Type.
-
Paste the certificate content copied in step 4 as the Application Certificate.
Note
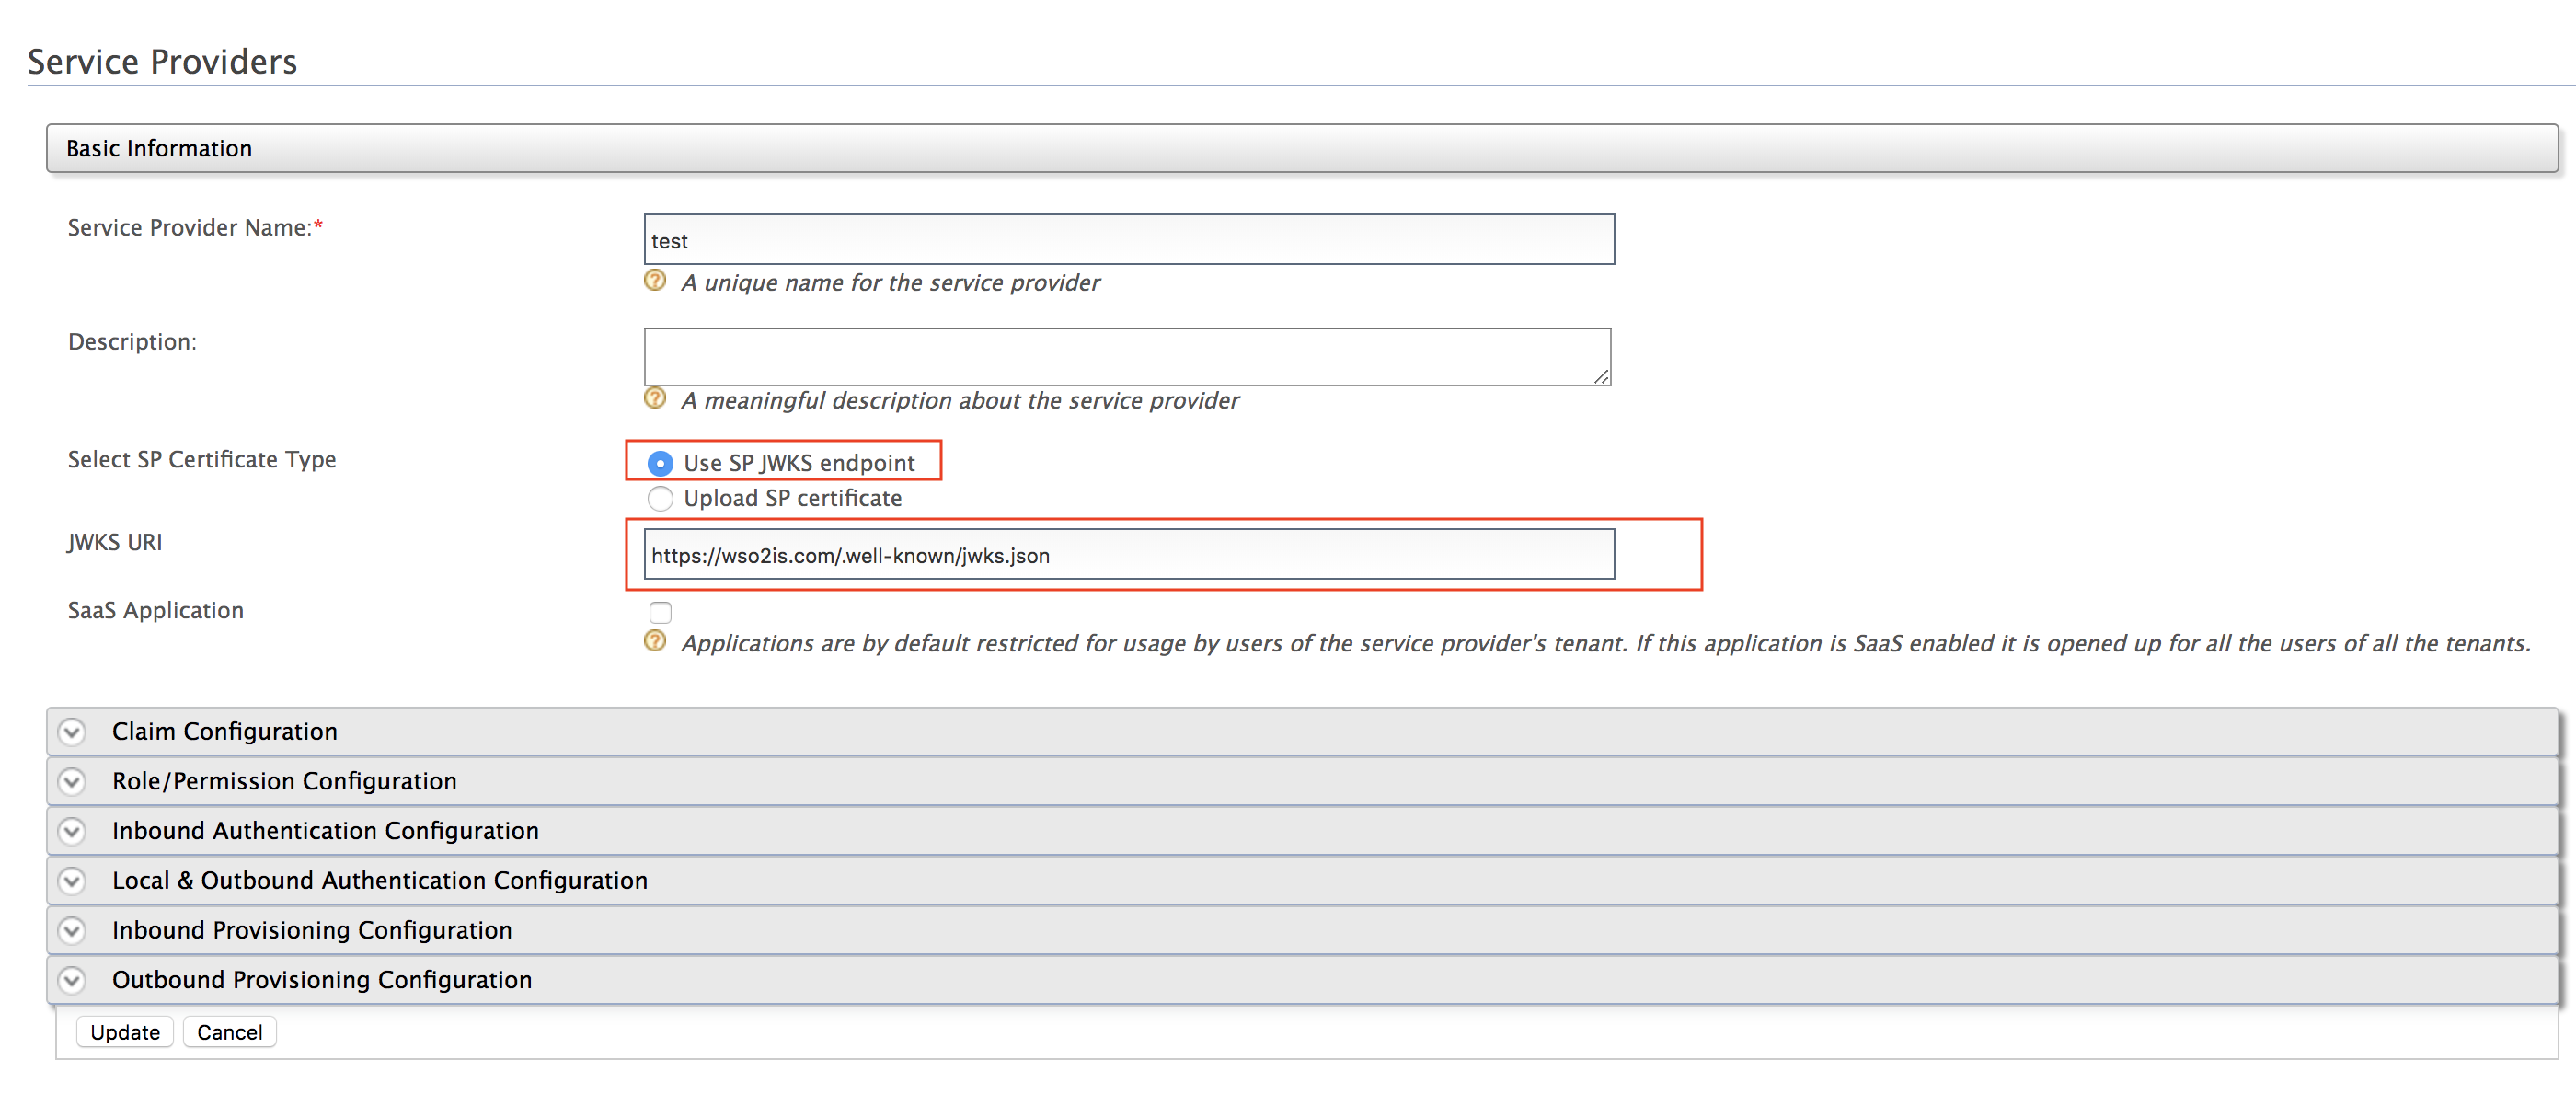
Instead of uploading the service provider certificate as shown above, you can choose to use the JWKS enpoint as shown below and add the relevant JWKS URI.
-
Click Update.
Related topics