Configure Rule-Based Provisioning
This page guides you through provisioning users based on defined XACML rules.
To get a better understanding of rule-based provisioning, consider a scenario where you need to provision users assigned to the finance role from WSO2 Identity Server to the GoogleIDP. To implement this scenario, you can define a XACML policy that permits the provisioning operation if the provisioning user is assigned the finance role.
Follow the steps given below to configure rule-based provisioning in WSO2 Identity Server.
Register an identity provider
-
Log in to the Management Console(
https://<IS_HOST>:<PORT>/carbon) using admin/admin credentials. -
Navigate to Main > Identity > Identity Providers > Add.
-
Enter an Identity Provider Name, Display Name, and Description.
-
Expand the Outbound Provisioning Connectors section and select Google, SCIM or Salesforce connecter.
Configure a service provider
To register your application as a service provider in the WSO2 Identity Server:
-
Log in to the WSO2 Identity Server Management Console using administrator credentials.
-
Go to Main > Identity > Service Providers > Add.
-
Enter a Service Provider Name. Optionally, enter a Description.
-
Click Register.
-
Expand the Outbound Provisioning Configuration section and select the provisioning connector you configured in the previous section.
-
Click on the + button and add the identity provider, then select Enable Rules in order to enable rules during provisioning.
-
Click Update to save.
Configure outbound provisioning
-
Navigate to Main > Identity > Service Providers > Resident.
-
Expand the Outbound Provisioning Configuration section and enter the name of the identity provider you just created, and select the connector from the dropdown list.
Info
If you enable Blocking, WSO2 Identity Server will wait for the response from the Identity Provider to continue.
-
Select Enable Rules.
-
Click Update to save changes.
Set up XACML rules
-
Click on Policy Administration under the Entitlement > PAP section on the Main tab of the management console.
-
Since this sample scenario is based on role, we select the policy
provisioing_role_based_policy_template.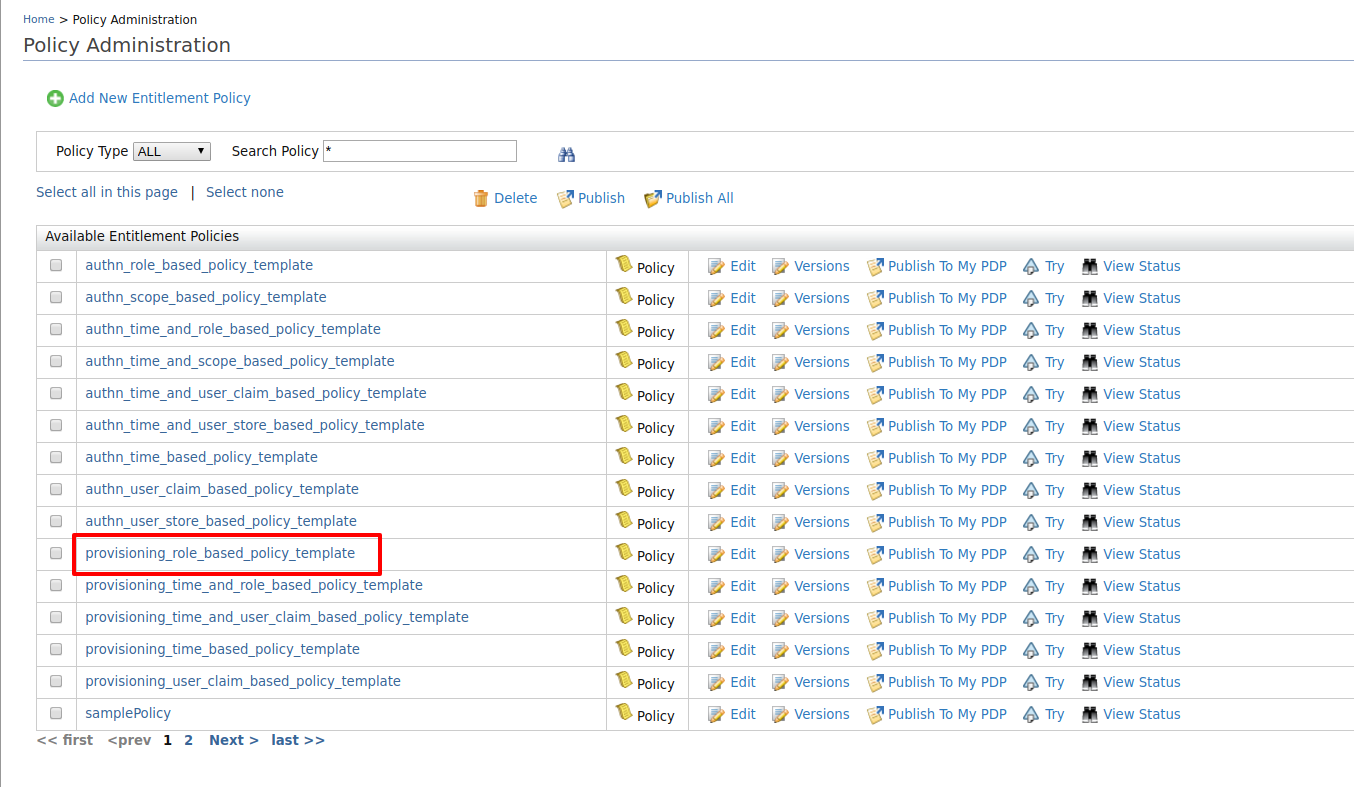
-
Once you click Edit, the XML based policy will appear in the policy editor. There are placeholders in capitals for entering the service provider and role names.
-
Edit the placeholders accordingly with the relevant values.
-
Change the
PolicyIdas follows:PolicyId="provisioning_role_based_policy" -
Edit the
<Description>tag and enter a description relevant to your custom policy.<Description>This template policy provides ability to authorize provisioning requests initiated from a given service provider(defined by SP_NAME) to a given identity provider(defined by IDP_NAME) in the outbound provisioning flow based on the roles of the user (ROLE_1, ROLE_2). Provisioning attempts to the users with given role(s) will be allowed and all others will be denied.</Description> -
Locate the IDP
_NAMEplaceholder and replace it with the identity provider name "WSO2IDP". - Locate the placeholder
ROLE_1and replace it with the role name "finance". - In this example, the policy authenticates users to the
specified service provider based on
ROLE_1orROLE_2. However, you can authenticate using only one role as well. To do this, remove the other role by removing that entire section from the start of the<Apply>tag to the ending</Apply>tag. This should be edited in both POST and PUT sections as the provisioning is initiated when creating the user and when updating the user as well. - Also for this example, we do not need a service provider.
Therefore we need to remove the service provider
SP_NAMEmatch block as well.
-
-
Once the changes have been made, the policy should be similar to the following.
<Policy xmlns="urn:oasis:names:tc:xacml:3.0:core:schema:wd-17" PolicyId="provisioning_role_based_policy" RuleCombiningAlgId="urn:oasis:names:tc:xacml:1.0:rule-combining-algorithm:first-applicable" Version="1.0"> <Description>This template policy provides ability to authorize provisioning requests initiated from a given identity provider(defined by IDP_NAME) in the outbound provisioning flow based on the roles of the user (finace). Provisioning attempts to the users with given role will be allowed and all others will be denied.</Description> <Target> <AnyOf> <AllOf> <Match MatchId="urn:oasis:names:tc:xacml:1.0:function:string-equal"> <AttributeValue DataType="http://www.w3.org/2001/XMLSchema#string">WSO2IDP</AttributeValue> <AttributeDesignator AttributeId="http://wso2.org/identity/idp/idp-name" Category="http://wso2.org/identity/idp" DataType="http://www.w3.org/2001/XMLSchema#string" MustBePresent="false"></AttributeDesignator> </Match> <Match MatchId="urn:oasis:names:tc:xacml:1.0:function:string-equal"> <AttributeValue DataType="http://www.w3.org/2001/XMLSchema#string">provisioning</AttributeValue> <AttributeDesignator AttributeId="http://wso2.org/identity/identity-action/action-name" Category="http://wso2.org/identity/identity-action" DataType="http://www.w3.org/2001/XMLSchema#string" MustBePresent="false"></AttributeDesignator> </Match> </AllOf> </AnyOf> </Target> <Rule Effect="Permit" RuleId="permit_by_role_when_create"> <Target> <AnyOf> <AllOf> <Match MatchId="urn:oasis:names:tc:xacml:1.0:function:string-equal"> <AttributeValue DataType="http://www.w3.org/2001/XMLSchema#string">POST</AttributeValue> <AttributeDesignator AttributeId="http://wso2.org/identity/provisioning/provision-operation" Category="http://wso2.org/identity/provisioning" DataType="http://www.w3.org/2001/XMLSchema#string" MustBePresent="true"></AttributeDesignator> </Match> </AllOf> </AnyOf> </Target> <Condition> <Apply FunctionId="urn:oasis:names:tc:xacml:1.0:function:or"> <Apply FunctionId="urn:oasis:names:tc:xacml:1.0:function:string-is-in"> <AttributeValue DataType="http://www.w3.org/2001/XMLSchema#string">finance</AttributeValue> <AttributeDesignator AttributeId="http://wso2.org/identity/provisioning/claim-group" Category="http://wso2.org/identity/provisioning" DataType="http://www.w3.org/2001/XMLSchema#string" MustBePresent="true"></AttributeDesignator> </Apply> </Apply> </Condition> </Rule> <Rule Effect="Permit" RuleId="permit_by_role_when_update"> <Target> <AnyOf> <AllOf> <Match MatchId="urn:oasis:names:tc:xacml:1.0:function:string-equal"> <AttributeValue DataType="http://www.w3.org/2001/XMLSchema#string">PUT</AttributeValue> <AttributeDesignator AttributeId="http://wso2.org/identity/provisioning/provision-operation" Category="http://wso2.org/identity/provisioning" DataType="http://www.w3.org/2001/XMLSchema#string" MustBePresent="true"></AttributeDesignator> </Match> </AllOf> </AnyOf> </Target> <Condition> <Apply FunctionId="urn:oasis:names:tc:xacml:1.0:function:or"> <Apply FunctionId="urn:oasis:names:tc:xacml:1.0:function:string-is-in"> <AttributeValue DataType="http://www.w3.org/2001/XMLSchema#string">finance</AttributeValue> <AttributeDesignator AttributeId="http://wso2.org/claims/role" Category="http://wso2.org/identity/user" DataType="http://www.w3.org/2001/XMLSchema#string" MustBePresent="true"></AttributeDesignator> </Apply> </Apply> </Condition> </Rule> <Rule Effect="Deny" RuleId="deny_others"></Rule> </Policy> -
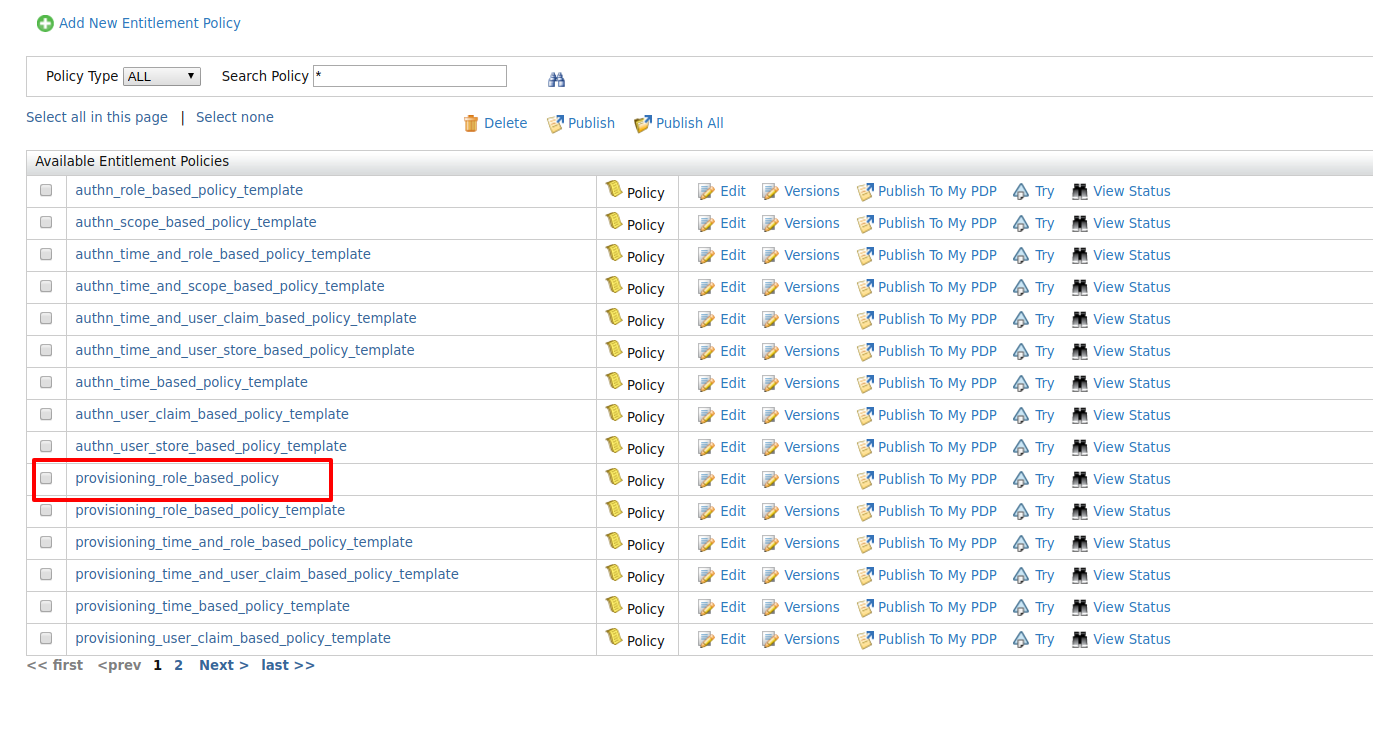
Click Save Policy to save the changes. You can see the policy you just created on the policy list (the original template policy will remain unchanged for later use).
-
Click on the Publish to My PDP link corresponding to the new policy.

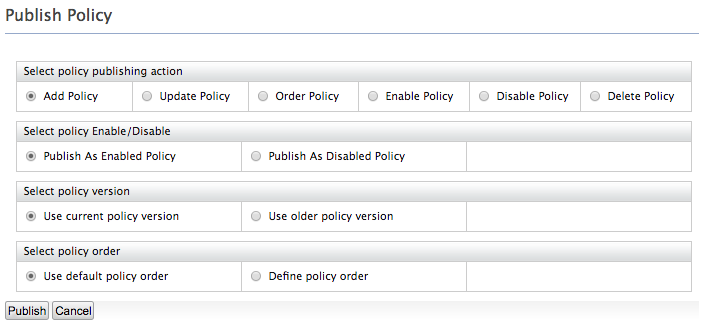
- On the UI that appears, leave the default selected values as they
are and click Publish.
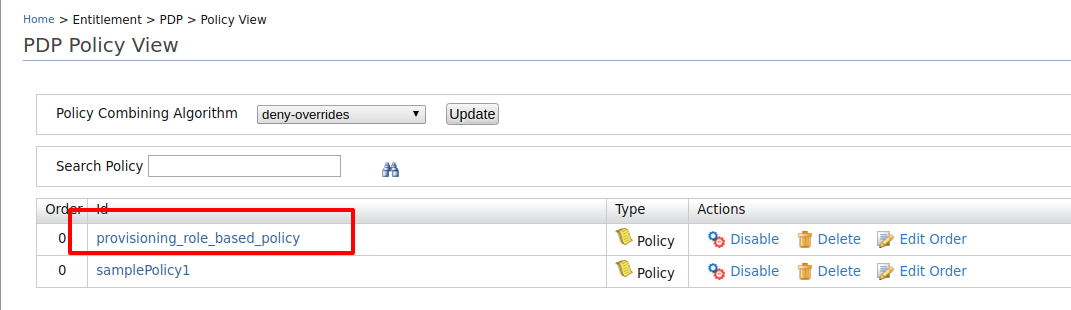
- Click on Policy View under the Entitlement>PDP section on the Main tab of the management console.
-
To ensure that the policy has been published successfully, check if the policy is listed.
 11. To test out whether the policy works, follow the Try it
out section.
11. To test out whether the policy works, follow the Try it
out section.
Try it out
Once the policies are published to PDP, they are ready to execute during outbound provisioning. You can test rule-based provisioning by creating a user in WSO2 Identity Server that matches the rules you enforced. For example, when you create a user with the role "finance" in WSO2 Identity Server, it should be provisioned to the external IDP you have configured for outbound provisioning as well. A user who is not assigned the "finance" role should not be provisioned.
Related topics