Set up Moesif analytics
WSO2 Identity Server can publish identity events - logins, sign-ups, sessions, tokens, and more - to Moesif, a software-as-a-service (SaaS) analytics platform in the WSO2 product family. Once the events are flowing, you build the charts and dashboards you want in Moesif on top of them.
You bring your own Moesif subscription and stay in control of it. You own the account, set the retention period, and decide who can see the data. Each WSO2 Identity Server tenant connects to Moesif separately, so every tenant can keep its analytics in its own workspace.
About pre-built dashboards
WSO2 Identity Server does not yet ship sample dashboards for Moesif. They are planned for a future release. For now you create the dashboards you need in Moesif, using the events described in Data published to Moesif.
Before you begin
You will need:
- A Moesif account. If you do not have one, sign up for Moesif. See Moesif pricing for the available plans.
- Access to the
deployment.tomlfile of your WSO2 Identity Server deployment, and the ability to restart the server. - Administrator access to the WSO2 Identity Server Console for each tenant you want to connect.
Step 1: Create your Moesif workspace
Log in to Moesif and create the workspace that will receive your identity events. If you want to keep tenants separate, create one workspace per tenant.
Step 2: Copy your collector Application Id
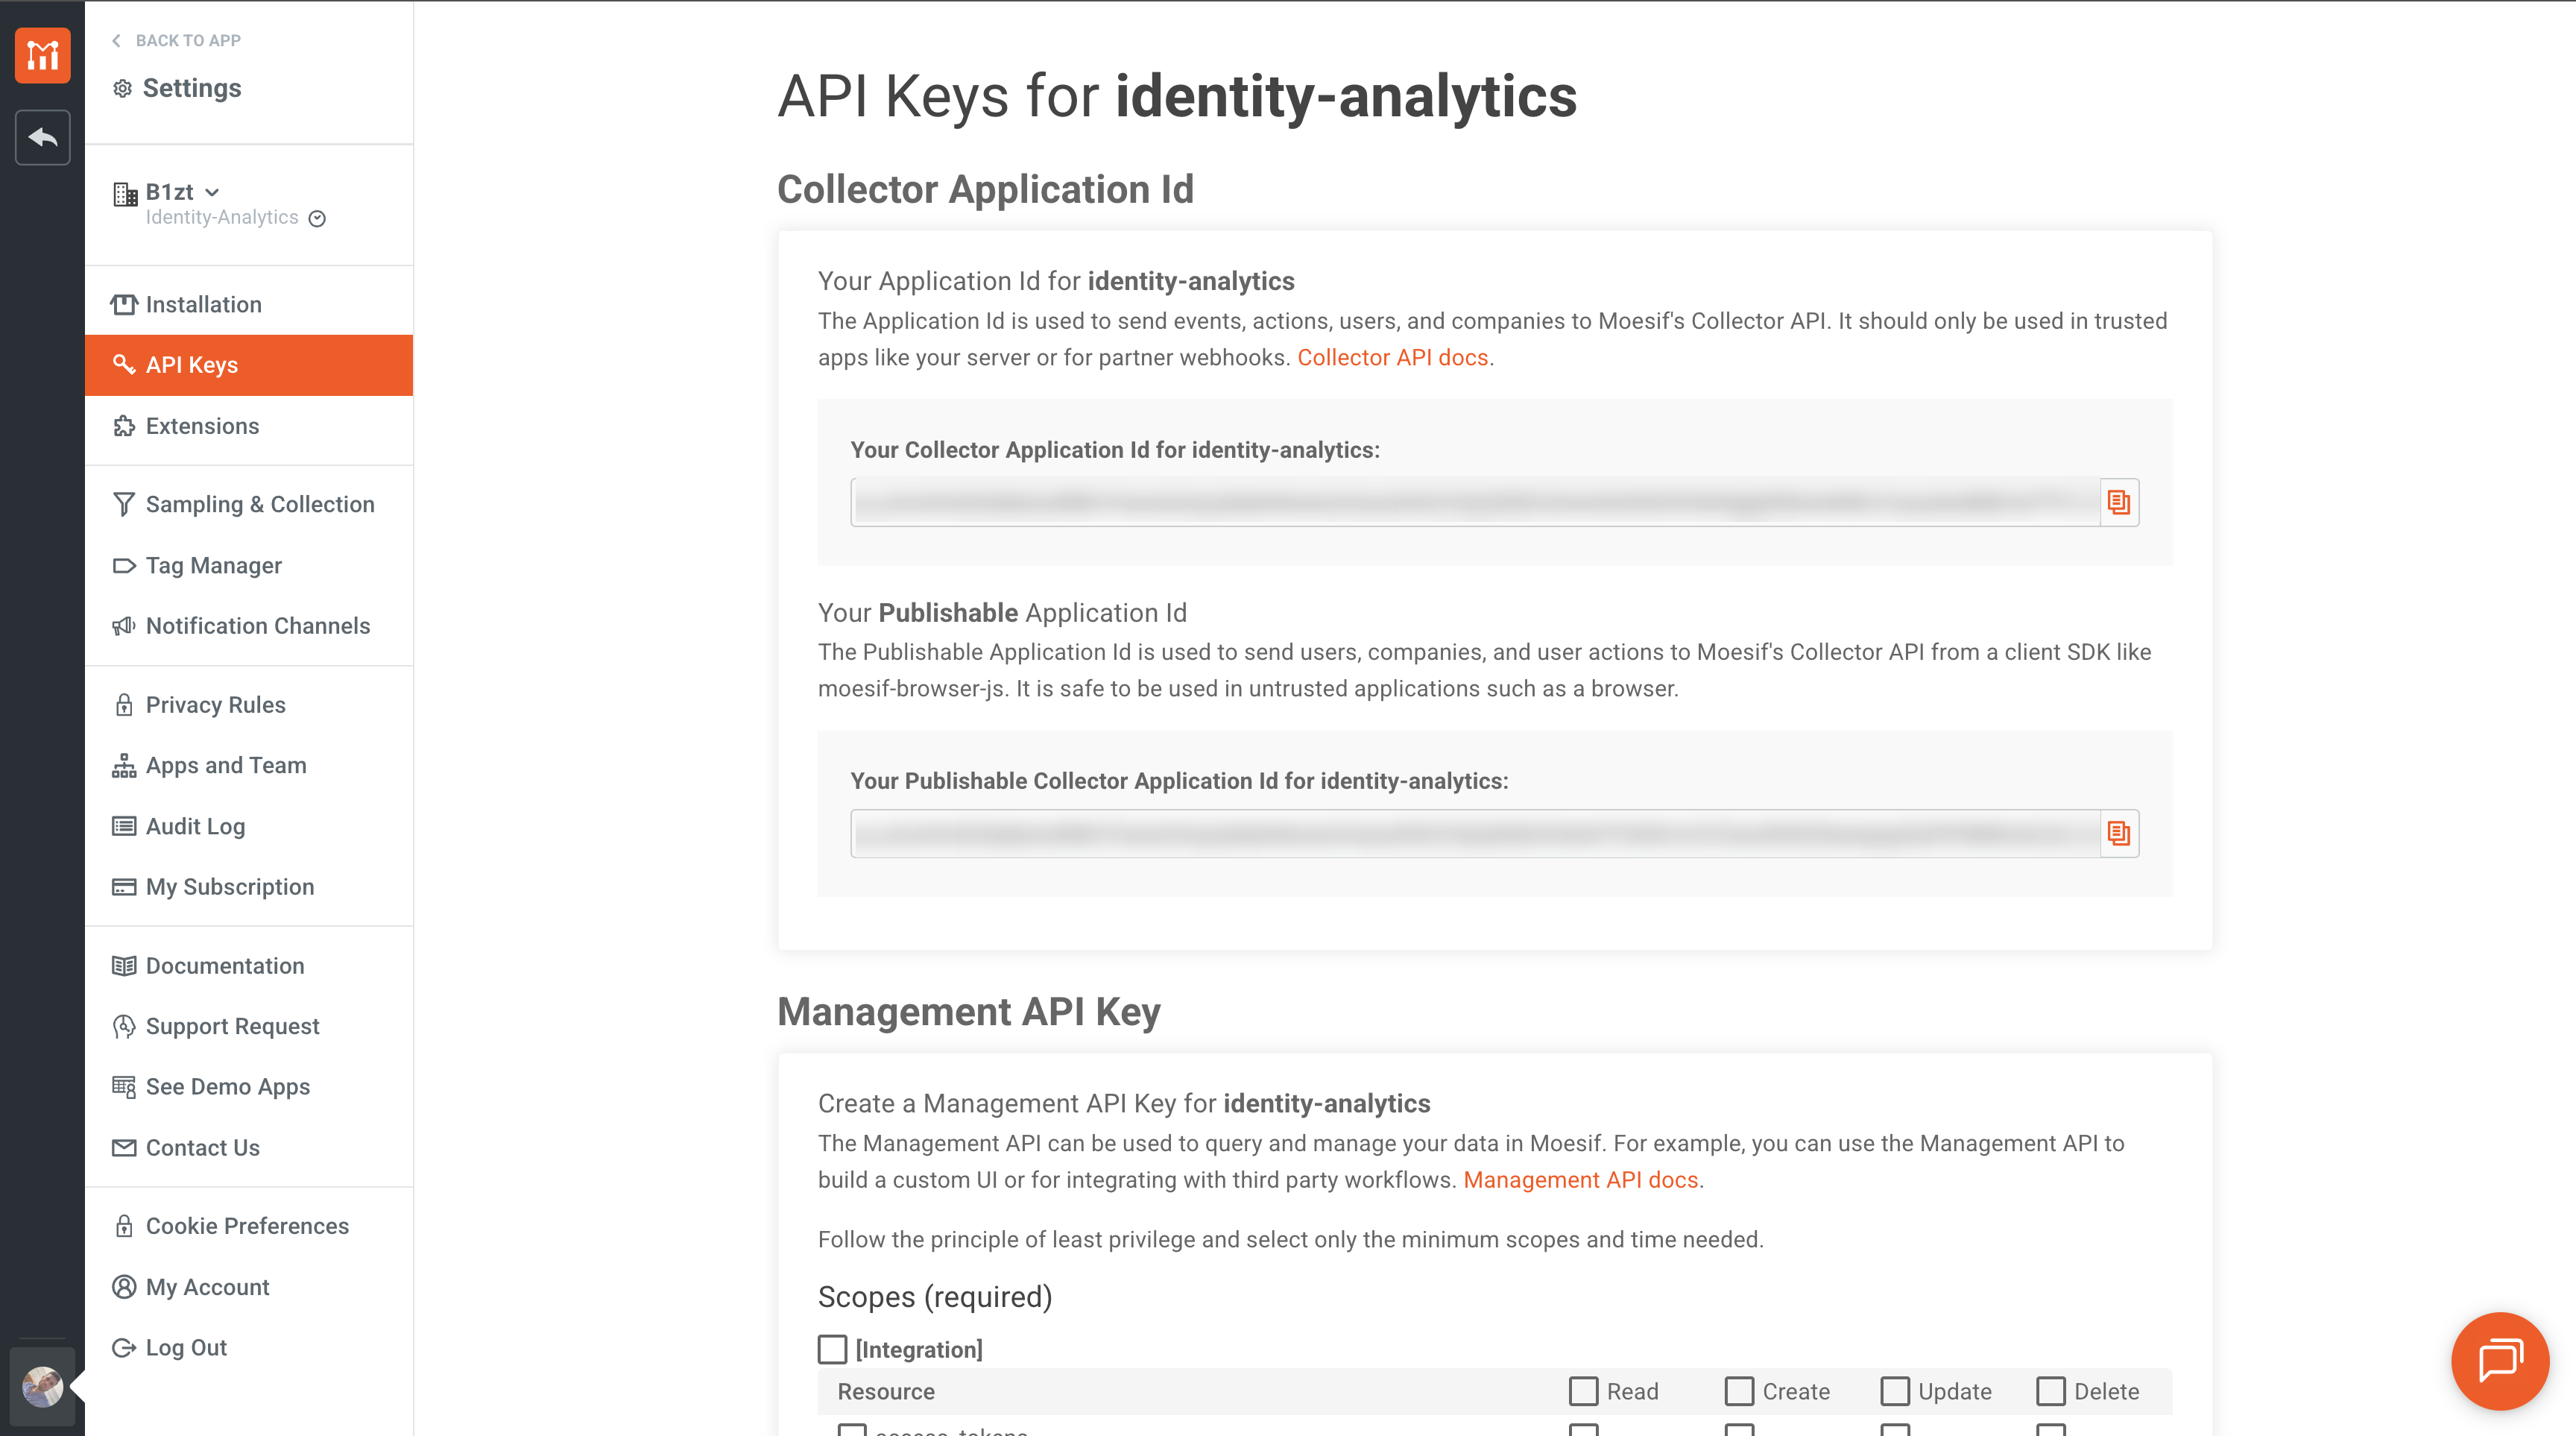
The collector Application Id is the write-only key WSO2 Identity Server uses to send events into your workspace. To find it:
-
Log in to the Moesif portal.
-
Open the menu at the bottom left of the screen (it shows your name) and select API Keys.
-
Copy the value under Collector Application Id.
Keep the two key types apart
The collector Application Id is write-only - it can send events, but it cannot read your data. The Management API key on the same page can read your data. Only ever give WSO2 Identity Server the collector Application Id.
If you want each tenant's data in its own workspace, repeat this step per workspace and keep the keys separate. You will paste one key per tenant in Step 5.
Step 3: Turn on the integration
Add the following to the deployment.toml file of your WSO2 Identity Server deployment:
[analytics.moesif]
enabled = true
provider_url = "https://api.moesif.net/v1"
auth_type = "API_KEY"
api_key_header = "X-Moesif-Application-Id"
stream_version = "1.0.0"
| Property | Description |
|---|---|
enabled |
Turns the integration on and makes the Insights page available in the Console. |
provider_url |
Base URL events are published to. Use the Moesif collector base URL shown above. |
auth_type |
Authentication method used against the collector. Moesif uses API key authentication. |
api_key_header |
HTTP header the collector Application Id is sent in. |
stream_version |
Version of the event streams published by WSO2 Identity Server. |
Setting provider_url
WSO2 Identity Server appends the Moesif API path to this base URL per event, for example /actions or /users, so configure the base URL without a trailing API path. If you publish through an intermediary such as an event gateway, point provider_url at the intermediary instead.
Step 4: Choose which events to publish
Each event category has its own publisher. Add an entry for every category you want to publish:
[identity_mgt.events.schemes.moesifUserAuthenticationPublisher.properties]
enable = true

[identity_mgt.events.schemes.moesifUserRegistrationPublisher.properties]
enable = true

[identity_mgt.events.schemes.moesifUserSessionPublisher.properties]
enable = true

[identity_mgt.events.schemes.moesifOAuthTokenIssuancePublisher.properties]
enable = true

[identity_mgt.events.schemes.moesifFlowPublisher.properties]
enable = true

[identity_mgt.events.schemes.moesifOrgSwitchPublisher.properties]
enable = true
| Publisher | Publishes |
|---|---|
moesifUserAuthenticationPublisher |
Login attempts and the outcome of each authentication step. |
moesifUserRegistrationPublisher |
User account creation. |
moesifUserSessionPublisher |
Session creation, update, and termination. |
moesifOAuthTokenIssuancePublisher |
OAuth2 and OpenID Connect token issuance, including M2M tokens. |
moesifFlowPublisher |
Step-by-step execution of self-registration, password recovery, and invited-user registration flows. |
moesifOrgSwitchPublisher |
Users switching into an organization in a business-to-business (B2B) setup. |
All publishers are off by default, so add an entry for each category you want available. Leaving out the categories you do not need is the simplest way to limit what leaves your deployment. For exactly what each category contains, see Data published to Moesif.
Now restart the server. The Insights page appears in the Console once it comes back up.
Step 5: Connect a tenant to Moesif
Repeat this step for each tenant you want to publish analytics for.
-
Log in to the WSO2 Identity Server Console as an administrator of the tenant.
-
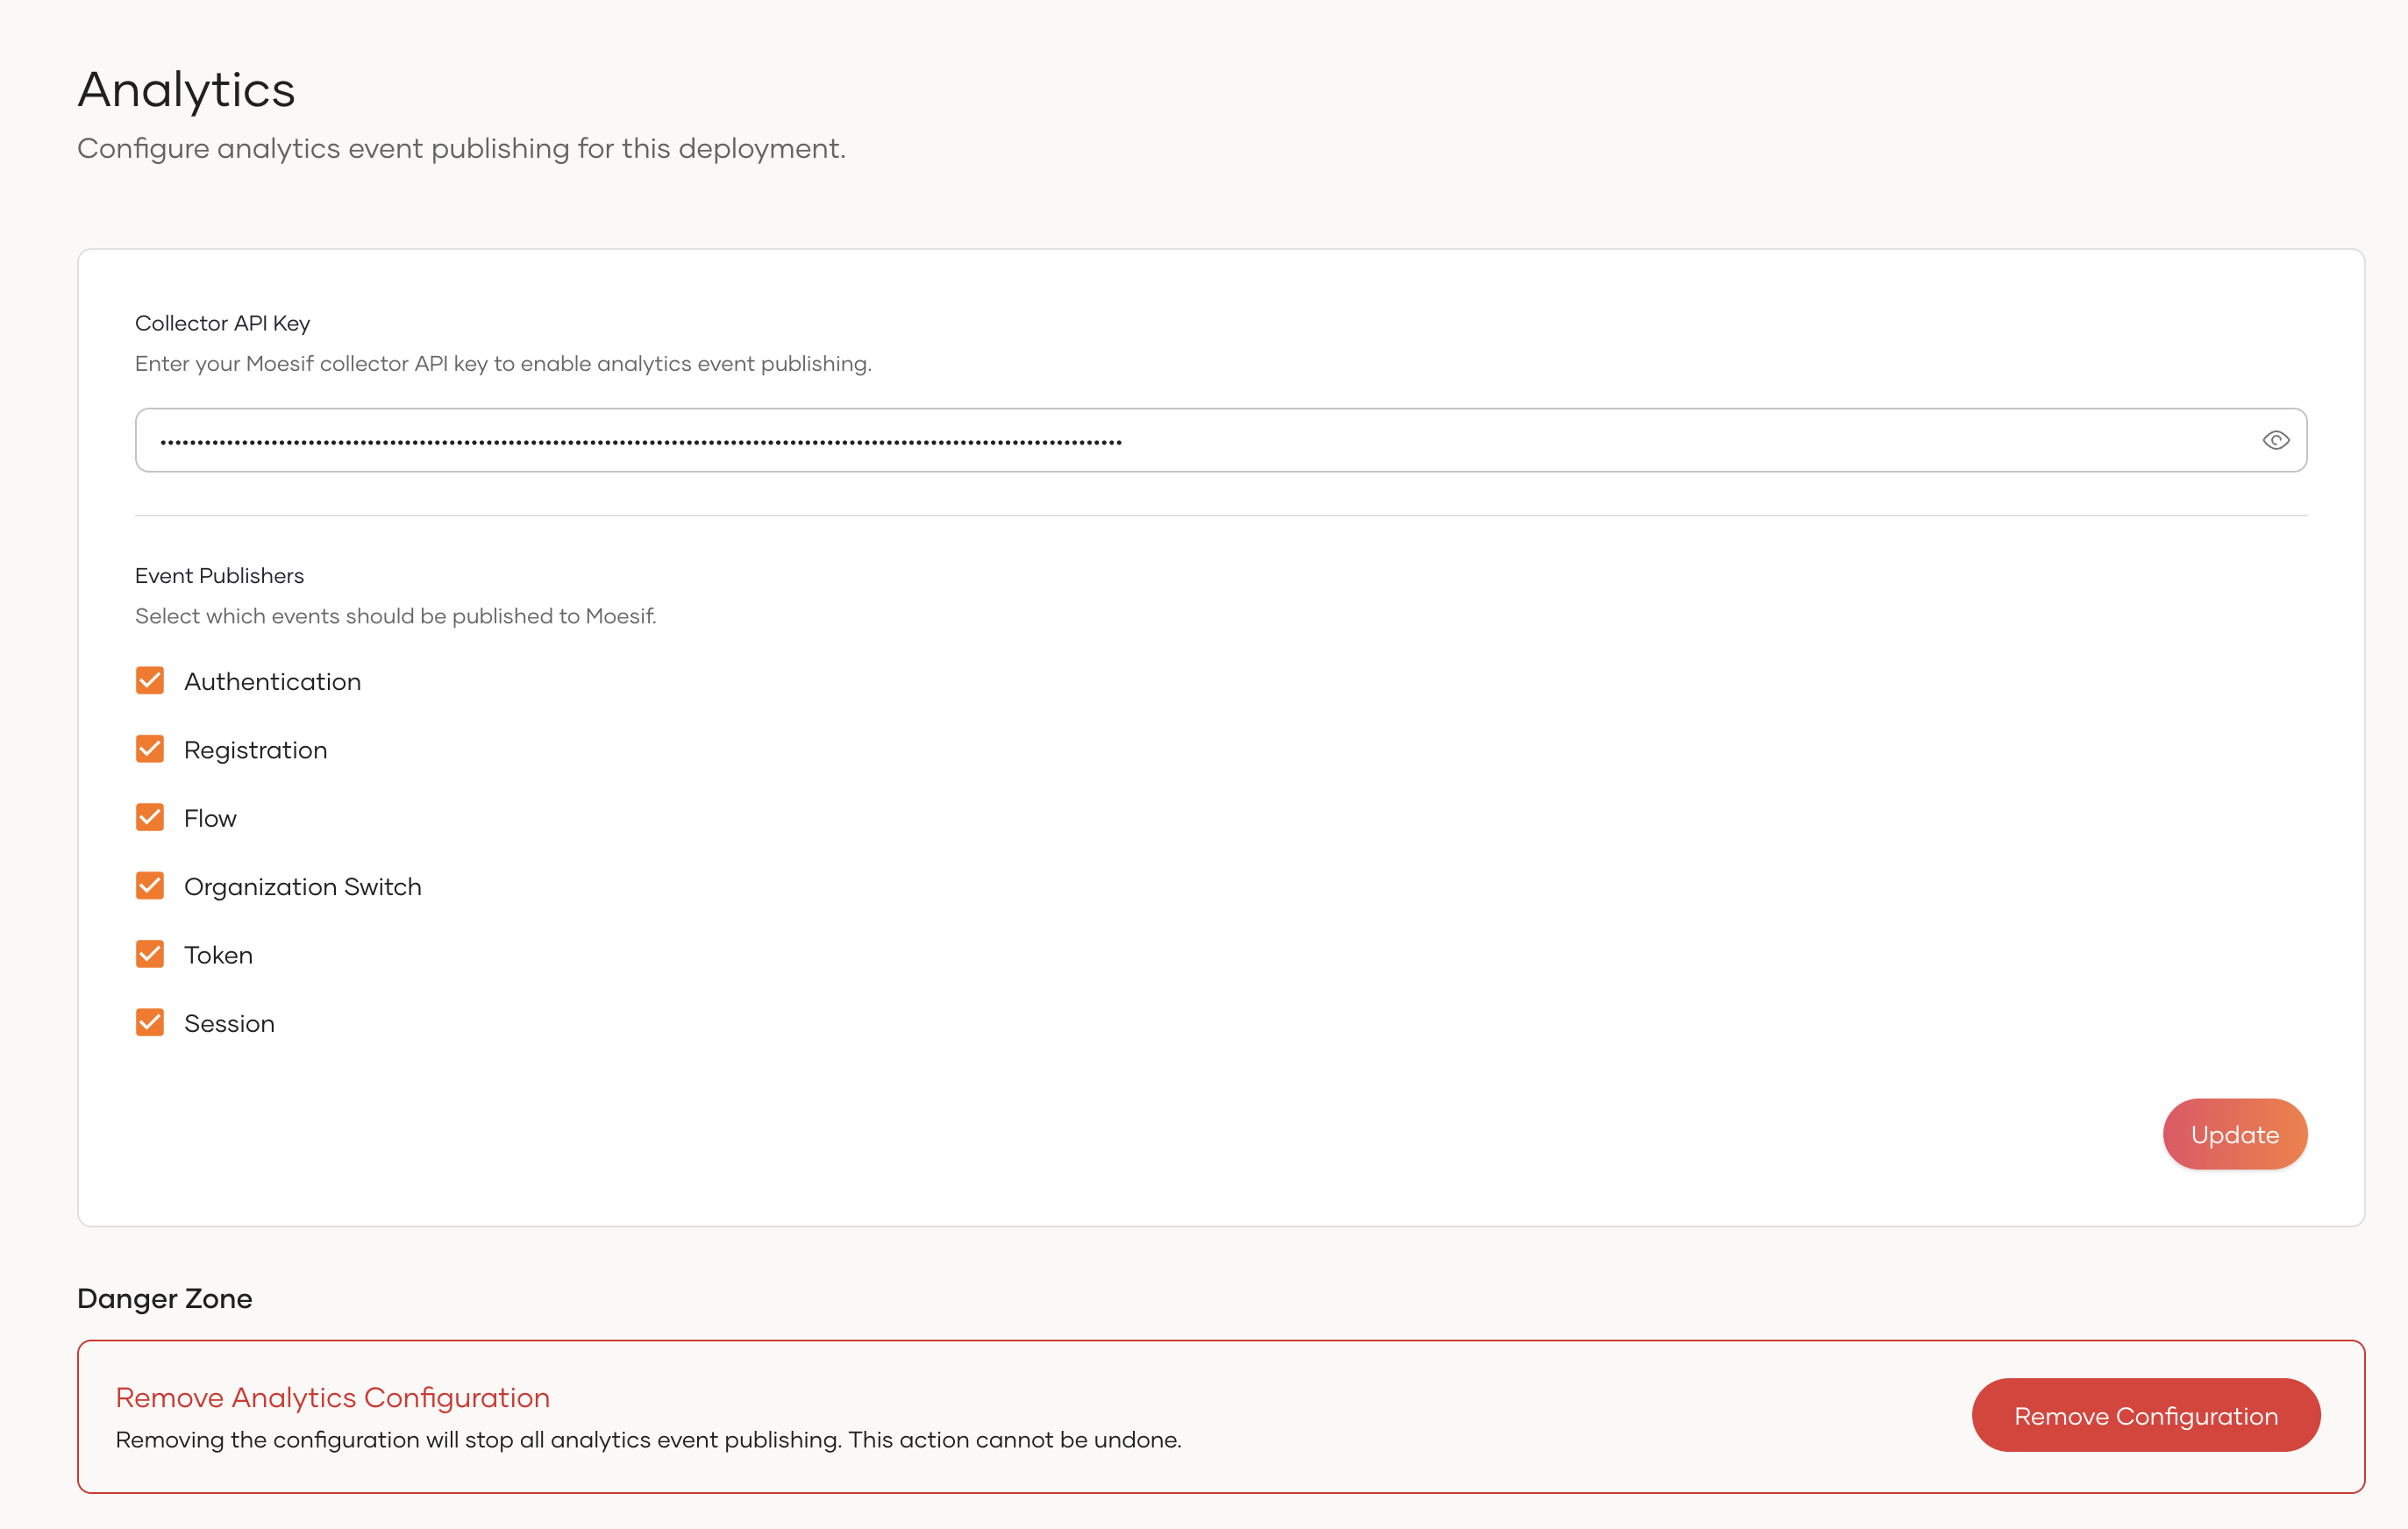
Go to Insights. The Analytics settings page opens.
-
Under Collector API Key, paste the Moesif collector Application Id you copied in Step 2.
-
Under Event Publishers, select the events this tenant should publish: Authentication, Registration, Flow, Organization Switch, Token, and Session.
-
Click Enable.
Note
This configuration is per tenant. Each tenant uses its own collector API key, so pointing two tenants at two different Moesif workspaces keeps their analytics fully separate.
All six publishers are always listed here. Selecting one takes effect only when the same publisher is enabled in deployment.toml (Step 4).
To change the key later, enter the new value and click Update. The stored key is never displayed back to you, so leave the field blank to keep the current key while changing which publishers are selected.
Step 6: Confirm data is arriving
Trigger some activity - log in to an application in that tenant, or create a test user - then open your Moesif workspace and check the Live Event Log. Events should appear within a few seconds.
If nothing shows up, work back through the chain:
- Is the publisher for that event category enabled in
deployment.toml(Step 4) and selected on the Insights page (Step 5)? - Was the server restarted after the
deployment.tomlchange? - Is the collector Application Id correct, and does it belong to the workspace you are looking at?
- Can the server reach
provider_url? Check for outbound network or proxy restrictions.
Step 7: Build your dashboards
With events flowing, create the charts you need in Moesif. Data published to Moesif lists every event and every attribute available to filter and group by, which is the reference you will want open while building.
A few dashboards worth starting with:
- Logins - successful versus failed logins over time, broken down by application and connection.
- Sign-ups - new accounts over time, split by
userOnboardedMethodto separate self sign-ups from invitations. - Tokens - token issuance by grant type and application, with machine-to-machine traffic isolated by
userType. - Funnels - flow events grouped by
currentNodeIdto find where users abandon sign-up or password recovery.
Stop publishing for a tenant
To disconnect a tenant from Moesif, go to Insights in that tenant's Console and, under Danger Zone, click Remove Configuration and confirm. This deletes the stored collector API key and turns off every publisher for the tenant. Data already sent to Moesif stays in your Moesif workspace and is yours to manage or delete there.
To turn the integration off for the whole server, set enabled = false under [analytics.moesif] in deployment.toml and restart.