Preference management consent
Preference management consent allows you to request user consent during registration for specific uses of their data, such as marketing communications, analytics, or third-party data sharing.
Overview
In WSO2 Identity Server, preferences are configured globally and apply across all applications in the organization.
Preference consent is collected during registration and ask-password flows by adding the Preference Management widget to the flow in the Flow Builder. Preferences are not shown during the login flow.
Preferences are always optional. Users can freely opt in or out. A preference can include one or more user attributes, allowing users to consent to each attribute individually within a single preference.
Add a preference
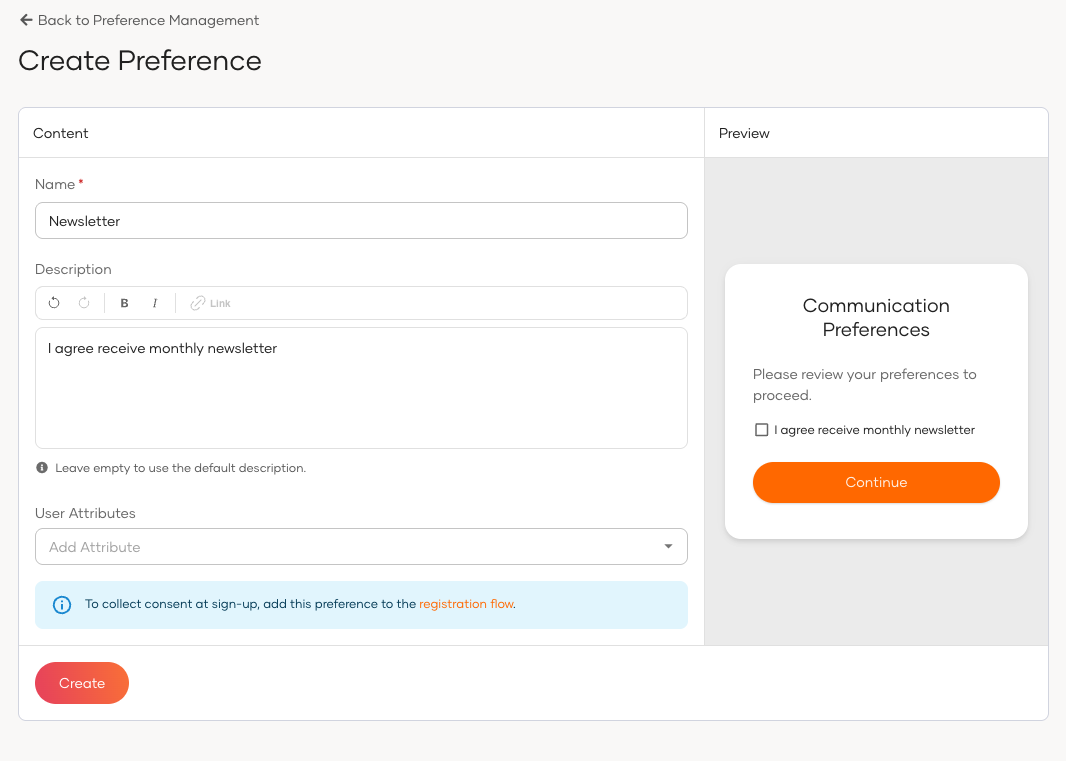
- On the WSO2 Identity Server Console, go to Login and Registration > Preference Management.
- Click New Preference.
-
Provide the following details:
Field Description Name A unique name for the preference (e.g., Newsletter Subscription). Description (Optional) Text displayed to users on the consent screen. User Attributes (Optional) One or more user attributes associated with this preference. Users can opt in or out of each attribute individually. -
Click Create.
Note
Preferences are automatically inherited by sub-organizations.
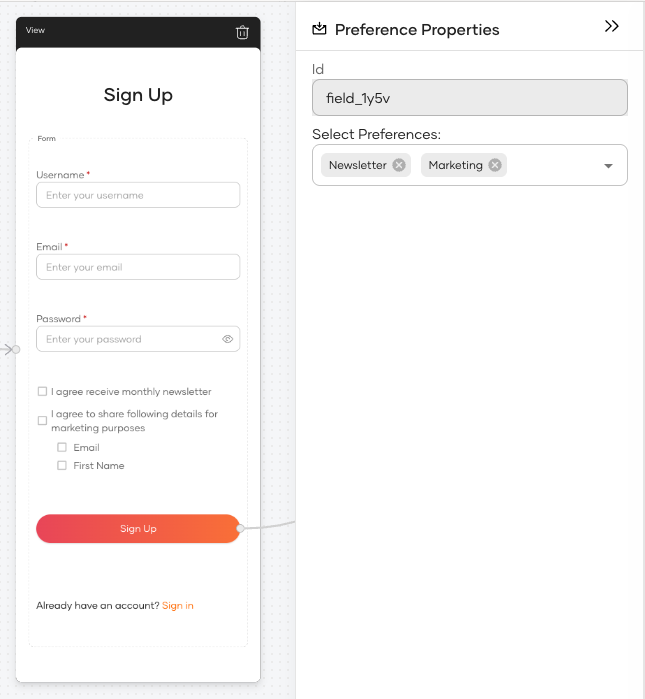
Add the preference management widget to a flow
To collect preference consent during registration or ask-password, add the Preference Management widget in the Flow Builder. It can be added in two ways:
- As a component – drag it from the Components panel into an existing view in the flow.
-
As a step – add it as a new step in the flow.
-
On the WSO2 Identity Server Console, navigate to your application and go to Login Flow.
- Select the Registration or Ask Password flow.
-
Add the Preference Management widget to the flow:
-
To add as a component, drag the widget from the Components panel into an existing view:
-
To add as a step, click Add Step in the flow and select the Preference Management widget from the list.
-
-
In the widget's properties panel, configure the following:
Property Description Select Preferences Choose which preferences to display in this widget. You can select one or more preferences from the list. Description The header text shown to users above the preference options.
Note
For policy consent, use the Policy Consent widget instead. Both widgets can be added independently to the same flow.
Delete a preference
- On the WSO2 Identity Server Console, go to Login and Registration > Preference Management.
- Click on the preference you want to delete.
- Scroll to the Danger Zone and click Delete Preference.
- Confirm the deletion.
Note
A preference cannot be deleted if any user has already given consent to it.
What the user sees
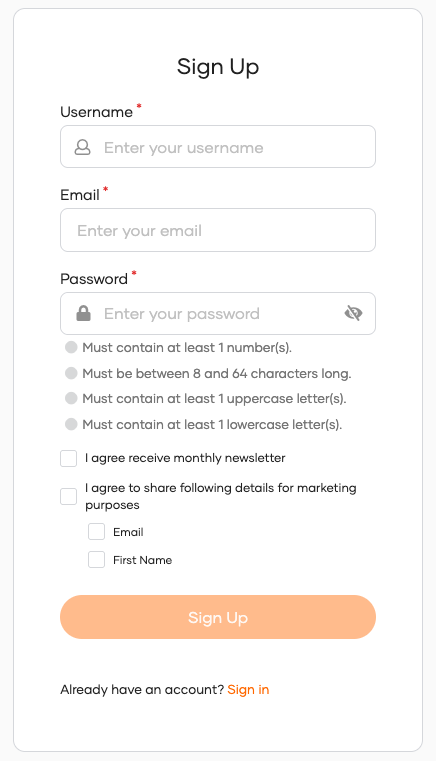
During registration or ask-password, users see a screen listing all configured preferences. Each preference has a main opt-in toggle. If the preference includes user attributes, individual checkboxes are shown for each, allowing granular selection.
What's next
- Manage consents – Users can view and revoke their preference consents from MyAccount.
- Policy consent – Capture acceptance of legal agreements such as privacy policies and terms of service.