Get started with flows
A flow defines the step-by-step journey a user takes during a specific interaction with your application, like signing up or resetting a password. This guide introduces the Flow Builder. It is a visual canvas where you can design and customize these journeys to meet your security and user experience goals without writing complex code.
The Flow Builder allows full customization of the following user journeys. Click on a flow to view a sample scenario built using the flow builder.
Create and enable a flow
The following sections outline the process for creating and publishing a custom flow.
Step 1: Access the flow builder
To access the flow builder:
-
On the WSO2 Identity Server Console, go to Flows.
-
Click on the corresponding flow you want to build. This opens the Flow Builder canvas for that specific flow.
Step 2: Build the flow
The Flow builder provides all the building blocks you need to create user journeys. To start building, you can choose one of the following methods and use flow elements to customize it.
-
Use a starter template
Select from a list of pre-built templates for common use cases to avoid starting from scratch. Click the
+icon next to a template to add it to the canvas.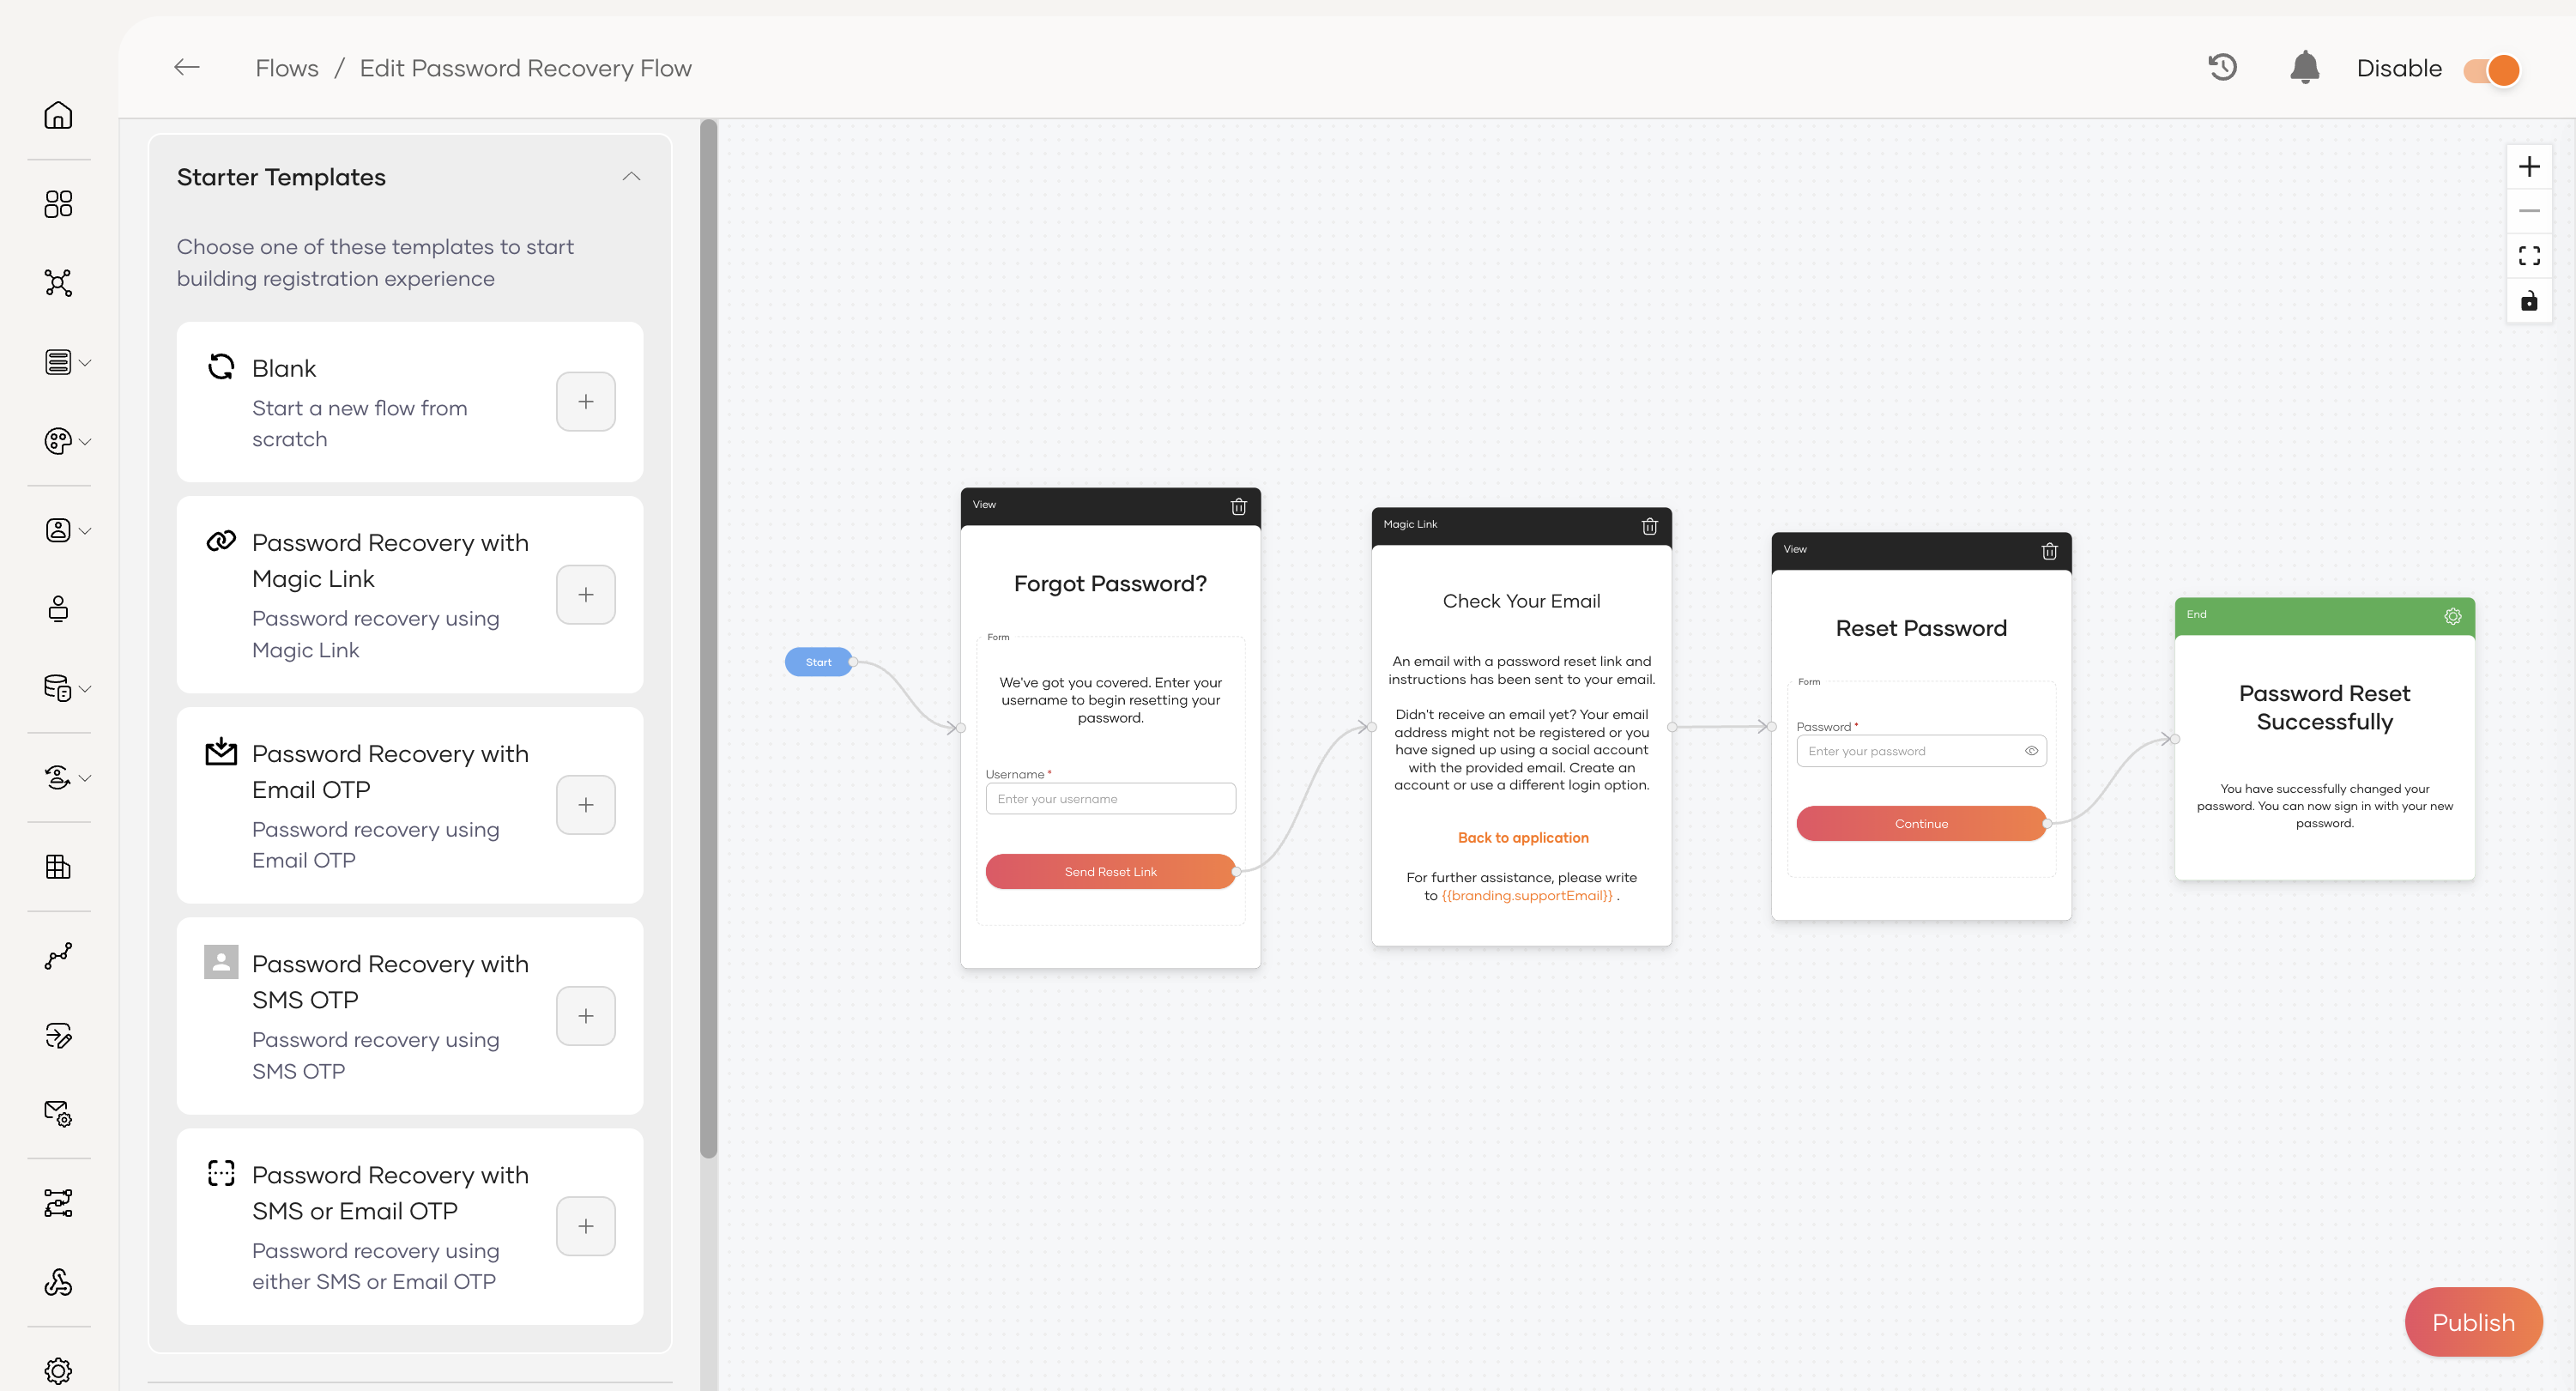
-
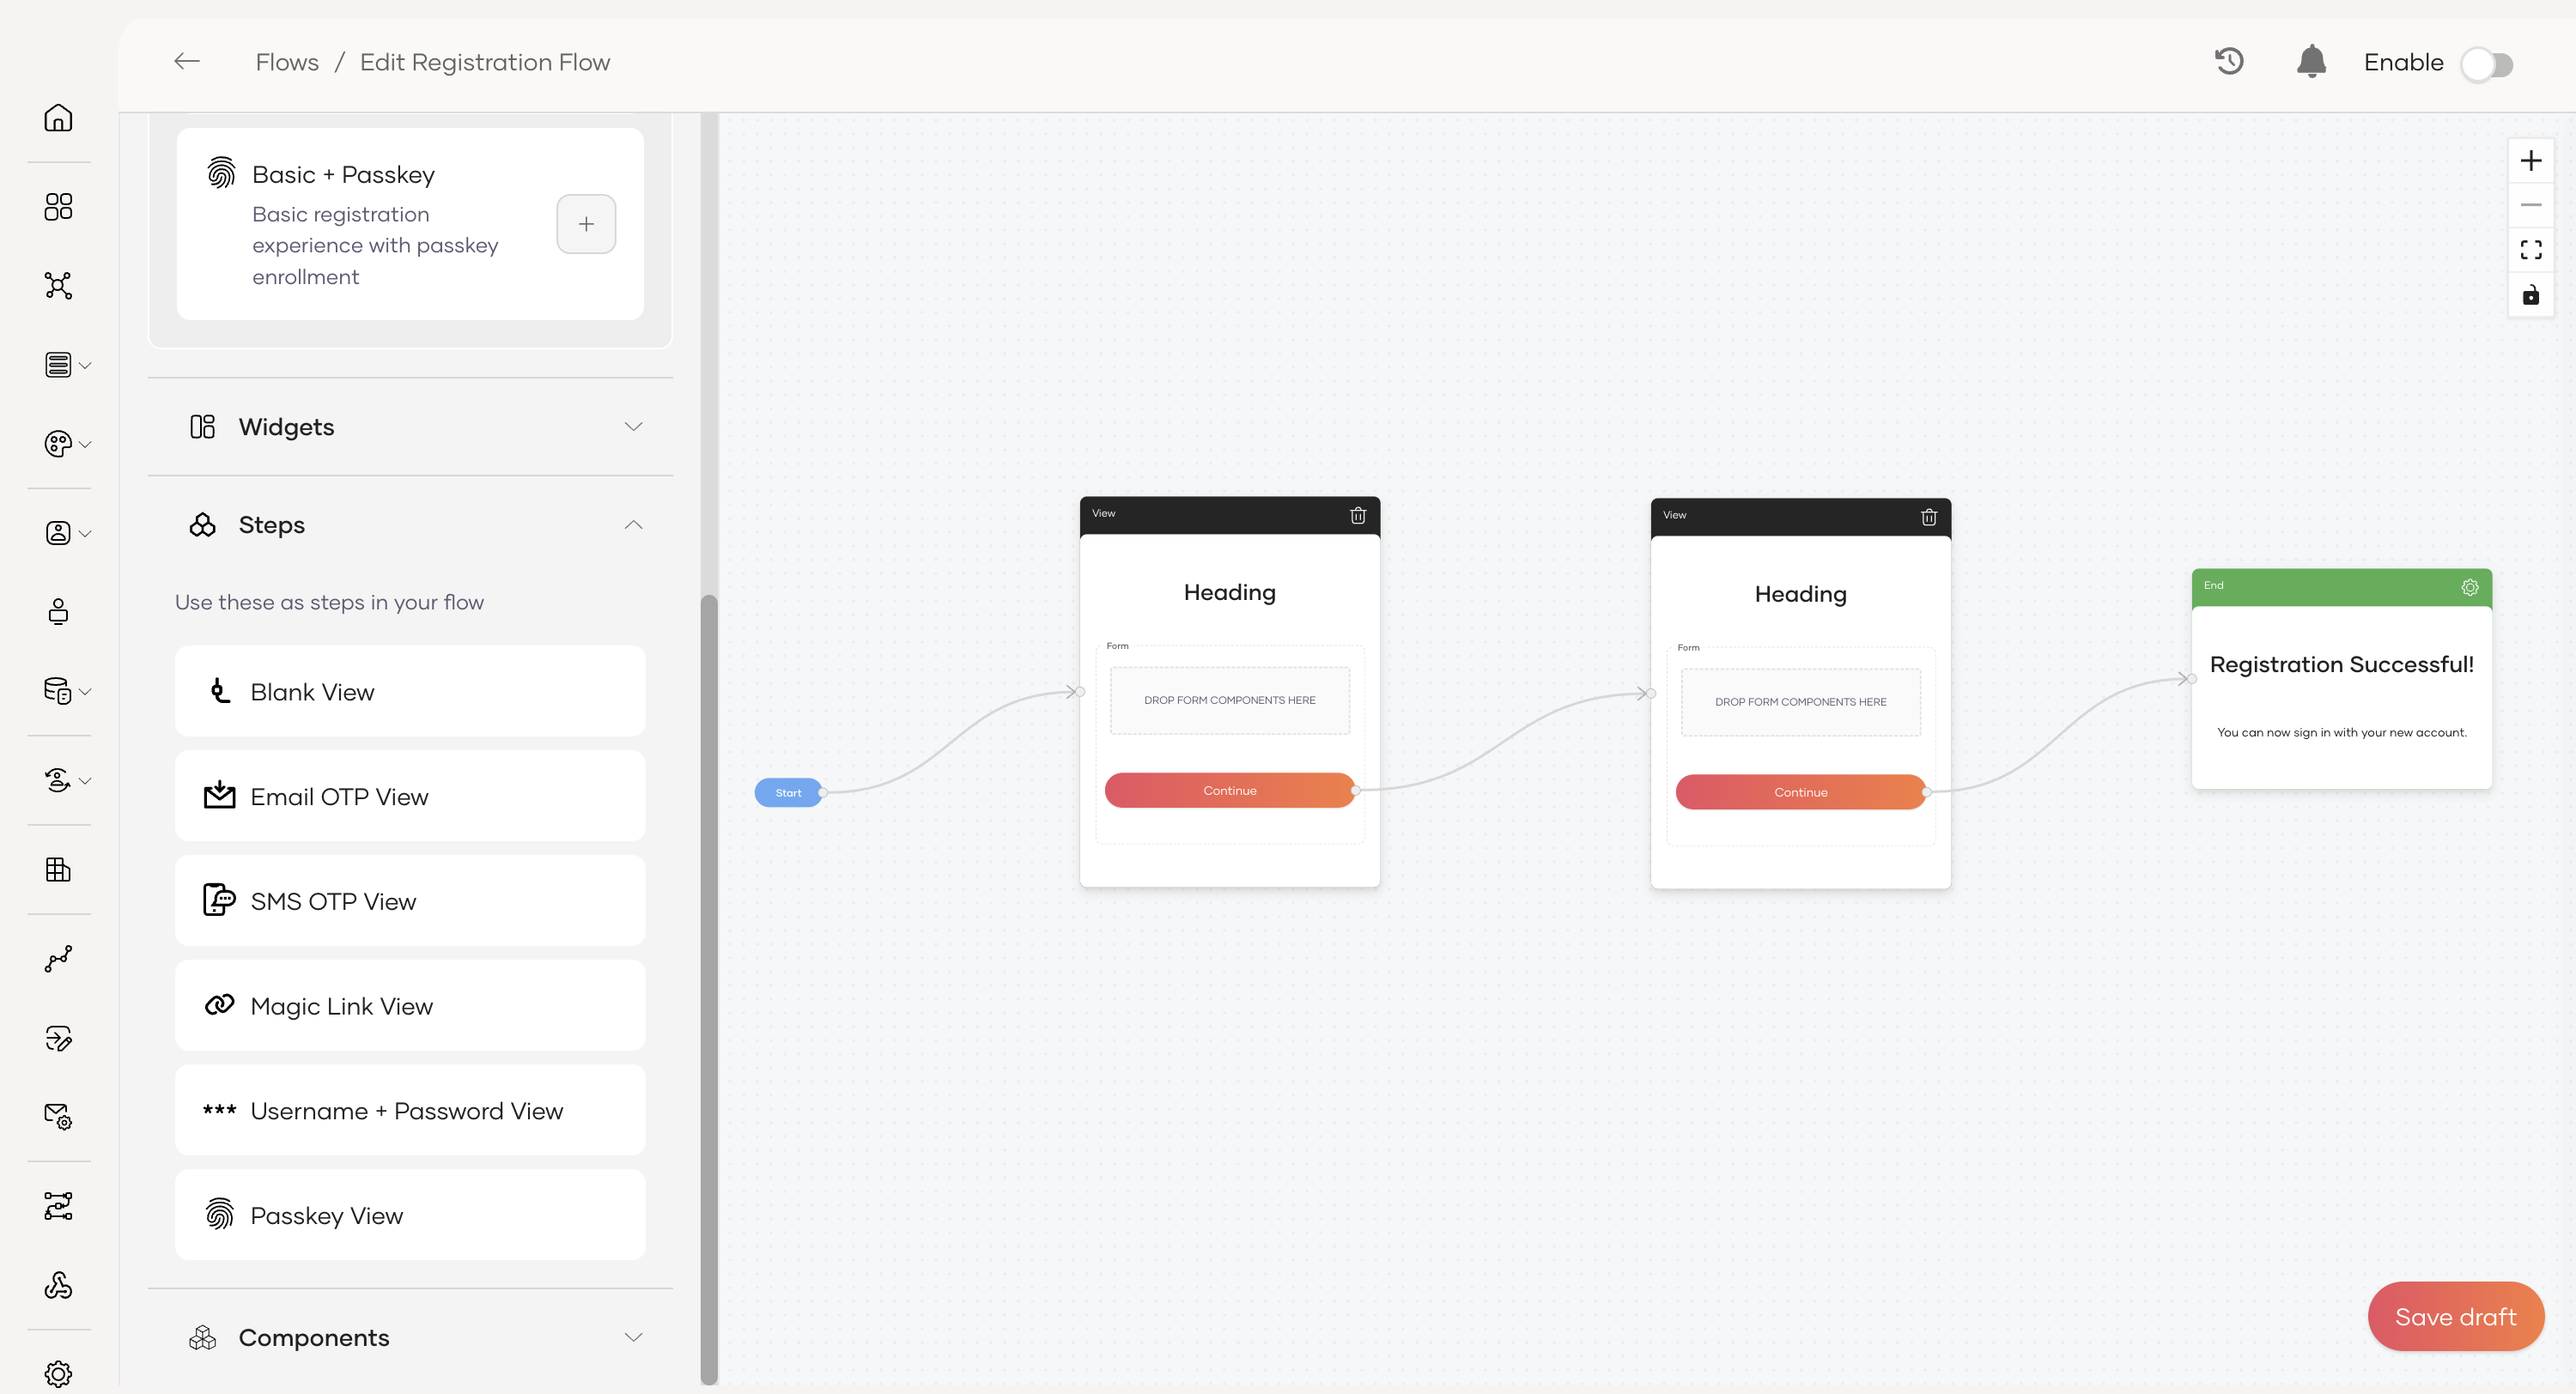
Build from scratch
For complete control, start with a blank canvas and build the flow by dragging and dropping the required flow elements.
Step 3: Enable the flow
You can enable a flow using the toggle on the top right corner of the Flow Builder. Your flows behave as follows based on their state:
-
If disabled,
-
You can build your flow and save it as a draft. The flow won't be active for users until you enable it.
-
This is the default state for any new flow.
-
If enabled,
-
The flow becomes immediately available for users.
- You can continue to make changes and improvements to the flow even after enabling it. Until you publish those changes, users will continue to experience the last published version.
- You can disable the flow at any time to remove it from user access temporarily.
Flow elements
The Flow Builder provides a library of reusable, no-code elements to create user journeys. The following sections describe the key flow elements.
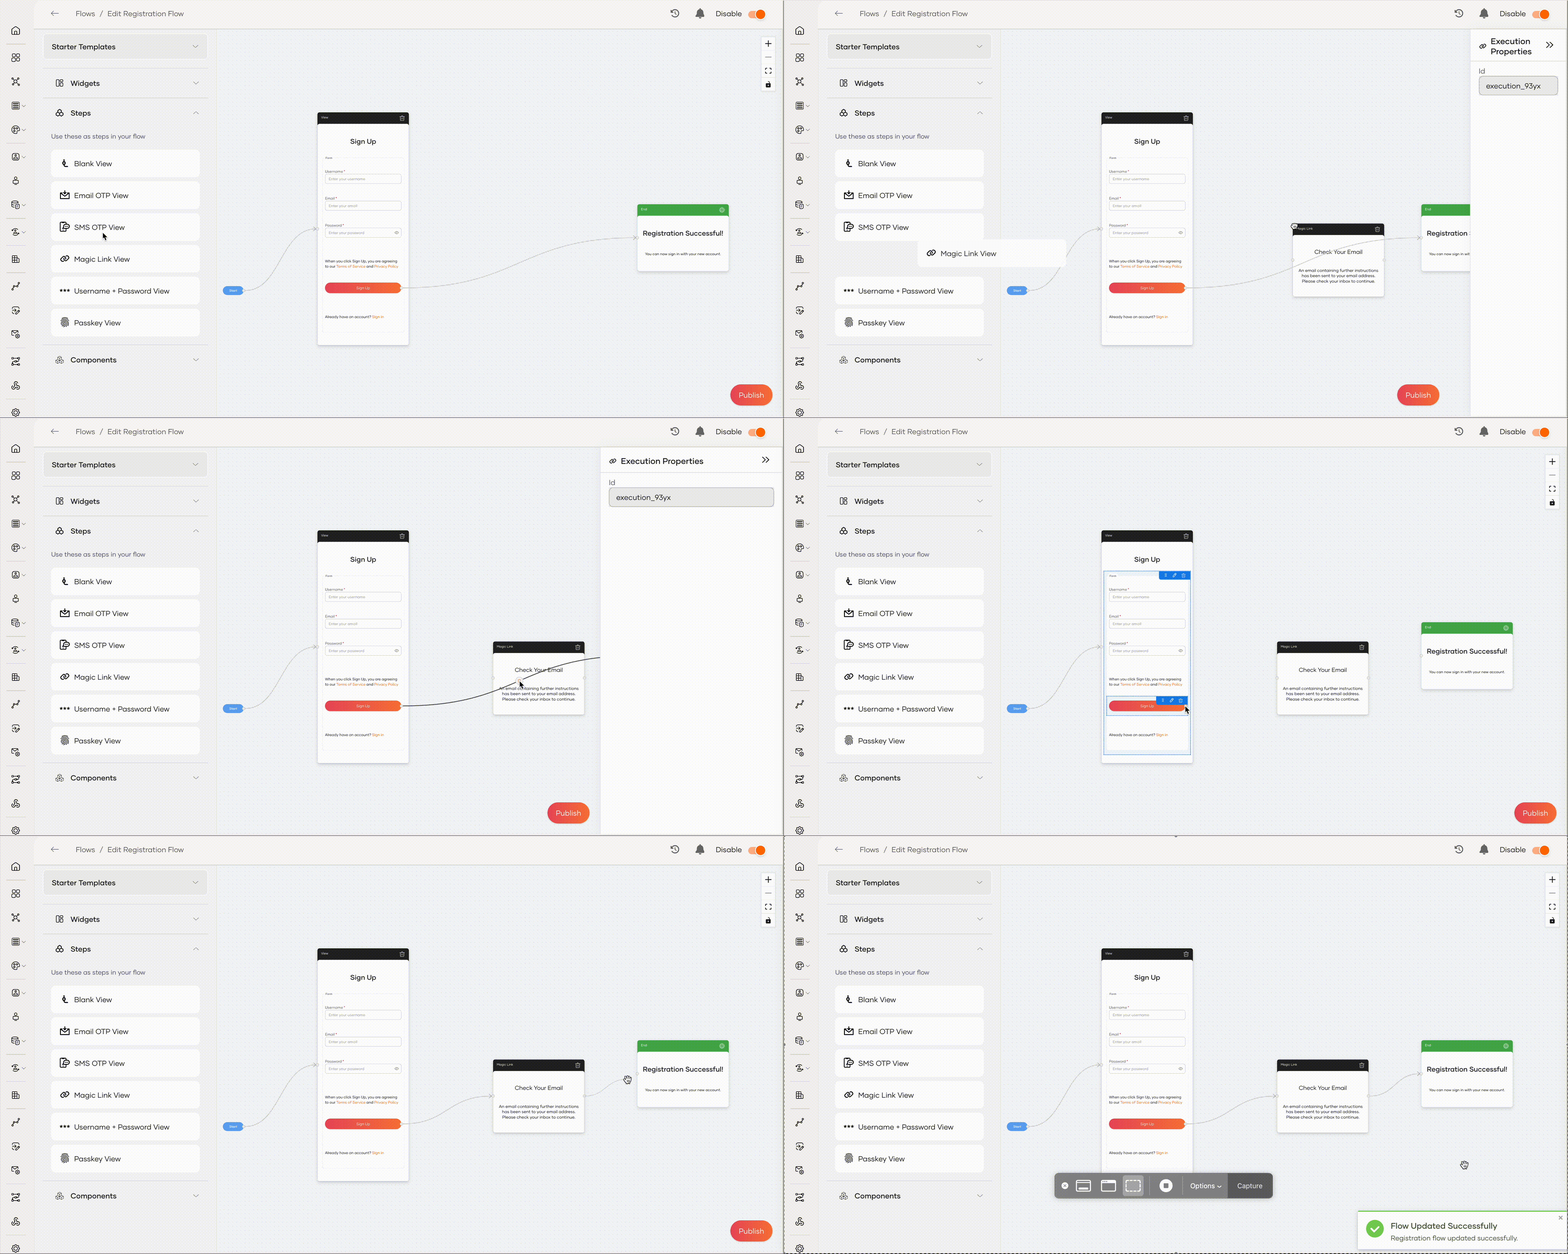
Steps
Steps function as the core building block and represent a distinct part of the flow. A flow can contain one or more steps.
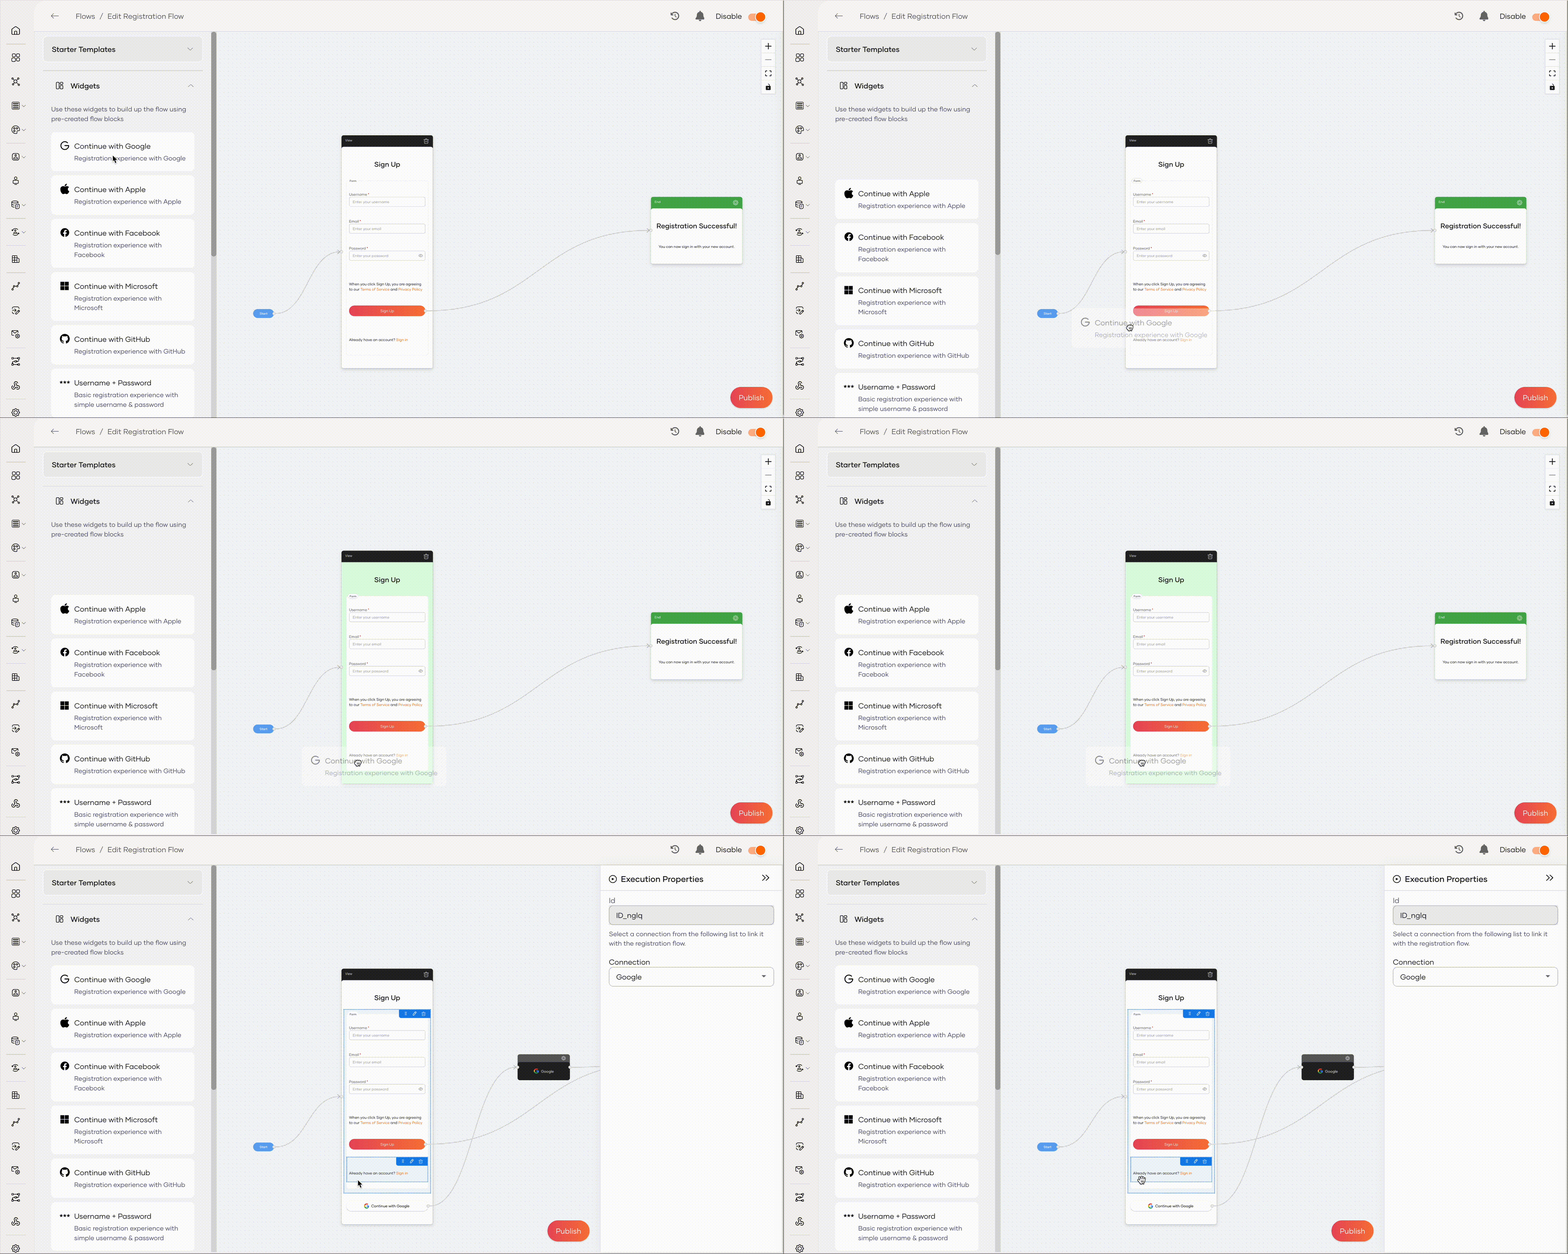
Widgets
Pre-built identity verification components that you can drag and drop into a step.
Components
Components are the individual UI elements placed inside a step, such as input fields, buttons, and paragraphs.
Note
Field components such as Text Input and Email Input etc. have the following constraints:
-
Only a Form component can contain them.
-
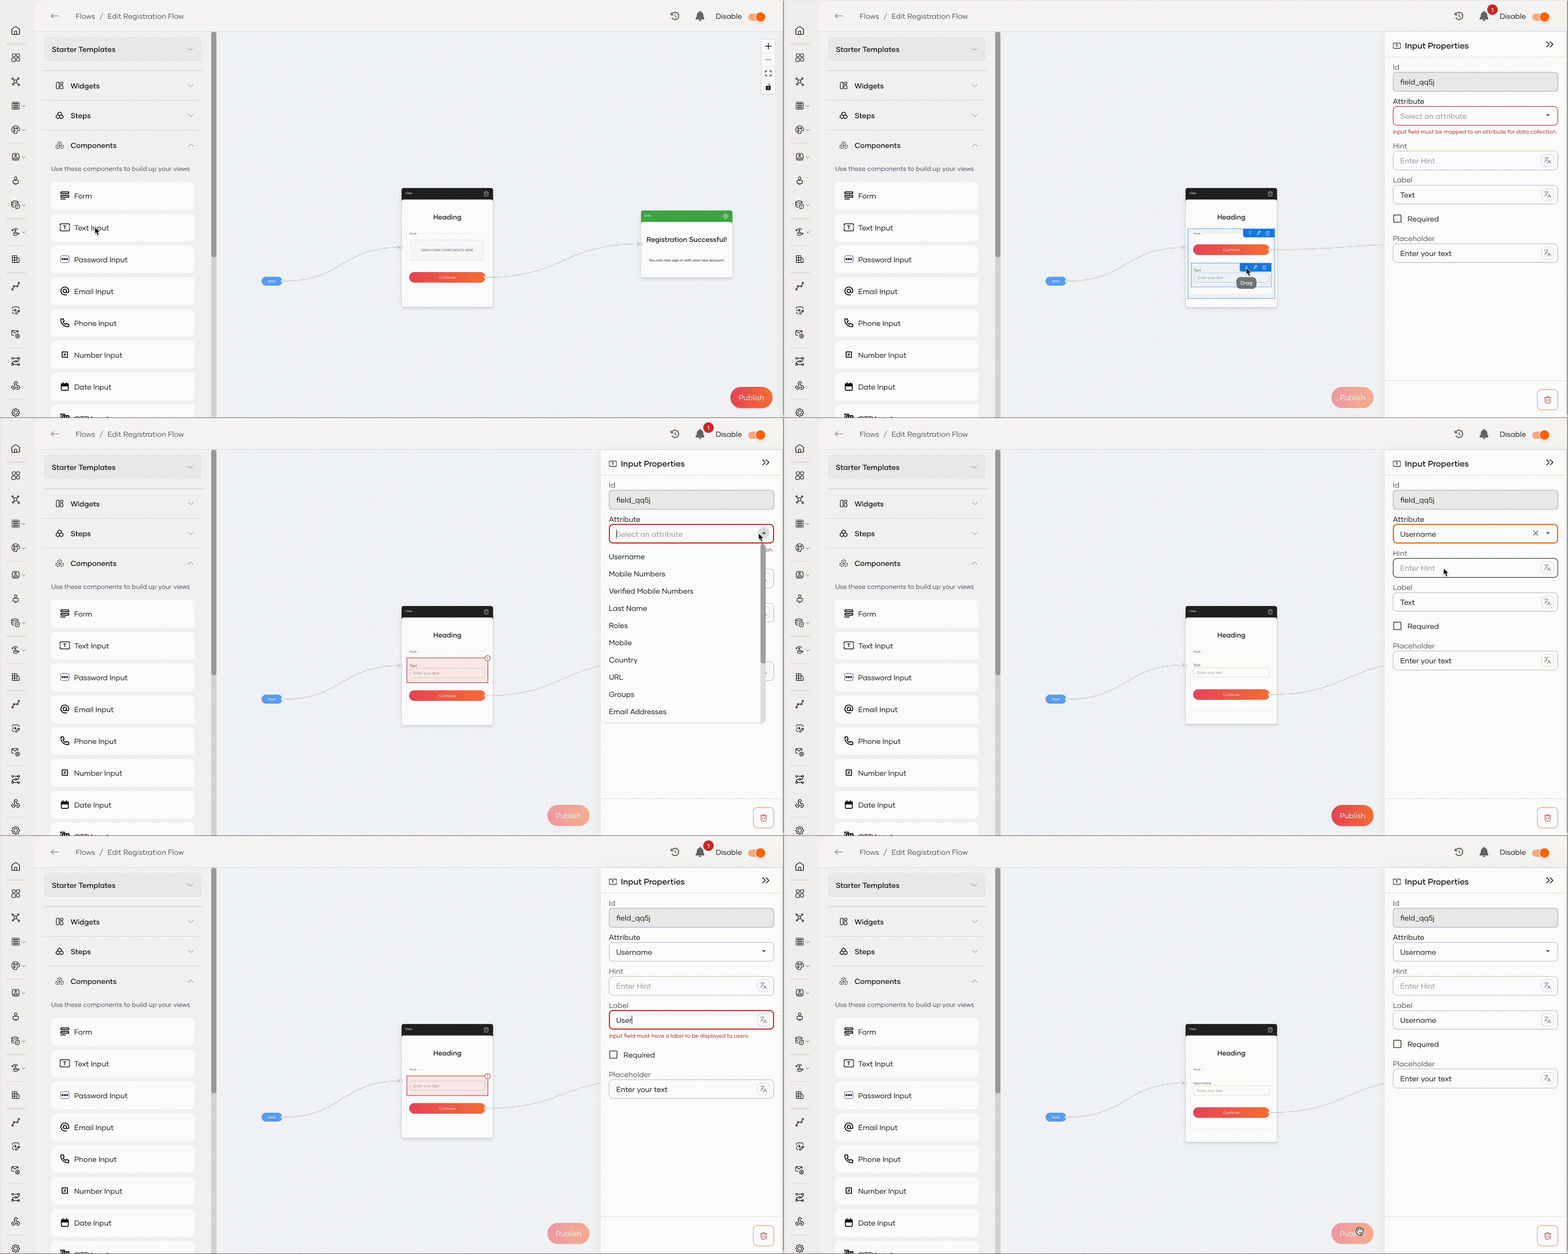
Must map to a user attribute. To do so,
-
Click the pencil icon on the element action panel.
-
From the Attribute dropdown, select the relevant attribute. Only attributes displayed in user profiles are available for mapping. Learn how to display attributes in user profiles.
-
Customize flow text
Every editable label, hint, heading, and button on a flow screen can be swapped for a translation key, so the same flow can render in different languages and use organization-specific wording.
Prerequisites
Branding must be enabled for the organization before flow translations take effect. In the WSO2 Identity Server Console, go to Branding and click Save & Publish once to activate the default configuration.
For related configuration, see Configure UI branding and Localization support.
Open the Translations panel
On any flow screen (for example, Sign Up, Email OTP, or Password Reset), select the element you want to change and click the translate icon next to the attribute in the properties panel on the right (for example, the Hint attribute of an Input).
Assign an existing translation key
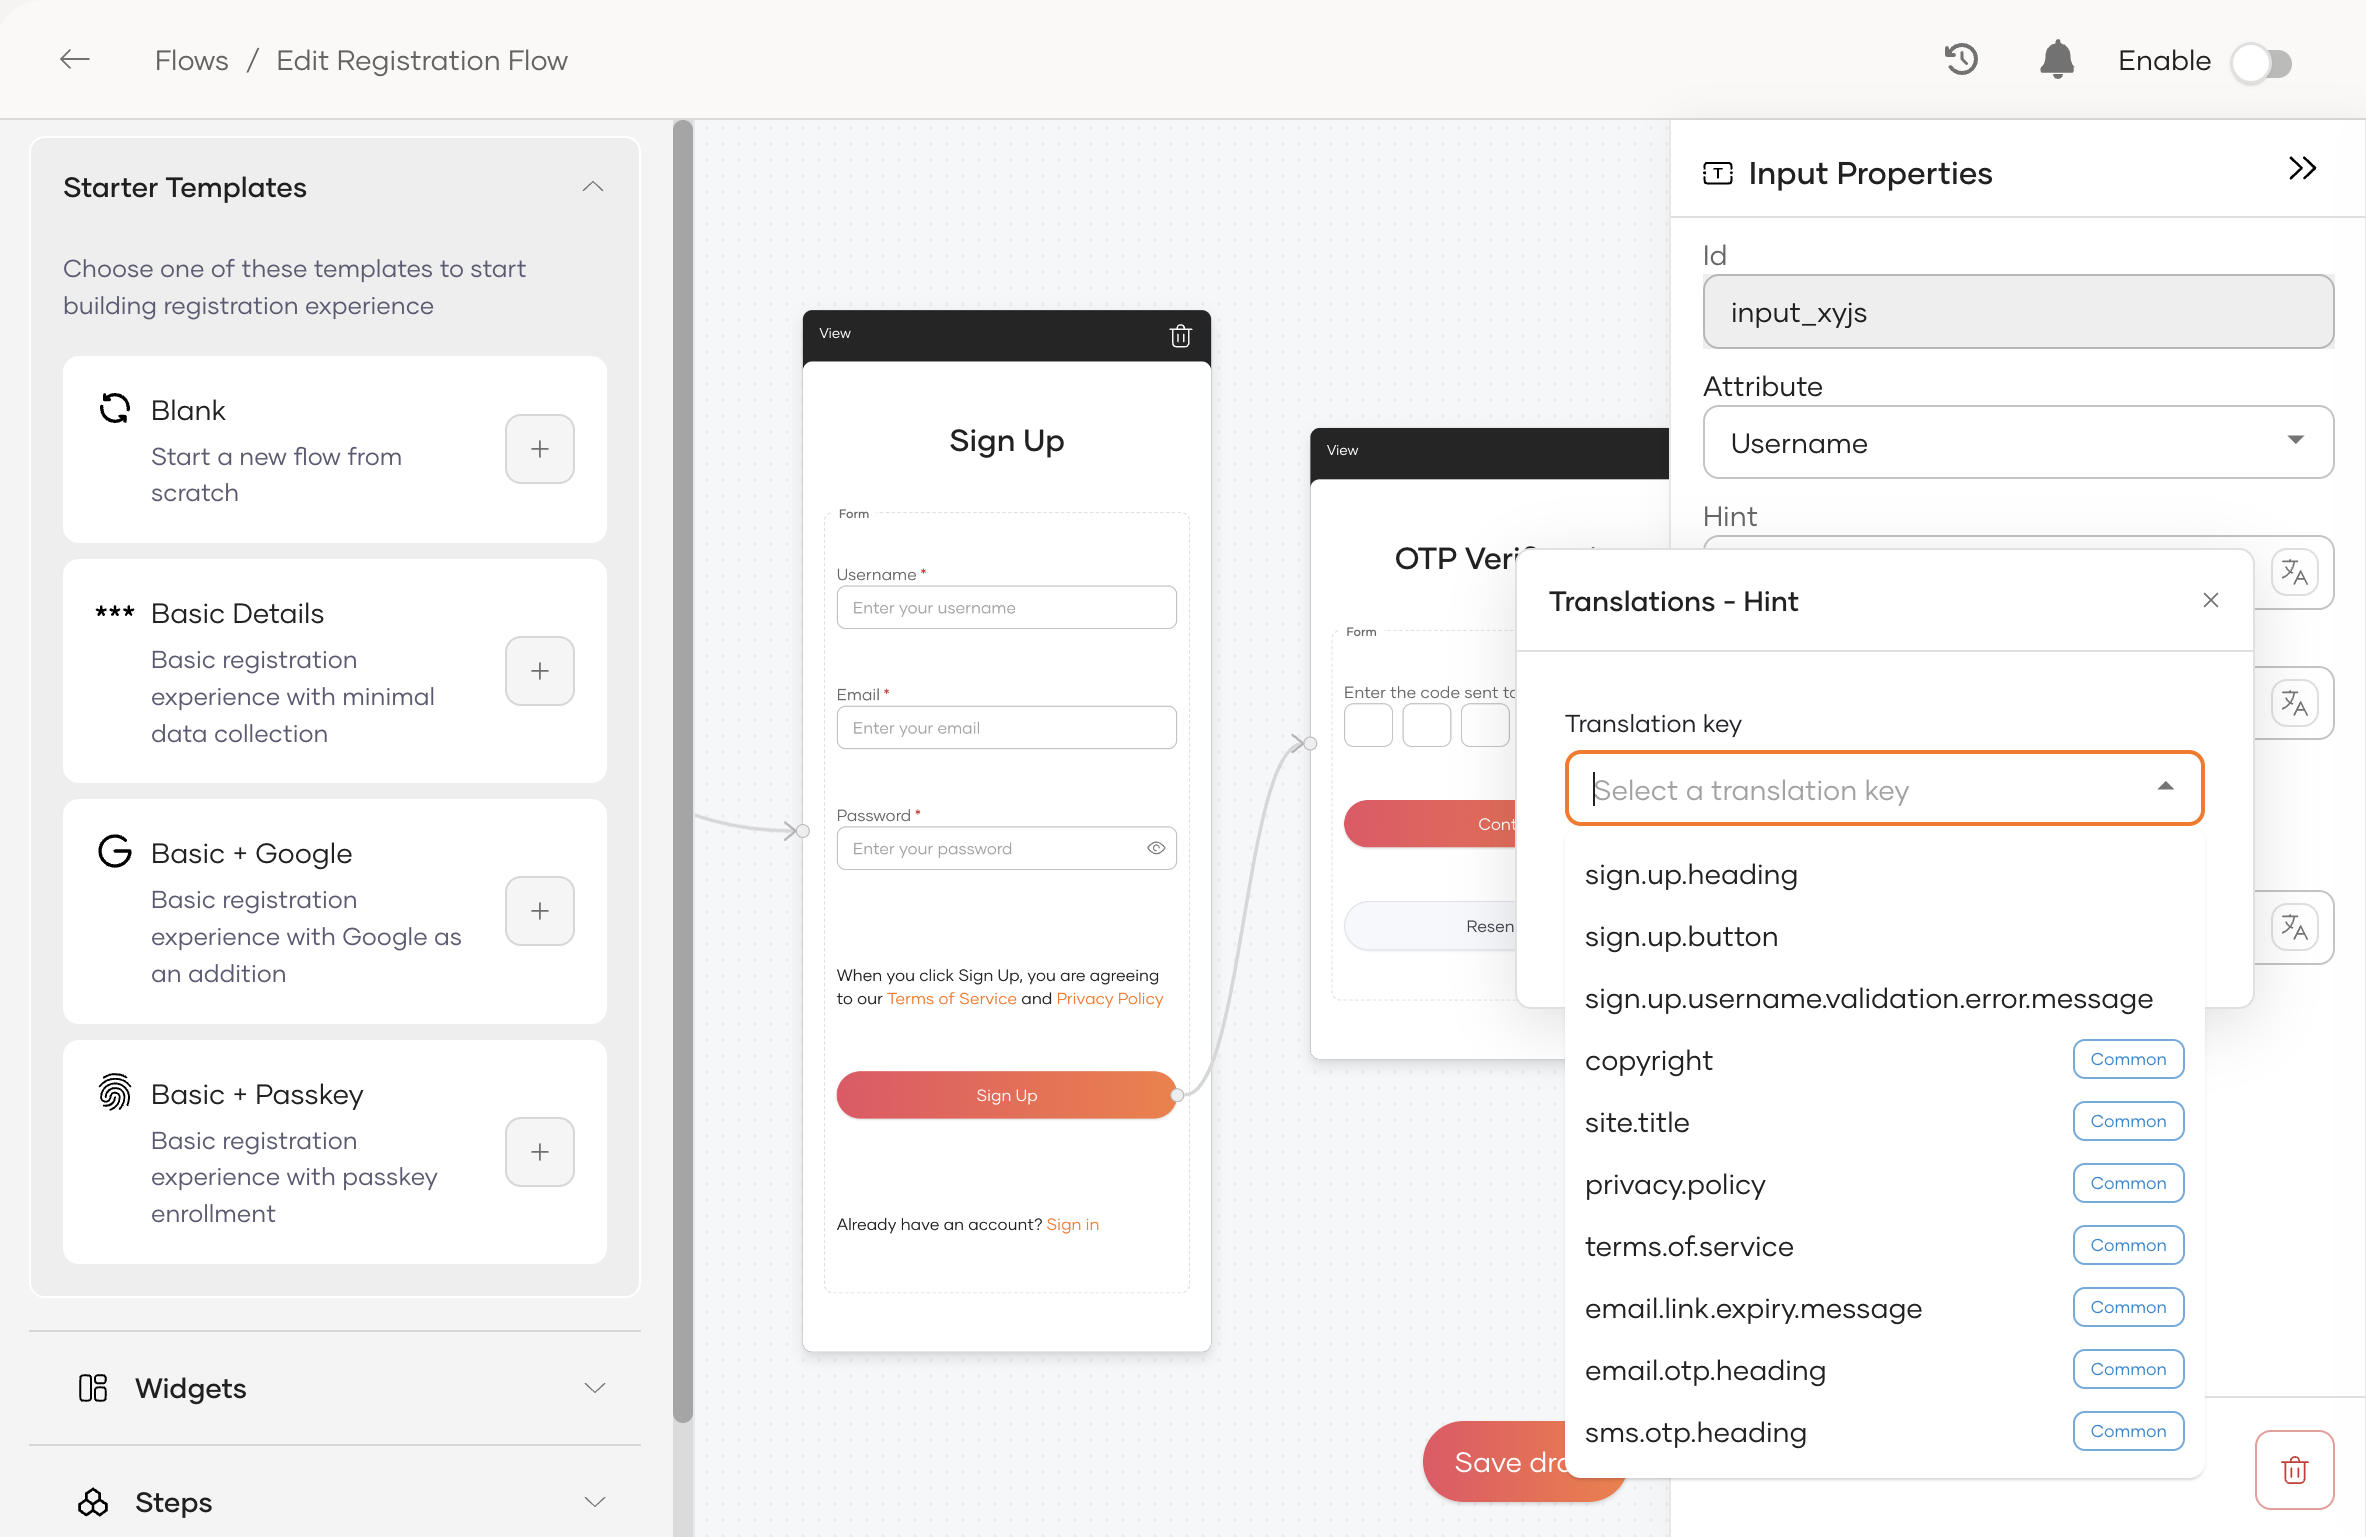
- Open the Translations panel on the target attribute.
- From the Translation key dropdown, select a key. Keys are grouped into two categories:
- Flow-specific keys – Prefixed by the current flow (for example,
sign.up.heading,sign.up.button,sign.up.username.validation.error.message). - Common keys – Shared across every flow, including
site.title,copyright,privacy.policy,terms.of.service,email.link.expiry.message,email.otp.heading, andsms.otp.heading.
- Flow-specific keys – Prefixed by the current flow (for example,
Create a new translation key
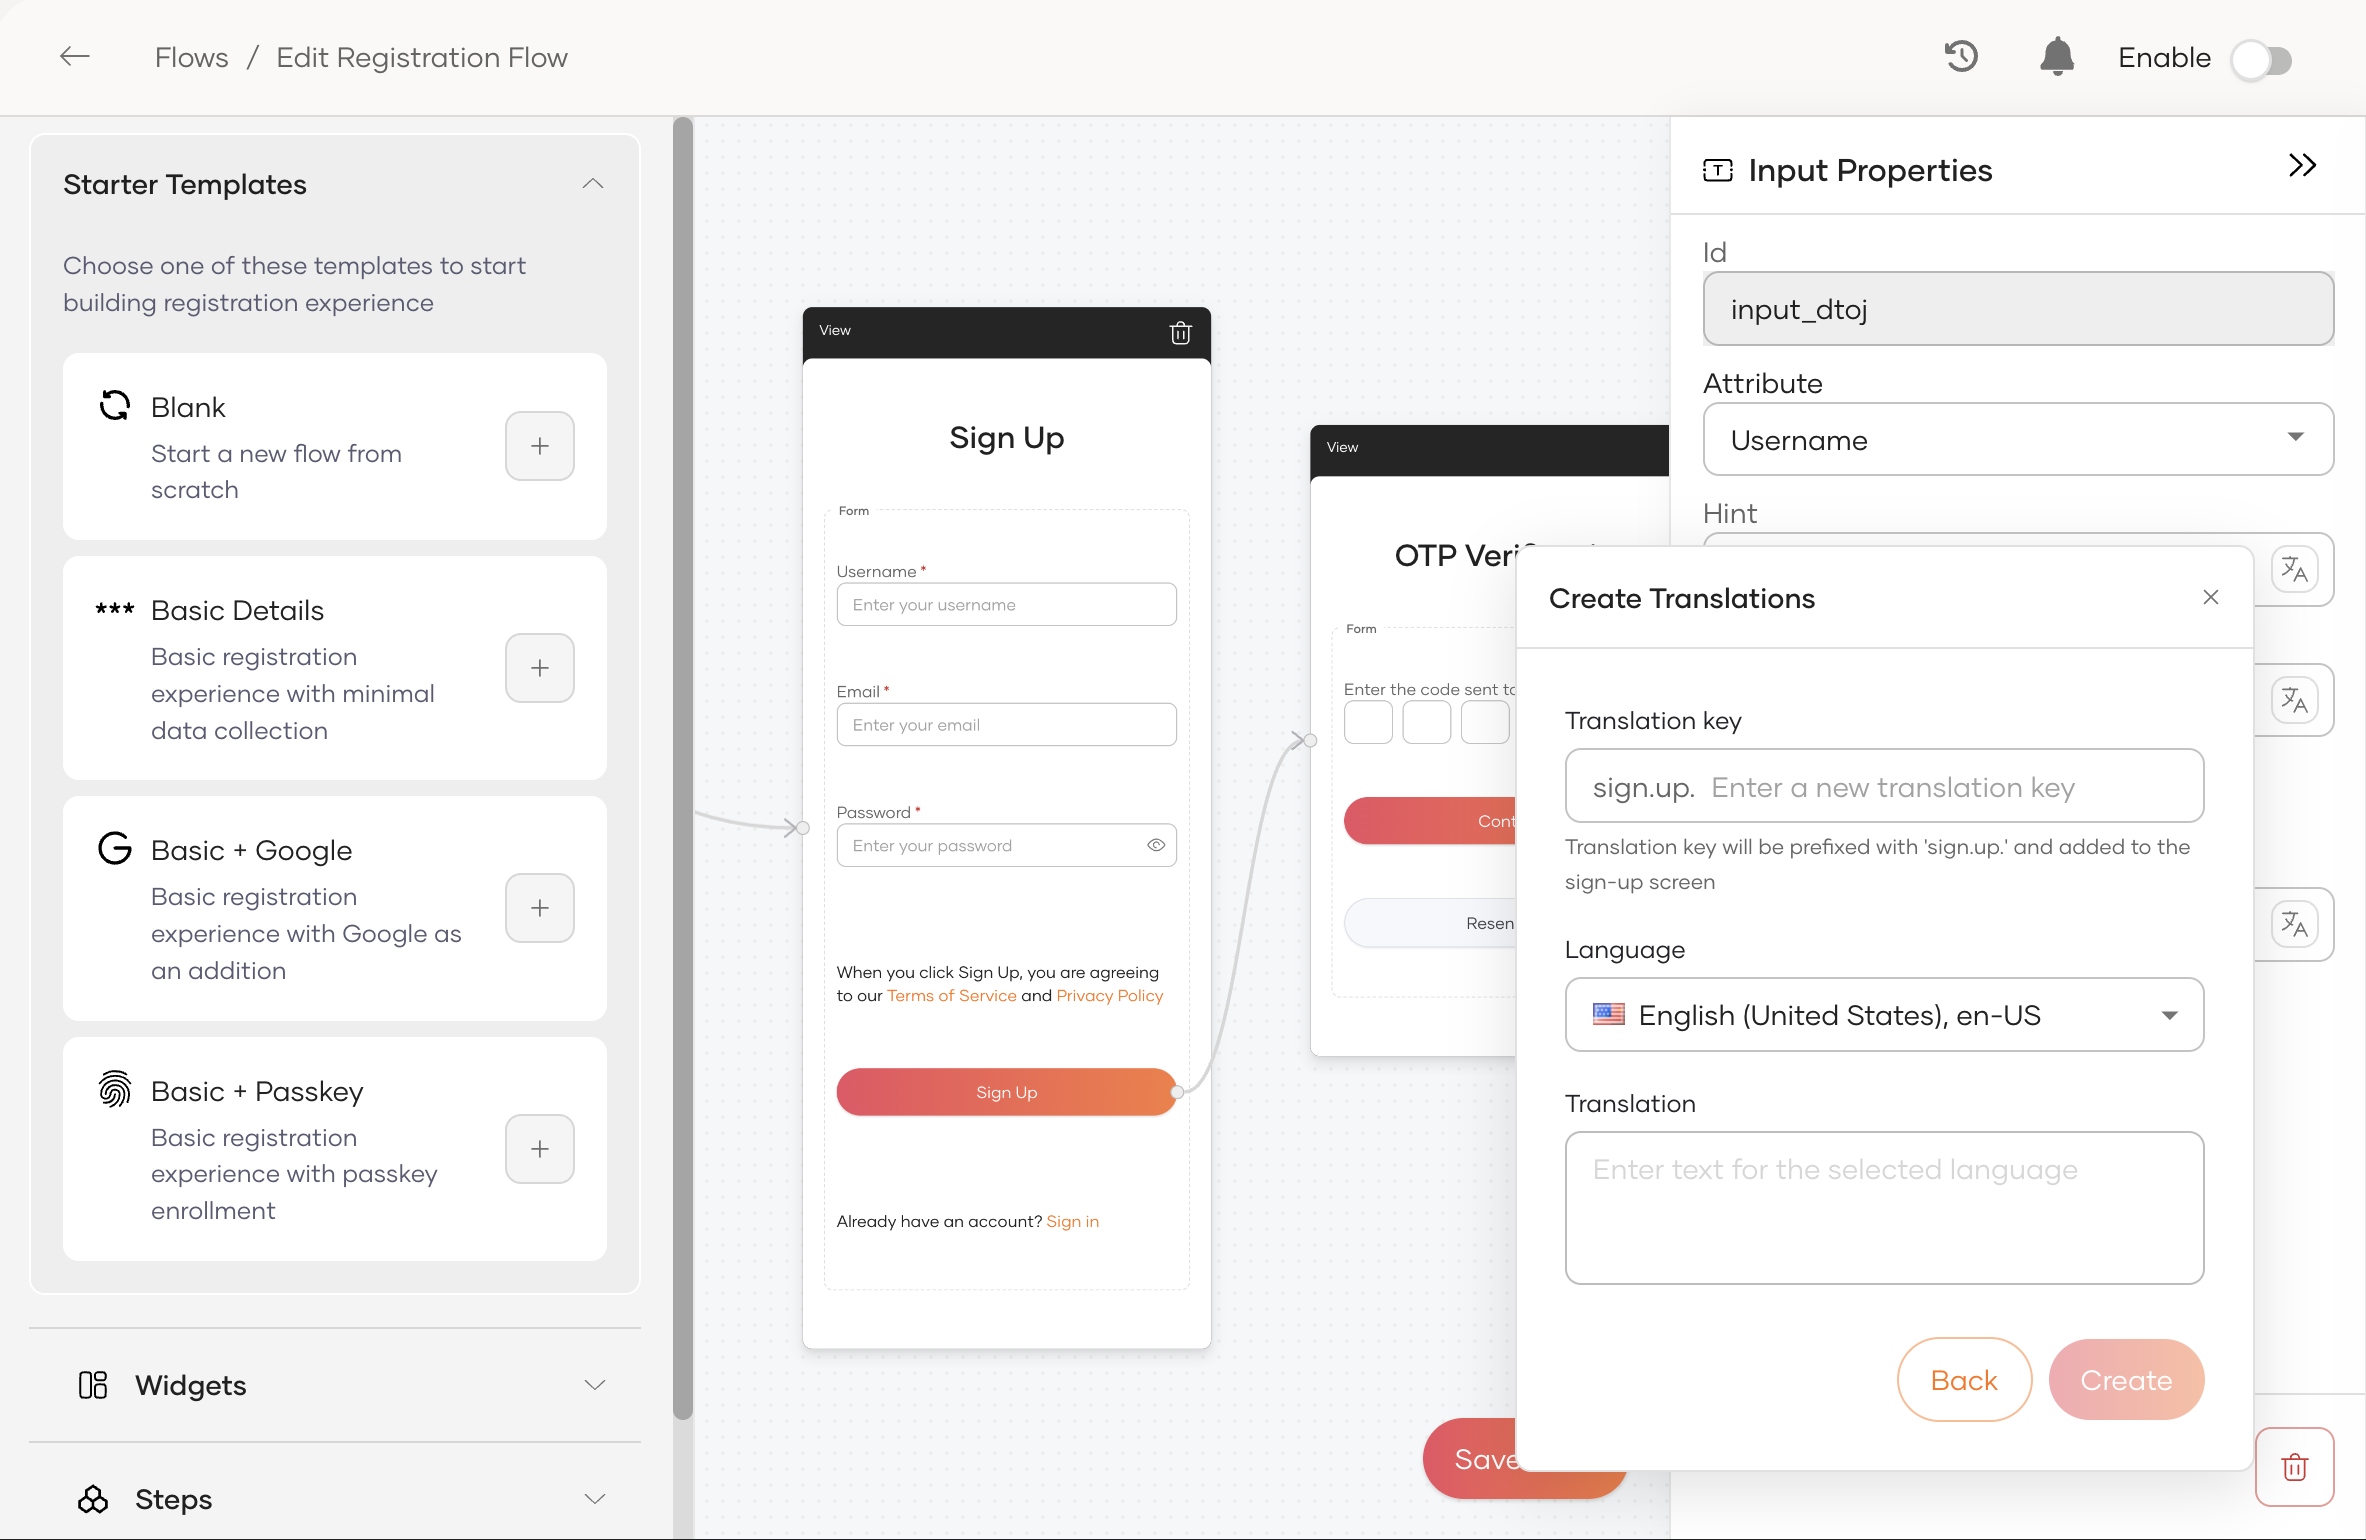
- In the Translations panel, select + New.
- Enter the key suffix. The key is auto-prefixed by the current flow (for example,
sign.up.for the Sign Up flow), so enteringusername.hintproducessign.up.username.hint. - Select the Language.
- Enter the Translation text and click Create.
Edit an assigned key
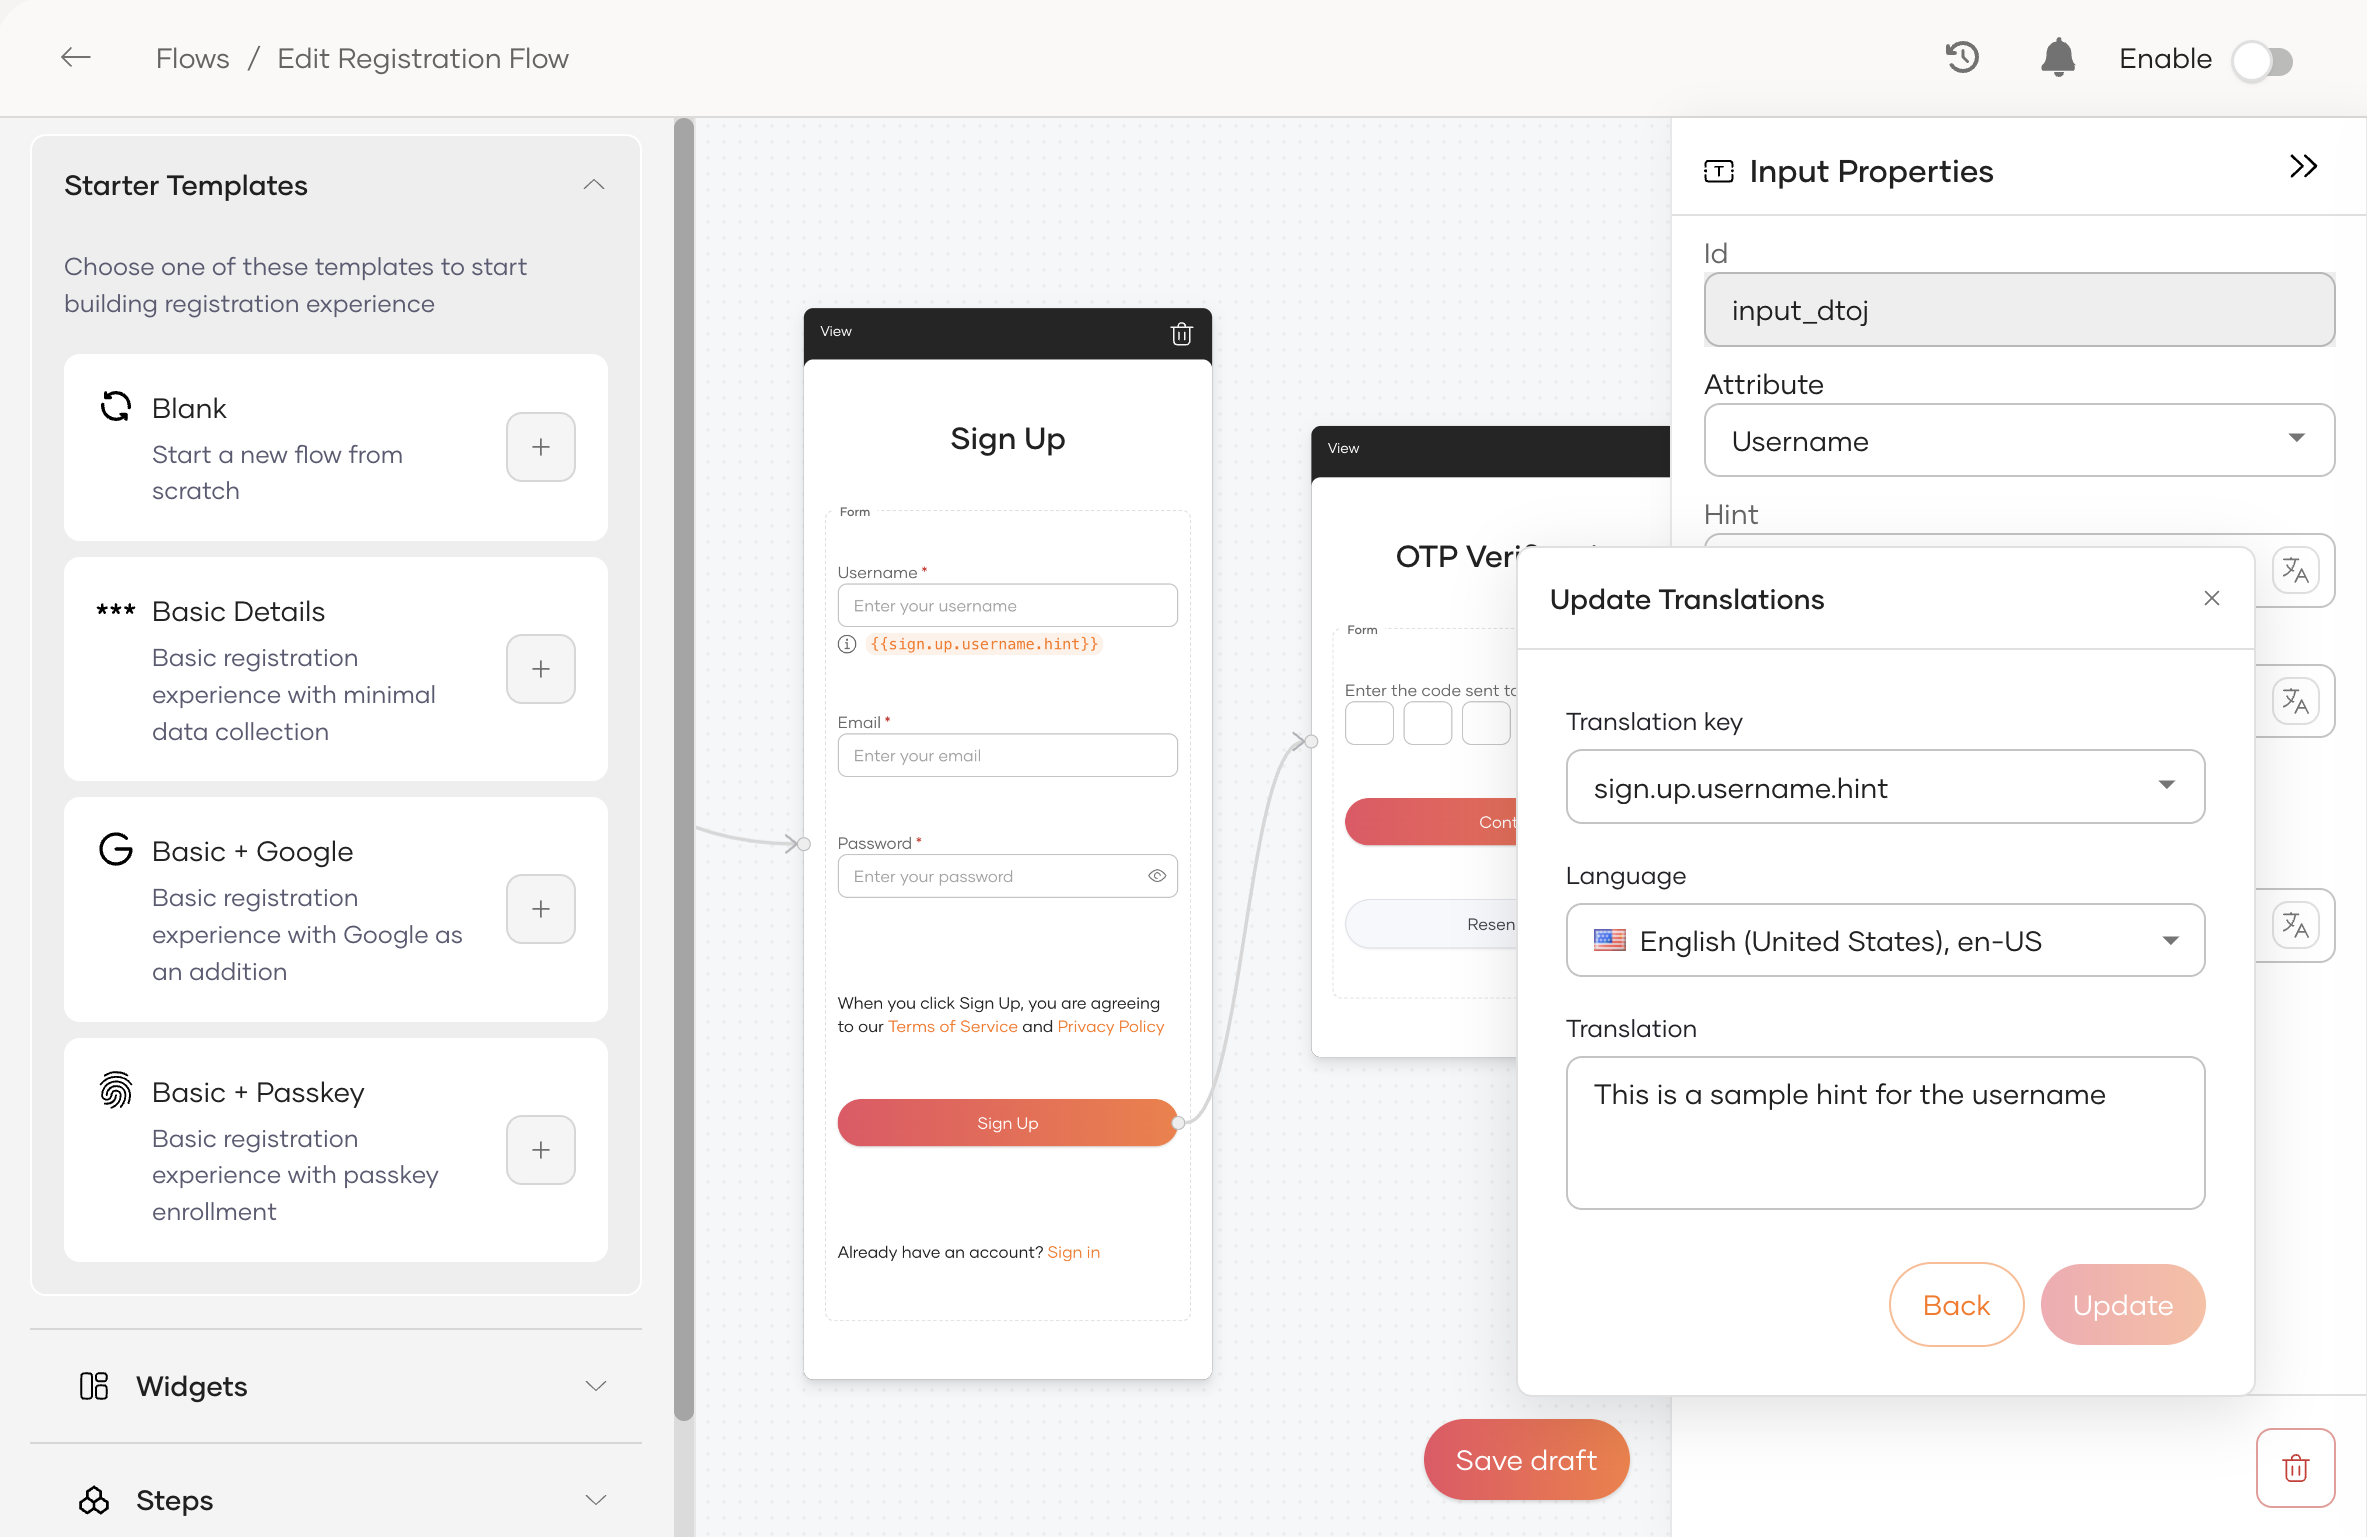
Once a key is assigned to an attribute, the Translations panel shows it with an Edit action.
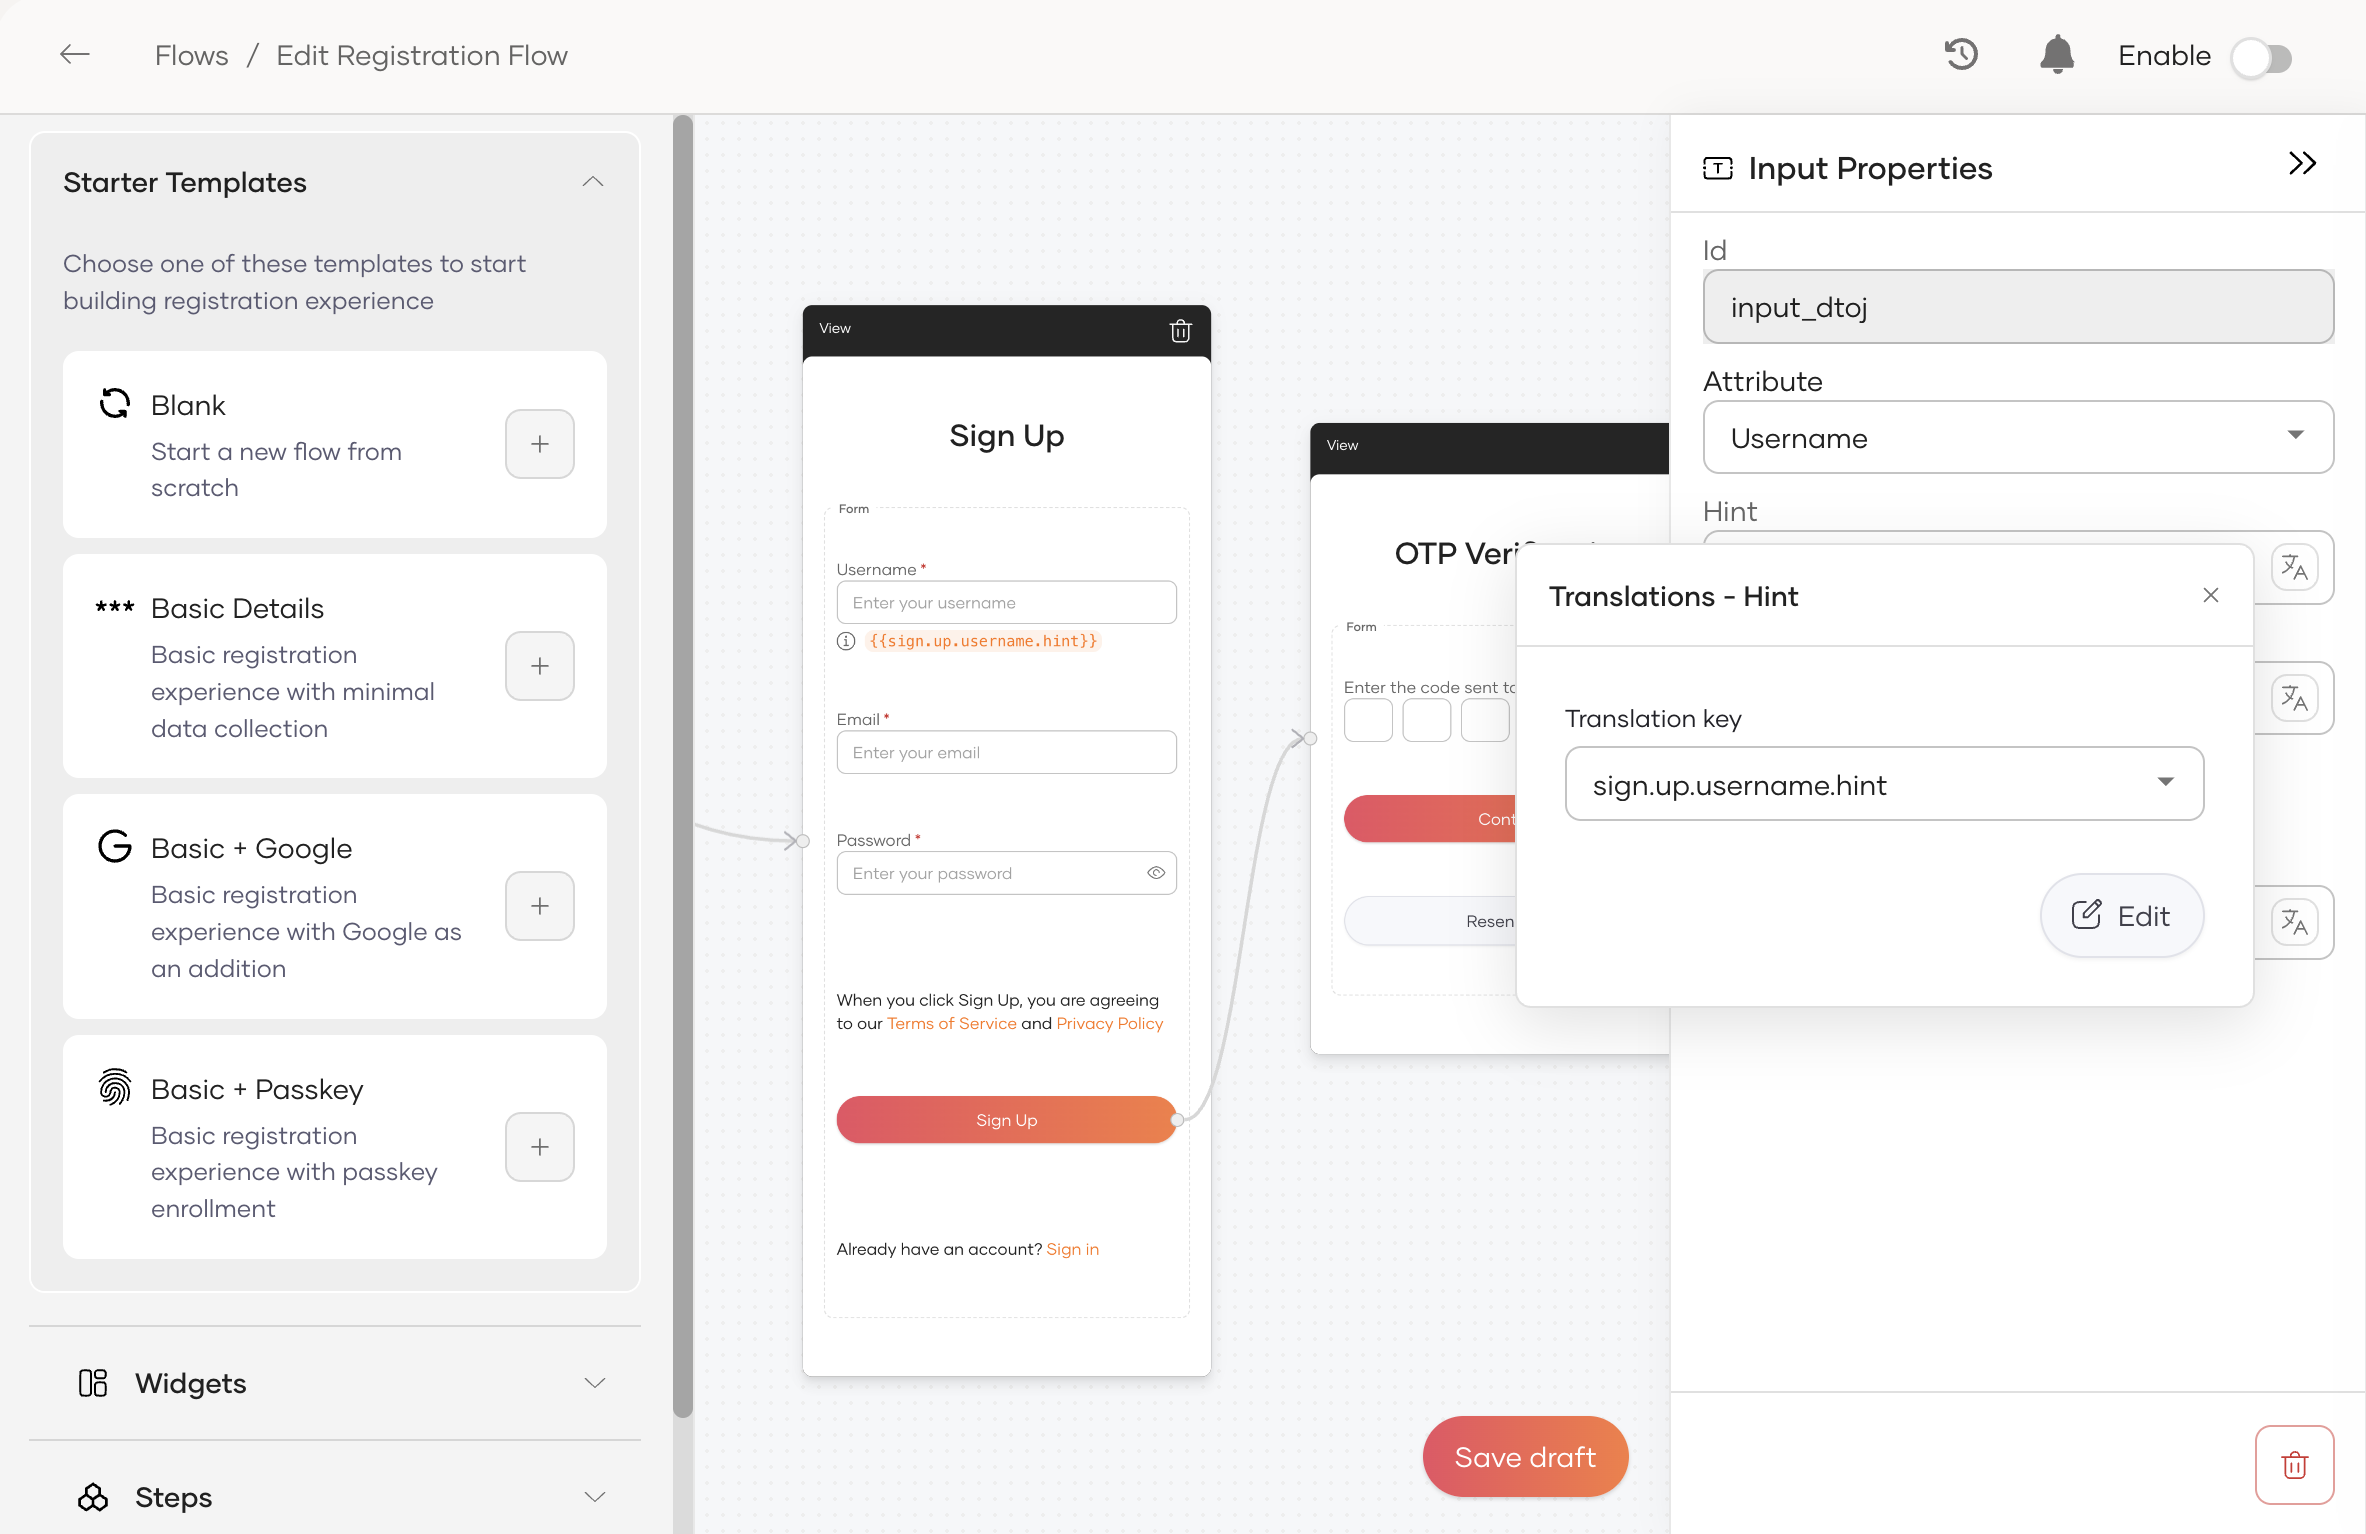
Click Edit to open Update Translations, select the Language you want to change, adjust the text, and click Update.
Publish the changes
Click Save Draft and then toggle Enable at the top-right of the Flow Builder to publish the updated flow. Users see the localized text on their next visit, resolved against the user's preferred locale.
Manage flow context data
Flow context records are stored in the IDN_FLOW_CONTEXT_STORE database table and accumulate over time. To prevent this from affecting server performance, periodically clean up the table using the provided stored procedure scripts. See Clean up flow context for instructions.