Policy consent
Policy consent allows you to present users with legal agreements, such as a Privacy Policy or Terms of Service, and capture their explicit acceptance during registration and login flows.
Overview
In WSO2 Identity Server, policies are configured globally and apply across all applications in the organization.
Policy consent is primarily collected during registration and ask-password flows by adding the Policy Consent widget to the flow in the Flow Builder. Policies can also be configured to prompt users during the login flow (see Configure policies for the login flow).
Add a policy
WSO2 Identity Server includes two built-in policies, Privacy Policy and Terms of Service, which are linked to the corresponding URLs in your branding configuration. These default policies can only be configured when branding is enabled. You can also create additional custom policies regardless of the branding configuration.
To add a policy:
- On the WSO2 Identity Server Console, go to Login and Registration > Policy Management.
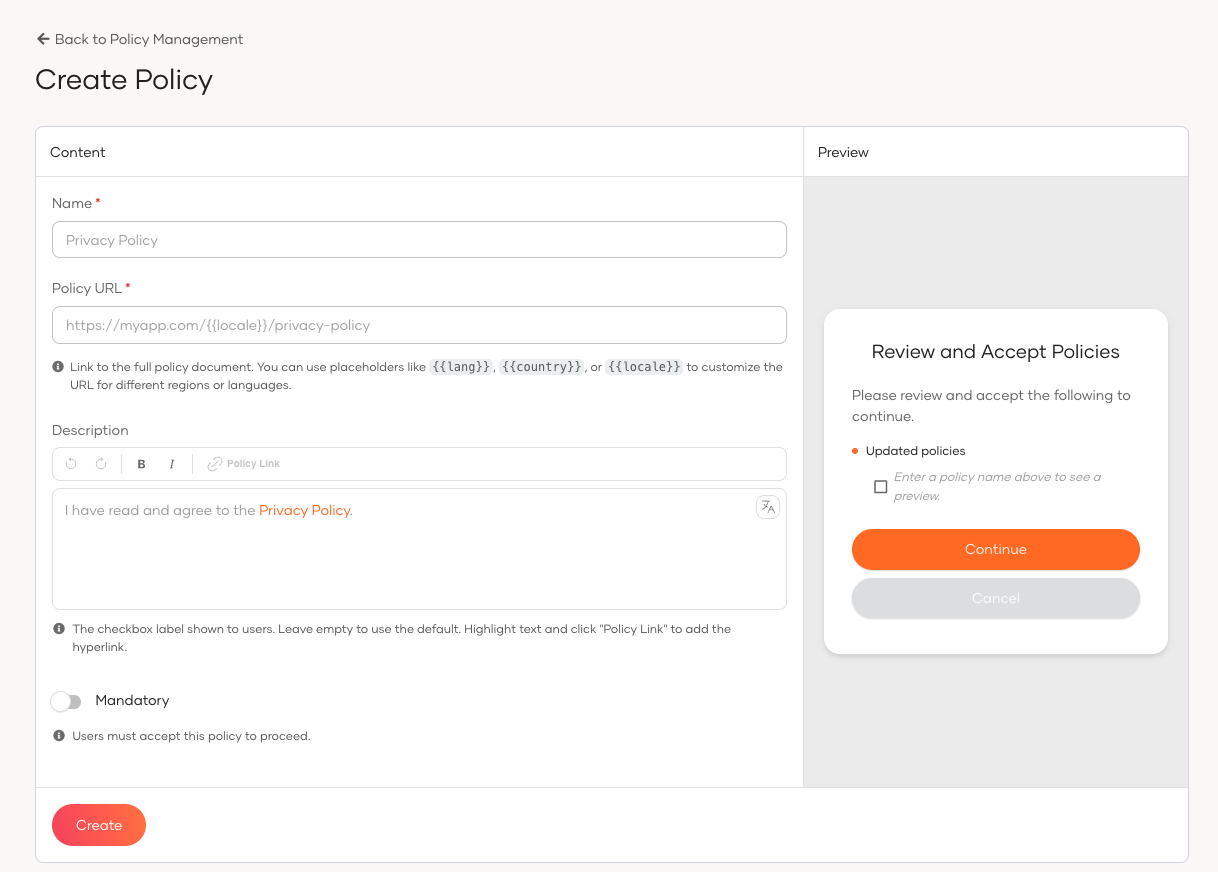
- Click New Policy.
-
Provide the following details:
Field Description Name A unique name for the policy (e.g., Cookie Policy). Policy URL The URL of the hosted policy document. You may use the placeholders {{ lang }},{{ country }}, and{{ locale }}to serve locale-specific versions (e.g.,https://myapp.com/{{ locale }}/privacy-policy).Description The checkbox label shown to users on the consent screen. If left empty, a default label is used. To hyperlink any word or phrase to the policy URL, highlight it in the editor and click Policy Link. Supports rich text and i18n keys in the format {{ keyName }}.Mandatory When enabled, users must accept this policy to proceed. When disabled, the policy is optional. The Preview panel on the right updates in real time as you fill in the form.
-
Click Create. In the dialog that appears, select whether existing users should be prompted to accept this policy at their next login by checking Prompt at next login.
- Click Confirm.
Note
Policies are automatically inherited by sub-organizations.
Manage policy versions
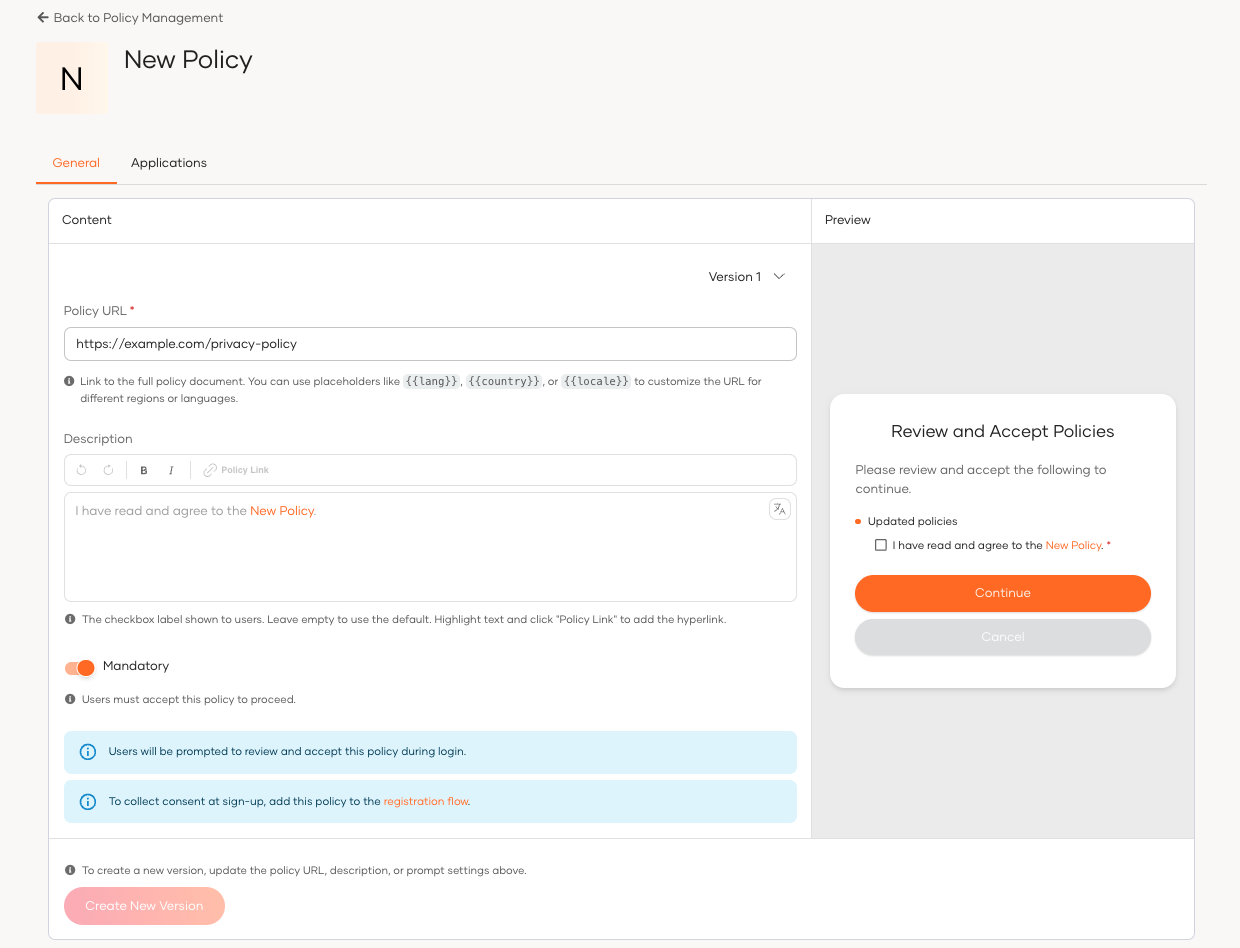
Each time you save changes to a policy, WSO2 Identity Server creates a new version automatically. Use the version selector on the policy page to review the full version history.
To create a new version:
- On the WSO2 Identity Server Console, go to Login and Registration > Policy Management.
- Open the policy you want to update.
- On the General tab, update the Policy URL, Description, or Mandatory setting as needed.
- Click Create New Version. The Save as New Version dialog appears.
- Check Prompt at next login if existing users should be re-prompted to accept this version at their next login.
- Click Confirm.
The Prompt at next login setting controls re-prompt behavior:
- Enabled: Users who have not yet accepted this version will be prompted at their next login (subject to application-level configuration).
- Disabled: Existing users are not re-prompted at login. Only users going through registration or ask-password flows will see the updated version.
Note
If a user has not yet consented to any version that has Prompt at next login enabled, they will be prompted at login, regardless of whether the latest version has this setting enabled.
Add the policy consent widget to a flow
To collect policy consent during registration or ask-password, add the Policy Consent widget from the Components panel in the Flow Builder.
- On the WSO2 Identity Server Console, navigate to your application and go to Login Flow.
- Select the Registration or Ask Password flow.
- From the Components panel, drag the Policy Consent widget into the flow.
-
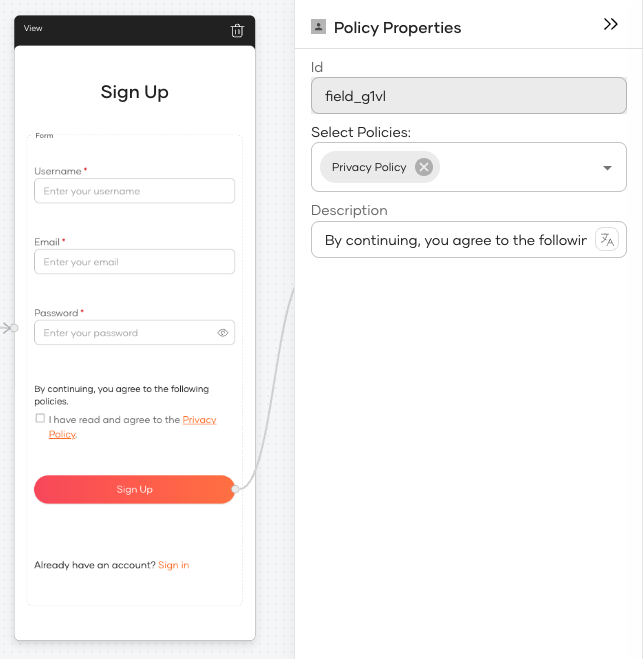
In the widget's properties panel, configure the following:
Property Description Select Policies Choose which policies to display in this widget. You can select one or more policies from the list. Description The header text shown to users above the policy checkboxes. Supports i18n keys.
Configure policies for the login flow
To prompt users to accept a policy at login, configure it at both levels described below. A user will be shown the policy at login only when both conditions are met:
- The policy version has Prompt at next login enabled.
- The application is configured to show the policy during login.
To configure the application-level setting:
- On the WSO2 Identity Server Console, go to Login and Registration > Policy Management.
- Open the policy you want to configure.
- Go to the Applications tab.
- Click + Assign Application and select the applications that should prompt users to accept this policy at login.
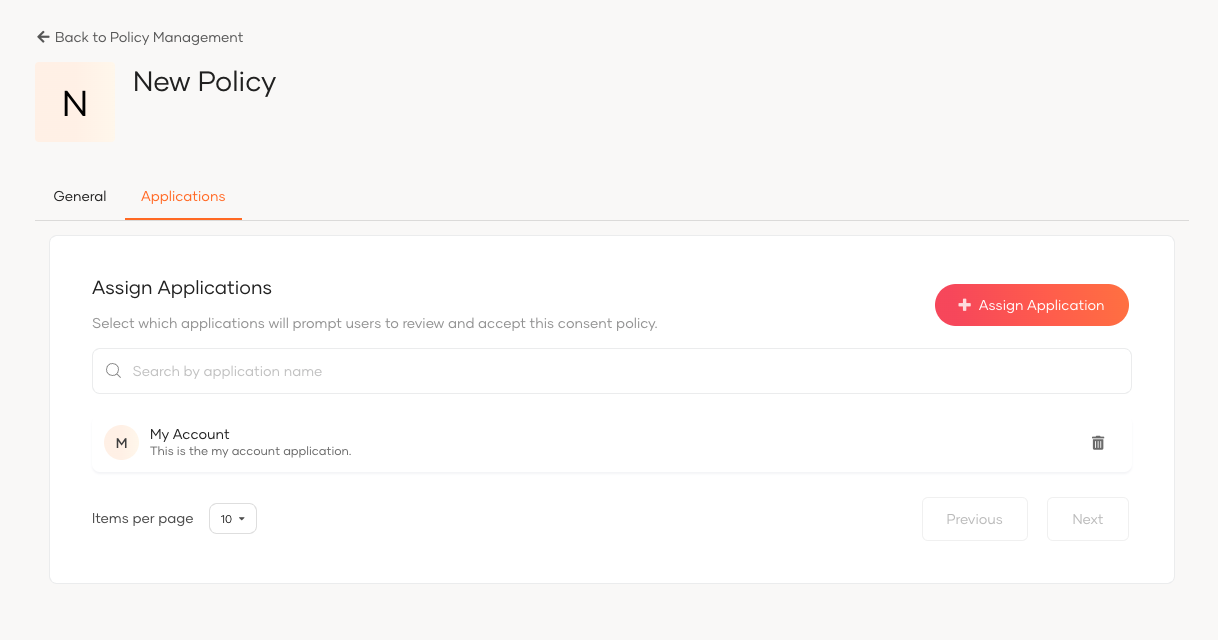
To remove an application, click the delete icon next to it in the list.
Note
Policy consent during login is not supported for federated users or app-native authentication flows.
Delete a policy
- On the WSO2 Identity Server Console, go to Login and Registration > Policy Management.
- Click on the policy you want to delete.
- Scroll to the Danger Zone and click Delete Policy.
- Confirm the deletion.
Note
A policy cannot be deleted if any user has already given consent to it.
What the user sees
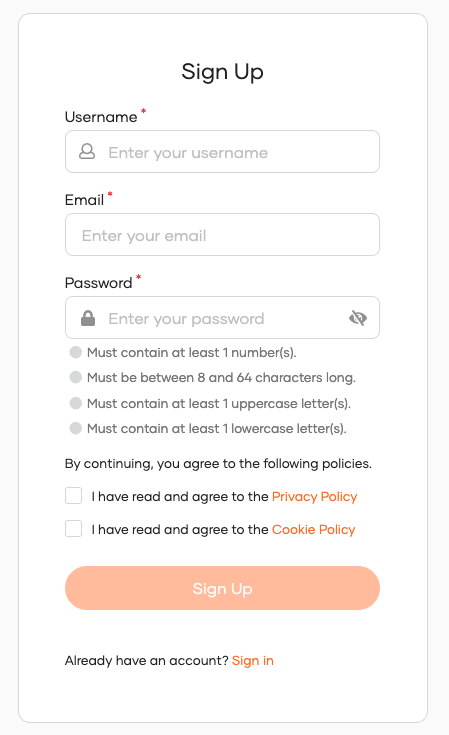
During registration or ask-password:
The consent screen appearance depends on how you configure the Policy Consent widget in the Flow Builder. This includes which policies are shown and the header description displayed to the user. The following is a sample consent screen:
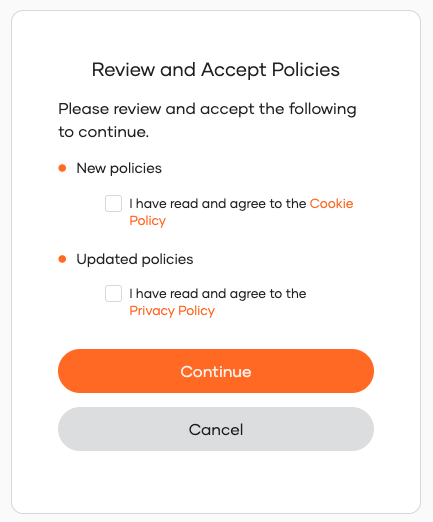
During login:
When a user logs in to a configured application, WSO2 Identity Server checks for policy versions marked with Prompt at next login. If the user has not yet accepted such a version, the policy consent screen appears before login completes. Policies are grouped into:
- New policies – policies the user has never consented to.
- Updated policies – policies the user already accepted but that have a newer version requiring consent.
What's next
- Manage consents – Users can view and revoke their policy consents from MyAccount.
- Preference management consent – Capture user preferences for specific data uses.