Flow extension configuration
This guide walks you through registering an external service as a flow extension, creating the attributes it returns, configuring attribute access, and adding the extension to a flow.
Sample use case
Imagine an organization that runs a loyalty program in an external CRM. When a new customer self-registers, the organization wants to:
- Validate the customer's email address against the CRM to confirm they are a recognized member.
- Pull the customer's existing loyalty tier (for example, Silver, Gold, or Platinum) from the CRM and store it on their new account, so downstream applications can offer tier-based benefits immediately.
A flow extension makes this possible:
- The customer enters their email and other details in the Self Registration flow.
- WSO2 Identity Server invokes the loyalty service endpoint, exposing the customer's email address and the application ID.
- The CRM looks up the customer and responds with their member identifier and loyalty tier.
- WSO2 Identity Server writes these values back into the flow as
identifierandtierclaims. - The account is created with the loyalty tier already populated, ready for use by connected applications.
This enriches the user's profile with trusted data from a system of record at the moment of registration, with no manual data entry required.
Build the flow
To use a flow extension, you first register it as a connection and then invoke it from a flow.
Step 1 – Create a new flow extension
To register your external service as a flow extension:
-
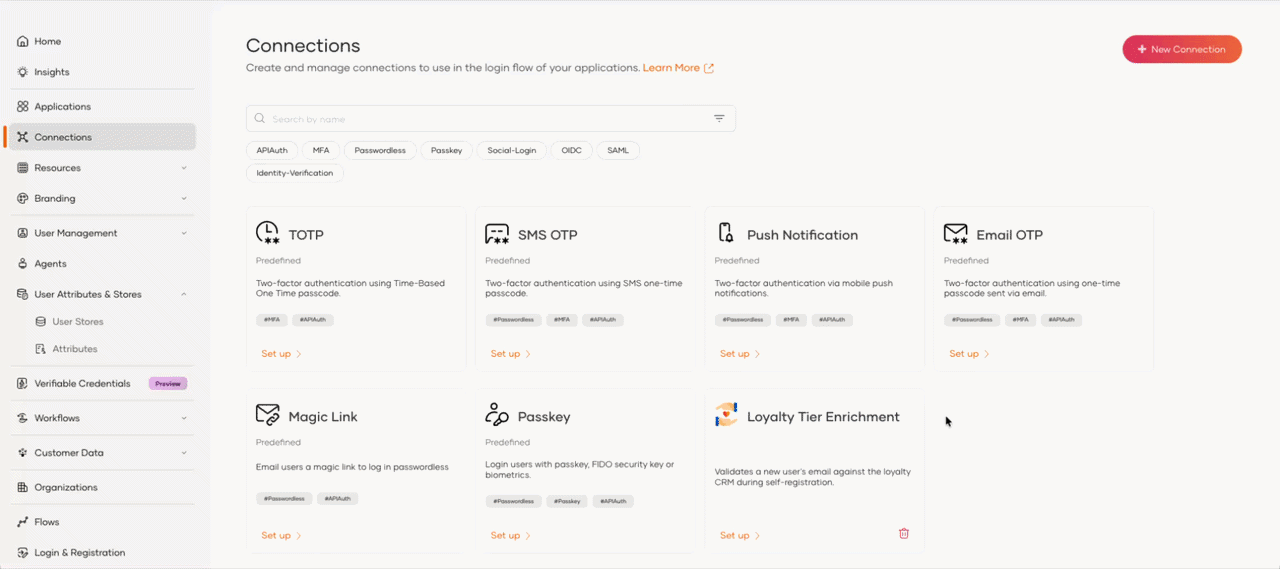
On the WSO2 Identity Server Console, go to Connections.
-
Click New Connection and select Create Flow Extension.
-
Provide the basic details for the extension:
- Name (required): A unique name to identify this flow extension.
- Description: A short description of what the extension does.
- Icon URL: A URL pointing to an icon that represents this flow extension.
-
Click Next.
-
In the Endpoint field (required), enter the URL of the external endpoint to integrate with this extension.
-
Under Authentication, select the Authentication Scheme (required) that WSO2 Identity Server uses to authenticate to your endpoint, and provide the required credentials. The supported schemes are None, Basic, Bearer, API Key, and Client Credential.
-
(Optional) Under Encryption Certificate, upload a certificate to encrypt field values exchanged with the extension endpoint. WSO2 Identity Server uses this certificate to encrypt the values it sends to your endpoint. To learn how encryption works, see configure field encryption.
Step 2 – Create the attributes returned by your endpoint
The flow extension writes the values returned by your endpoint into the flow as user attributes (claims). Before you can map these values, the corresponding attributes must exist in WSO2 Identity Server.
In the loyalty example, the endpoint returns a member identifier and a tier. The email attribute already exists as a default attribute, but identifier and tier are not available by default, so you need to add them as custom attributes.
For each value your endpoint returns that doesn't already exist as an attribute:
-
On the WSO2 Identity Server Console, go to User Attributes & Stores > Attributes.
-
Add a new custom attribute (for example,
identifierandtier).
For detailed steps, see Add custom attributes.
Step 3 – Configure the flow extension
Once the extension and its attributes exist, configure which attributes WSO2 Identity Server exposes to your endpoint and which attributes it writes back from the response.
-
On the WSO2 Identity Server Console, go to Connections and select the flow extension you created.
-
Click Set Up and go to the Access Configuration tab.
-
Under Claims, click + Add Entry to add each attribute the extension uses, and set its access level. Use Read for attributes sent to your endpoint and Write for attributes it returns. For the loyalty example, mark
emailandapplicationIdas Read, andidentifierandtieras Write. -
Click Update to save the configuration.
The flow extension is now ready to be invoked from the Self Registration flow.
Step 4 – Configure field encryption
For sensitive attributes, you can encrypt the values exchanged with your endpoint on a per field basis.
- Read (sent to your endpoint): WSO2 Identity Server encrypts the values it sends using an encryption certificate. If you didn't upload one when creating the extension, see manage the encryption certificate.
- Write (returned by your endpoint): your endpoint encrypts the values it returns and WSO2 Identity Server decrypts them. No certificate is required.
For the wire format your endpoint must handle, see work with encrypted values.
To mark a field as encrypted:
-
On the Access Configuration tab, select the field you want to encrypt. The Field Configuration panel opens.
-
Under Encryption, turn on the toggles you need:
- Read encrypted: WSO2 Identity Server sends this field to your endpoint encrypted. Available once the field is marked as Read.
- Write encrypted: Your endpoint returns this field's value encrypted. Available once the field is marked as Write.
-
Click Update to save the configuration.
Fields marked as encrypted show a lock icon on their Read and Write indicators.

Note
If you remove a field's Read or Write access, its corresponding encryption setting clears automatically.
Step 5 – Add the flow extension to the flow
Add the extension to the Self Registration flow so that WSO2 Identity Server invokes it while a user registers.
-
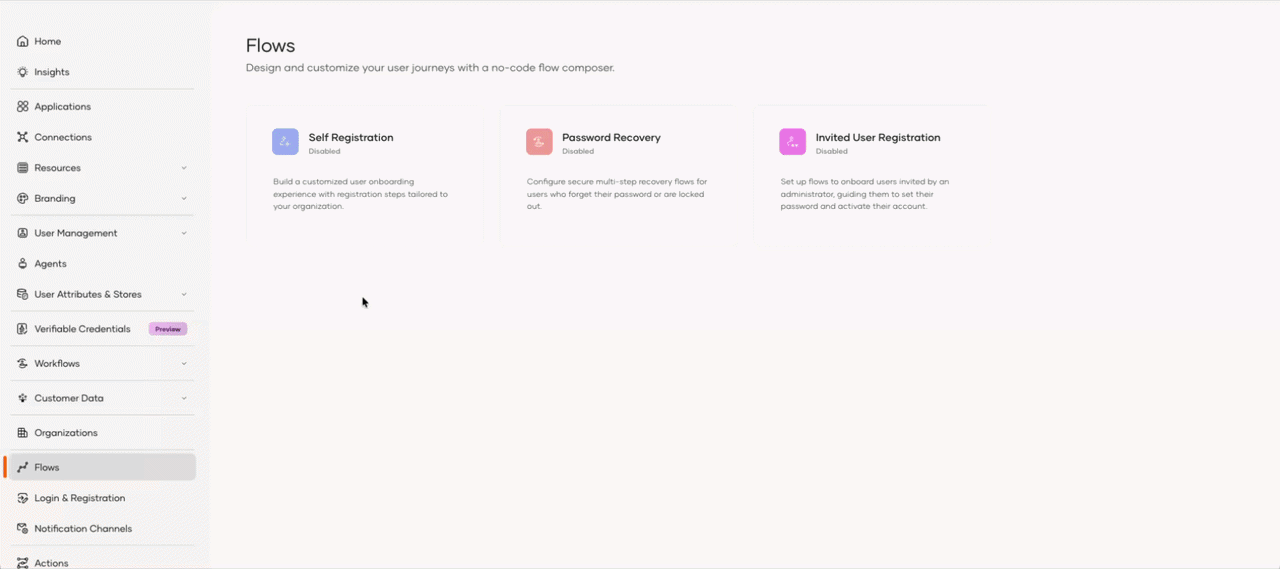
On the WSO2 Identity Server Console, go to Flows, and click the Self Registration card. Click the Basic Details template to add it to the canvas.
-
From the Steps panel, drag and drop a Flow Extension View onto the canvas, then wire it into the flow:
- Delete the existing connection from the Email OTP view to the green End node.
- Draw a new connection from the Continue button of the Email OTP view to the Flow Extension View.
- Draw a final connection from the Flow Extension View to the End node.
-
With the Flow Extension View selected, click the gear icon (⚙️) to open the execution properties, and select the flow extension you created from the Connection dropdown.
-
Click Save Draft to save all changes, then turn the toggle on the top right corner of the Flow Builder ON to publish the flow.
New users who self-register now pass through the flow extension, and the values returned by your endpoint are written to their account before the account is created.
Manage the encryption certificate
You can add, replace, or remove the encryption certificate of an existing flow extension:
-
On the WSO2 Identity Server Console, go to Connections and select the flow extension.
-
Click Set Up and go to the Settings tab.
-
Under Encryption Certificate:
- If no certificate is configured, upload one using the certificate form.
- If a certificate is already configured, click Clear to remove it. To replace it, upload a new certificate after clearing the existing one.
-
Click Update to save the changes.

Note
For security reasons, WSO2 Identity Server never displays a certificate after you upload it. The Console only indicates whether a certificate is configured.