Add login with AWS Cognito
You can connect an AWS Cognito user pool to your applications using WSO2 Identity Server and let users log in with their existing AWS Cognito accounts.
AWS Cognito user pools act as an OpenID Connect (OIDC) identity provider. WSO2 Identity Server connects to AWS Cognito as a standard OIDC identity provider using the authorization code flow.
Follow this guide to register WSO2 Identity Server in AWS Cognito and add AWS Cognito to the login flow of your application.
Note
For detailed instructions on configuring AWS Cognito, refer to the AWS Cognito documentation.
Register WSO2 Identity Server in AWS Cognito
You need to register WSO2 Identity Server as an app client in an AWS Cognito user pool.
Create a user pool and an app client
If you already have a user pool, skip to step 4 and create a new app client in the existing user pool.
-
Sign in to the AWS Management Console and open the AWS Cognito console.
-
Go to User pools and click Create user pool.
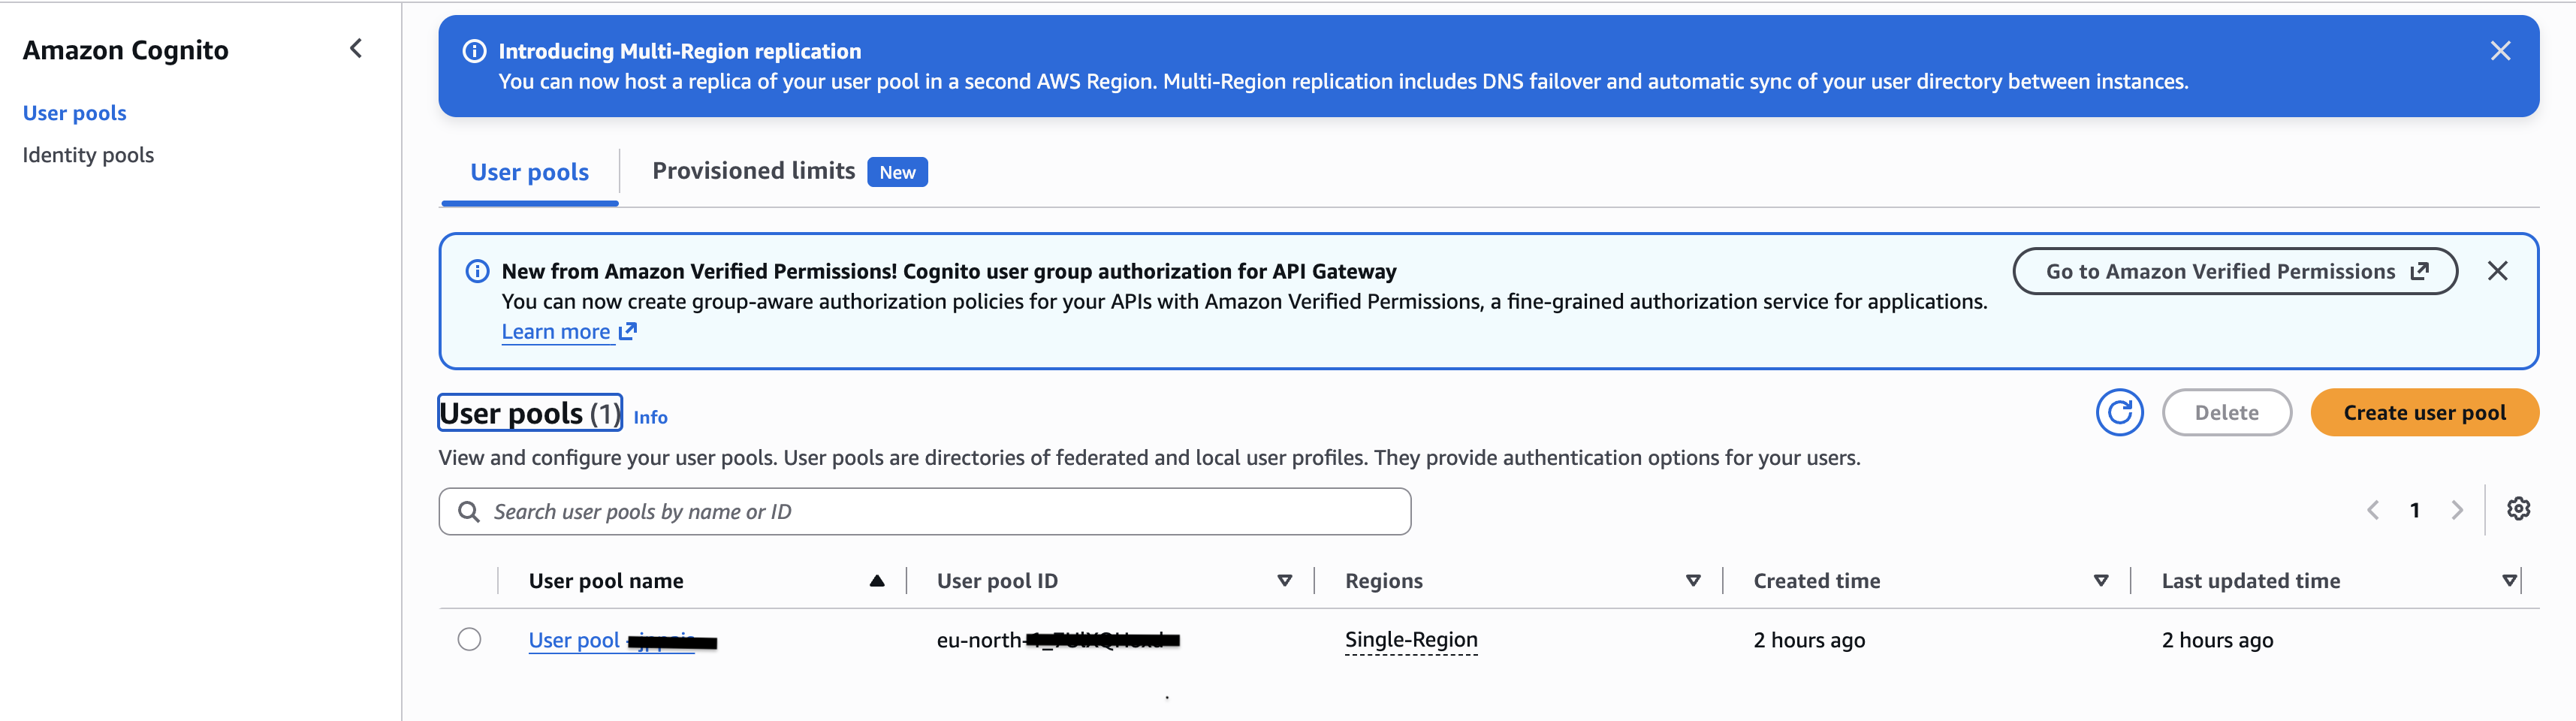
-
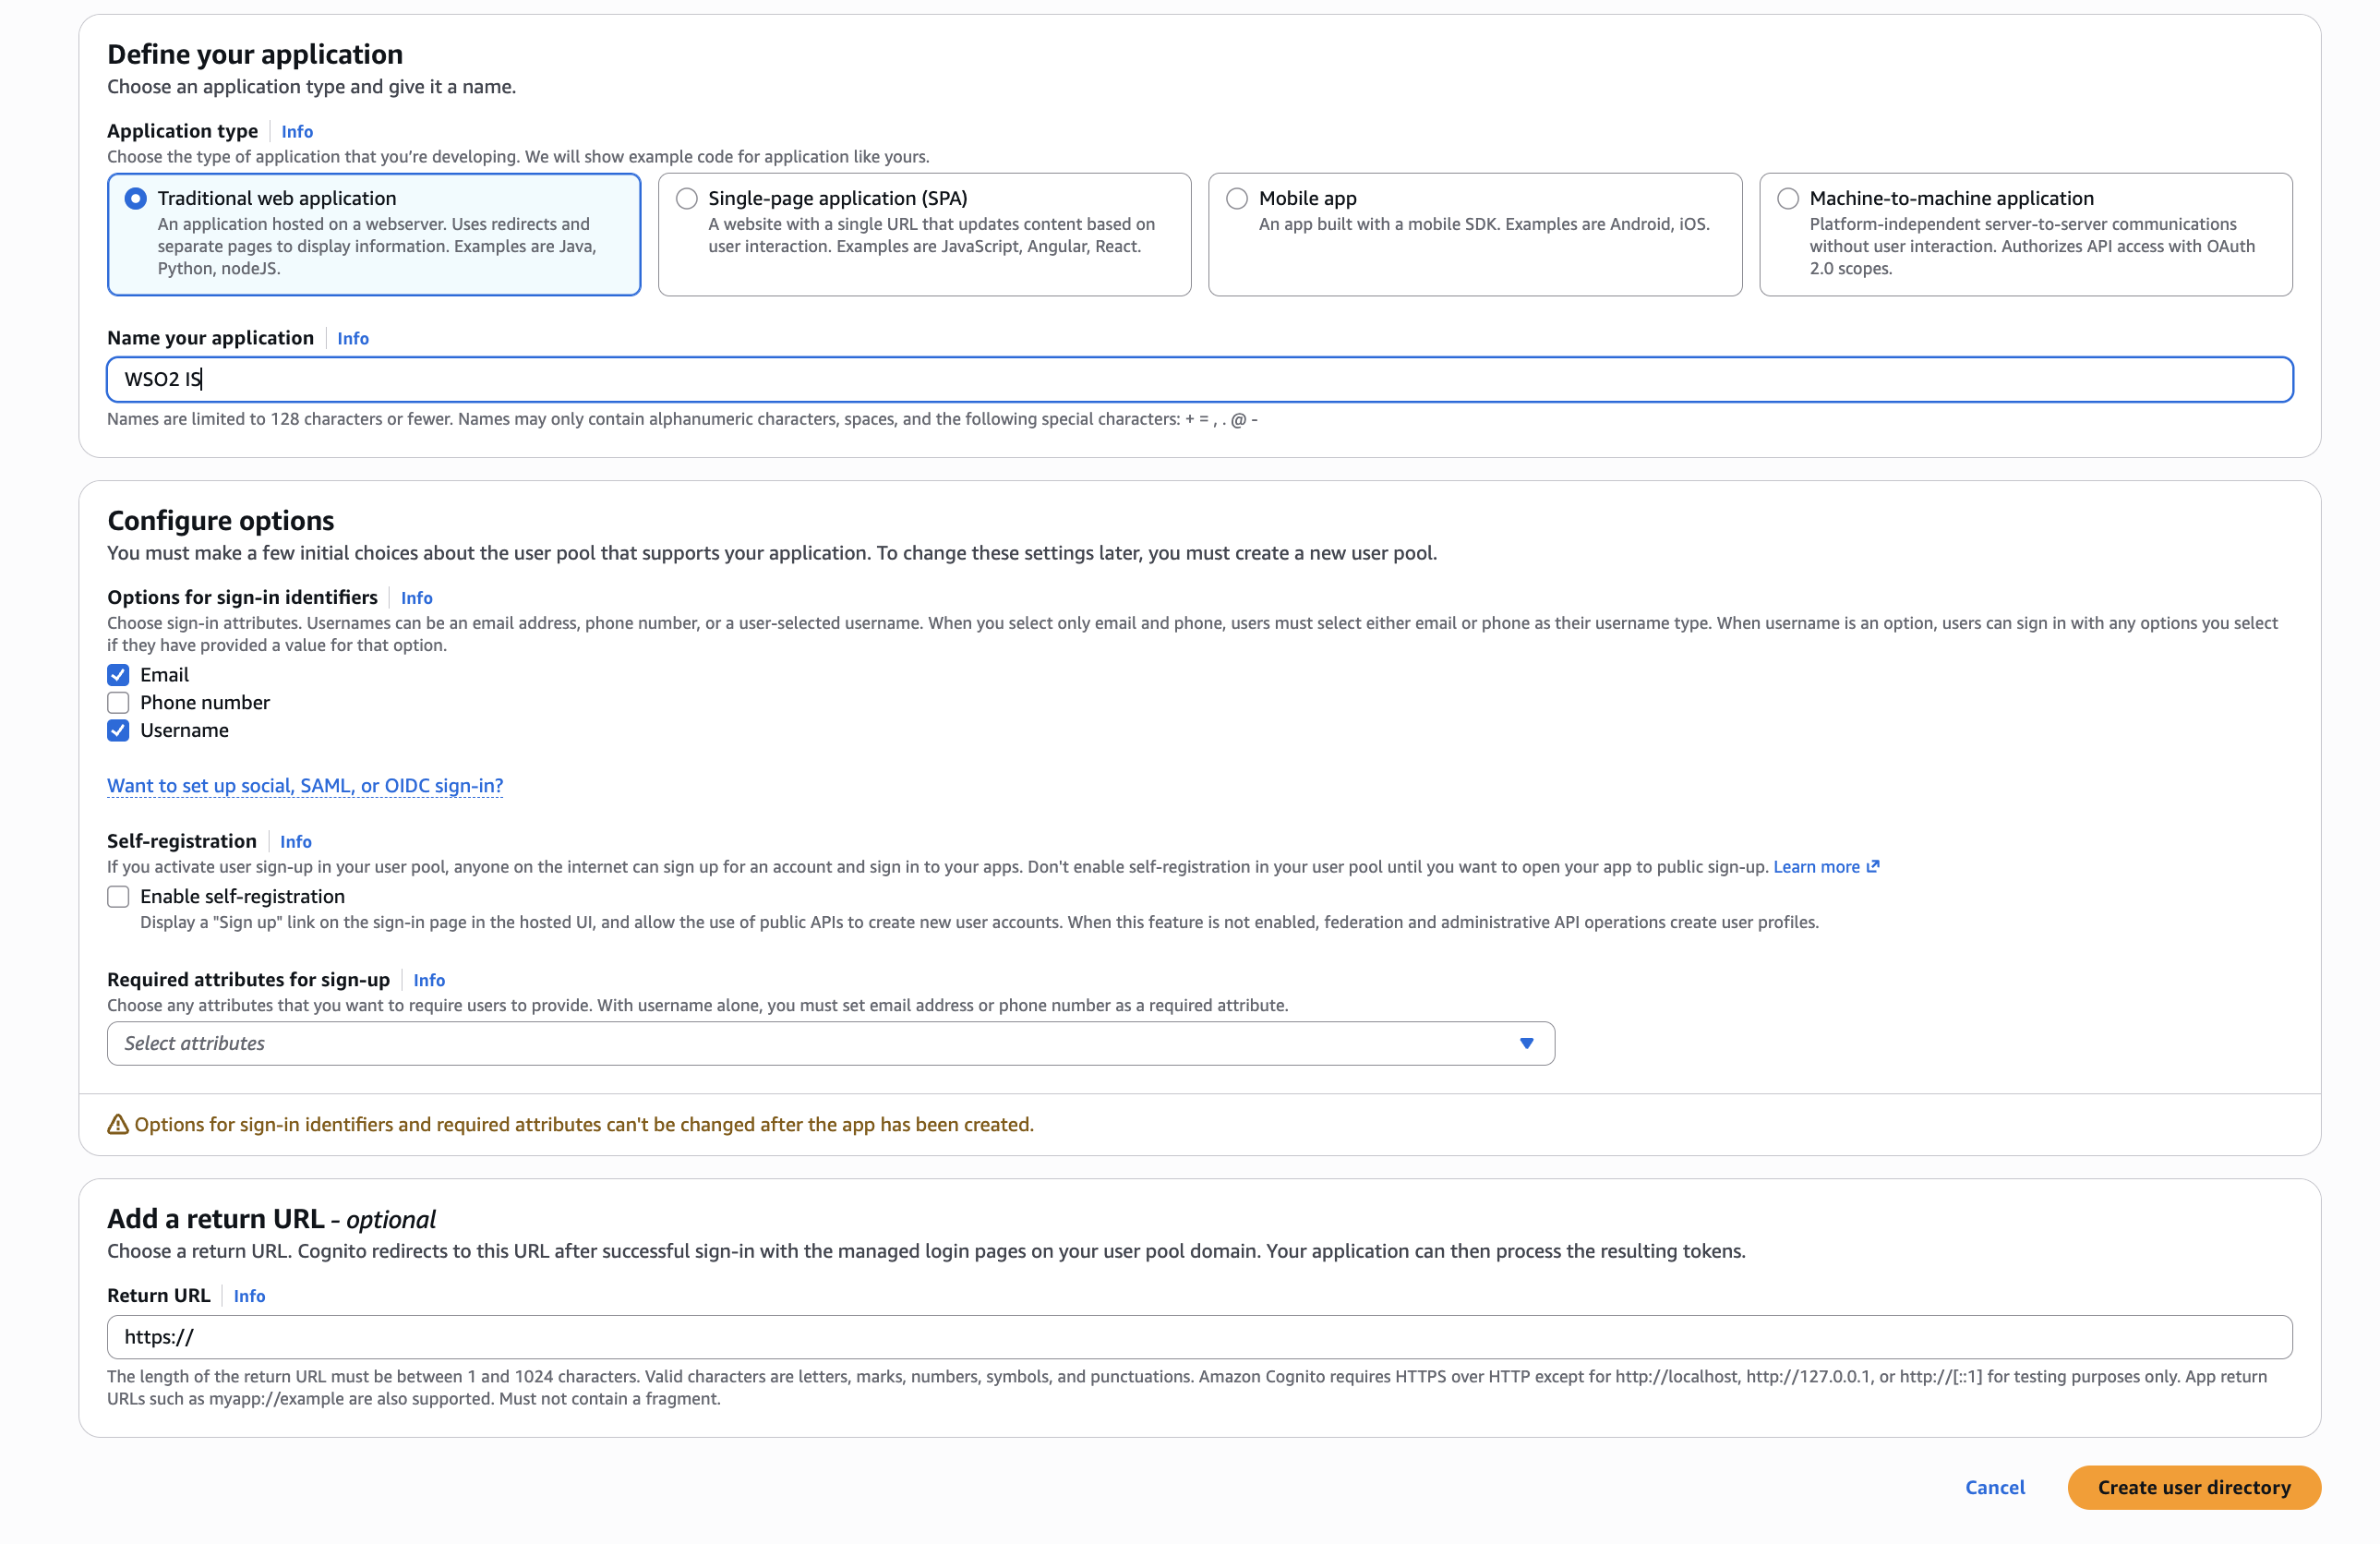
Under Define your application, select Traditional web application as the application type and enter a name for the application.
-
Under Configure options, select the sign-in identifiers and the required sign-up attributes for your users. For example, select Email as the sign-in identifier.
-
Under Add a return URL, enter the following URL. AWS Cognito redirects users to this URL after they log in.
-
Click Create user directory to create the user pool and the app client.
Get the app client credentials
-
On the AWS Cognito console, select your user pool.
-
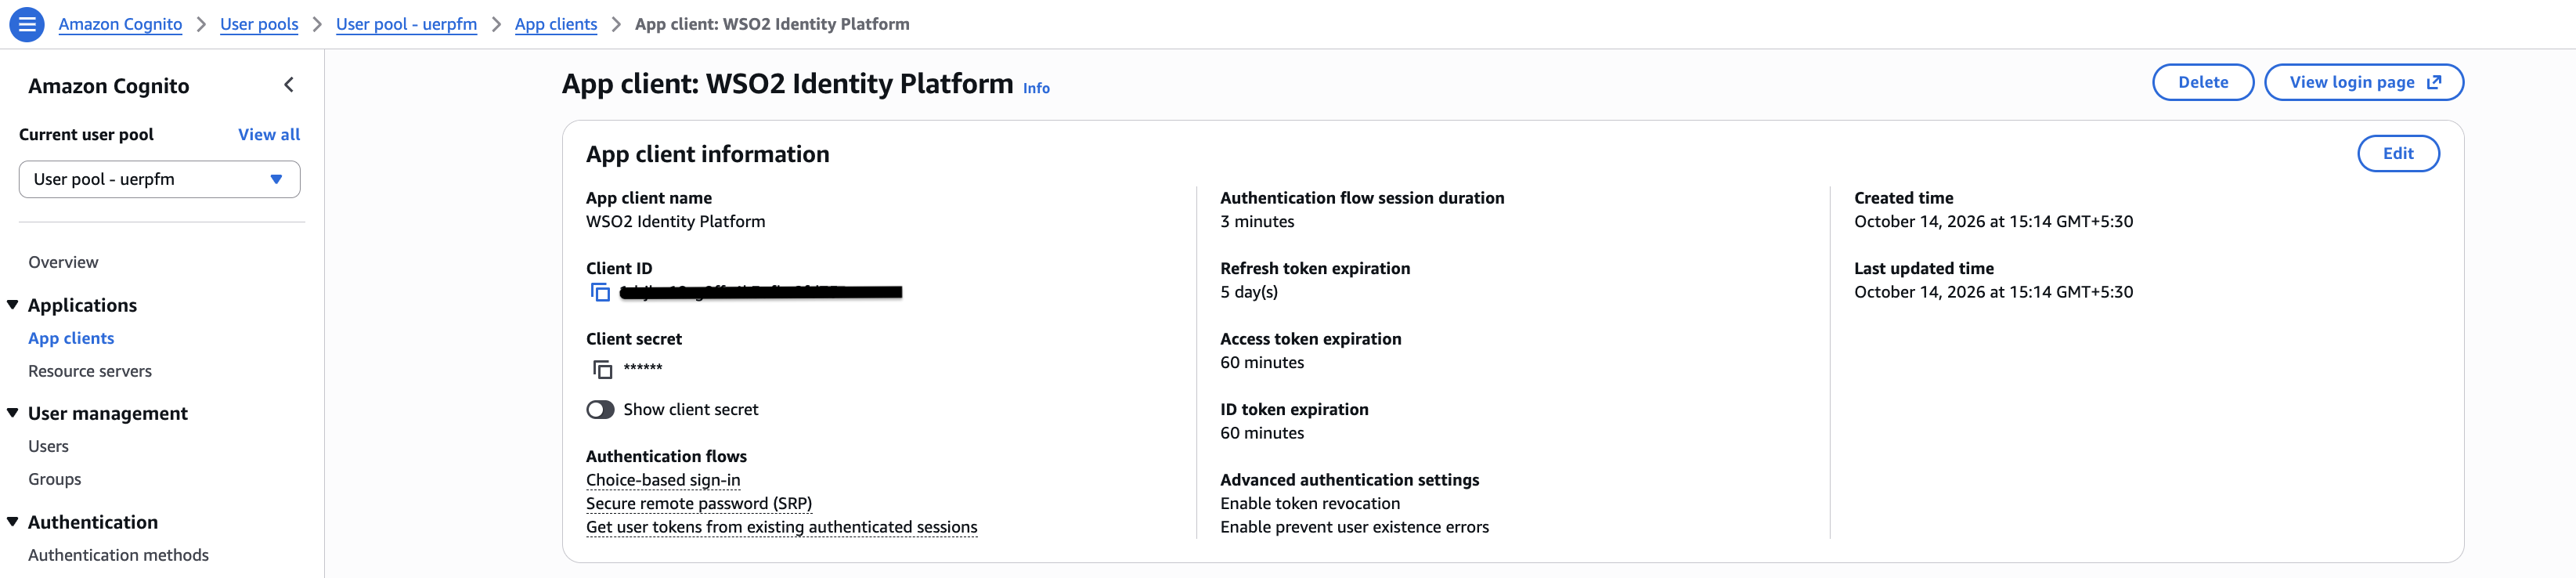
Go to Applications > App clients and select the app client you created.
-
Under App client information, copy Client ID and the Client secret.
Verify the login pages of the app client
AWS Cognito accepts a login request only if the request matches the login pages configuration of the app client. If the callback URL, grant type, or scopes that WSO2 Identity Server sends aren't allowed, AWS Cognito rejects the request with an error such as redirect_mismatch or invalid_scope, and the user can't log in.
When you create a Traditional web application, AWS Cognito configures the login pages for you. If you use an existing app client, or if login fails with one of these errors, verify the configuration as follows:
-
On the app client, go to the Login pages tab and click Edit under Managed login pages configuration.
-
Make sure the following values are set and click Save changes.
- Allowed callback URLs:
https://localhost:9443/commonauth - Identity providers: Cognito user pool directory
- OAuth 2.0 grant types: Authorization code grant
- OpenID Connect scopes: OpenID, Email, and Profile
- Allowed callback URLs:
Get the user pool endpoints
WSO2 Identity Server needs the OpenID Connect endpoints of your user pool. These endpoints are built from the domain, the region, and the ID of the user pool.
Get your domain
-
On the AWS Cognito console, select your user pool.
-
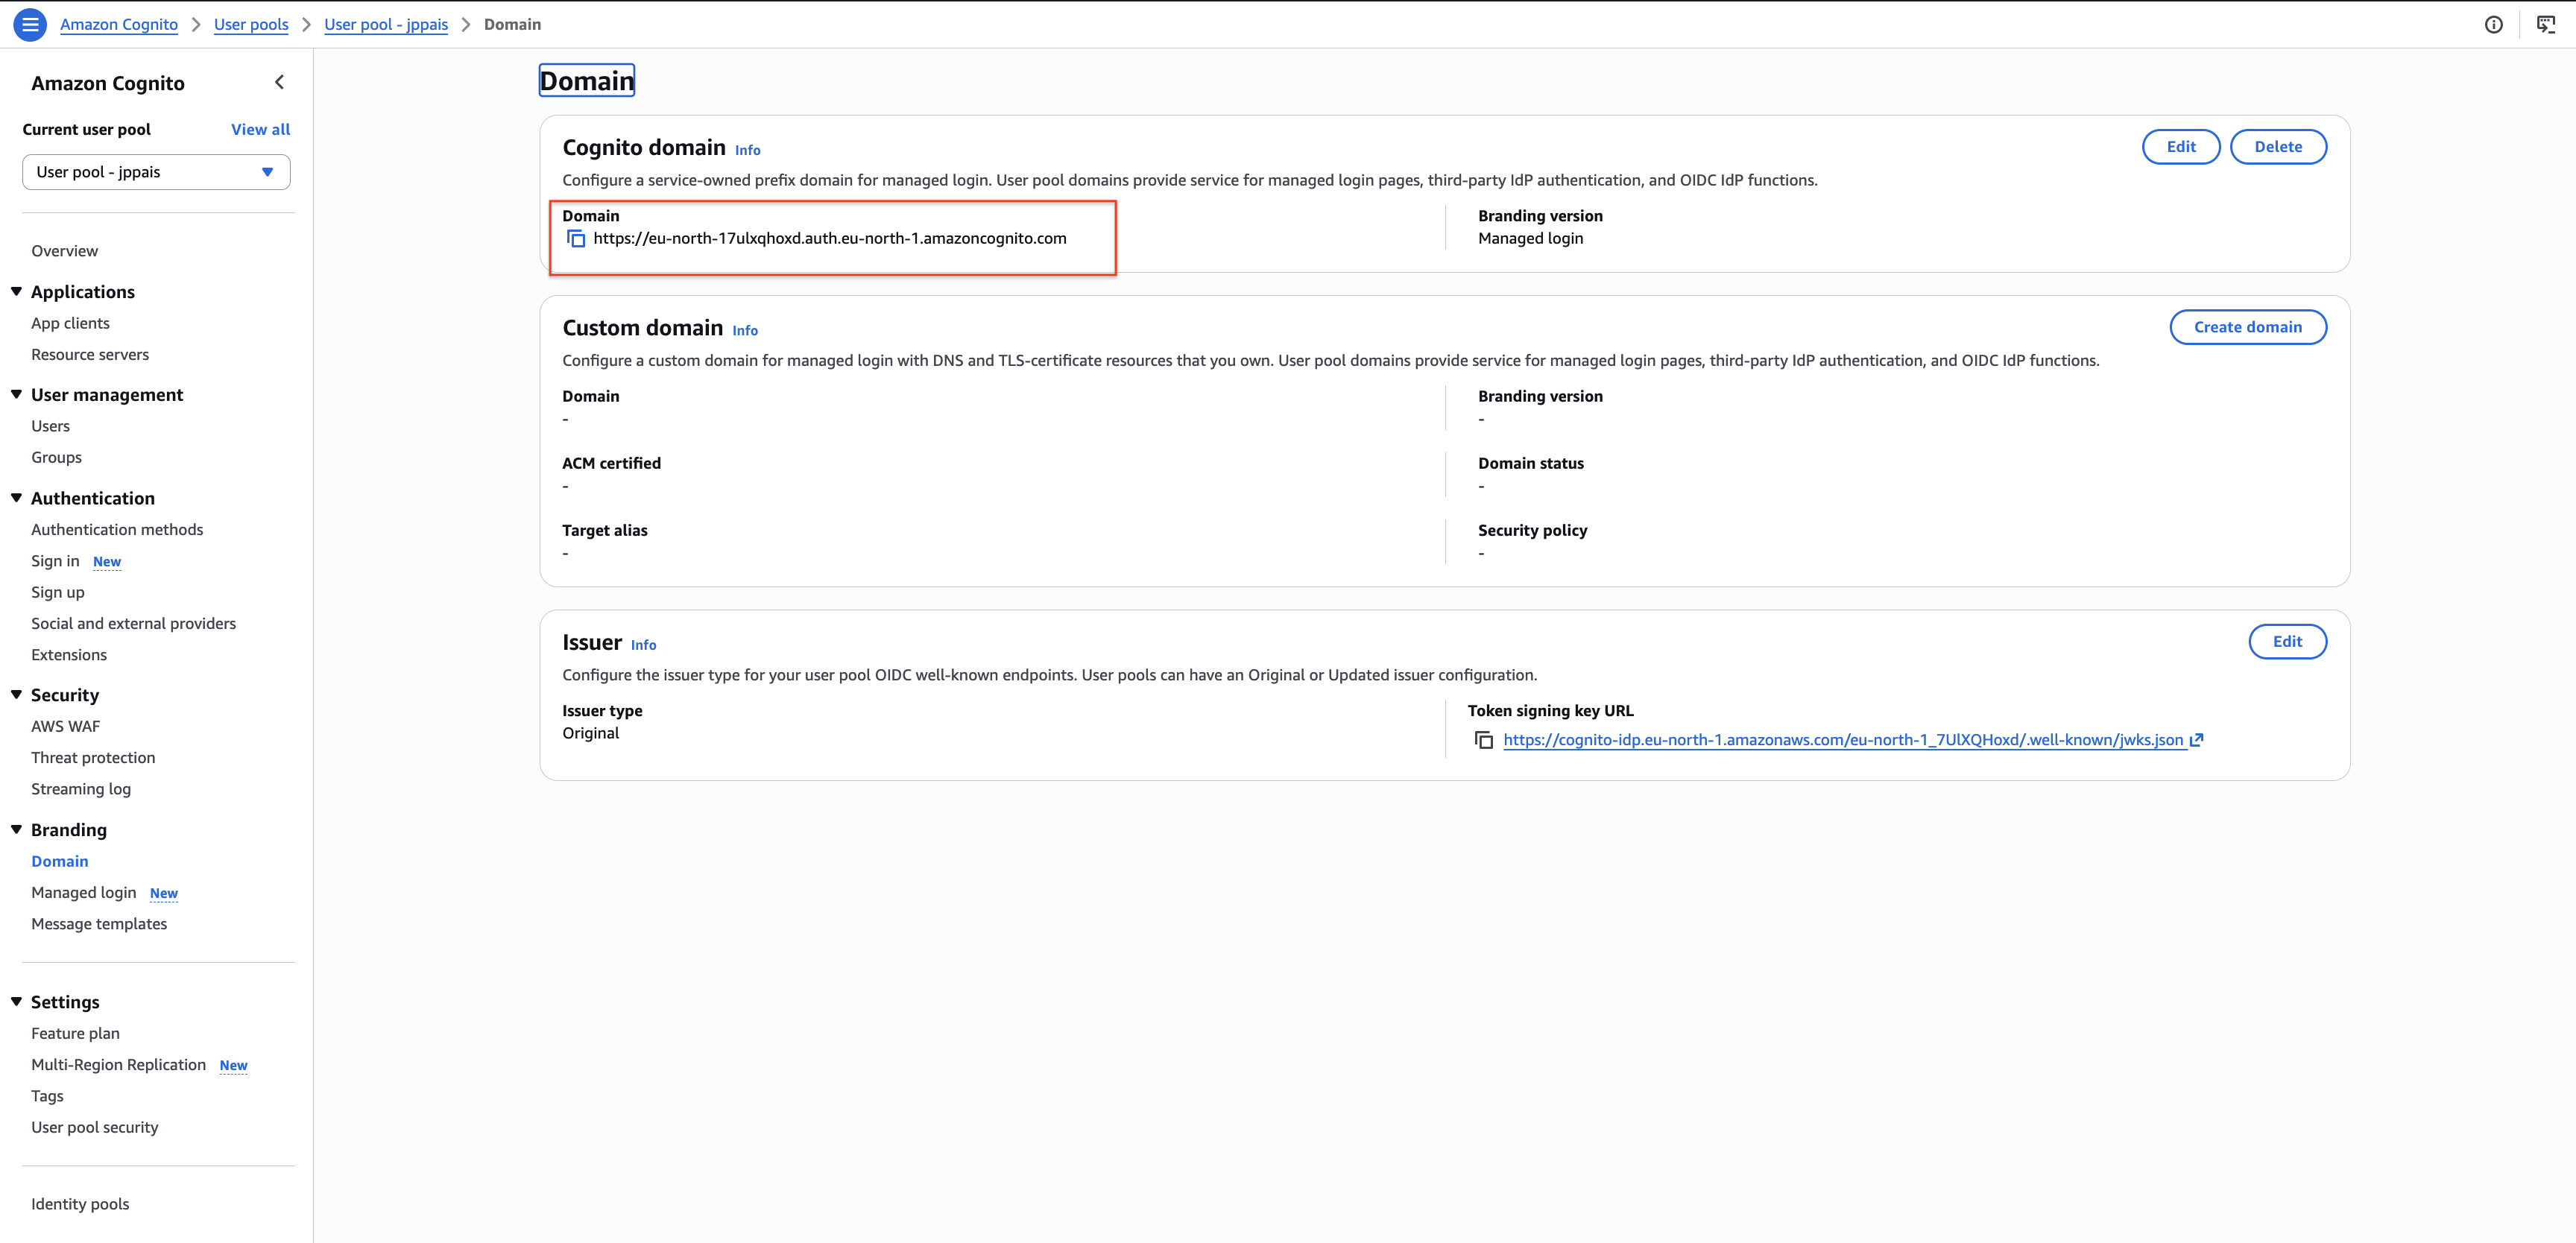
Go to Branding > Domain and take note of the Domain. If the user pool doesn't have a domain yet, click Actions > Create Cognito domain and create one.
The domain takes one of the following formats:
- Cognito domain:
https://<domain_prefix>.auth.<region>.amazoncognito.com - Custom domain:
https://<your_custom_domain>
- Cognito domain:
Endpoints
-
On the AWS Cognito console, go to Overview of your user pool and take note of the User pool ID and the AWS region of the user pool.
-
Use the domain, the region, and the user pool ID to build the endpoints that WSO2 Identity Server needs:
Endpoint URL Authorization endpoint https://<cognito_domain>/oauth2/authorizeToken endpoint https://<cognito_domain>/oauth2/tokenUser info endpoint https://<cognito_domain>/oauth2/userInfoJWKS endpoint https://cognito-idp.<region>.amazonaws.com/<user_pool_id>/.well-known/jwks.jsonTip
You can verify these values in the OpenID Connect discovery document of the user pool at
https://cognito-idp.<region>.amazonaws.com/<user_pool_id>/.well-known/openid-configuration.
Create a user in the user pool
To try out the login flow, you need a user account in the AWS Cognito user pool. If the user pool doesn't have a user yet, follow the steps below to create one.
-
On the AWS Cognito console, select your user pool.
-
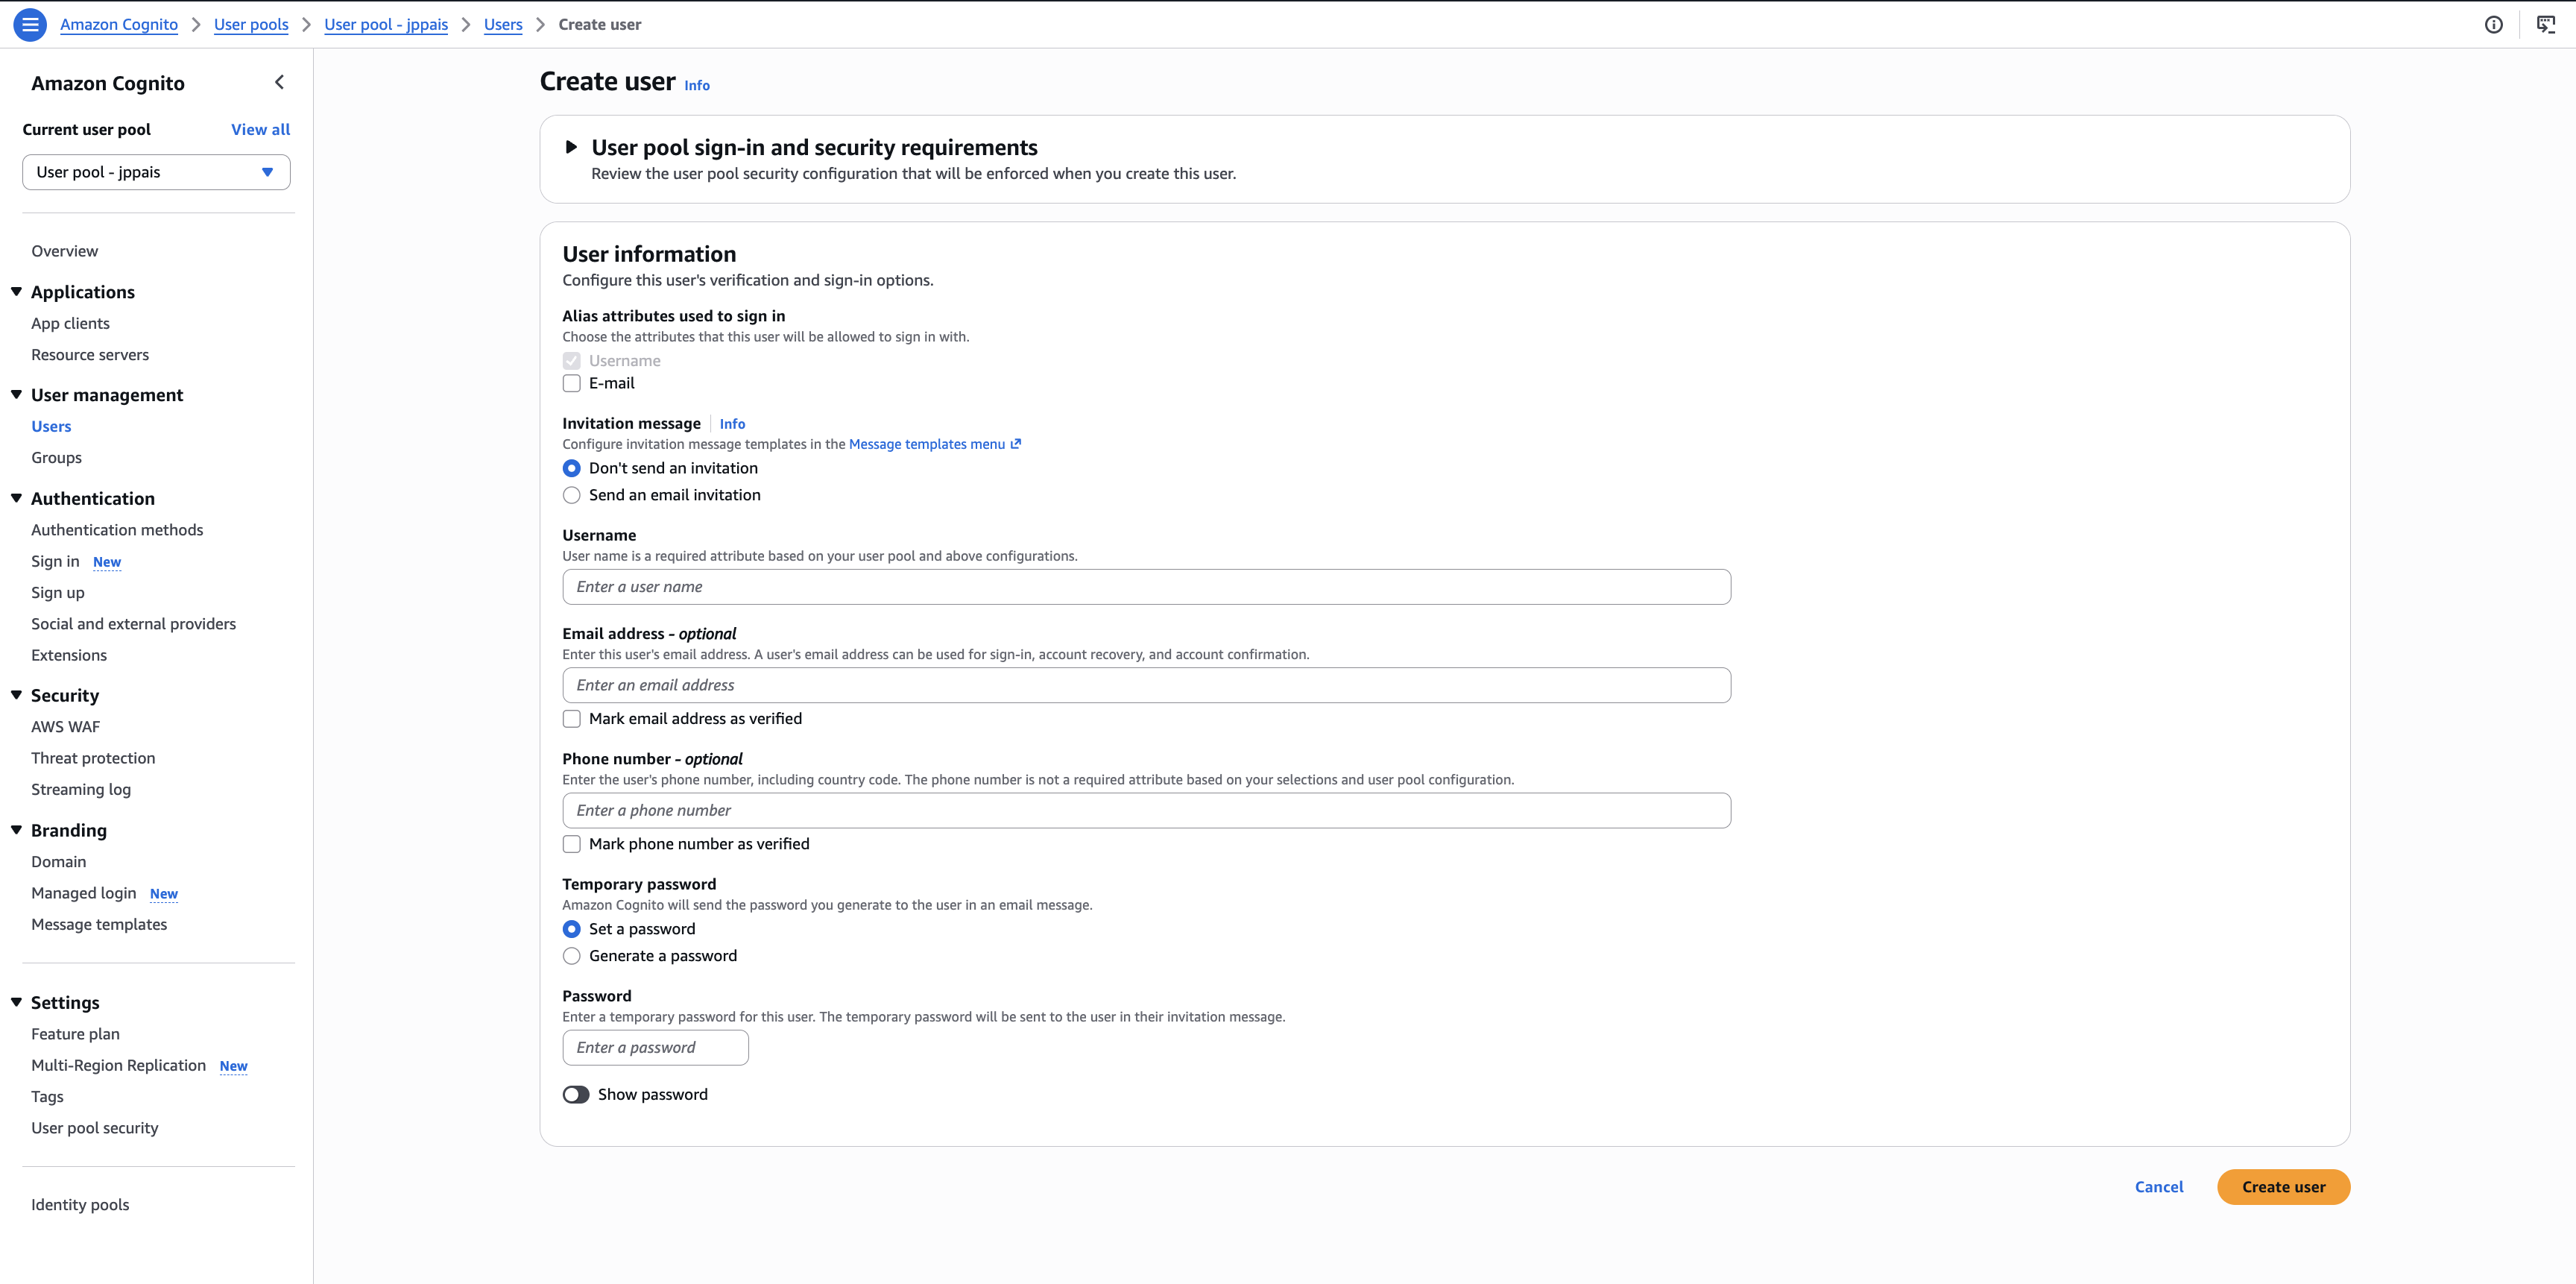
Go to User management > Users and click Create user.
-
Enter the following details of the user:
Parameter Description Invitation message Select Don't send an invitation to share the credentials with the user yourself, or Send an email invitation to email the temporary password to the user. Email address The email address of the user. Select Mark email address as verified so that the user can log in without verifying the email address. Temporary password Select Set a password and enter a password, or select Generate a password to let AWS Cognito generate one. Note
The fields you see depend on the sign-in identifiers and required attributes you selected when creating the user pool. For example, if you selected Username as a sign-in identifier, you need to enter a User name as well.
-
Click Create user.
AWS Cognito creates the user with the Force change password status. The user must change the temporary password at the first login.
Tip
Instead of creating users manually, you can let users create their own accounts. To do so, go to Authentication > Sign-up on your user pool and enable Self-registration. Users can then sign up from the AWS Cognito managed login page.
Register the AWS Cognito IdP
Now, let's register AWS Cognito as a connection in WSO2 Identity Server.
-
On the WSO2 Identity Server Console, go to Connections.
-
Click Create Connection and select Standard-Based IdP.
-
Enter a unique name for the identity provider, for example,
AWS Cognito, select OpenID Connect, and click Next.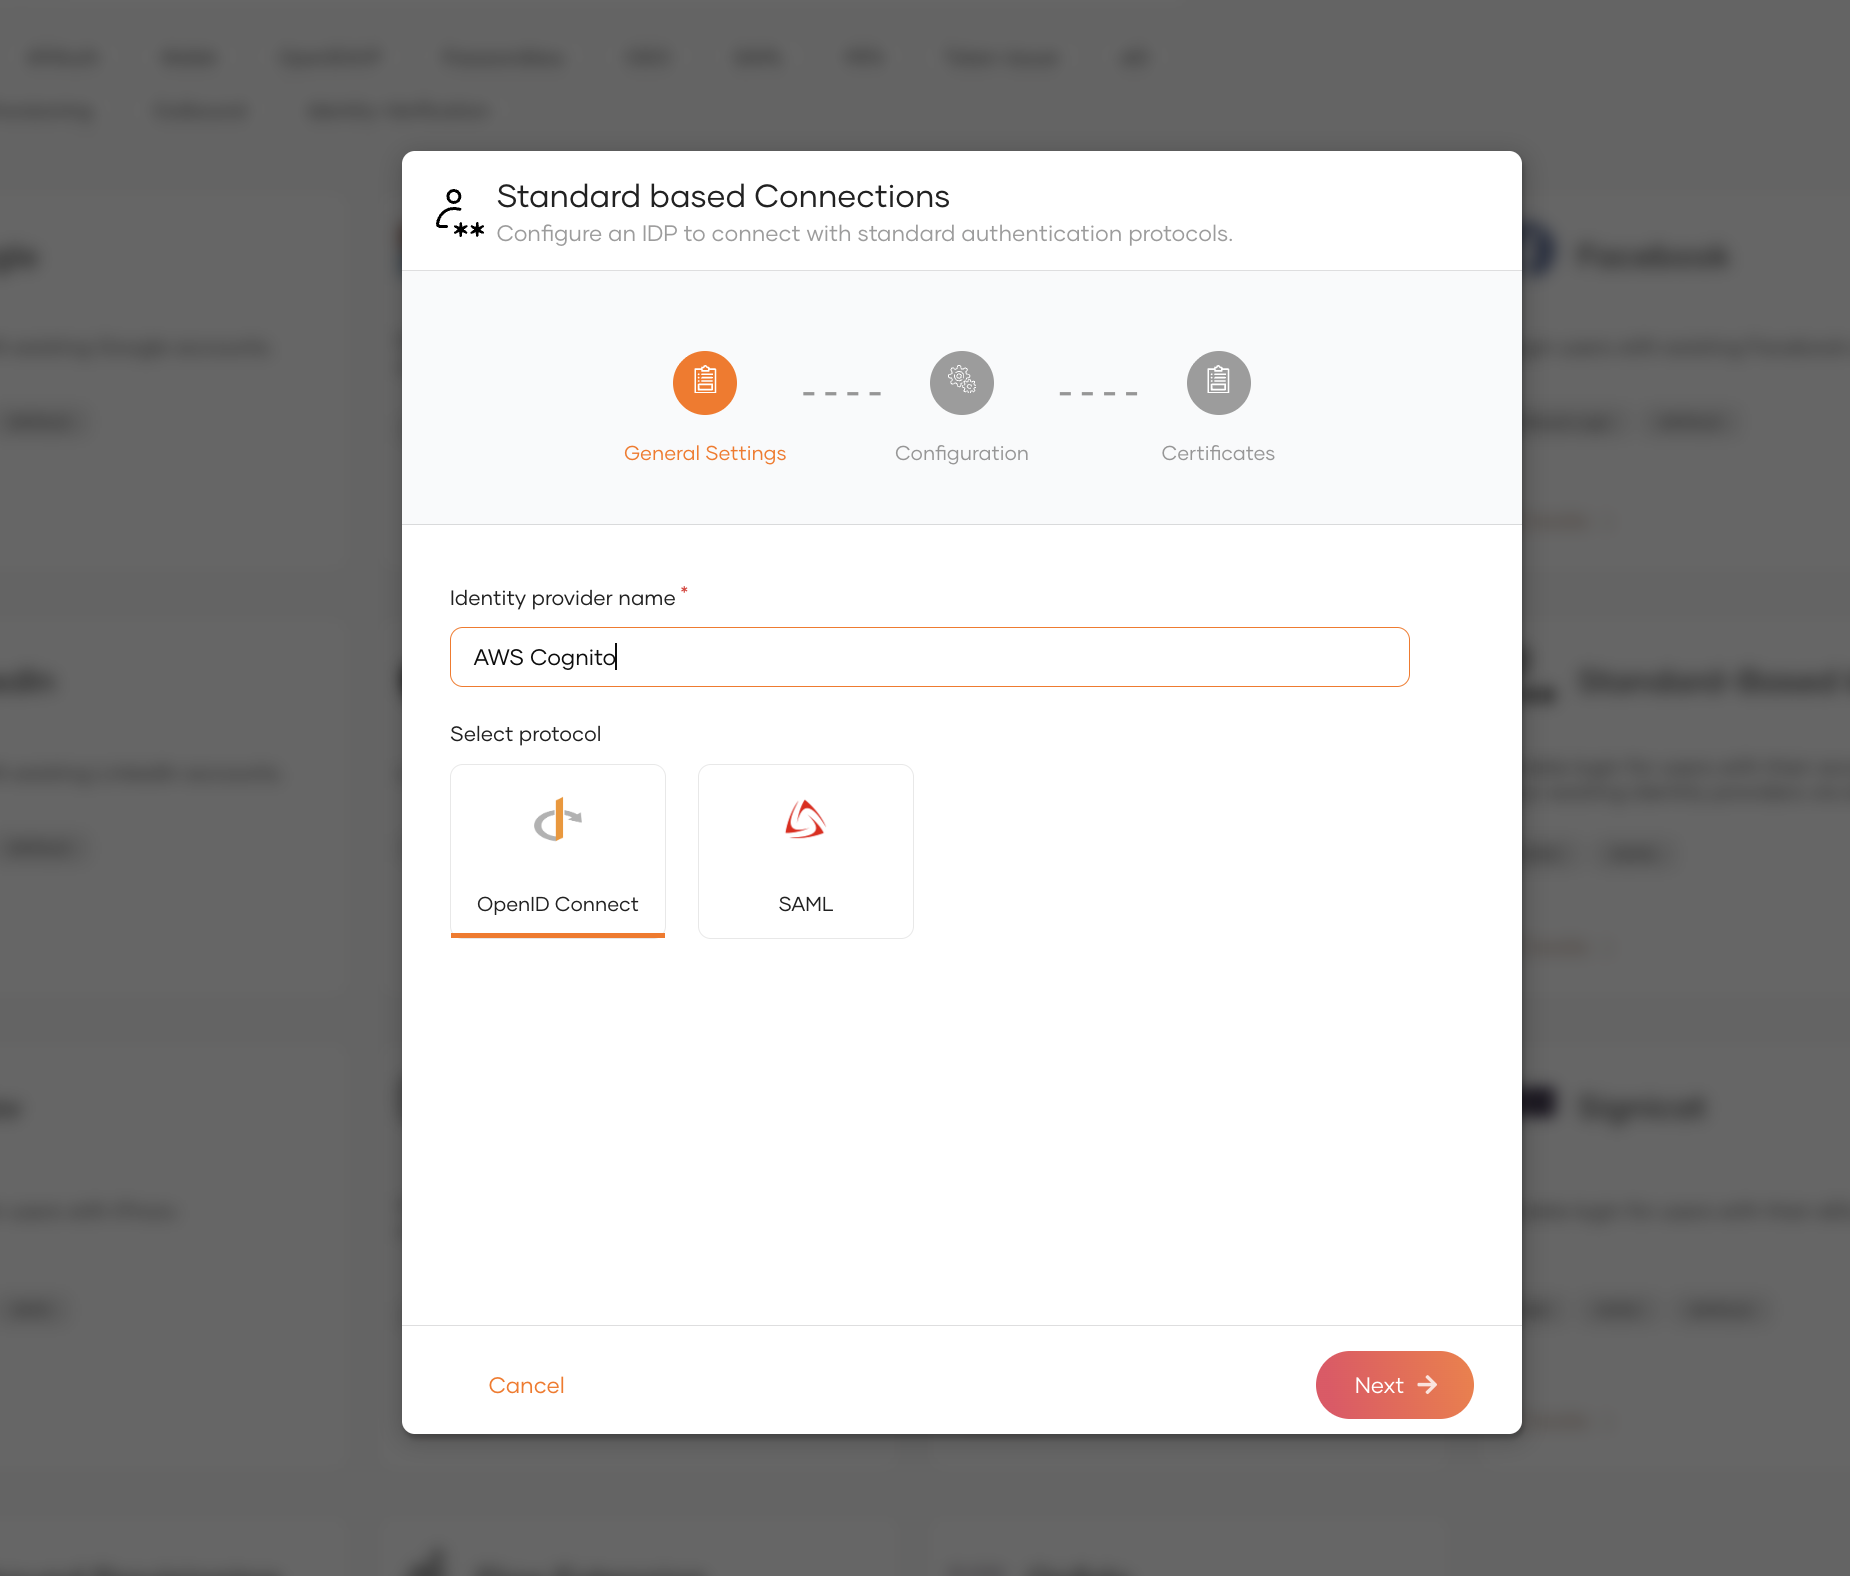
-
Enter the following details of AWS Cognito and click Next:
Parameter Description Client ID The client ID of the AWS Cognito app client. Client secret The client secret of the AWS Cognito app client. Authorization endpoint URL https://<cognito_domain>/oauth2/authorizeToken endpoint URL https://<cognito_domain>/oauth2/token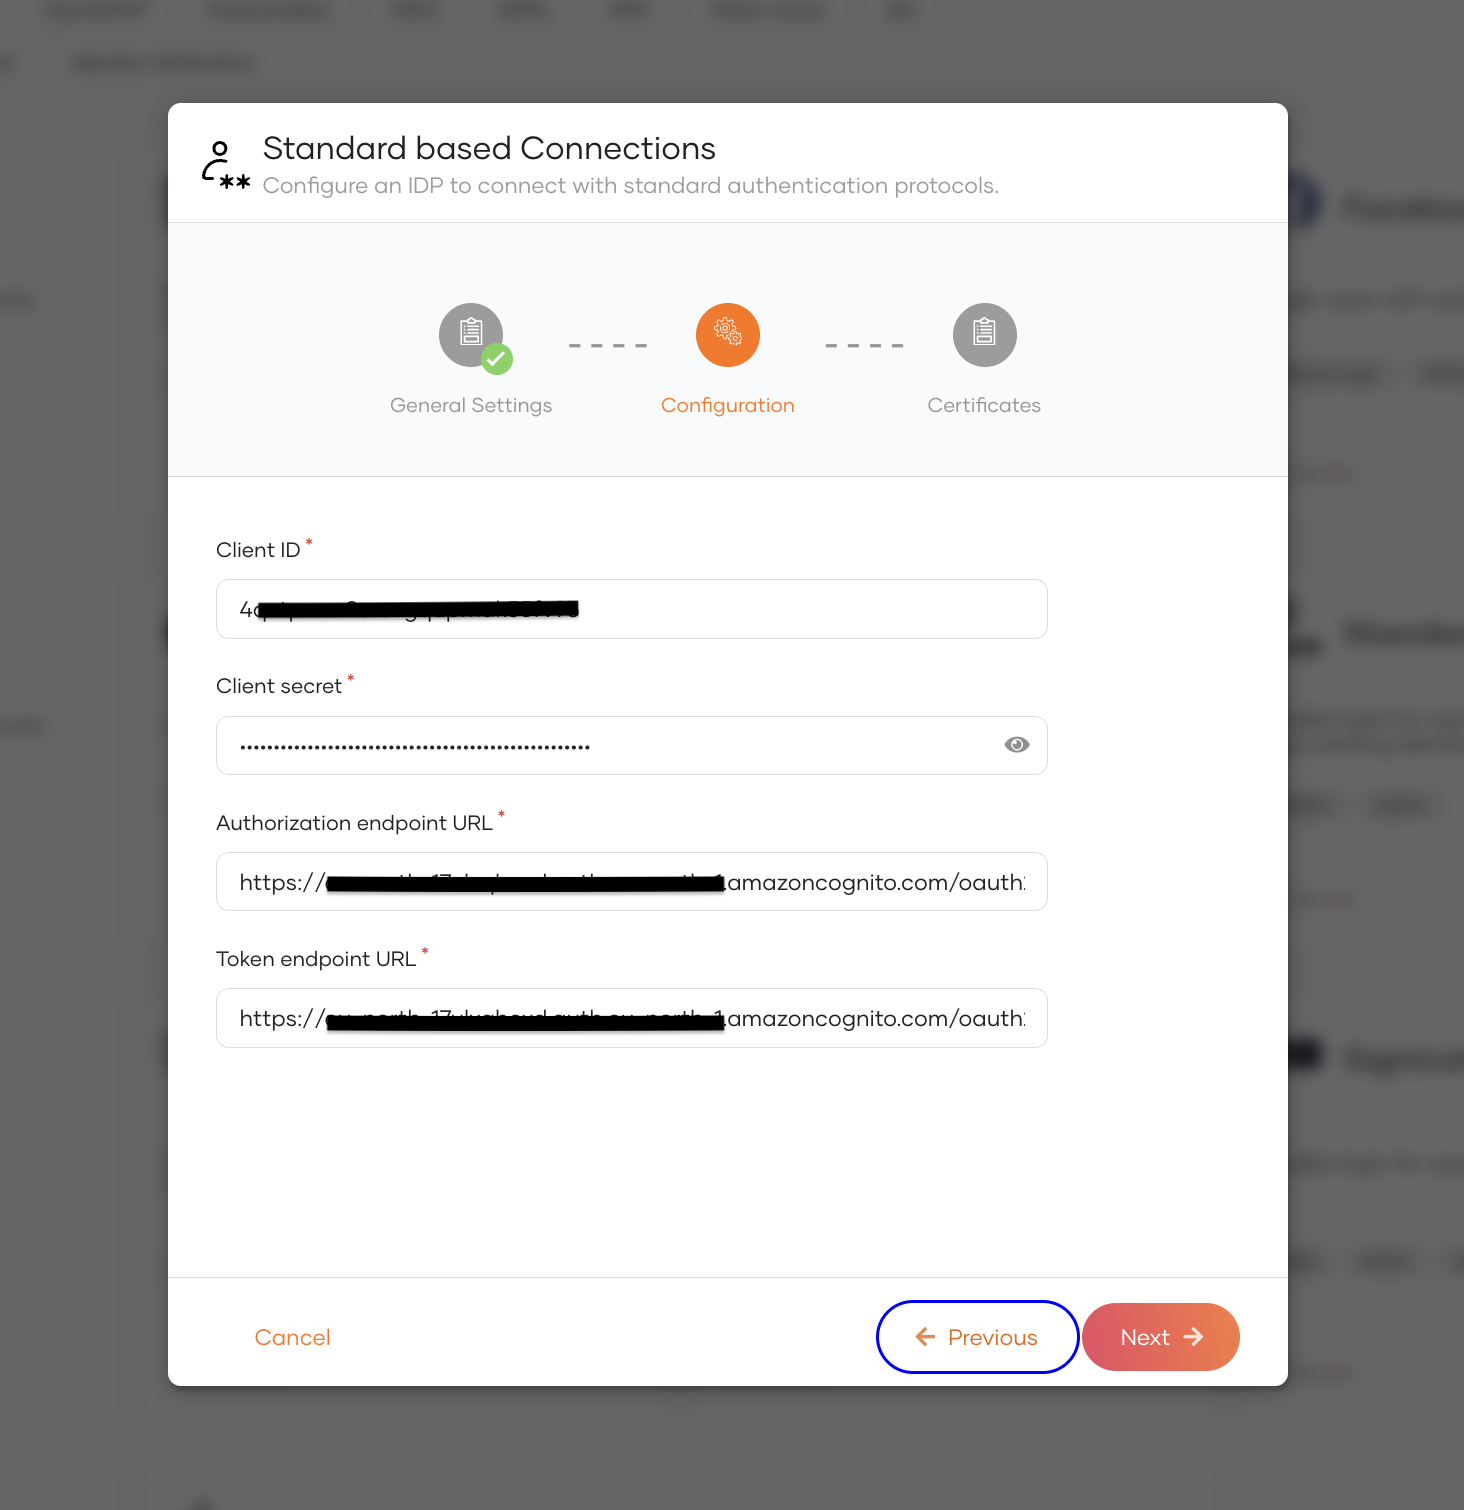
-
Select JWKS endpoint as the mode of certificate configuration and enter the JWKS endpoint of the user pool.
WSO2 Identity Server uses this endpoint to validate the signature of the ID tokens that AWS Cognito issues.
-
Click Finish to complete the registration.
Configure the scopes
By default, WSO2 Identity Server requests only the openid scope from the external identity provider. To receive the user's email and profile attributes from AWS Cognito, add the required scopes.
-
On the created connection, go to the Settings tab.
-
Under Scopes, add
emailandprofile.Note
The scopes you add here must be enabled under OpenID Connect scopes of the AWS Cognito app client.
-
Optionally, enter
https://cognito-idp.<region>.amazonaws.com/<user_pool_id>/oauth2/userInfoas the Userinfo Endpoint URL. -
Click Update to save your changes.
Enable AWS Cognito login
Before you begin
You need to register an application with WSO2 Identity Server. You can register your own application or use one of the sample applications provided.
To enable AWS Cognito login:
-
On the WSO2 Identity Server Console, go to Applications.
-
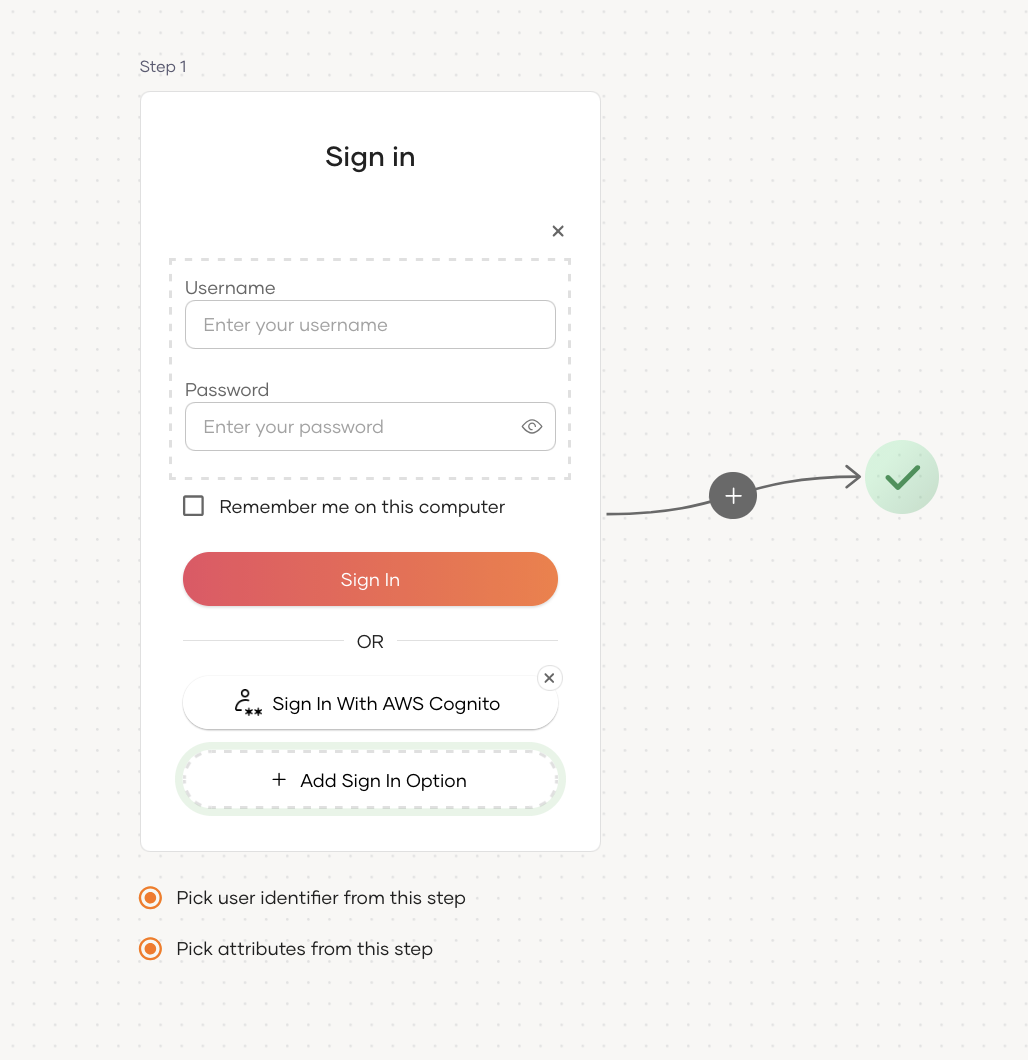
Select your application, go to the Login Flow tab and add AWS Cognito login from your preferred editor:
-
Click Add Sign In Option to add a new authenticator to the first step.
-
Select the AWS Cognito connection.
-
Click Confirm to add AWS Cognito login to the sign-in flow.
Recommendations
It is recommended to add your social and enterprise connections to the first authentication step as they are used for identifying the user.
-
-
Click Update to save your changes.
Try it out
Follow the steps given below.
-
Access the application URL.
-
Click Login to open the WSO2 Identity Server login page.
-
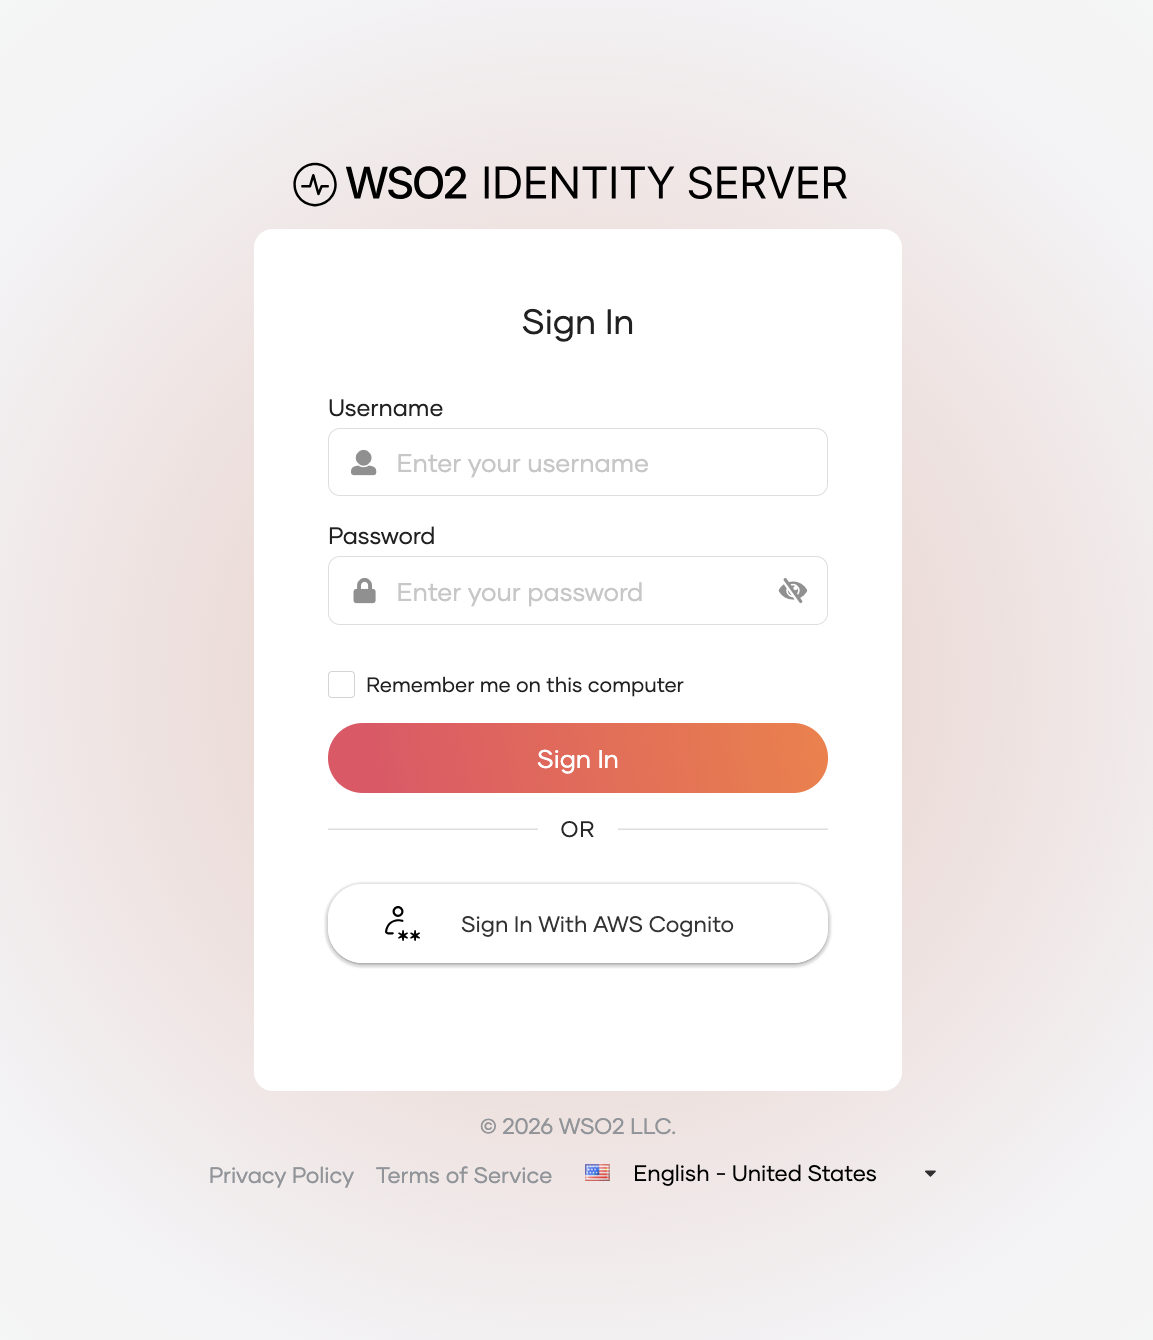
On the WSO2 Identity Server login page, click Sign in with AWS Cognito.
Note
The label of the login button uses the name you gave the connection.
-
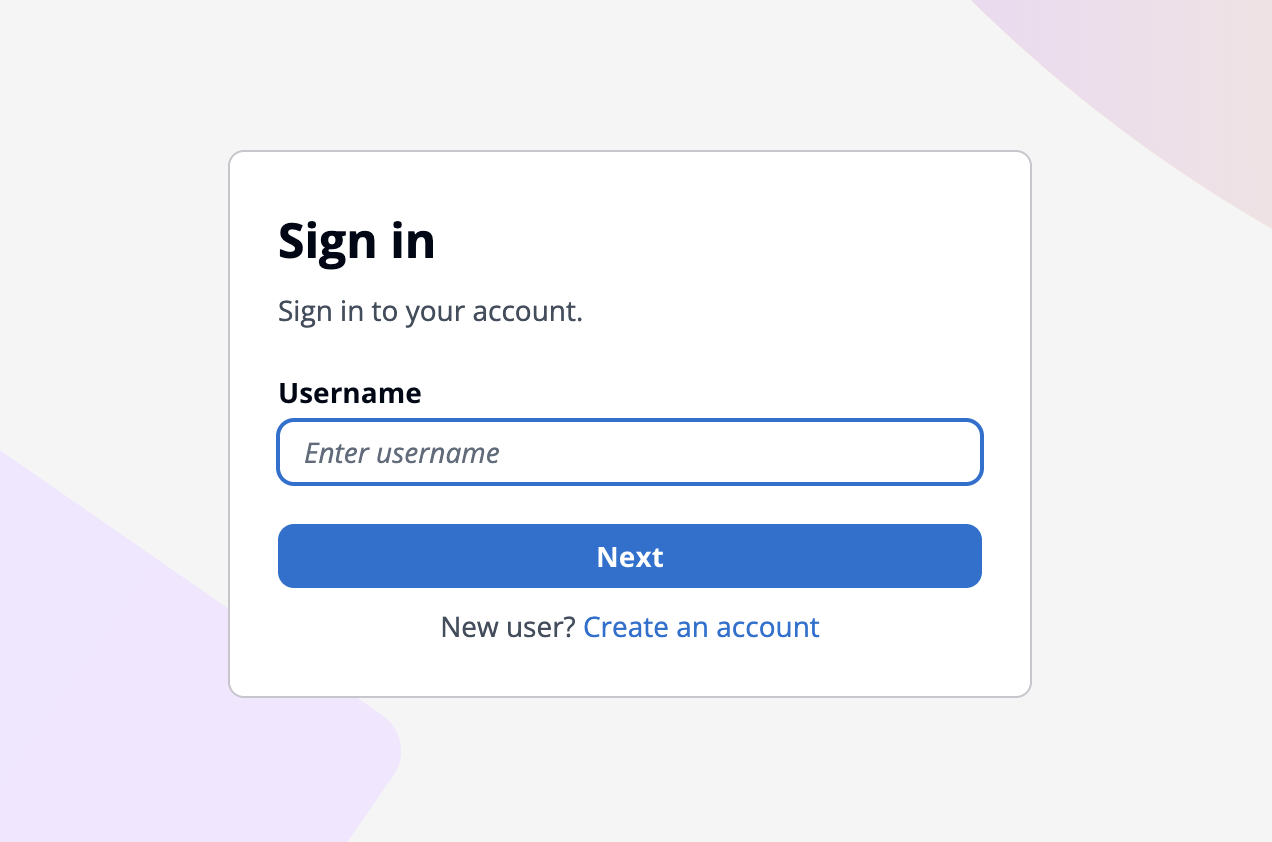
Log in to the AWS Cognito managed login page using an AWS Cognito user account. If you don't have a user account yet, see Create a user in the user pool.
Note
If you created the user with a temporary password, AWS Cognito prompts the user to set a new password at the first login.
Configure user attributes
AWS Cognito returns user attributes as standard OpenID Connect claims such as sub, email, email_verified, given_name, and family_name. The sub claim holds a unique identifier that AWS Cognito generates for the user.
Configuring attributes for an Identity Provider (IdP) involves mapping the attributes available in the external IdP to local attributes. This is done so that WSO2 Identity Server can identify the user attributes in the response sent from the external IdP.
To do so,
-
On the WSO2 Identity Server Console, click Connections.
-
Select the relevant IdP connection from the list and click Set up.
-
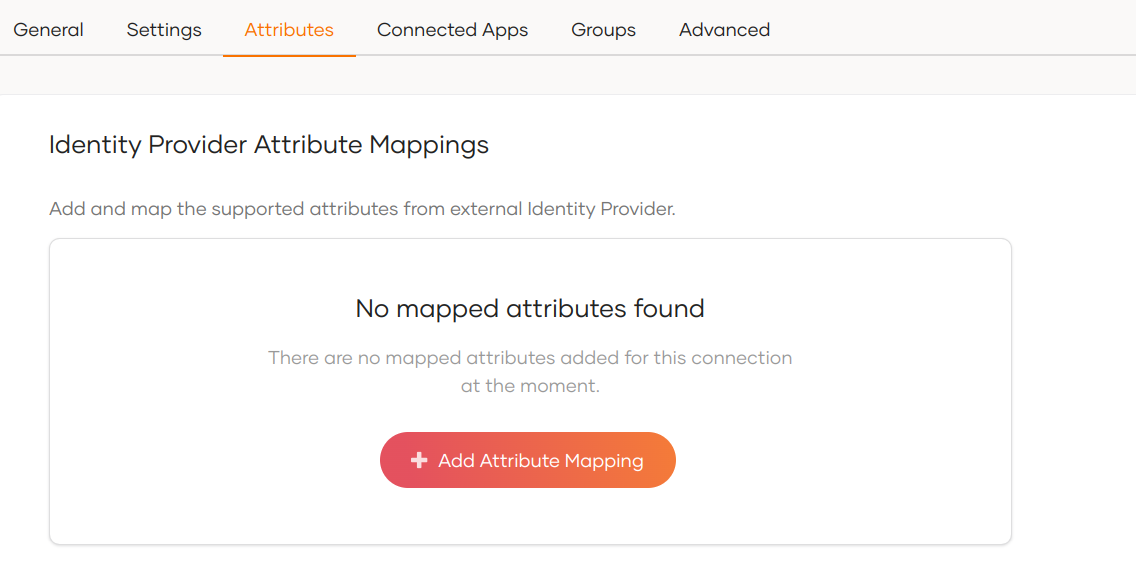
Go to the Attributes tab and under Identity Provider Attribute Mappings, click Add Attribute Mapping.
-
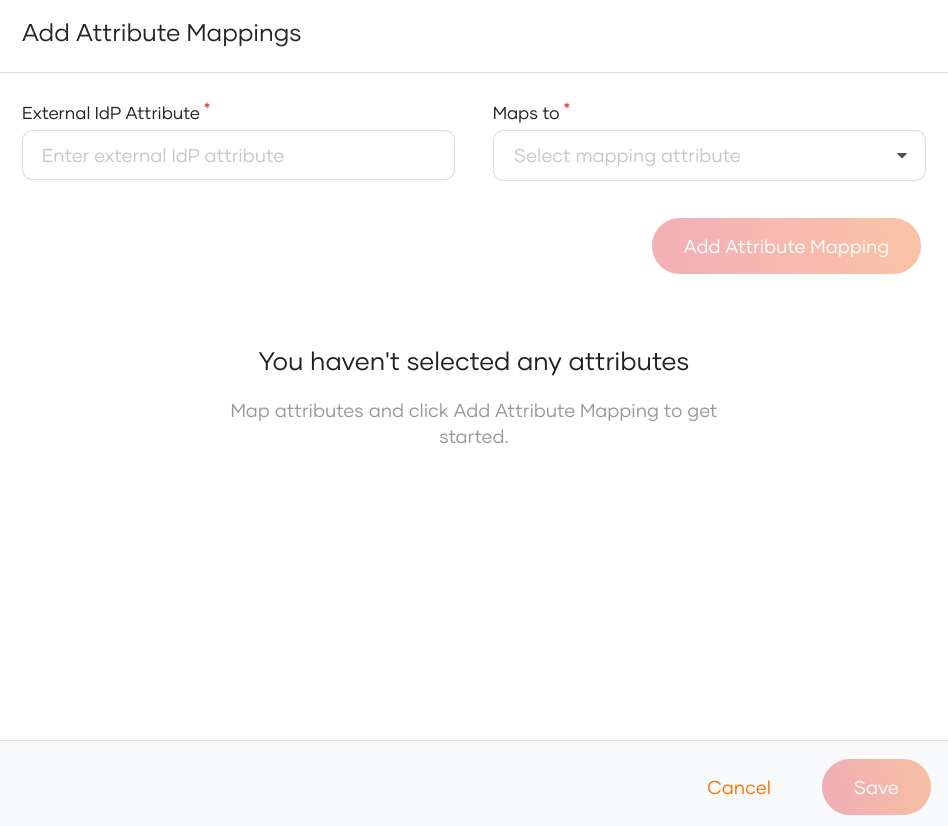
Enter the external attribute, select the corresponding local attribute to which it maps and click Add Attribute Mapping.
-
Click Save to save the entries.
-
Under Subject, select a Subject Attribute that will be used to uniquely identify the user.
-
Under Provisioning Attributes Selection, select the required attributes that needs to be sent in the response to provision the user in WSO2 Identity Server.
-
Click Update to save the changes.
Configure connection
To learn more about other configurations available for the connection, refer to the add federated login documentation.