Log in to AWS IAM Identity Center using WSO2 Identity Server
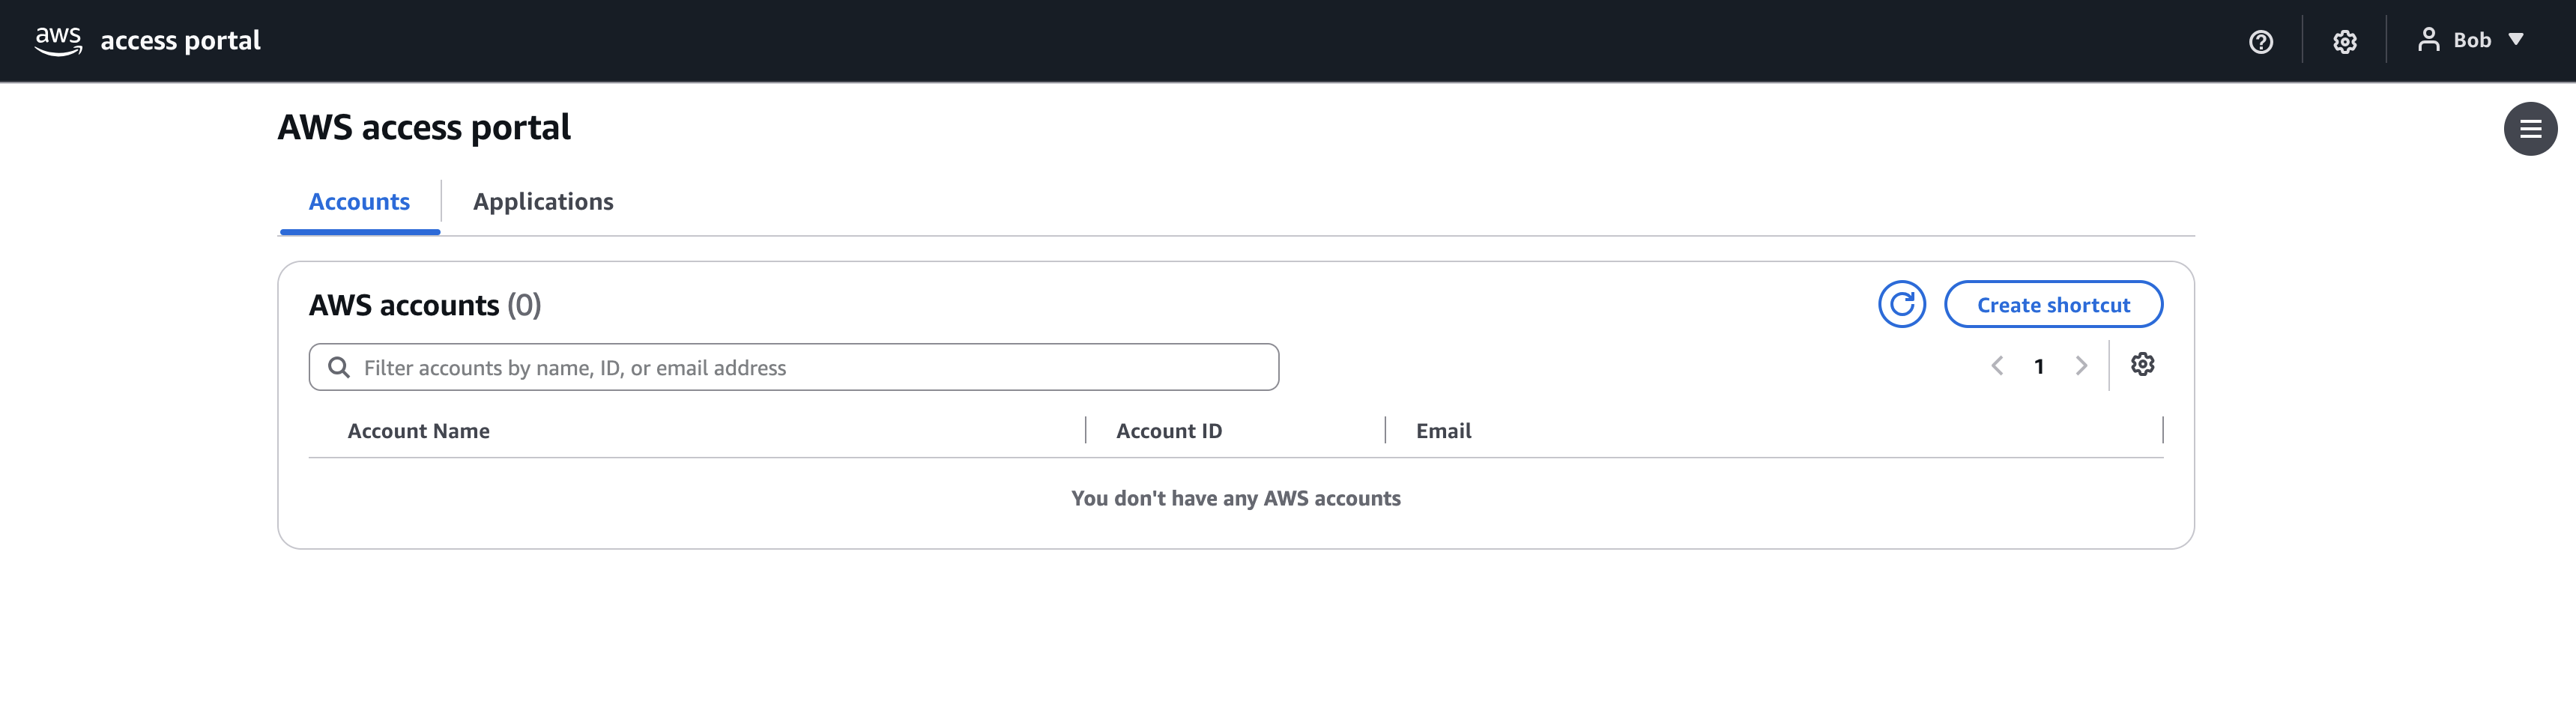
This page guides you through integrating WSO2 Identity Server for Single Sign-On (SSO) with AWS IAM Identity Center. Once configured, users sign in to the AWS access portal with their WSO2 Identity Server credentials and access the AWS accounts and applications assigned to them.
In this integration, WSO2 Identity Server acts as the SAML 2.0 identity provider and AWS IAM Identity Center acts as the service provider.
Before you begin
- You need an AWS account with IAM Identity Center enabled. Refer to the AWS documentation for more details.
- You need administrator permissions to change the identity source of your IAM Identity Center instance.
Get the SAML application details from AWS
Follow the steps below to obtain the SAML service provider details of IAM Identity Center.
-
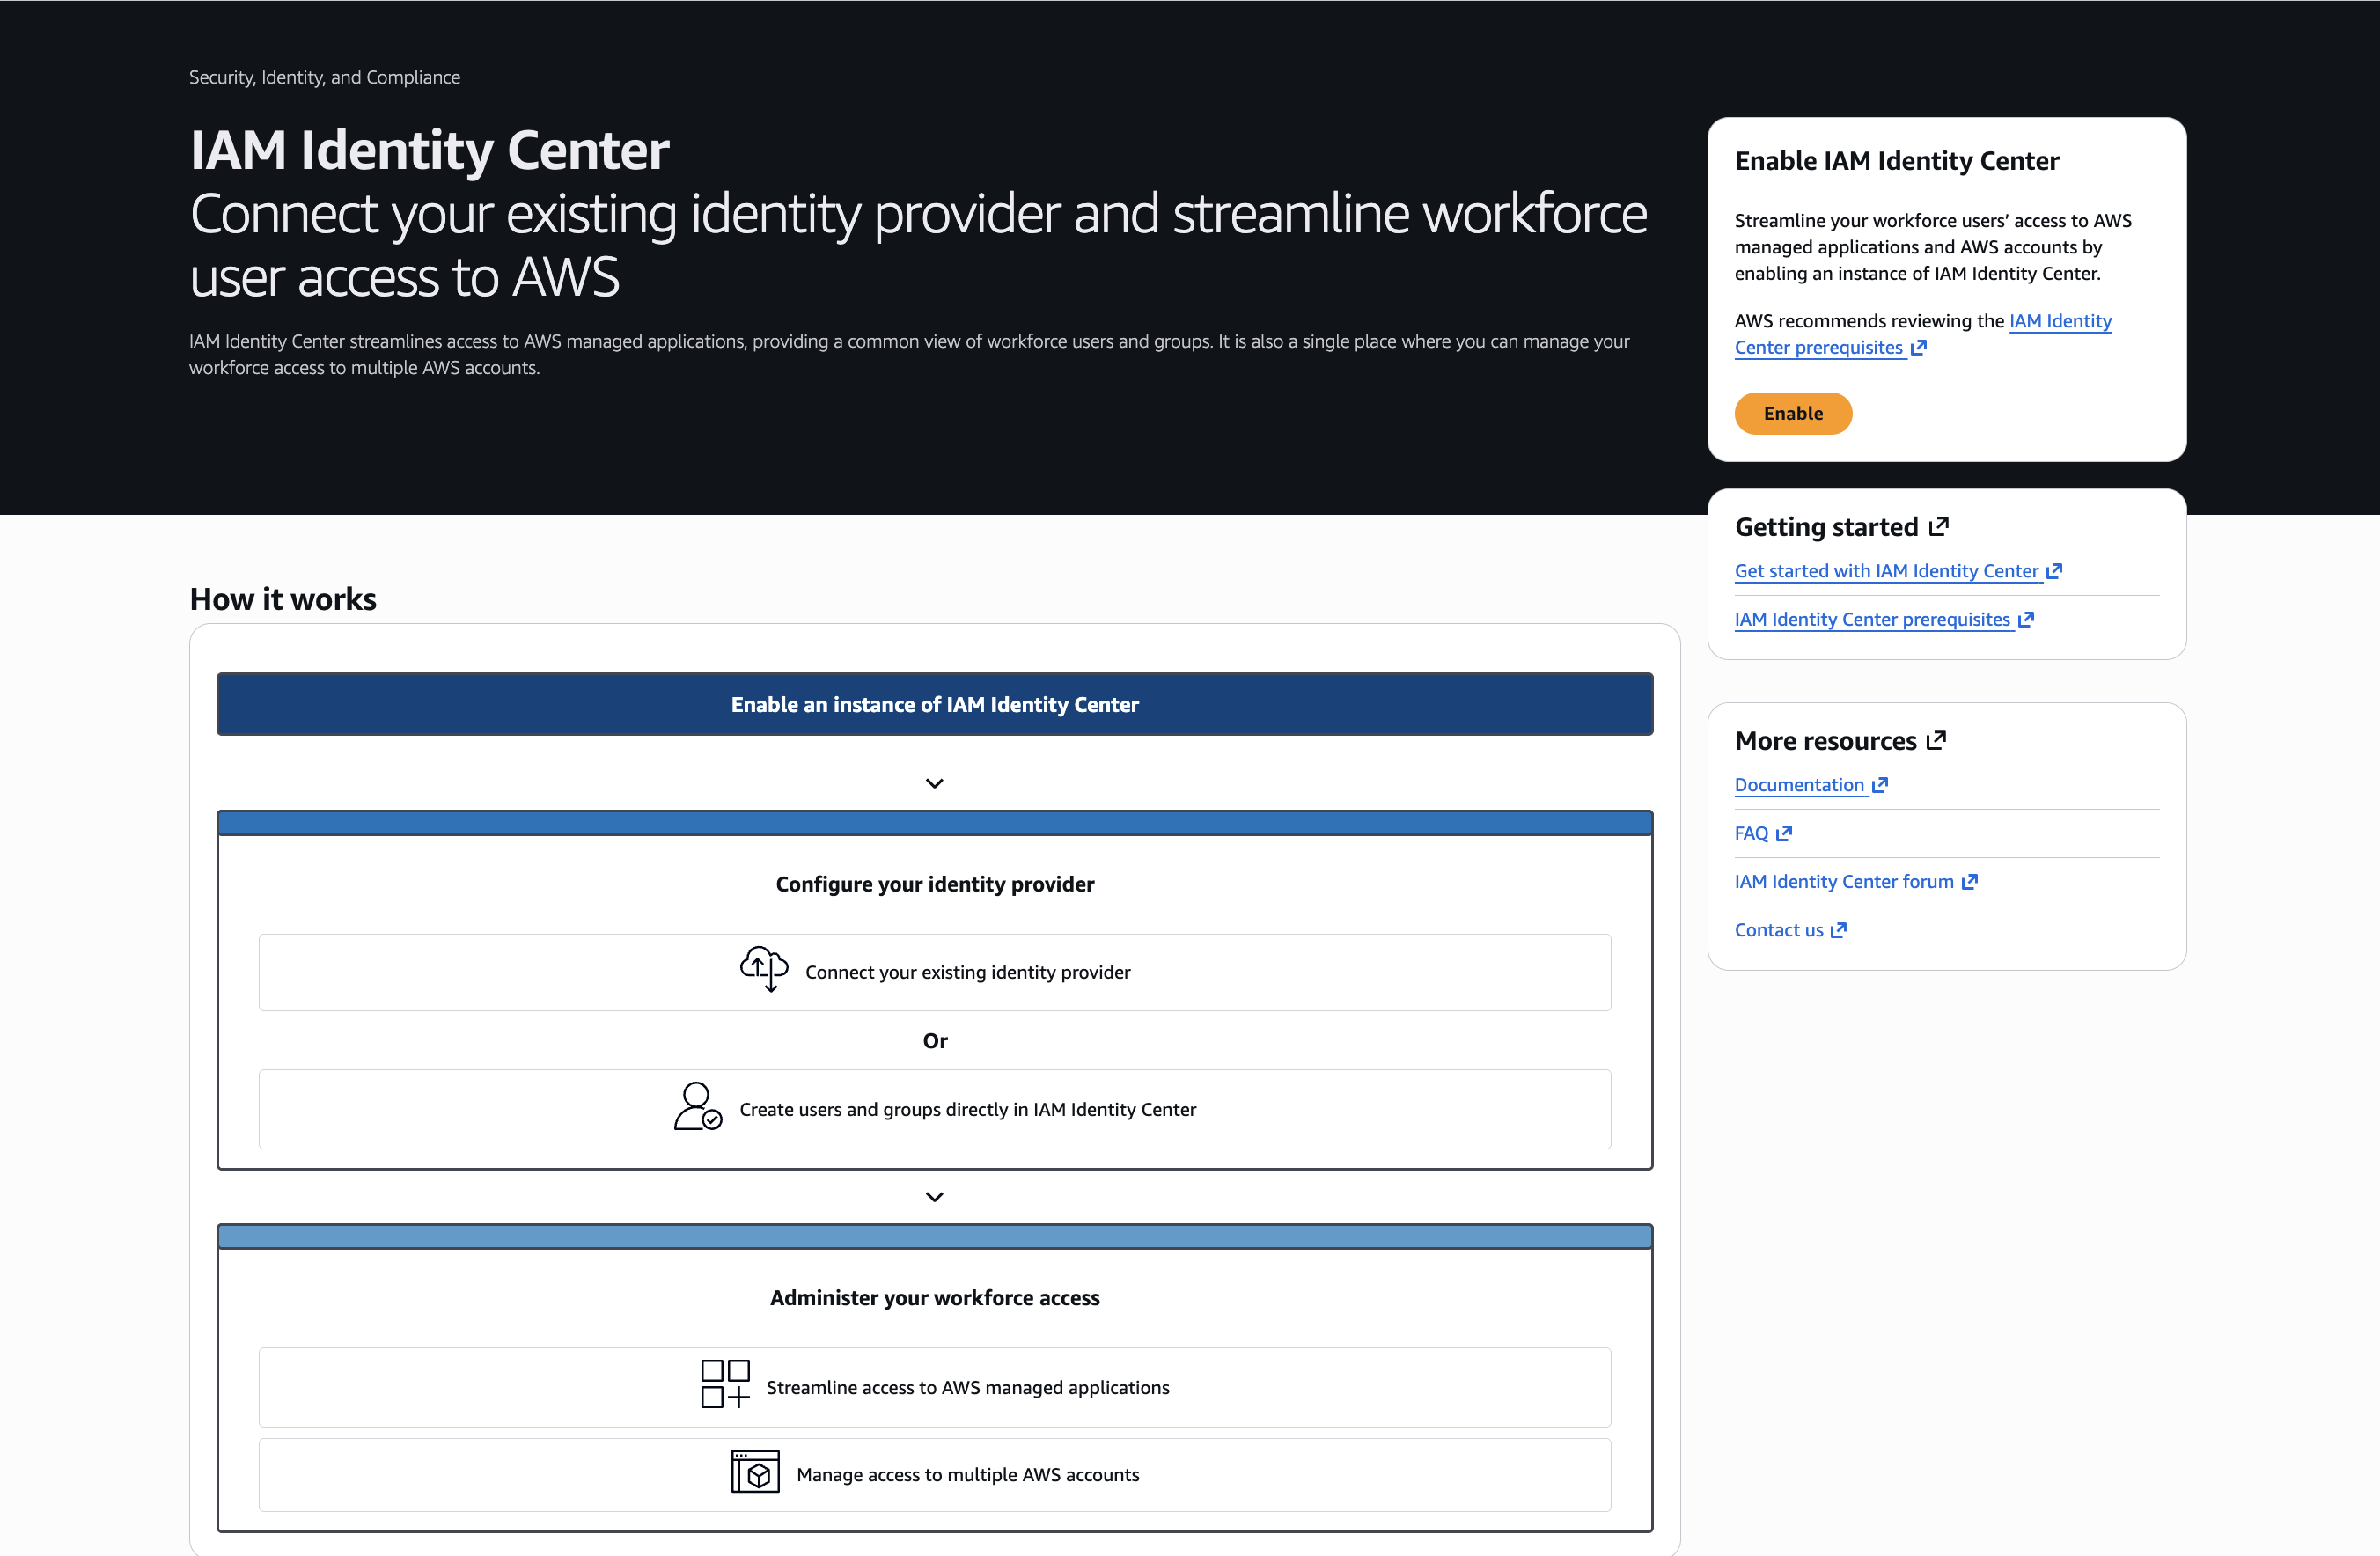
Sign in to the AWS Management Console and open the IAM Identity Center console.
If IAM Identity Center is not yet enabled in your account, click Enable.
-
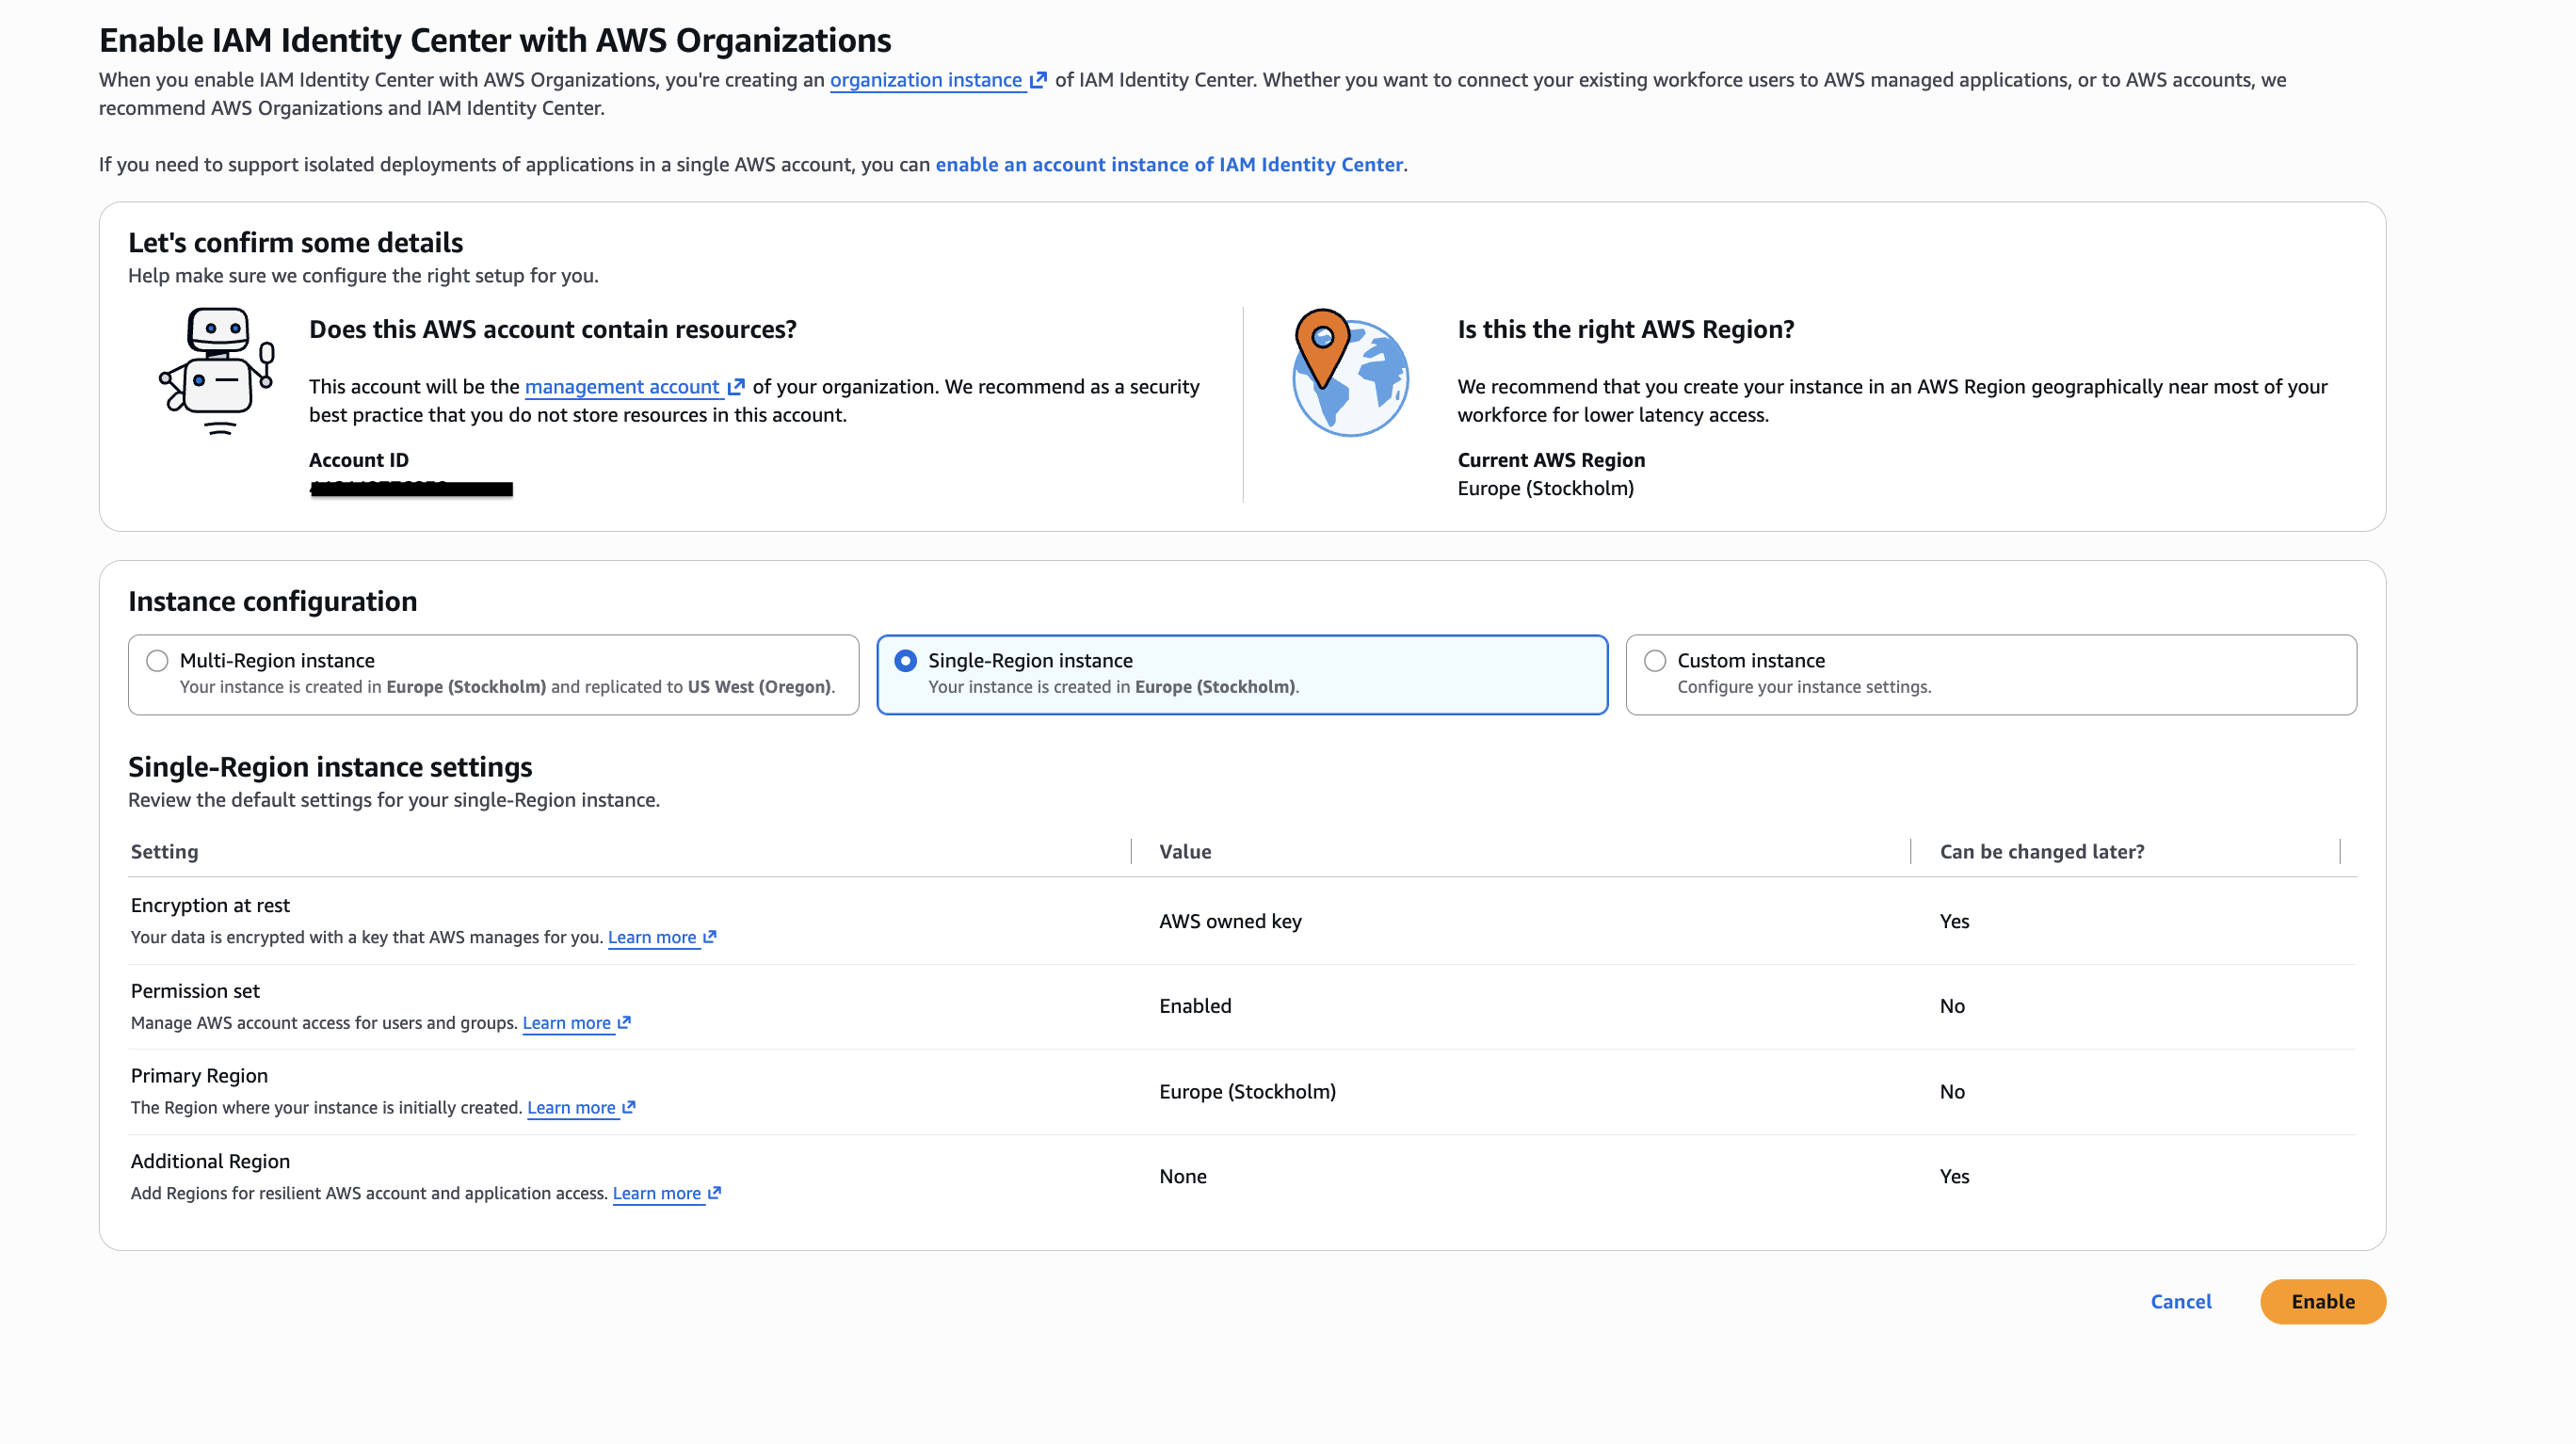
Review the instance configuration and click Enable to create an organization instance of IAM Identity Center.
-
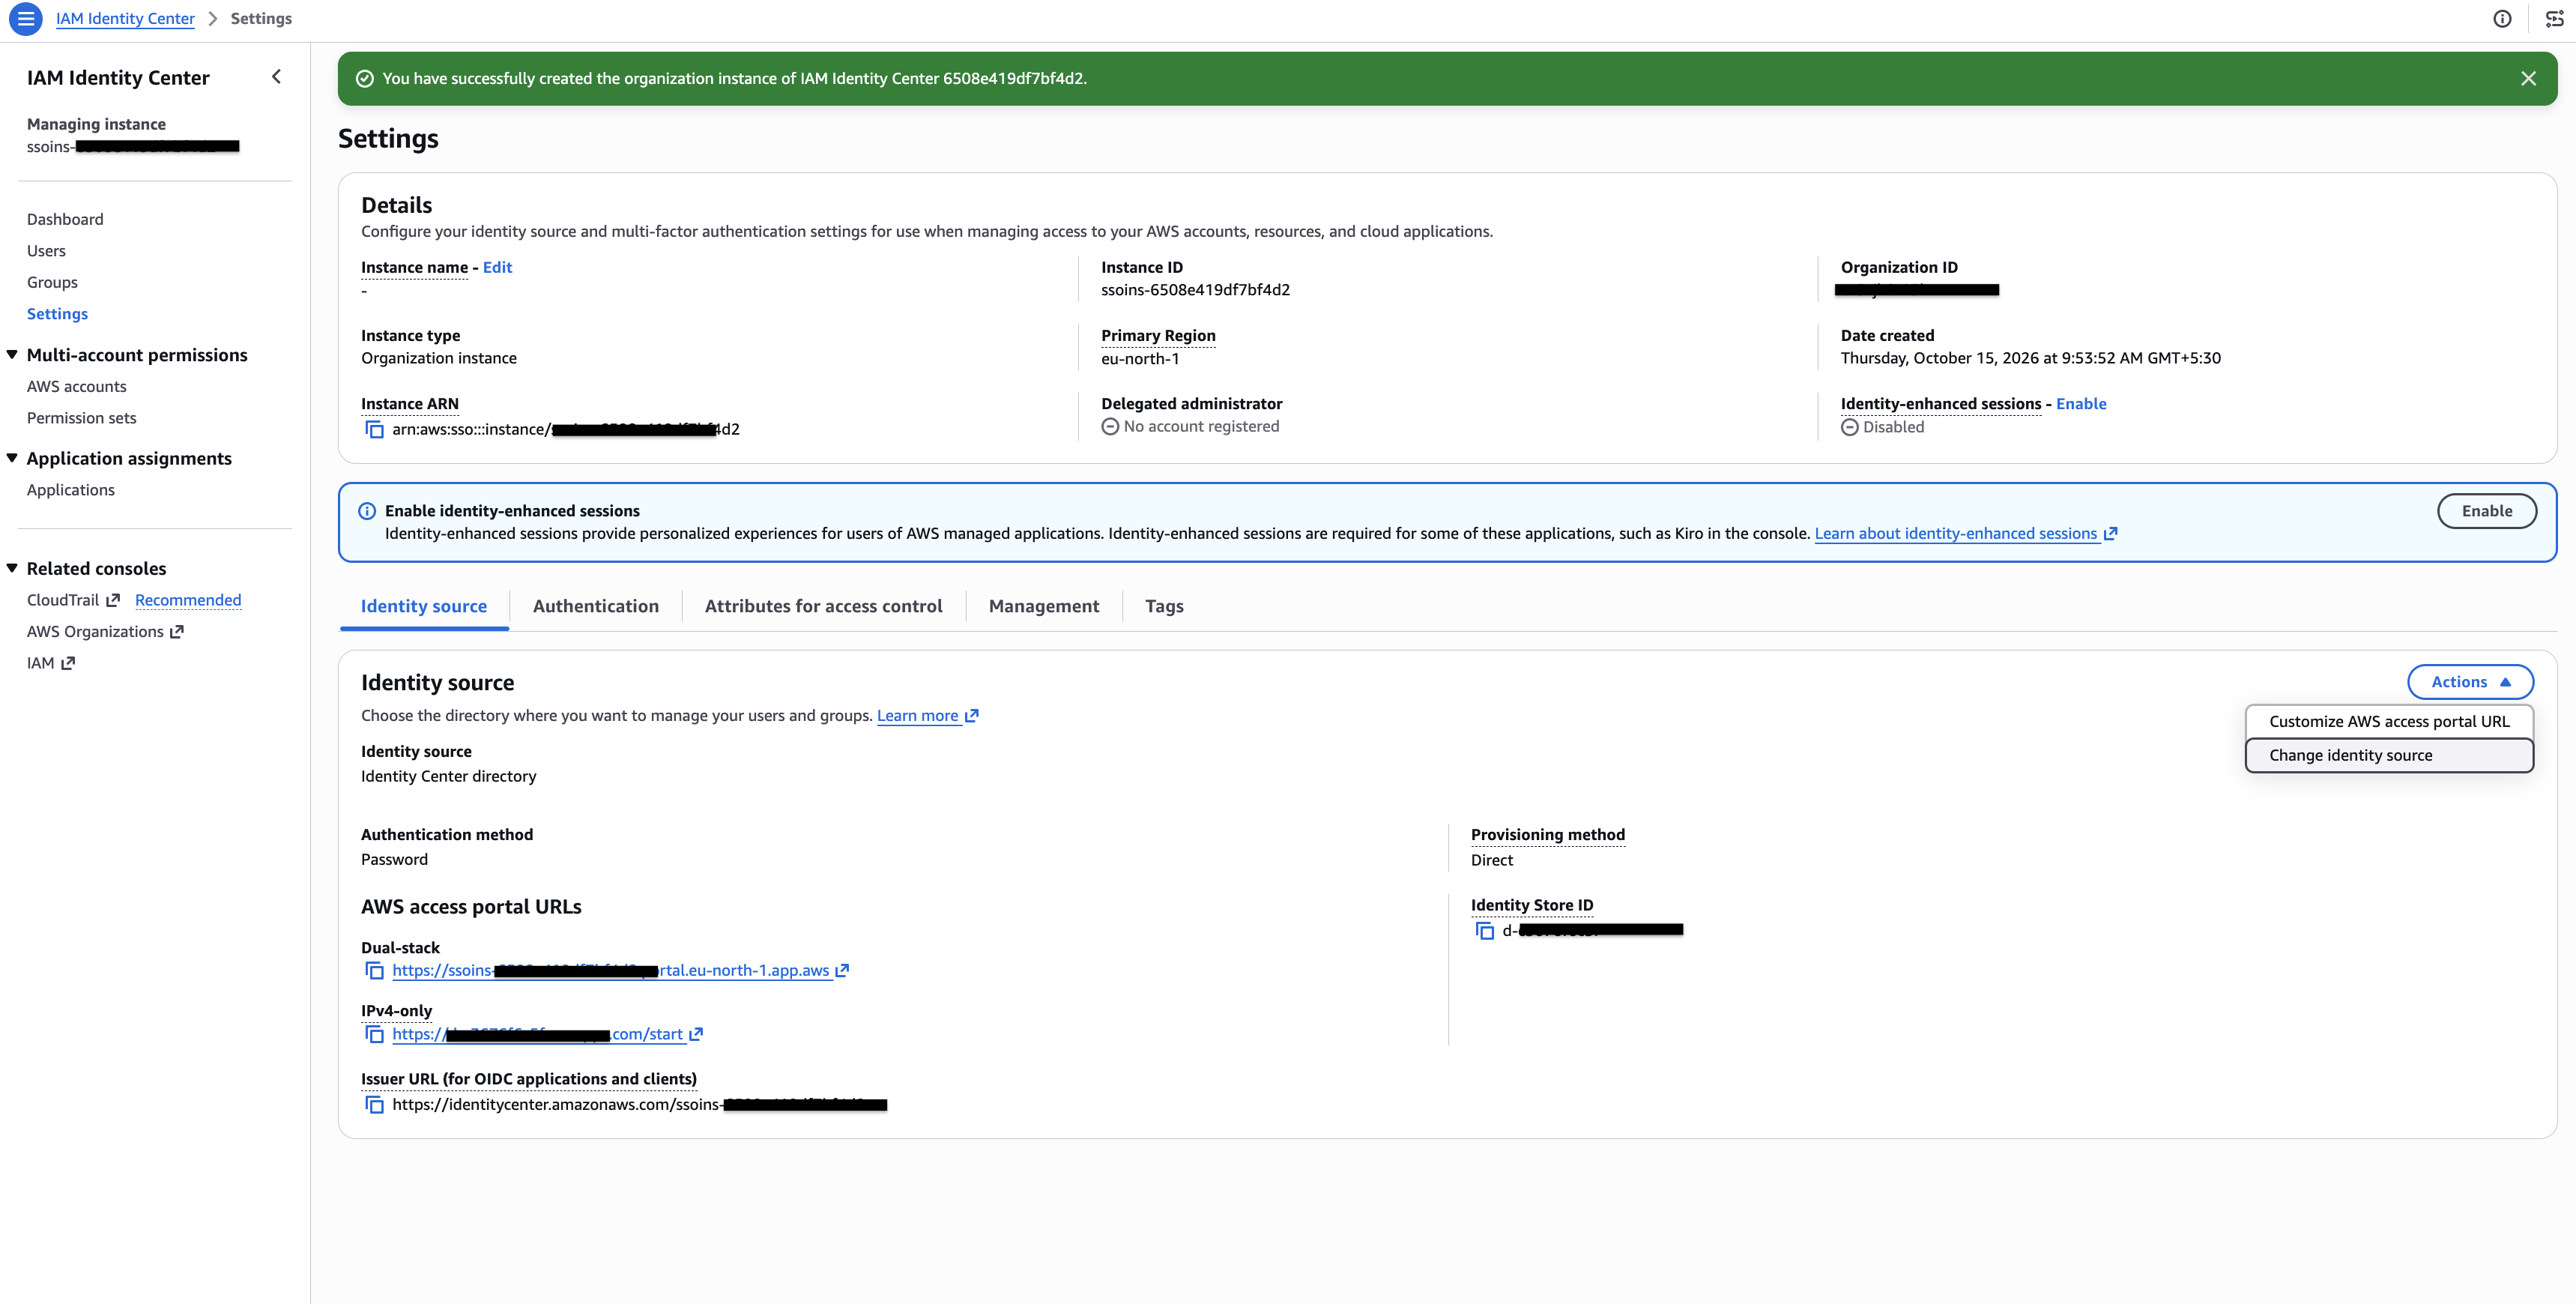
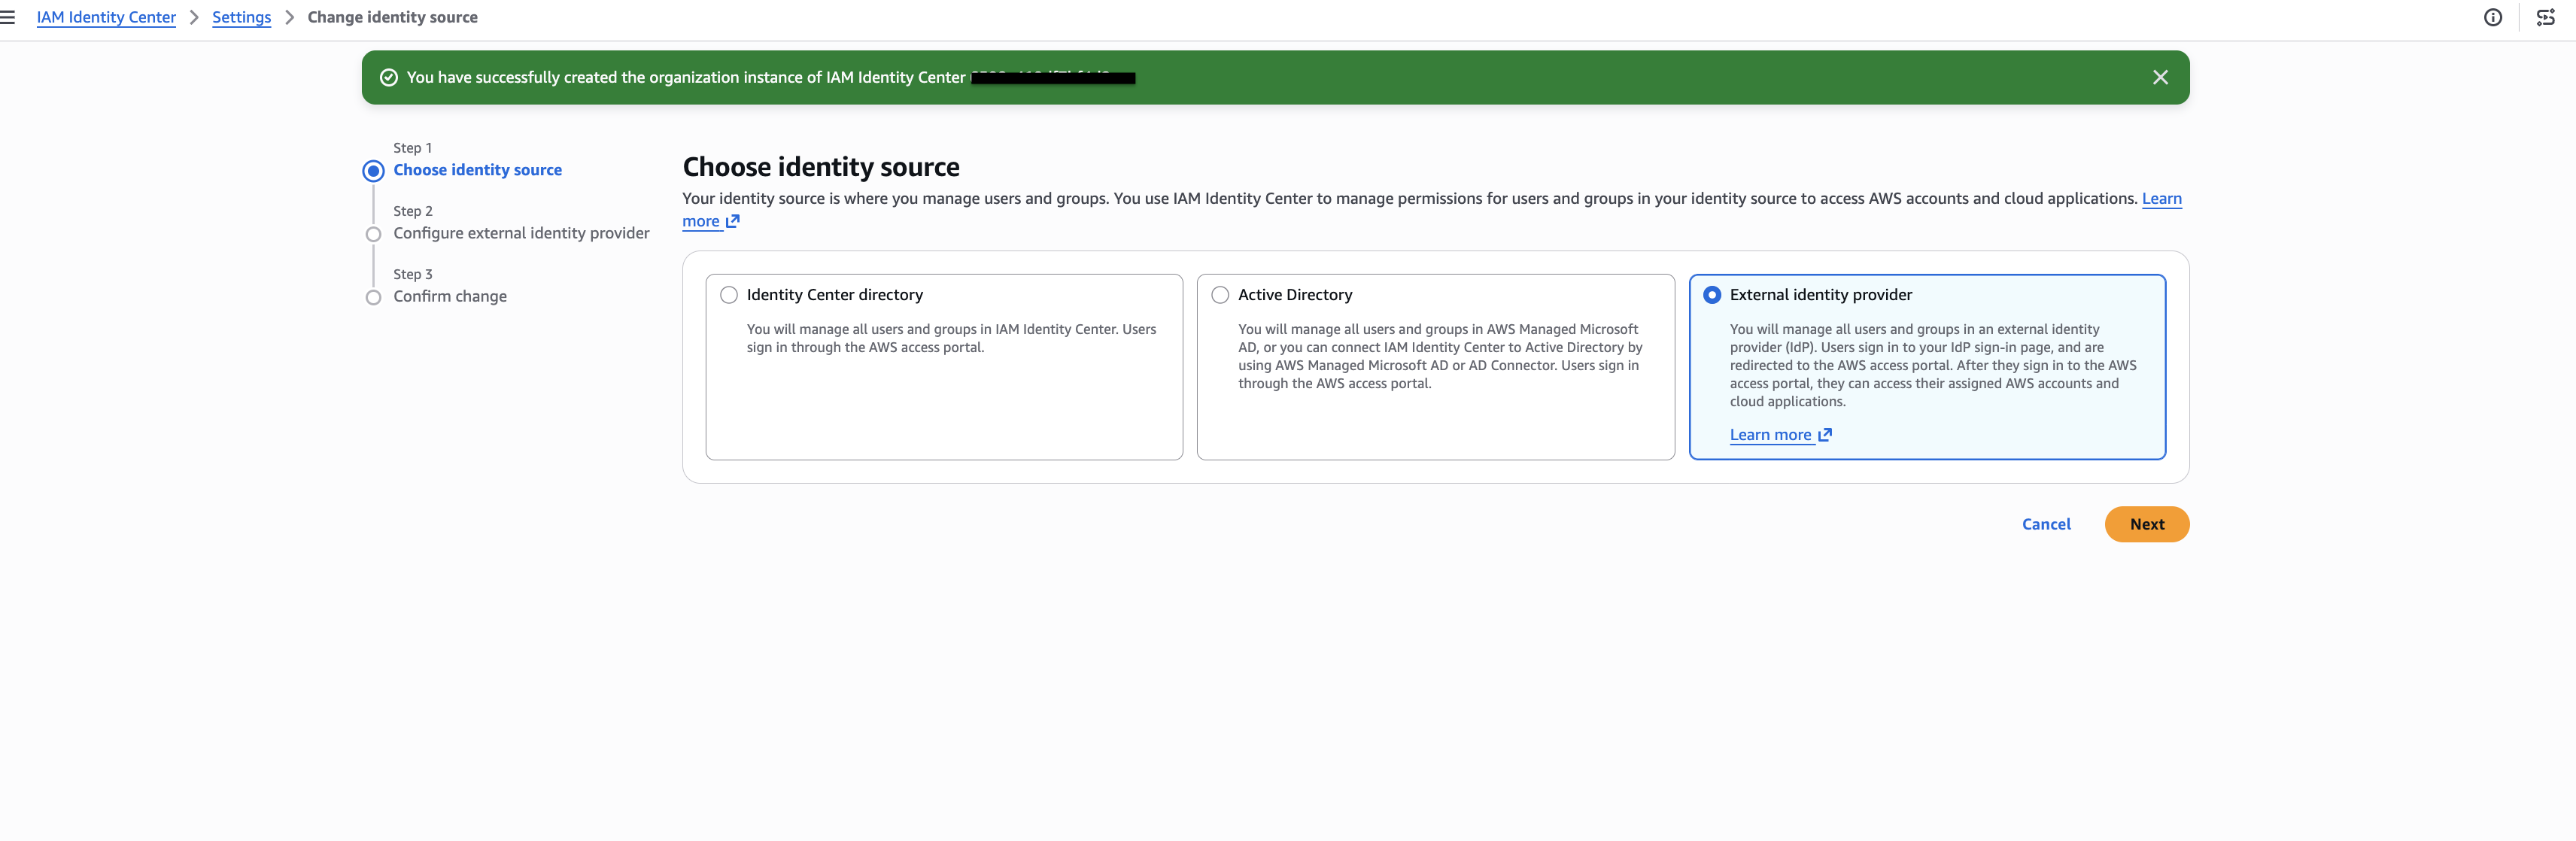
Go to Settings and under the Identity source tab, click Actions > Change identity source.
-
Select External identity provider and click Next.
-
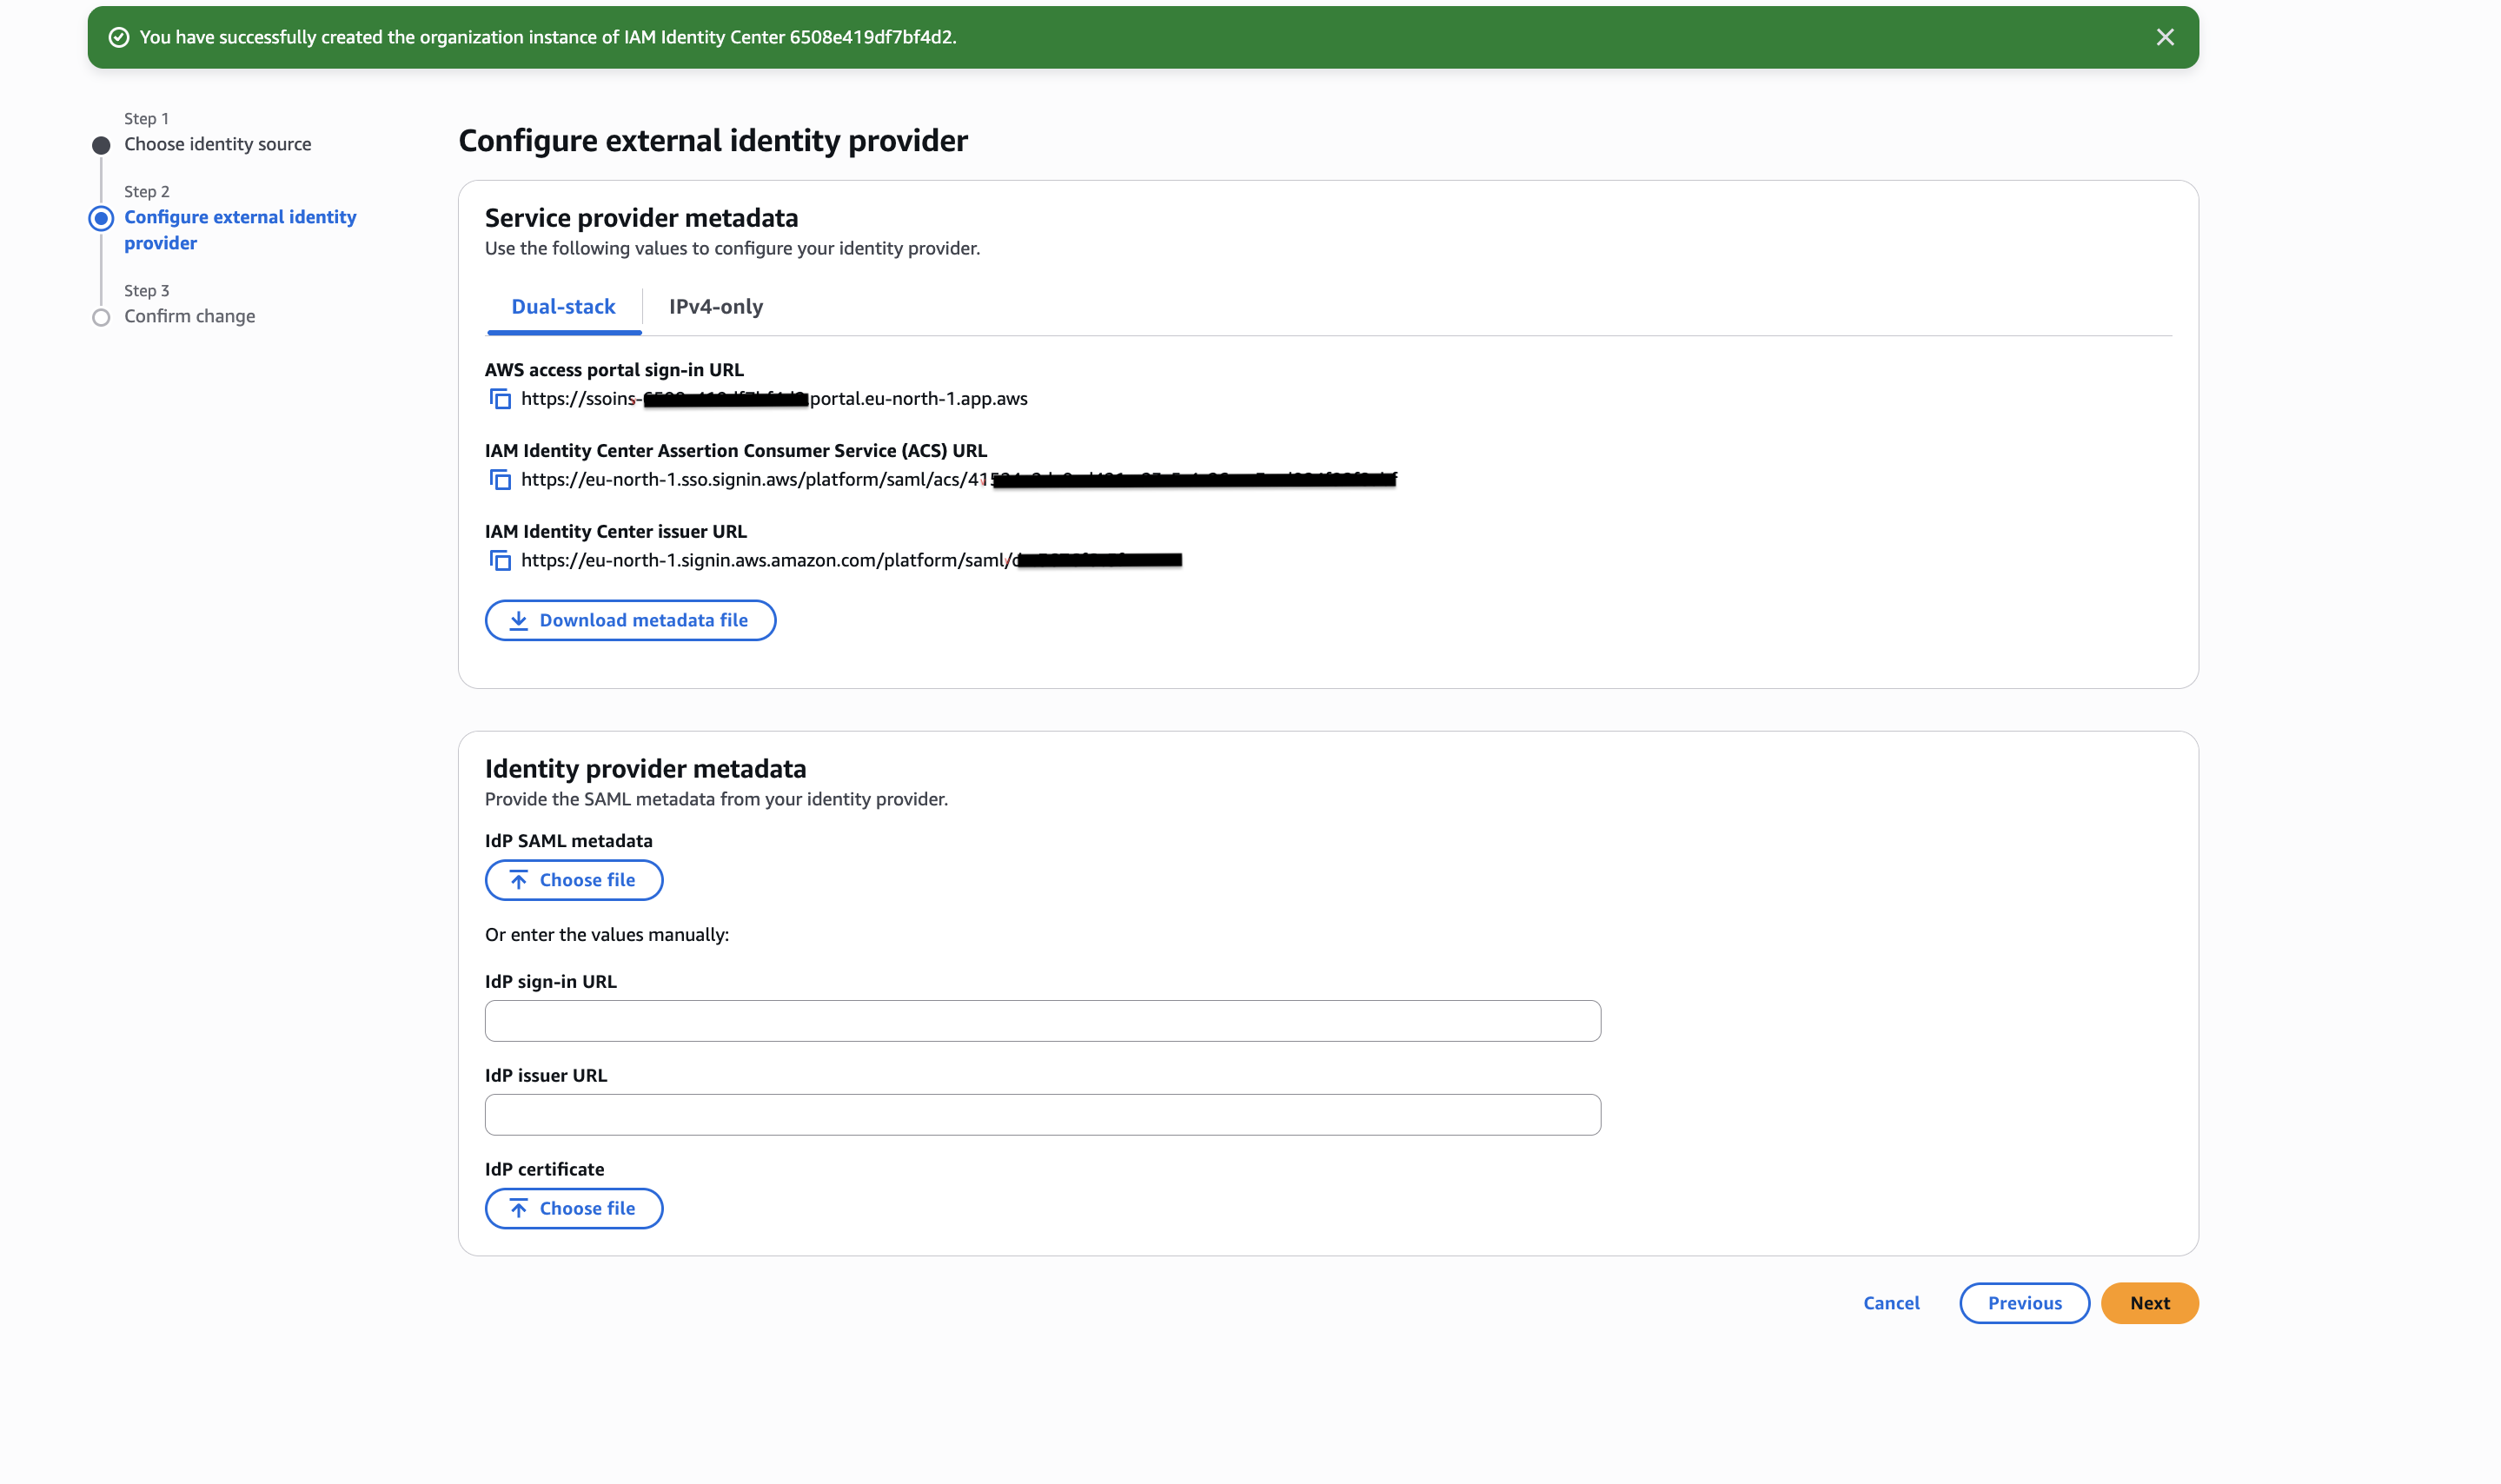
Under Service provider metadata, click Download metadata file to download the SAML service provider metadata.
Tip
Keep this browser tab open. You will return to it to upload the WSO2 Identity Server identity provider metadata.
Register the application in WSO2 Identity Server
Follow the steps below to register IAM Identity Center as an application in WSO2 Identity Server.
-
On the WSO2 Identity Server Console, go to Applications.
-
Click New Application and select Traditional Web Application.
-
Provide a name for the application, for example,
AWS IAM Identity Center, and select SAML as the protocol. -
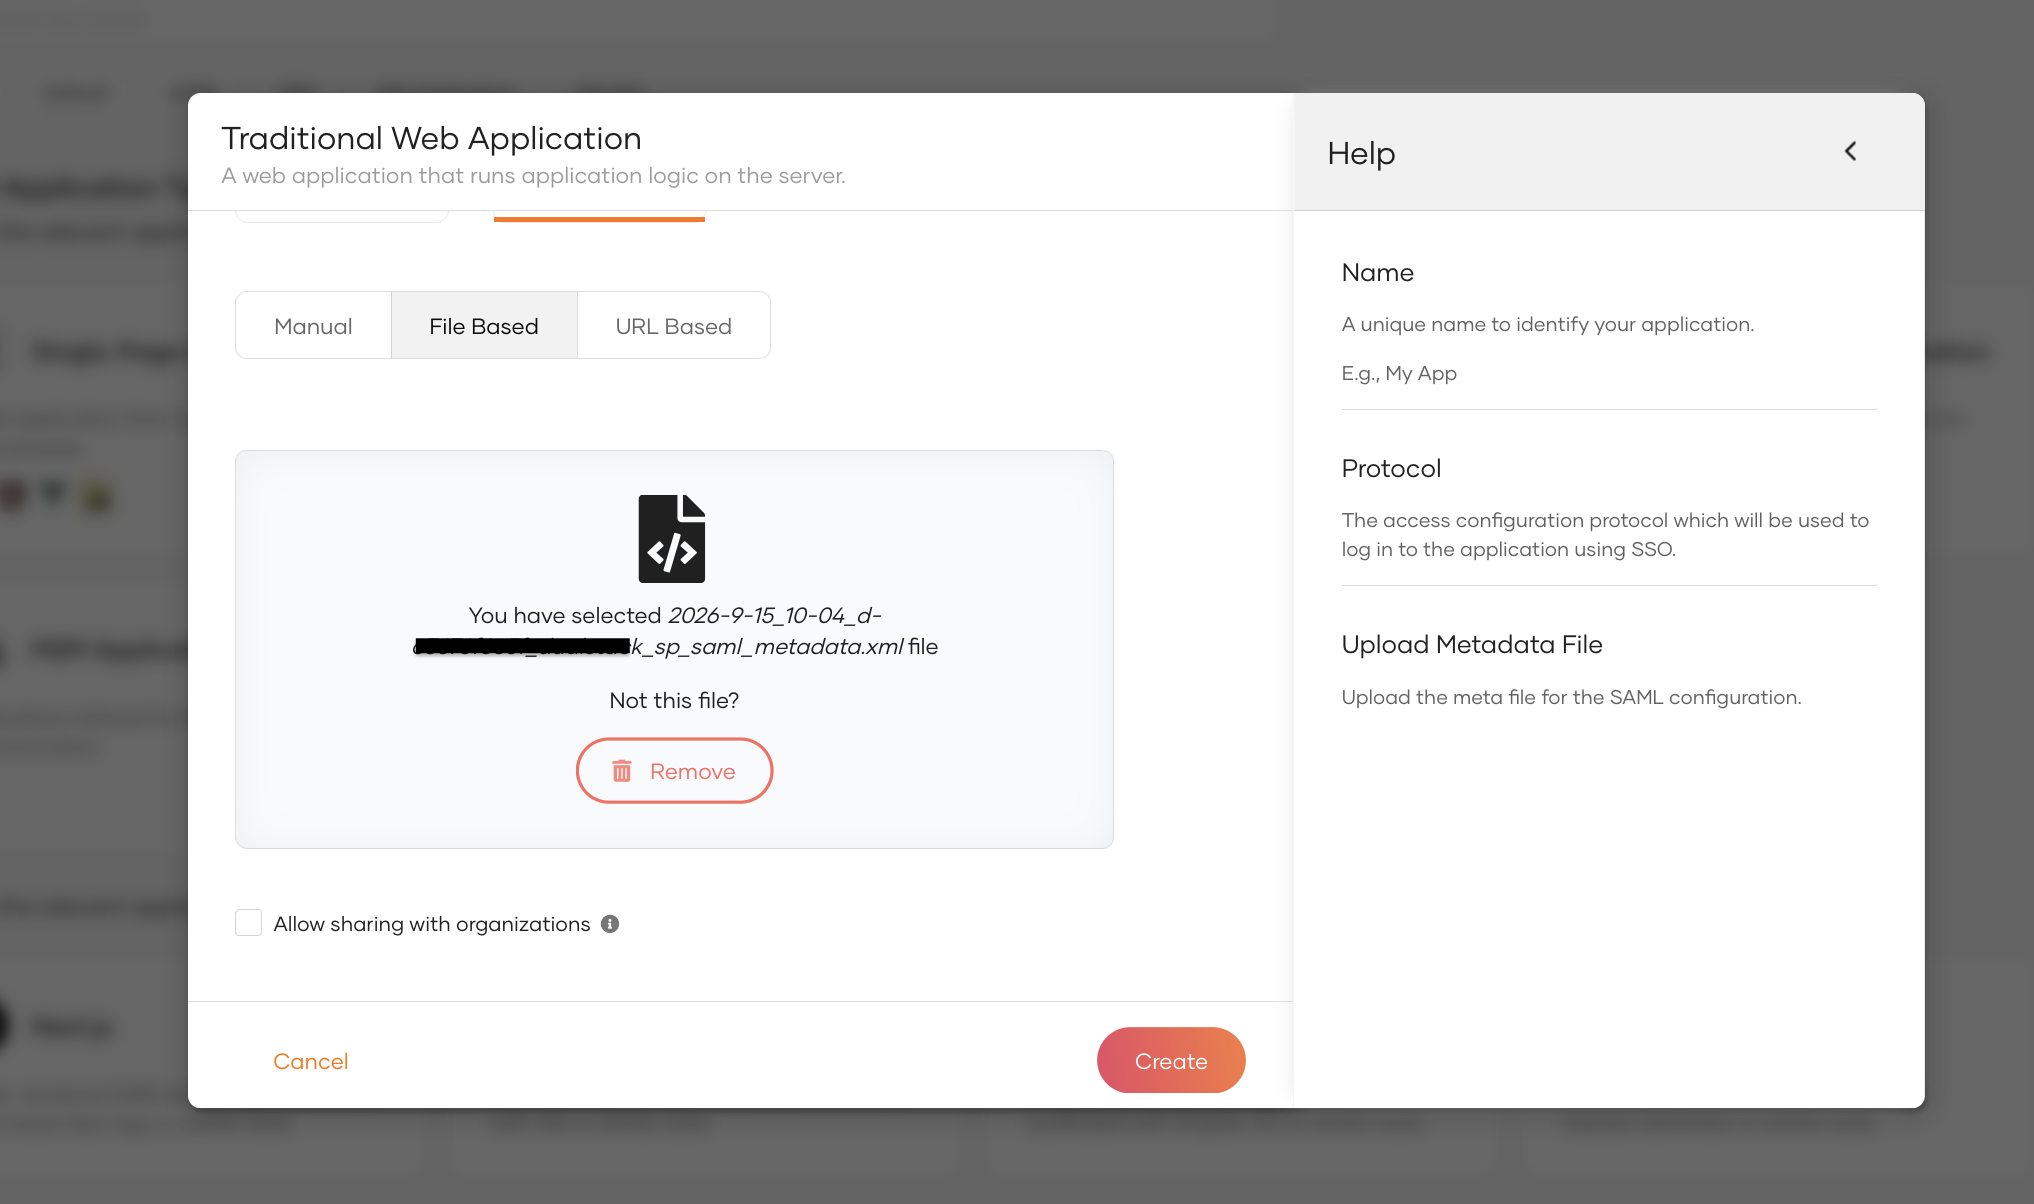
Select File Based and upload the service provider metadata file you downloaded from AWS.
Note
Alternatively, select Manual and enter the following values from the Service provider metadata section in AWS. Learn more about registering a SAML web application.
- Issuer - The IAM Identity Center issuer URL.
- Assertion consumer service URLs - The IAM Identity Center Assertion Consumer Service (ACS) URL.
-
Click Create to complete the registration, and go to the Protocol tab of the application.
-
Under Response Signing, make sure Sign SAML responses is enabled. IAM Identity Center rejects unsigned responses.
-
Click Update to save the changes.
-
Go to the Info tab of the application and note down the following details. You need them to configure WSO2 Identity Server as the identity provider in IAM Identity Center.
- Issuer - The identity provider issuer of WSO2 Identity Server, for example,
localhost. - Single Sign-On - The SAML single sign-on endpoint of WSO2 Identity Server, for example,
https://localhost:9443/samlsso. - IdP certificate - Download the identity provider certificate.
Tip
Alternatively, download the IdP metadata file from the Info tab. The metadata file contains all of the above details.
- Issuer - The identity provider issuer of WSO2 Identity Server, for example,
Configure the subject attribute
IAM Identity Center matches the incoming SAML assertion to a user by comparing the NameID value with the username of the user in IAM Identity Center. Configure WSO2 Identity Server to send the user's username as the subject.
-
Go to the User Attributes tab of the application.
-
Add Username as a user attribute and mark it as Mandatory.
-
Under Subject, select Username as the subject attribute.
-
Click Update to save the changes.
Warning
The username sent by WSO2 Identity Server must exactly match the username of the corresponding user in IAM Identity Center. Otherwise, the login fails even though the user authenticates successfully in WSO2 Identity Server.
Configure AWS IAM Identity Center
Follow the steps below to configure WSO2 Identity Server as the external identity provider of IAM Identity Center.
-
Return to the Change identity source page in the IAM Identity Center console.
-
Under Identity provider metadata, either upload the IdP metadata file you downloaded from WSO2 Identity Server as the IdP SAML metadata, or enter the following values manually using the details you noted from the Info tab of the application:
- IdP sign-in URL - The Single Sign-On URL.
- IdP issuer URL - The Issuer.
- IdP certificate - The IdP certificate you downloaded.
Note
IAM Identity Center only accepts the IdP certificate in PEM format. Make sure the certificate file you upload is PEM-encoded, starting with
-----BEGIN CERTIFICATE-----and ending with-----END CERTIFICATE-----. -
Click Next, review the changes, type ACCEPT, and click Change identity source.
Warning
Changing the identity source affects how existing users, groups, and MFA settings behave in IAM Identity Center. Review the AWS documentation before you change the identity source of an instance in use.
Provision users to AWS IAM Identity Center
IAM Identity Center only allows users that already exist in its directory to sign in through external federation. You can create users in IAM Identity Center in one of the following ways.
Option 1: Provision users manually
In the IAM Identity Center console, go to Users > Add user and create a user whose Username matches the username of the user in WSO2 Identity Server.
Option 2: Provision users manually using the SCIM2 API
You can create users in IAM Identity Center by directly invoking the SCIM2 API of IAM Identity Center.
-
In the IAM Identity Center console, go to Settings. In the Automatic provisioning panel, click Enable.
-
Copy the SCIM endpoint and the Access token.
Note
AWS displays the access token only once. Store it securely, as you need it to authenticate each SCIM request.
-
Send a
POSTrequest to the/Usersendpoint of the SCIM endpoint to create the user. Replace<scim-endpoint>and<scim-token>with the values you copied.curl -i -X POST "<scim-endpoint>/Users" \ -H "Authorization: Bearer <scim-token>" \ -H "Content-Type: application/scim+json" \ -d '{ "schemas": ["urn:ietf:params:scim:schemas:core:2.0:User"], "userName": "[email protected]", "displayName": "Bob Smith", "name": { "givenName": "Bob", "familyName": "Smith" }, "emails": [ { "value": "[email protected]", "type": "work", "primary": true } ], "active": true }'Note
- The
userNamemust exactly match the username of the user in WSO2 Identity Server. - IAM Identity Center requires the
userName,displayName,name.givenName, andname.familyNameattributes.
A successful request returns a
201 Createdresponse with the details of the created user. - The
-
In the IAM Identity Center console, go to Users and verify that the user is listed.
Note
Once automatic provisioning is enabled, you can no longer create or edit users from the IAM Identity Center console. Use the SCIM2 API or Option 3 to manage users.
Option 3: Provision users automatically with SCIM2 Outbound provisioning
You can configure WSO2 Identity Server to automatically provision users and groups to IAM Identity Center using SCIM 2.0.
-
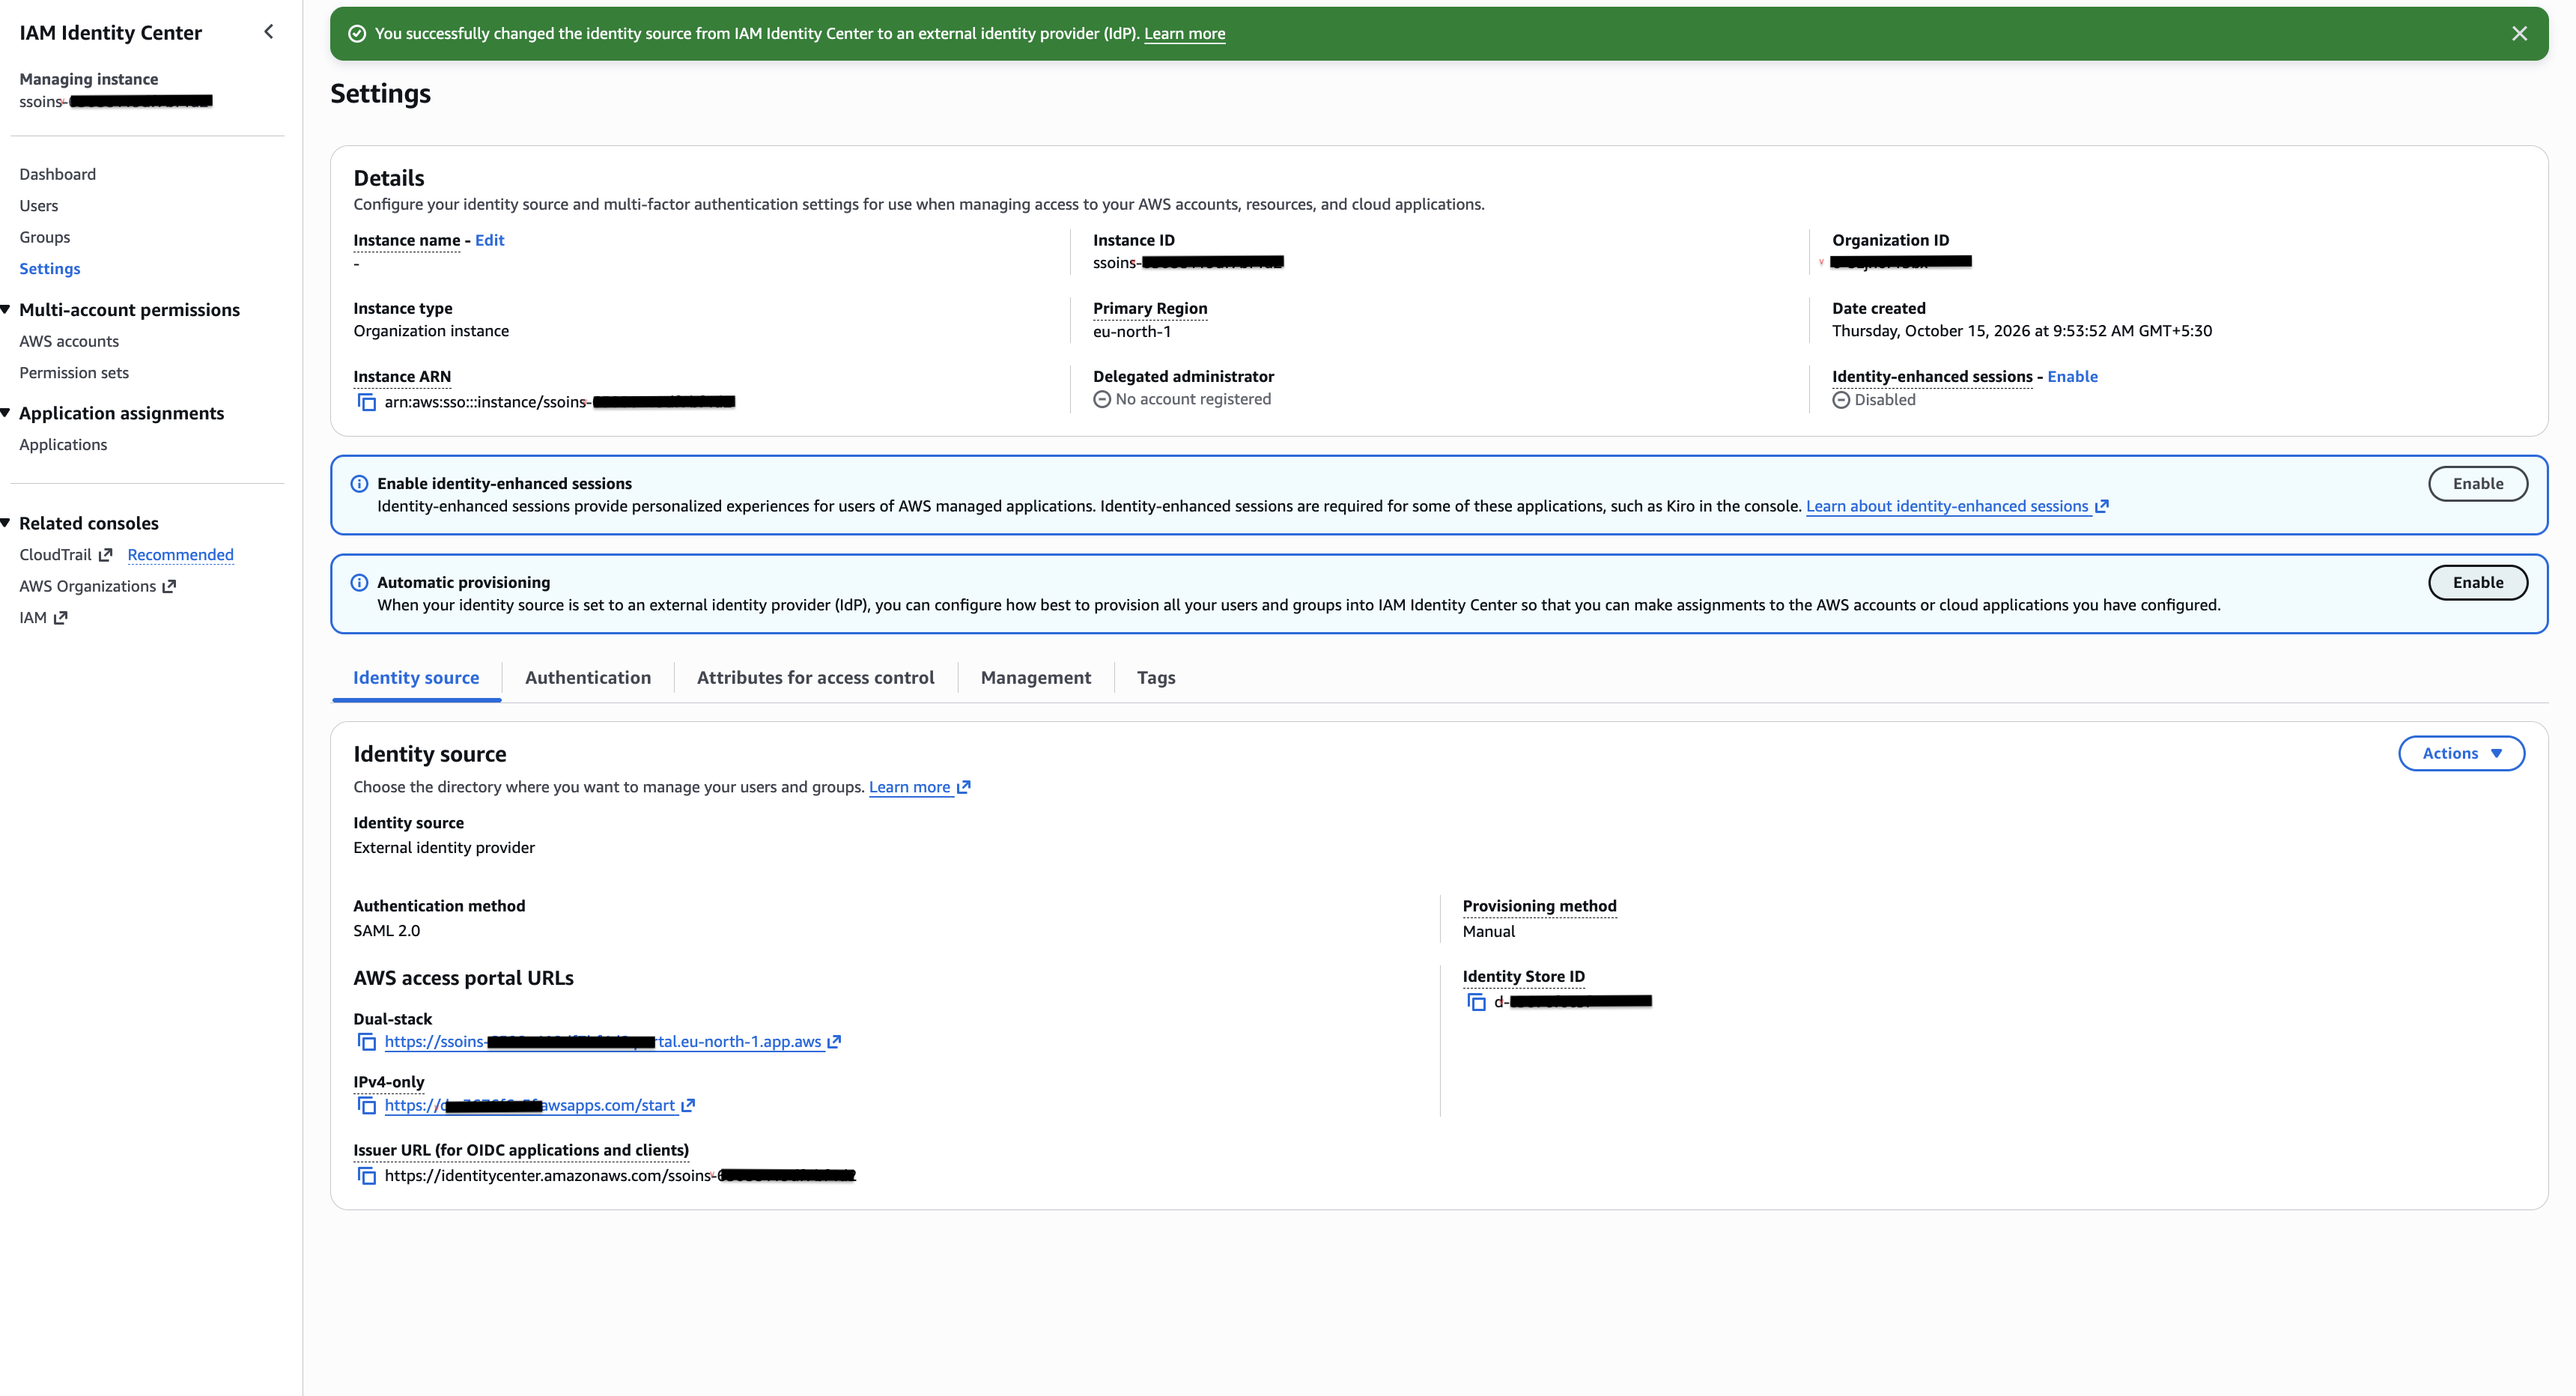
In the IAM Identity Center console, go to Settings. In the Automatic provisioning panel, click Enable.
-
Copy the SCIM endpoint and the Access token.
Note
AWS displays the access token only once. The token expires after one year, after which you need to generate a new token and update it in WSO2 Identity Server.
-
In WSO2 Identity Server, set up outbound provisioning and create an outbound provisioning connection. Provide a name for the connection, for example,
IAM Identity Center, select SCIM2 as the connection type, and click Next.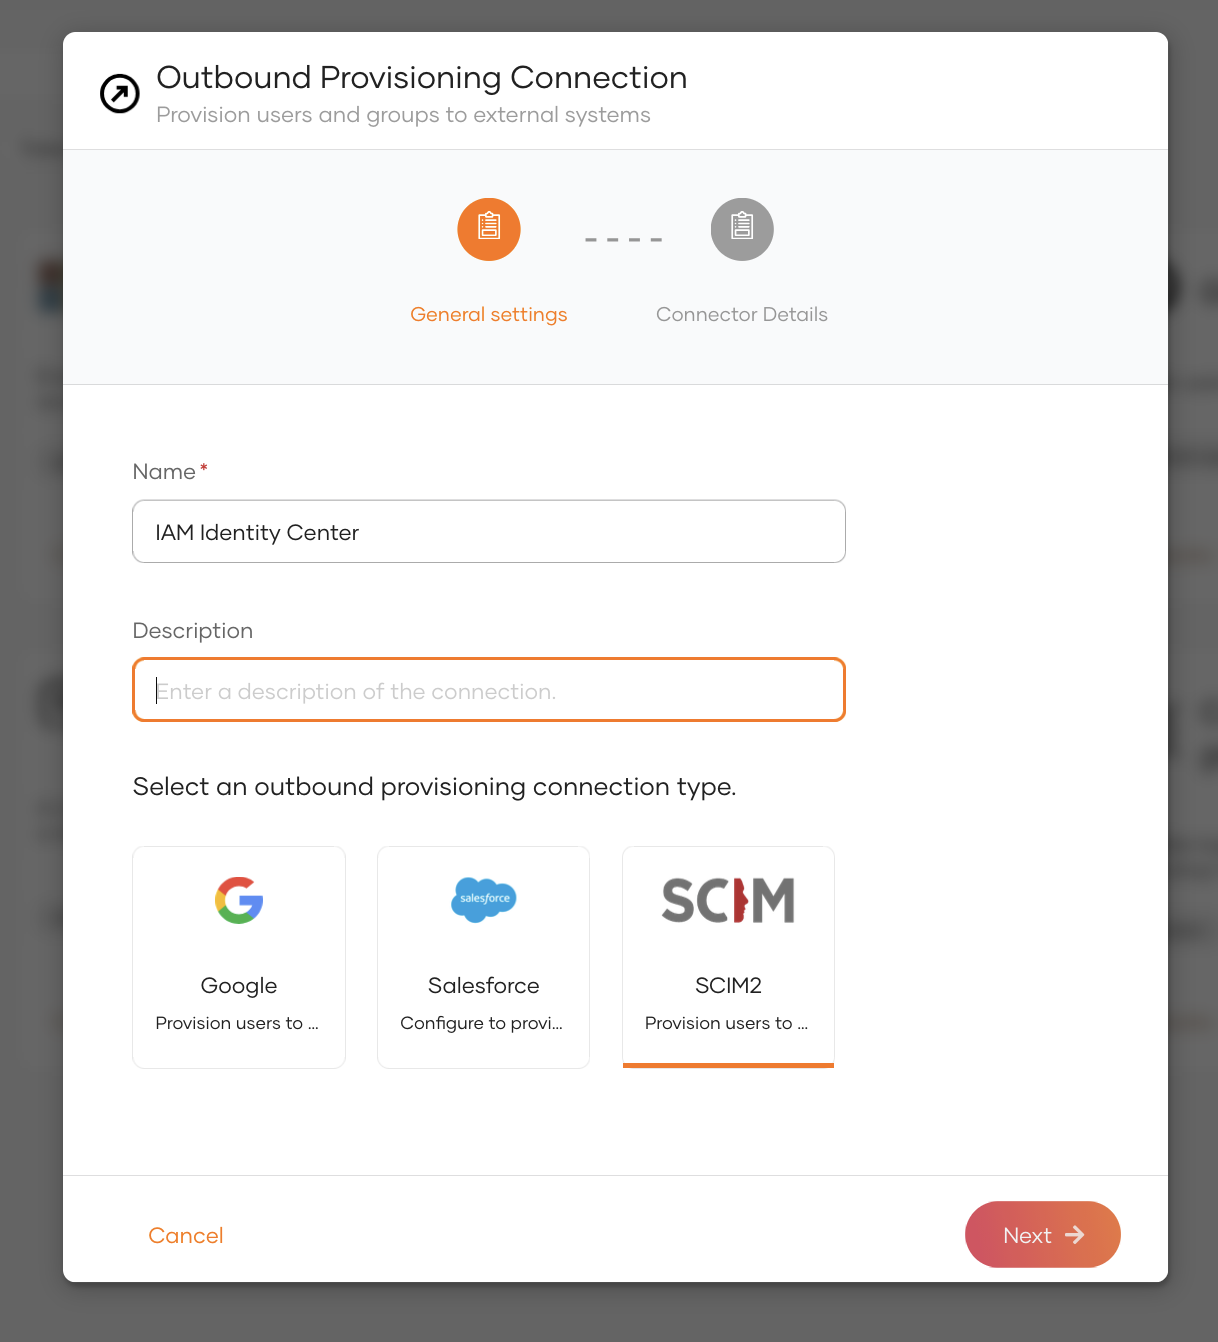
-
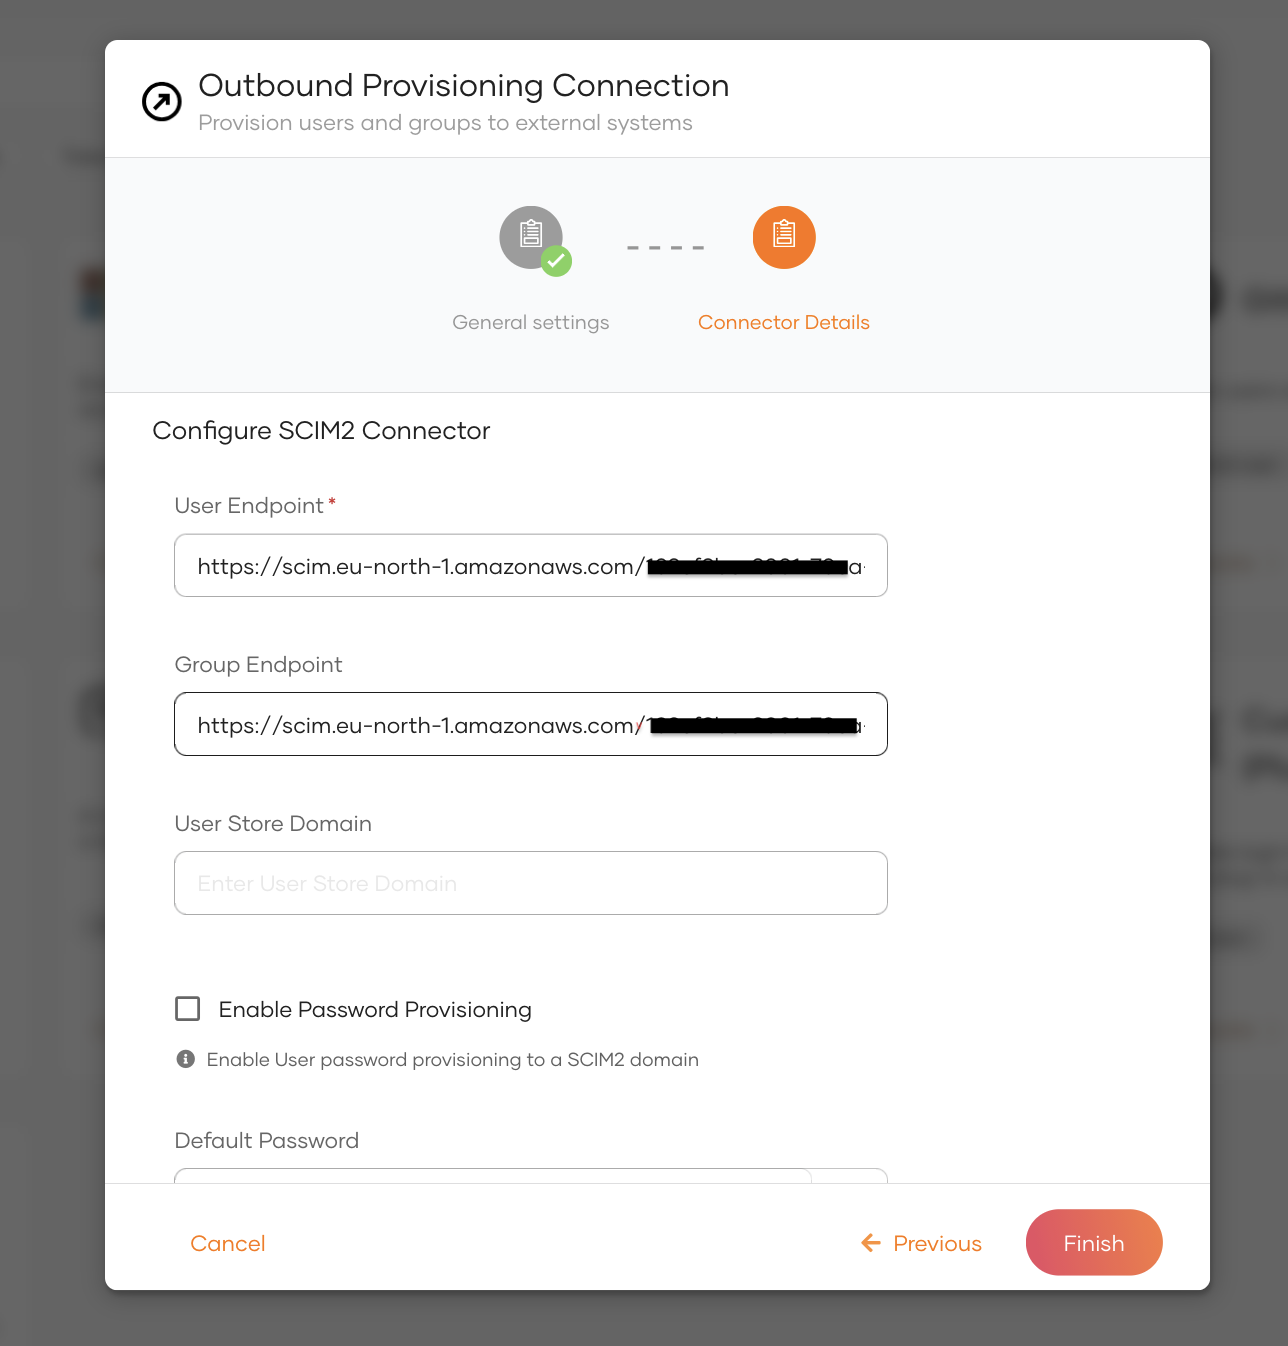
Configure the SCIM2 connector with the following values and click Finish.
- Authentication Mode -
Bearer - Access Token - The access token you copied from AWS.
- User Endpoint -
<SCIM endpoint>/Users - Group Endpoint -
<SCIM endpoint>/Groups
- Authentication Mode -
-
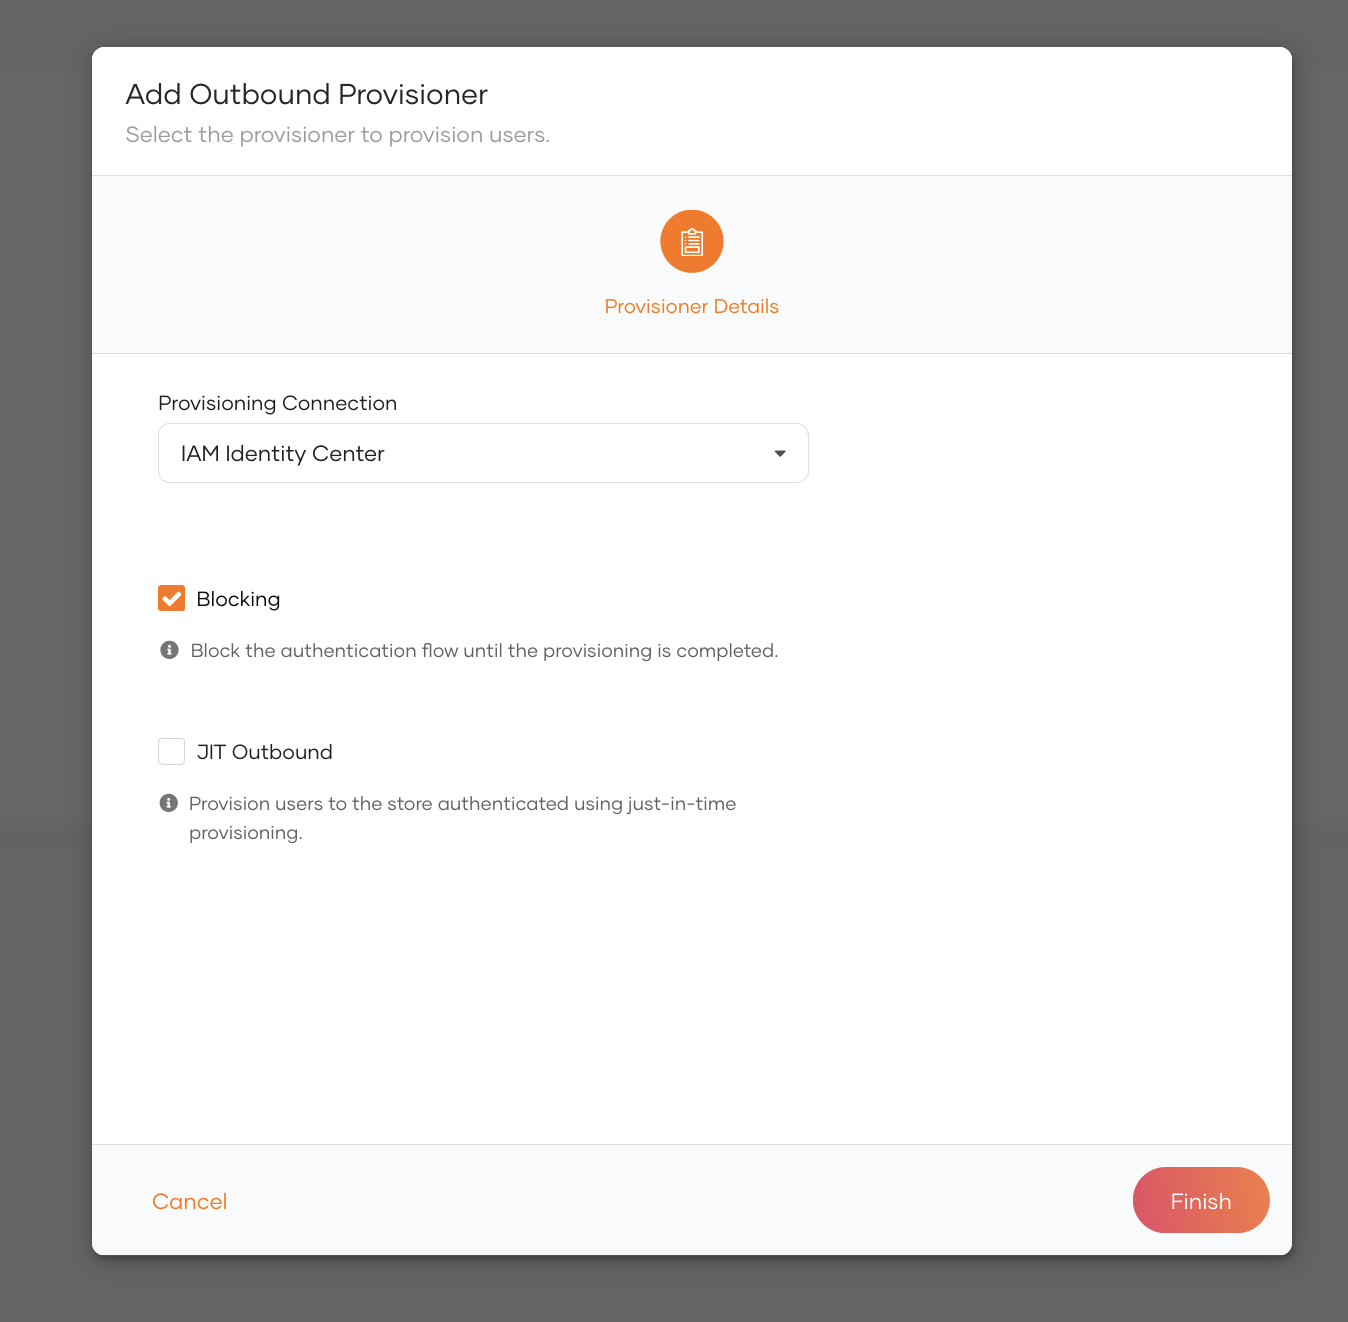
Add the connection you created as an outbound provisioner, at the organization level or for a specific application, by selecting it as the Provisioning Connection. Refer to set up outbound provisioning for details.
Note
IAM Identity Center requires the first name, last name, and display name of a user to be present in the SCIM request. Make sure that users in WSO2 Identity Server have values for these attributes. Refer to the AWS documentation for the supported SCIM attributes and limitations.
Assign access in AWS
Once users exist in IAM Identity Center, assign them access to AWS accounts or applications.
-
In the IAM Identity Center console, go to AWS accounts under Multi-account permissions.
-
Select the AWS account, click Assign users or groups, and select the users or groups.
-
Select a permission set and click Submit.
Refer to the AWS documentation for more details.
Try it out
Now that you have integrated WSO2 Identity Server with AWS IAM Identity Center, follow the steps below to test it with AWS access portal.
-
Create a user in WSO2 Identity Server and make sure the same user exists in IAM Identity Center with access to at least one AWS account.
-
In the IAM Identity Center console, go to Settings and copy the AWS access portal URL. It takes the form
https://<id>.awsapps.com/start. -
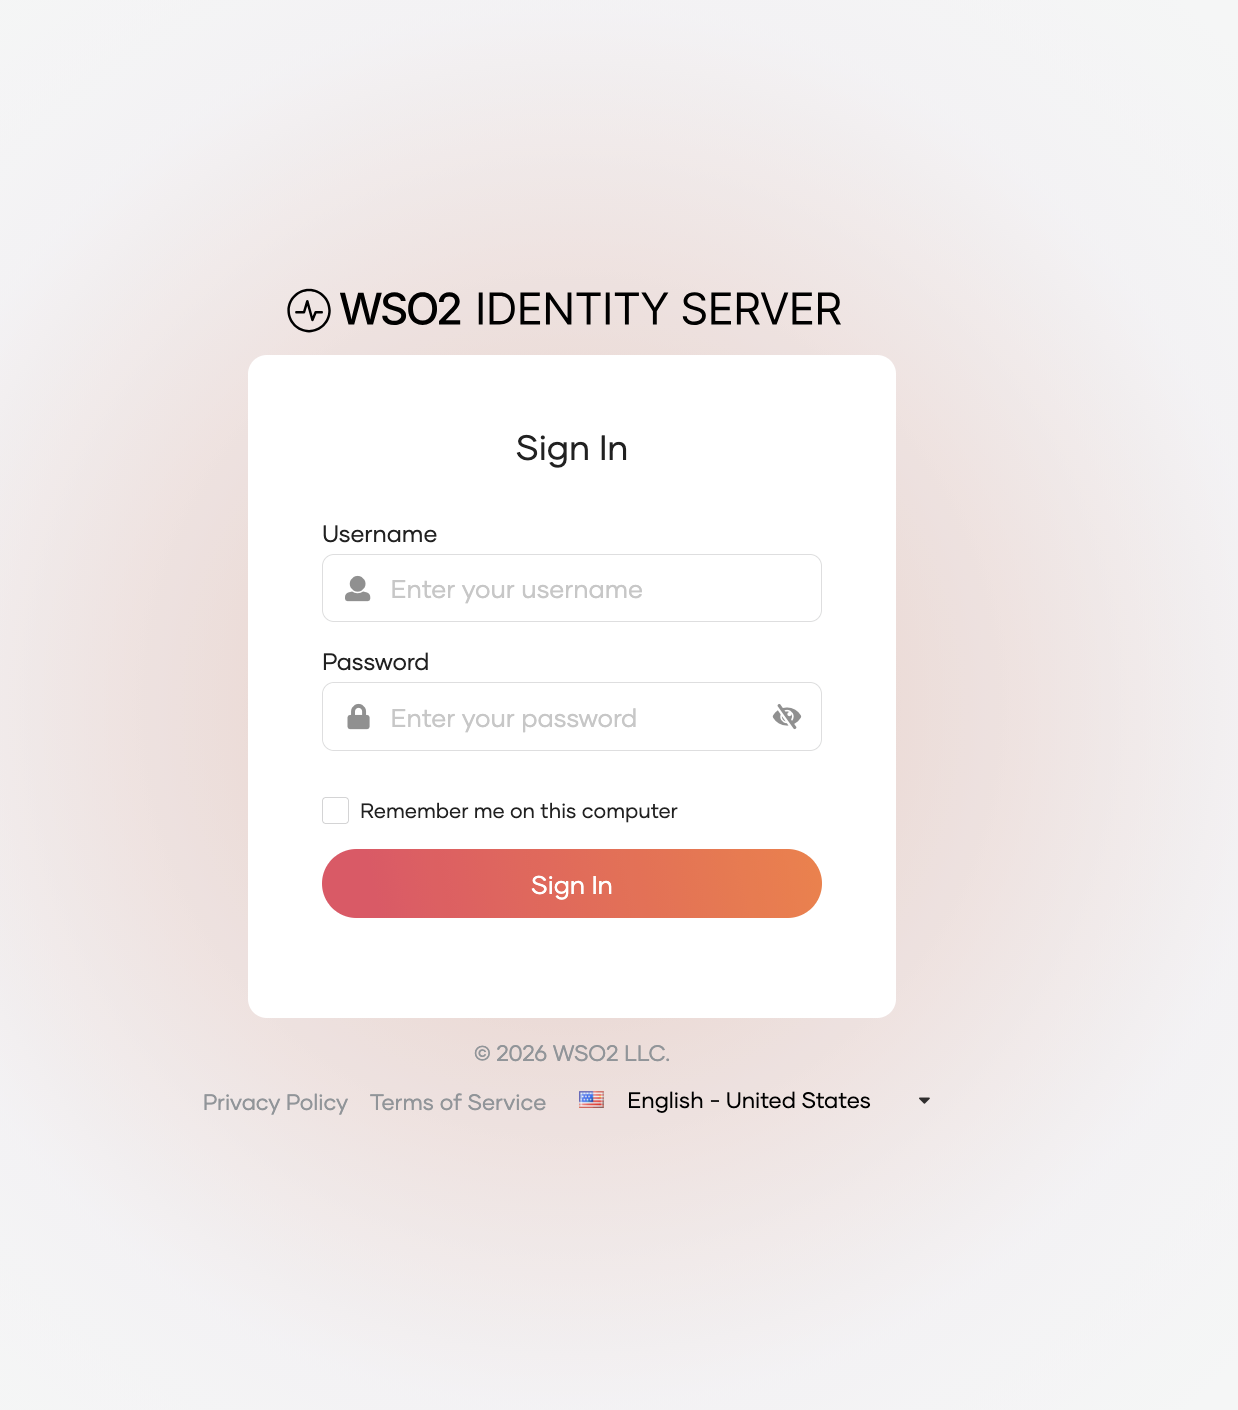
Open the AWS access portal URL in a private browser window. You will be redirected to the WSO2 Identity Server login screen.
-
Enter the username and password of the user, and complete the login process.
-
Once redirected to the AWS access portal, verify that the assigned AWS accounts are listed.