Configuring Active Directory User Stores for SCIM 2.0 based Inbound Provisioning
WSO2 Identity Server can act both as a SCIM Provider and a SCIM consumer at the same time. You can test the WSO2 Identity Server's SCIM 2.0 Provider API as described here. The WSO2 Identity Server build includes the ApacheDS embedded LDAP server. The LDAP server's schema is customized to have the mandatory SCIM attributes, therefore SCIM implementation works by default with the WSO2 Identity Server.
However, when the WSO2 Identity Server is connected to an external LDAP or an Active Directory instance, they might not have these mandatory SCIM attributes in their schema. So the option is to map the SCIM claims to the existing attributes of the Active Directory.
Add a user with the username "john" and password "Wso2@123". Here we have to map the userName (urn:ietf:params:scim:schemas:core:2.0:User) SCIM attribute to an existing claim in the Active Directory (e.g.: cn). Furthermore, when a user is being added in SCIM, there are four more SCIM attributes being added behind the scene. These are the SCIM attributes such as location (urn:ietf:params:scim:schemas:core:2.0), created (urn:ietf:params:scim:schemas:core:2.0), lastModified (urn:ietf:params:scim:schemas:core:2.0) and finally the id (urn:ietf:params:scim:schemas:core:2.0). So we need to map these to existing Active Directory user attributes.
When mapping claims to attributes, there are a few things that need to be considered. The SCIM claim dialect (urn:ietf:params:scim:schemas:core:2.0:User and urn:ietf:params:scim:schemas:core:2.0) uses String type to hold their values. So, when mapping any SCIM claim to an attribute in the Active Directory, make sure to use the attributes which are having the String type. You can find all Active Directory attributes here.
When a user or a group is created with SCIM 2.0, there are a set of mandatory SCIM 2.0 claim values that need to be saved along with the user or group. Some of these values are as follows.
- urn:ietf:params:scim:schemas:core:2.0:meta.location
- urn:ietf:params:scim:schemas:core:2.0:meta.resourceType
- urn:ietf:params:scim:schemas:core:2.0:meta.version
- urn:ietf:params:scim:schemas:core:2.0:meta.created
- urn:ietf:params:scim:schemas:core:2.0:id
- urn:ietf:params:scim:schemas:core:2.0:meta.lastModified
- urn:ietf:params:scim:schemas:core:2.0:User:userName
Log in to WSO2 Identity Server using your credentials.This claim mapping can be done through the WSO2 Identity Server Claim Management Feature.
- Go to the Main menu in the Management Console menu and click List under Claims.
- Select
http://wso2.org/claimsfrom the list. -
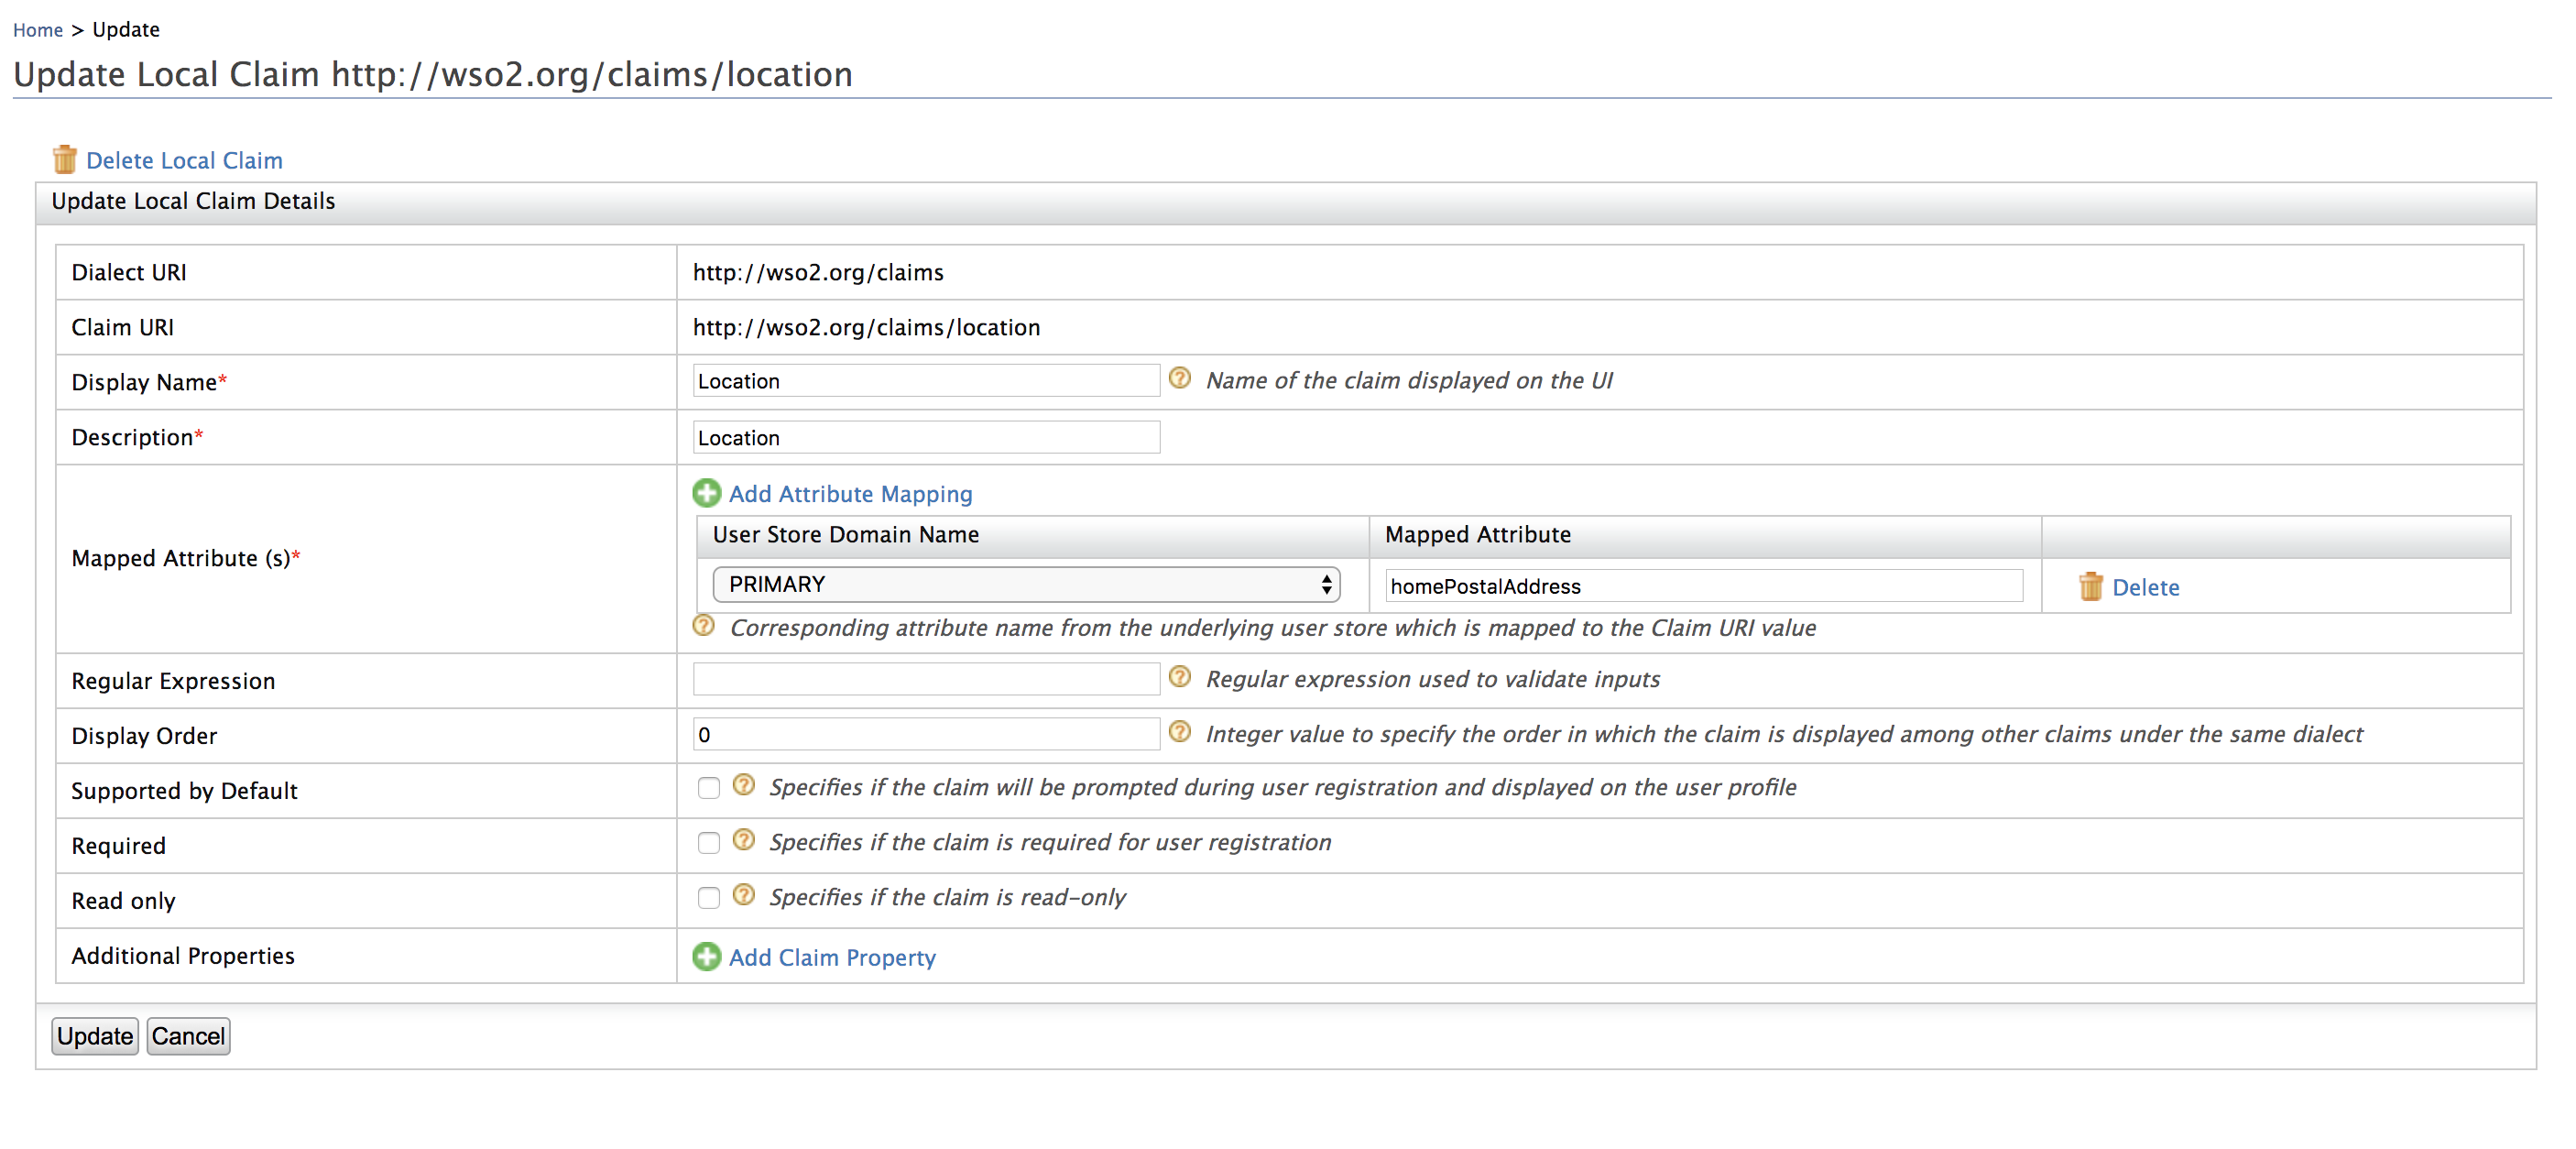
Choose the Location claim and click on Edit.

-
Change the Mapped Attribute value to homePostalAddress and click Update.

-
Edit the other four claims in the same way.
Now the basic claim mapping is done. You can now add a user using the curl commands here.
In RestClient, the following header parameters must be added and the double quotations must be removed from the message body.
Content-Type: application/json Accept: / Message body {schemas:[],userName:'wso2.com/uresh67',password:Wso2@123}
Info
You need to do the claim mapping for every SCIM claim you are using with user operations.