User Registration with Password Entry
Registering users with password entry is an account management feature offered by WSO2 Identity Server.
In this approach, an administrator first creates a user account in the system upon which a confirmation link will be emailed to the user’s registered email Id. Once the user clicks on the confirmation link, the user will be taken into a screen prompting to enter the password. Once the user enters the correct password, the user account gets activated.
Scenario
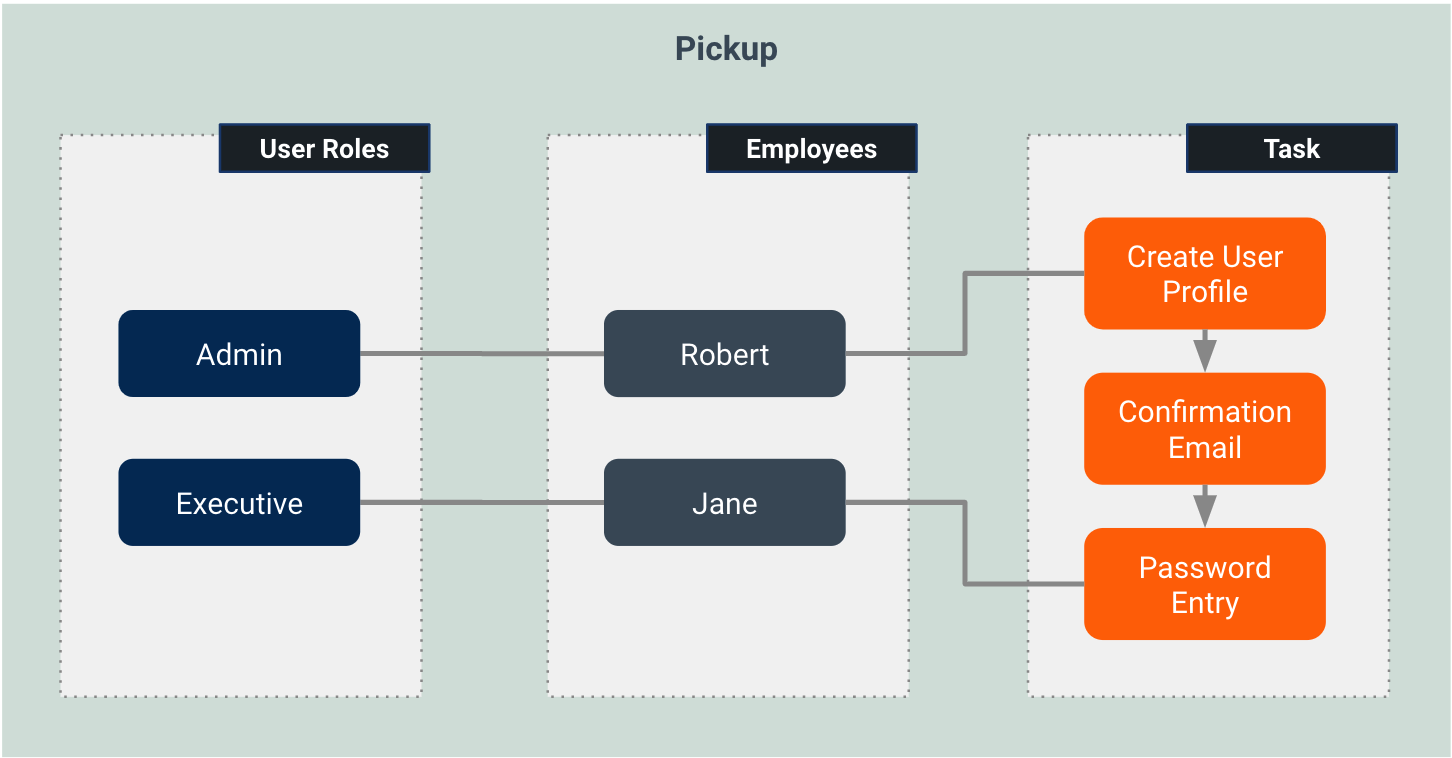
Pickup is a cab company that has many employees who use different credentials to sign in to different internal enterprise applications. While Sam is an administrator at Pickup, Jane is a new recruit.
Sam wants to register a user account for Jane and get it activated by requesting Jane to enter a password.
Let's learn how it's done!
Set up
Follow the steps below to configure WSO2 Identity Server to enable password entry for account confirmation.
-
Open the
deployment.tomlfile in the<IS_HOME>/repository/confdirectory.-
To request password entry from the users who are registered via Management Console, add the following configurations.
[identity_mgt.user_onboarding] ask_password_from_user= true -
To configure the email server to send emails requesting passwor entry, add the following configurations.
- from_address: This is the email address from which the confirmation email will be sent.
- username: This is the user name of the given email address.
- password: This is the password of the given email address.
[output_adapter.email] from_address= "" username= "" password= "" hostname= "smtp.gmail.com" port= 587 enable_start_tls= true enable_authentication= true[output_adapter.email] from_address= "[email protected]" username= "wso2iamtest" password= "Wso2@iam70" hostname= "smtp.gmail.com" port= 587 enable_start_tls= true enable_authentication= trueIf you are using a Google email account
Google has restricted third-party applications and less secure applications from sending emails by default. As WSO2 Identity Server acts as a third-party application when sending emails for password entry, follow the steps below to enable your Google email account to provide access to third-party applications.
-
Under Signing in to Google section, turn off the 2-step Verification option.
-
-
Sign in to the WSO2 Identity Server Management Console at
https://<SERVER_HOST>:9443/carbonas an administrator. -
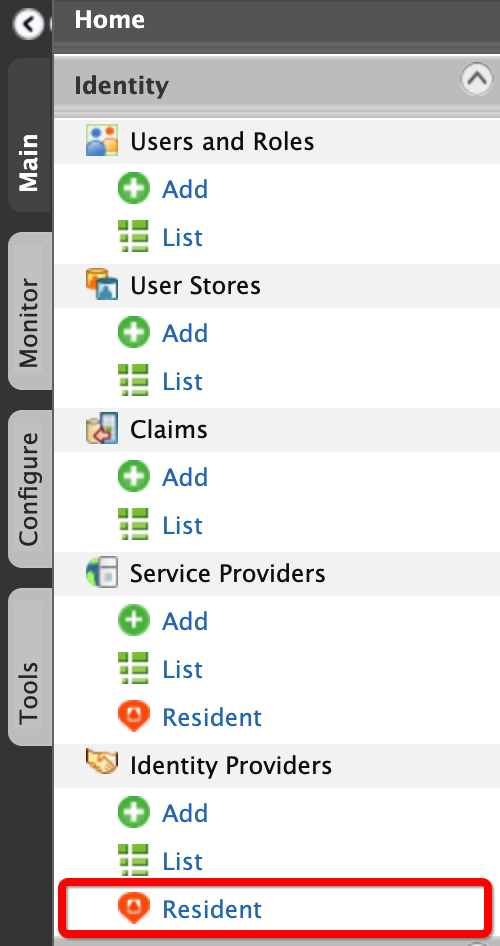
On the Main menu of the Management Console, click Identity > Identity Providers > Resident.
-
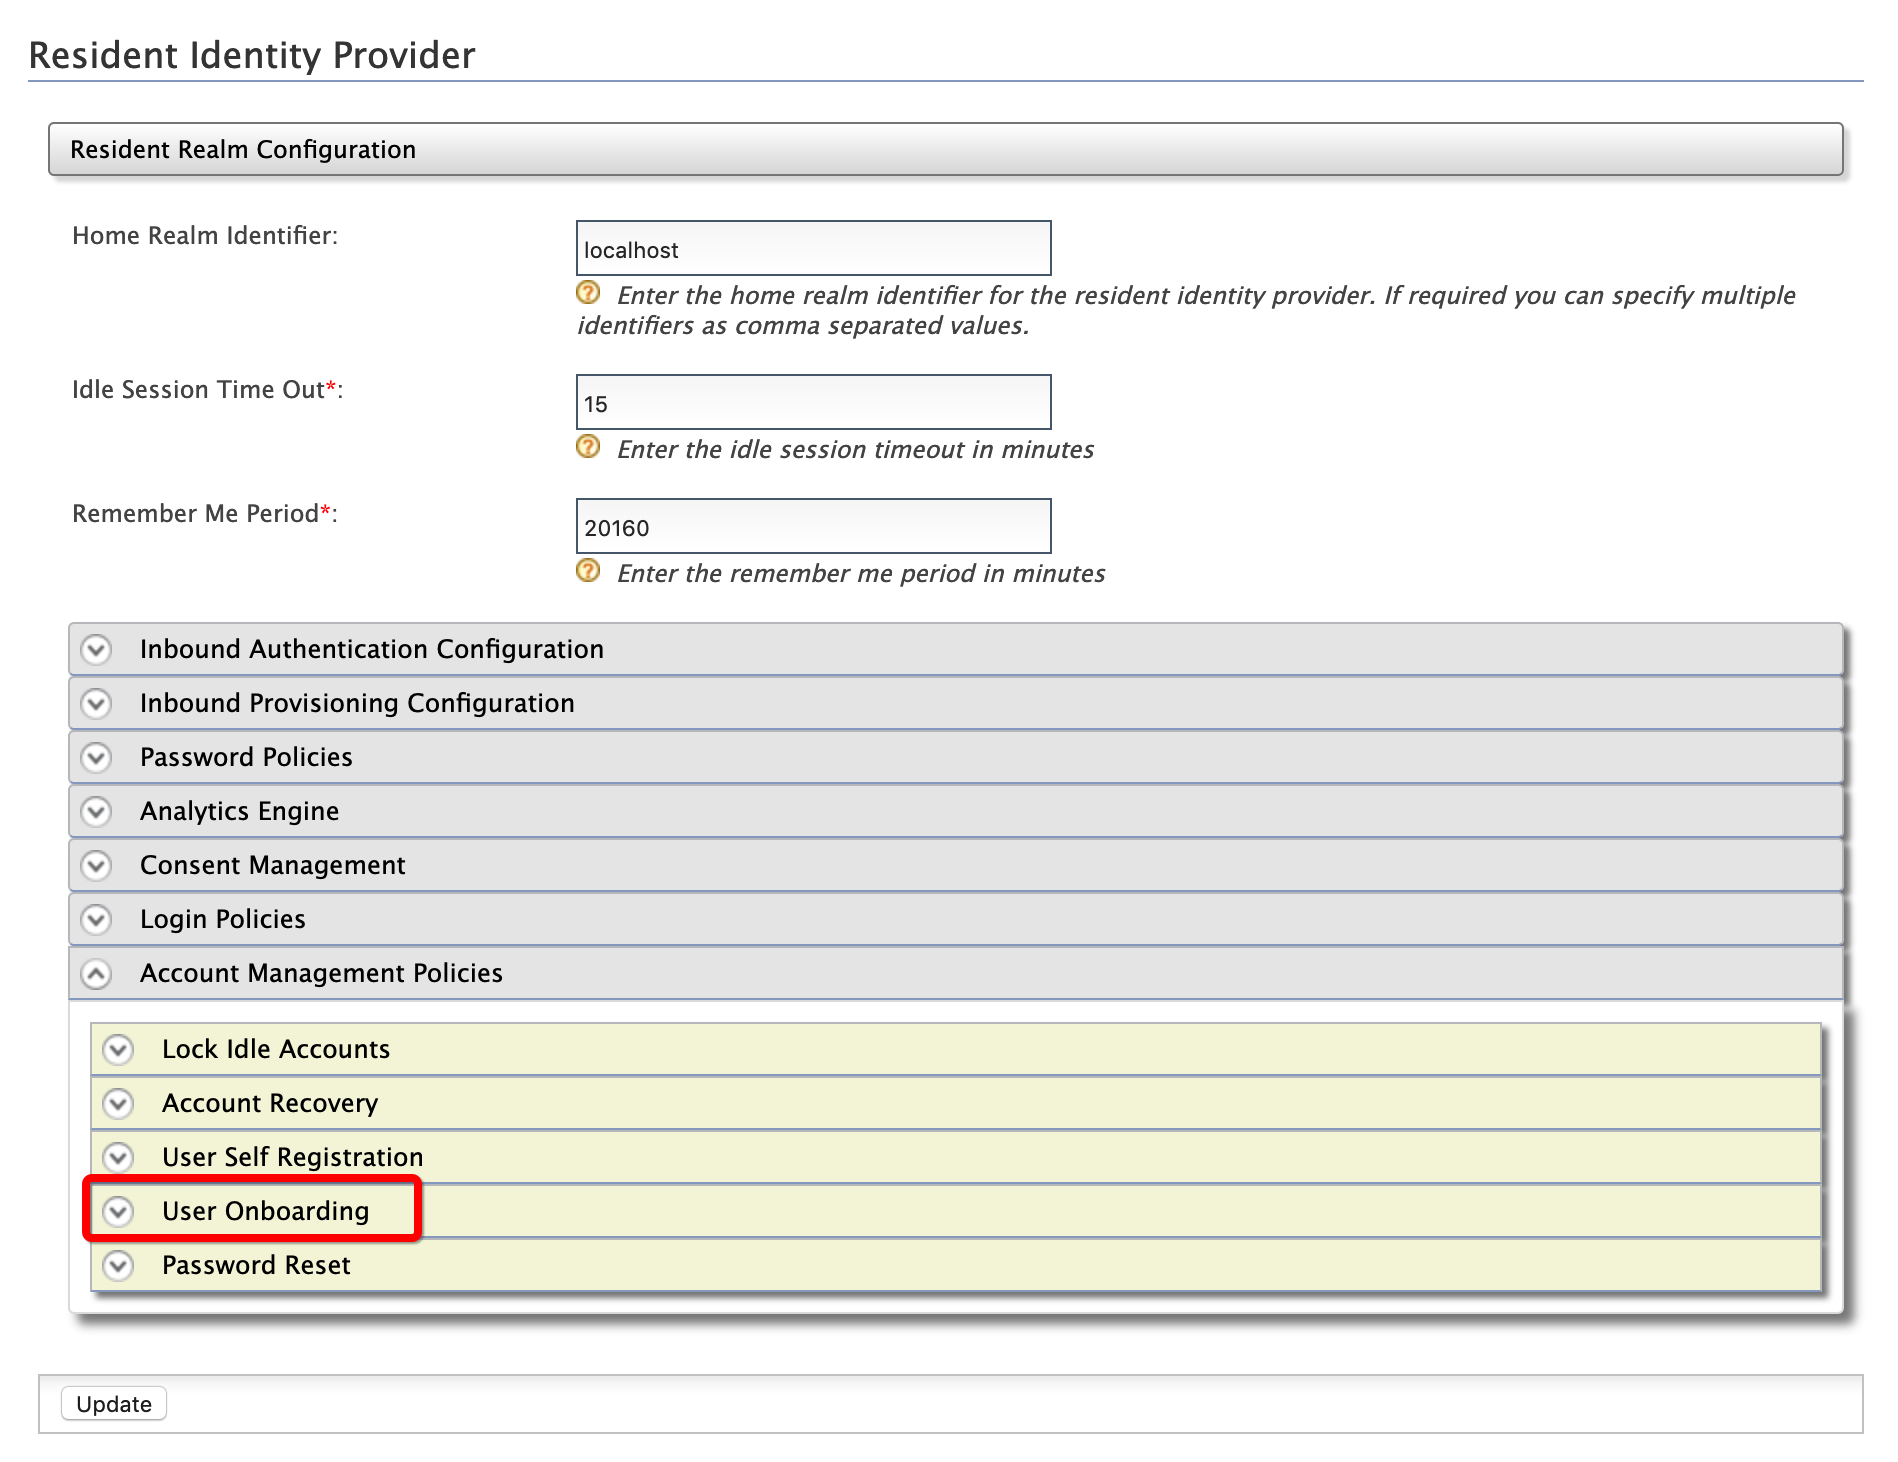
Under the Account Management Policies section, click User Onboarding.
-
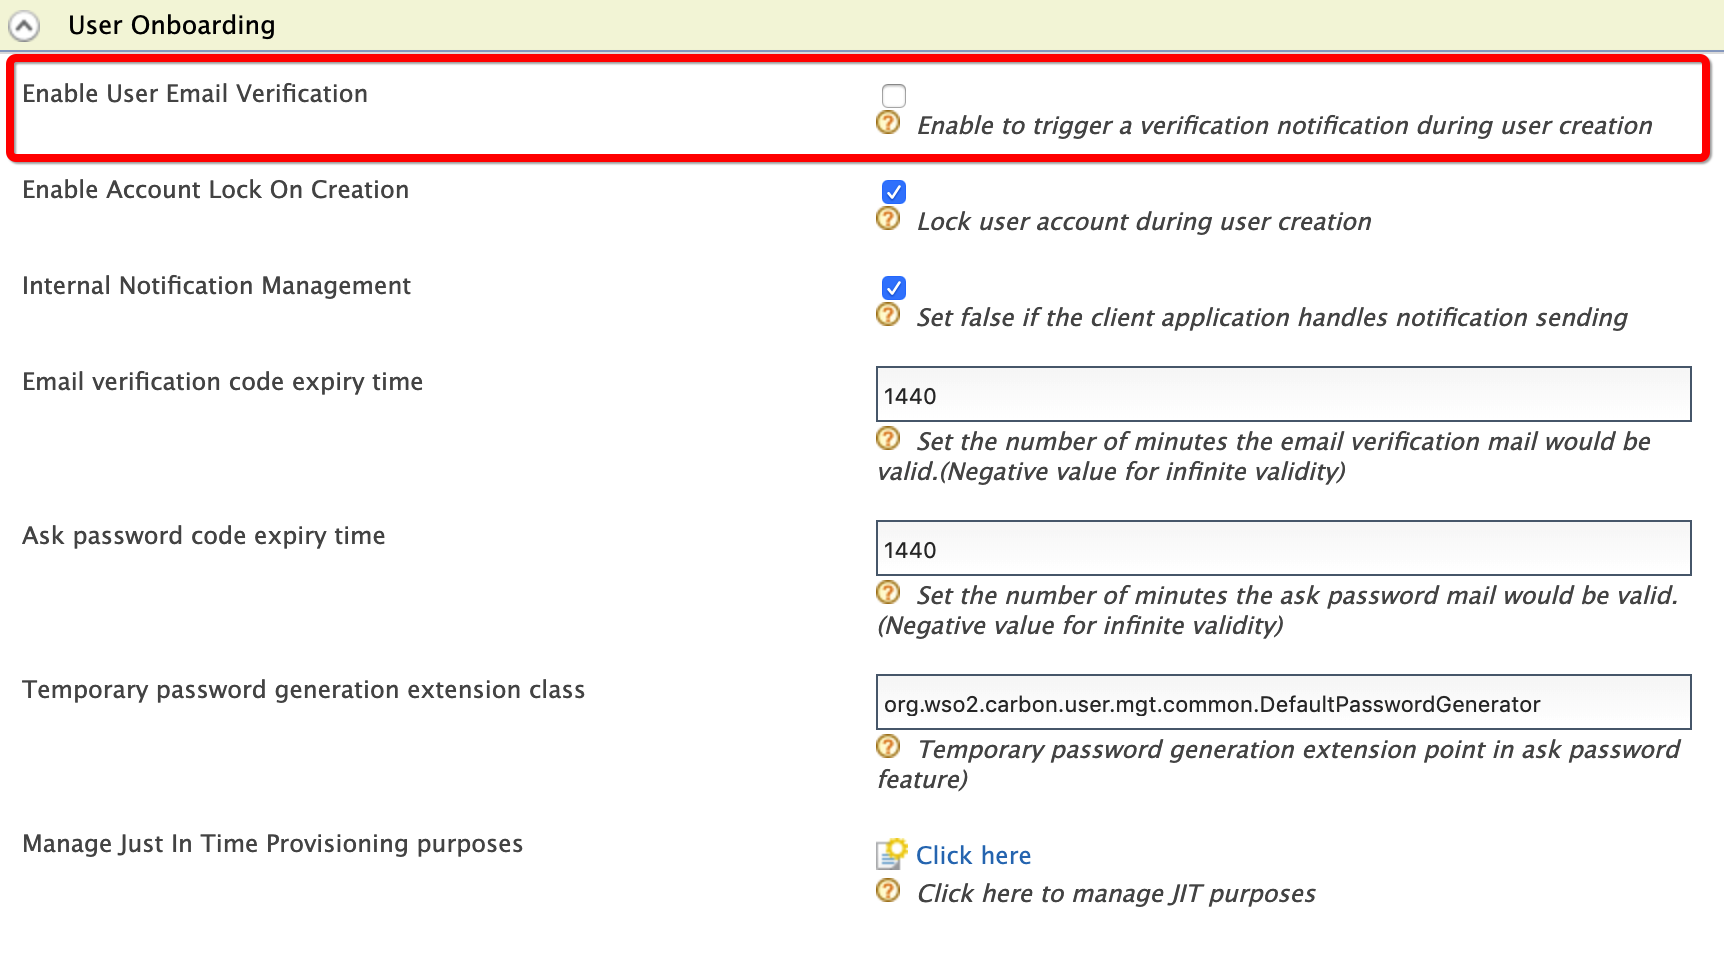
Select the Enable User Email Verification check box.
-
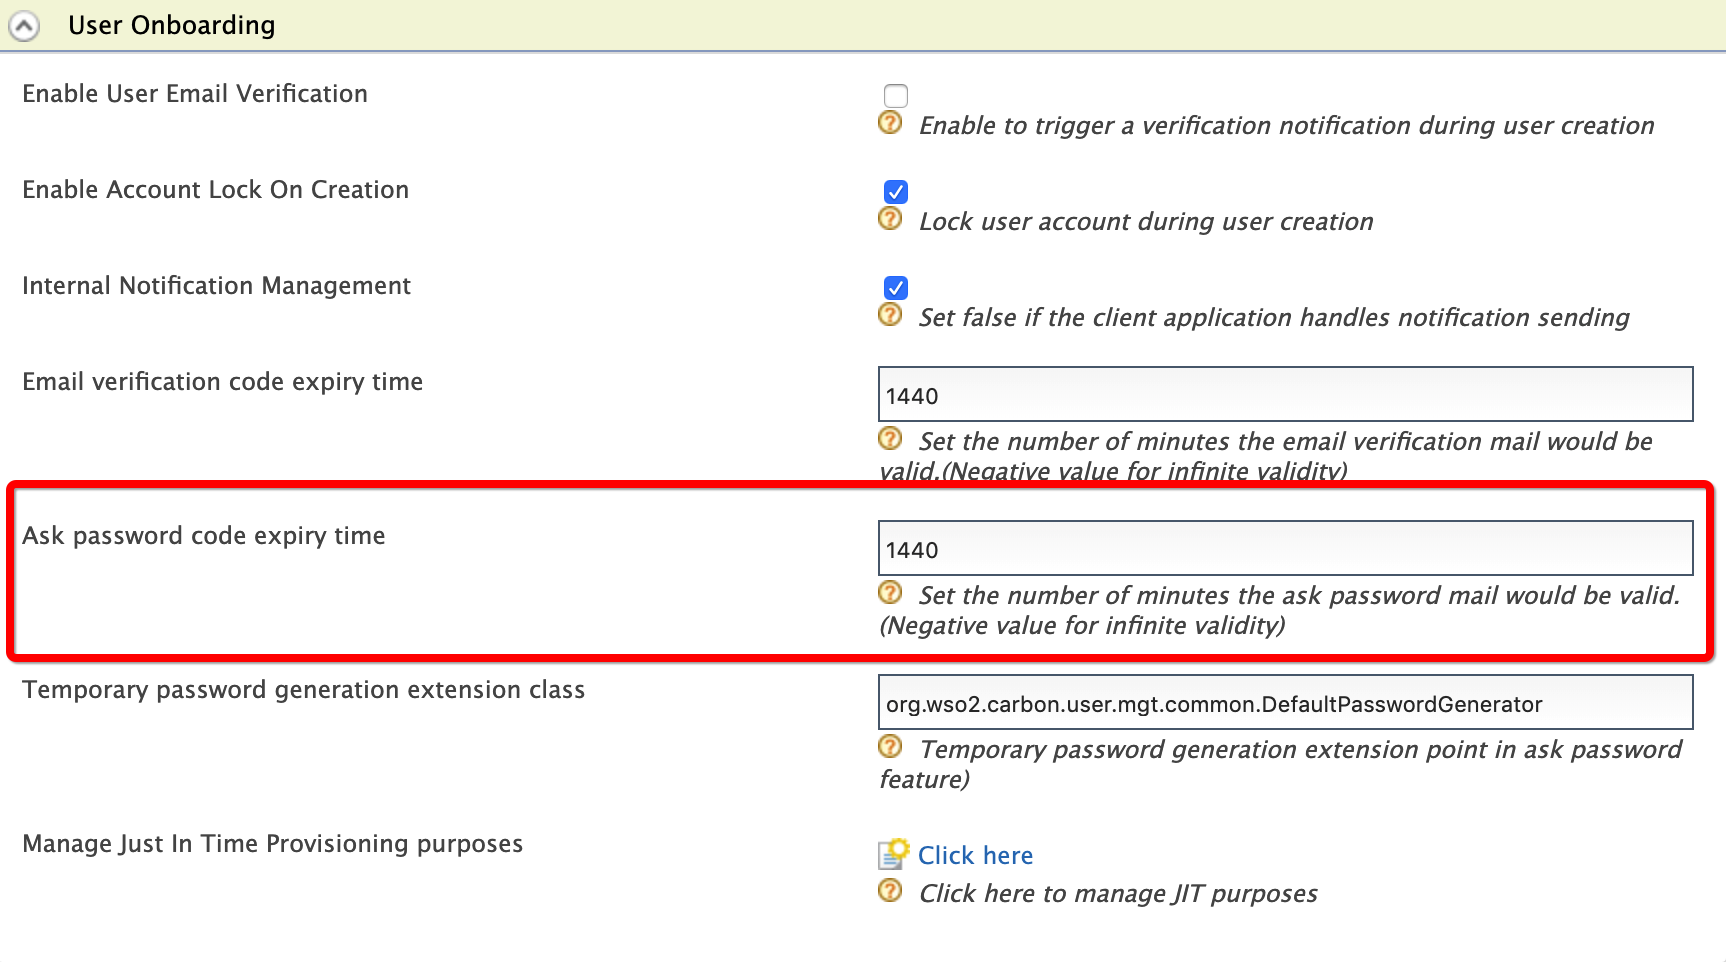
You may enter the password entry validity period (in minutes) in the Ask password code expiry time text box.
-
Click Update.
You have now configured WSO2 Identity Server to send the user account confirmation email to the registered user. Let's try it out!
Try out
-
To create the user account for Jane:
-
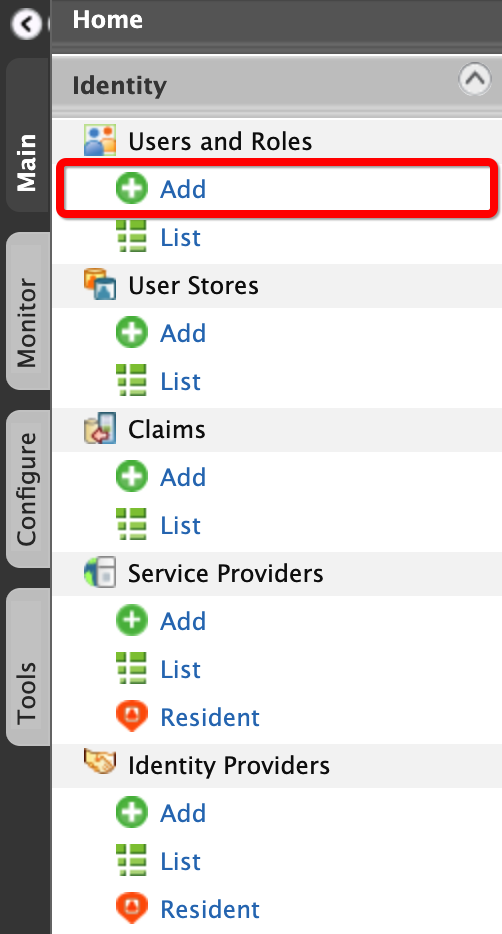
On the Main menu of the Management Console, click Identity > Users and Roles > Add.
-
Click Add New User.

-
Enter the required data as follows.
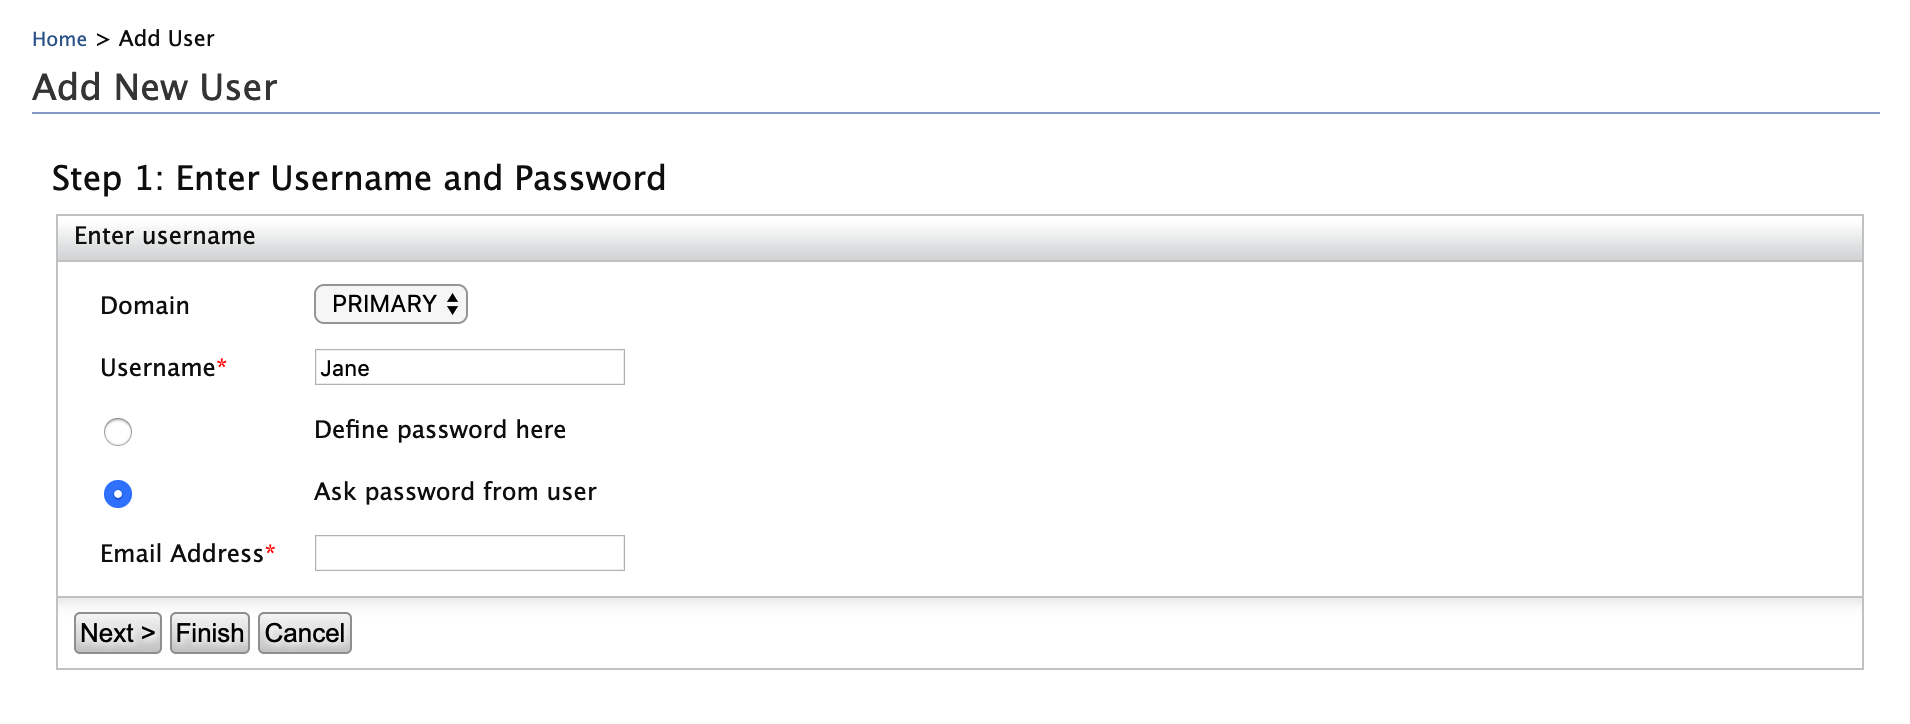
- Domain:
Primary - Username:
Jane - Define password here: Unselected
- Ask Password from user: Selected
-
Email Address: Enter the email address to which you wish to recieve the account confirmation email.
Using special characters in the email address
If you are using special characters such as
$in your email address, see Configuring Emails with Special Characters.
- Domain:
-
Click Finish.
-
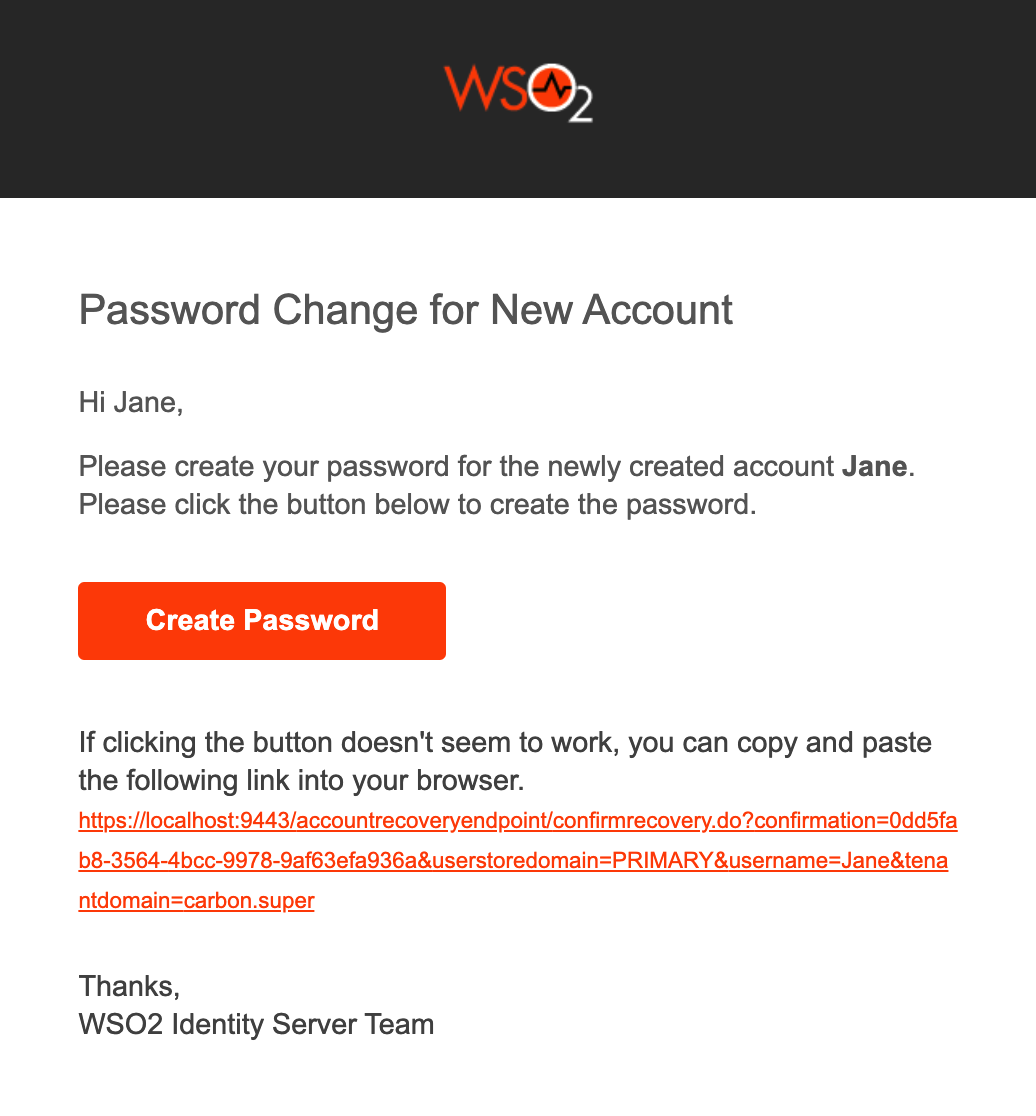
A confirmation email requesting to enter the password is sent to the given email address.
-
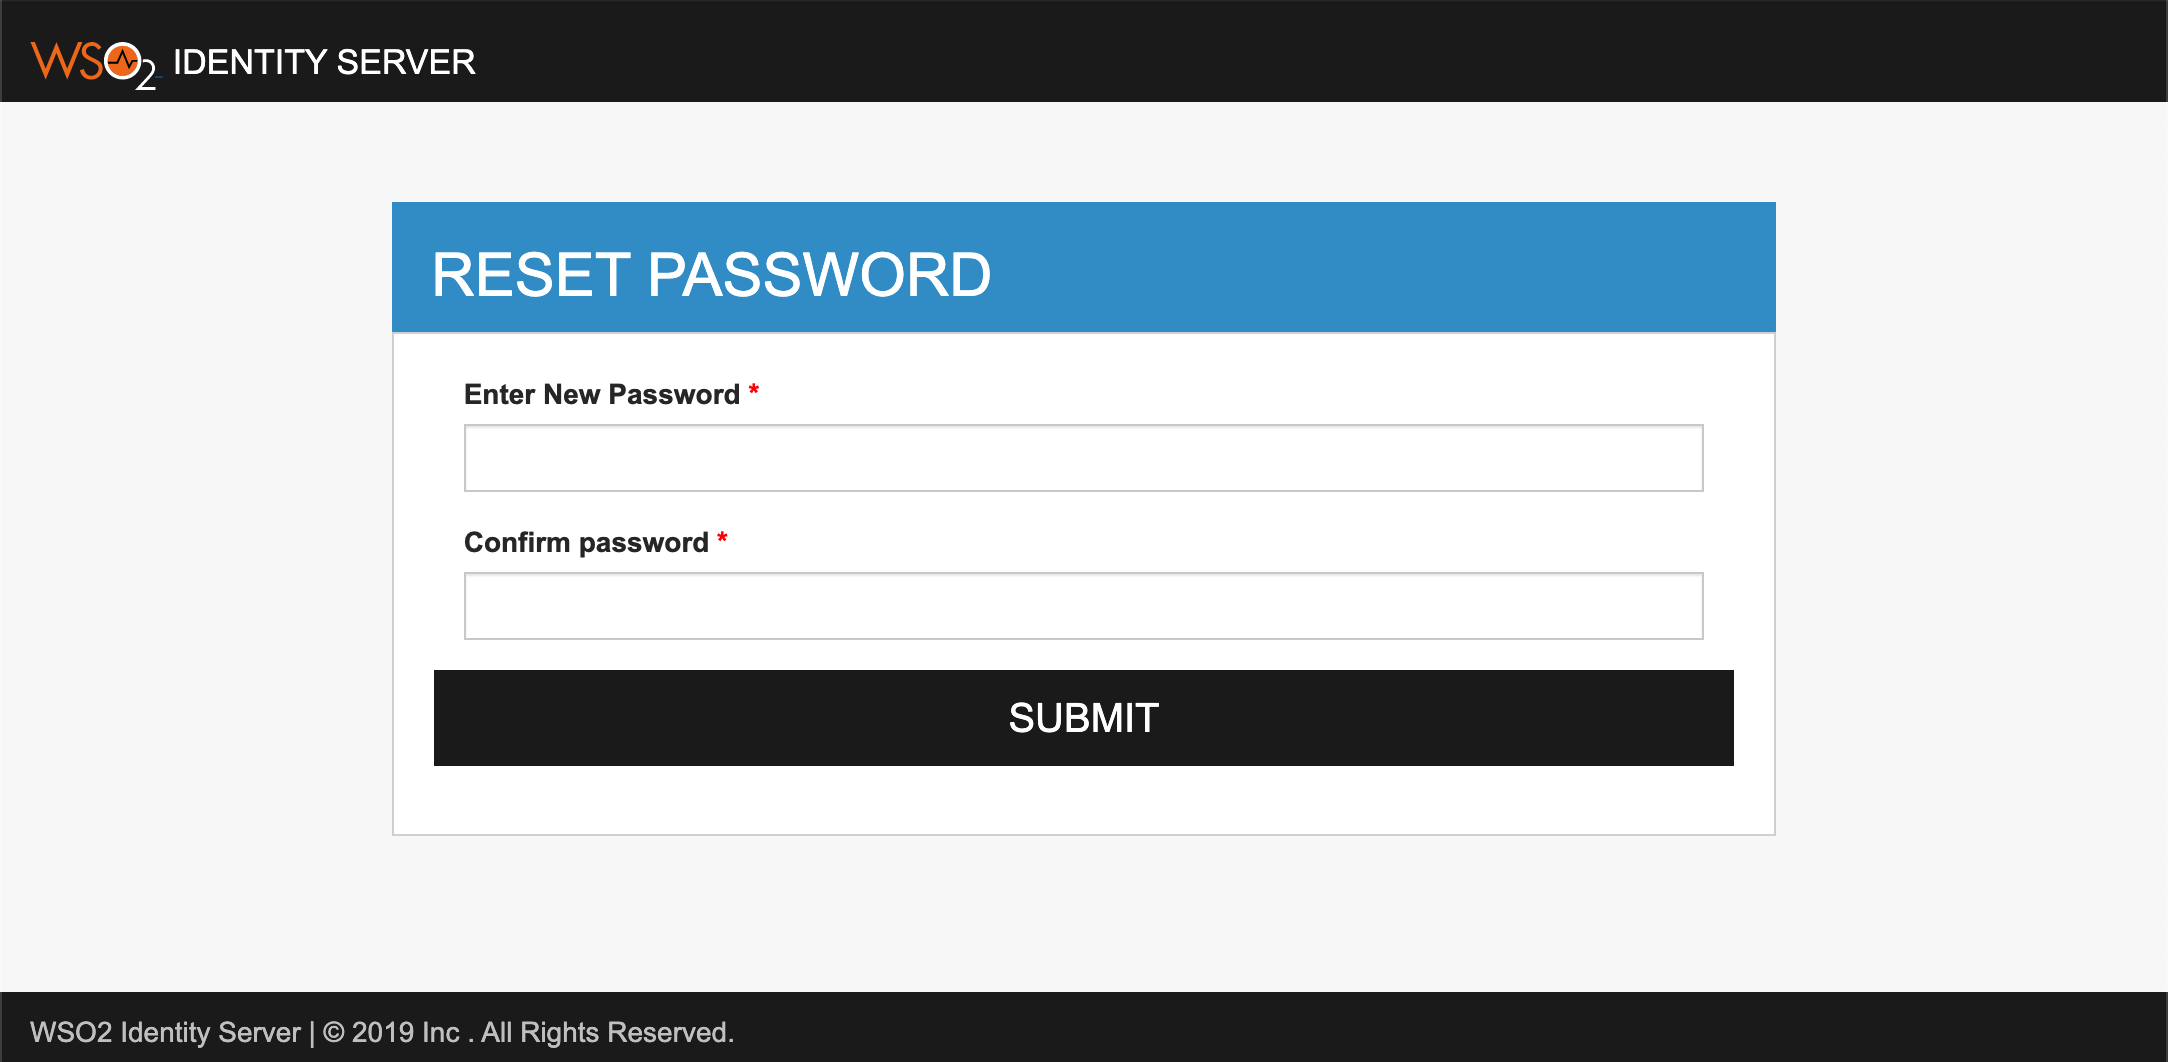
Click Create Password. The Reset Password screen appears.
-
Enter a preferred password and click Submit.
-