Configure an SP and IdP Using Configuration Files
This topic provides instructions on how to create a service provider and identity provider in WSO2 Identity Server using configuration files which is typically used during the deployment stage. This is configured so that multiple tenants in the Identity Server can have the same identity provider.
Even though this topic is not specifically about federated authentication, this
scenario also addresses a federated authentication
solution. This scenario requires two WSO2 Identity Server instances,
where one acts as the external identity provider, and the other acts as
the service provider. From this point onwards, the Identity Server
instance that acts as the external identity provider will be referred to
as identity provider IS and the instance that
acts as the service provider will be referred to as
service provider IS. Once the configurations
are done, the service provider IS will
have the travelocity application configured as a service provider and an
identity provider configured and shared across its tenant space. This is
illustrated via the following diagram.

The following are the high level steps required for this scenario.
- Add the
identity provider ISto theservice provider ISas an identity provider. - Add the
service provider ISto theidentity provider ISas a service provider. - Add the
travelocity.comapplication in theservice provider ISas a service provider. This uses the identity provider created earlier (in step 1) as a federated authenticator.
Note
The above processes can be easily done using WSO2 Identity Server Management Console, but the
service provider and identity provider created in service provider IS, will only be visible to the
tenant who creates them.
Therefore, difference here is that the identity
provider and service provider in service provider IS are created using
configuration files are available to all the tenants
in service provider IS.
The following sections provide instructions on how to carry out the above steps.
Before you begin
Follow the instructions given below to setup two WSO2 Identity Server instances for this scenario.
- Download and install the two WSO2 Identity Server instances.
-
Navigate to
<IDENTITY_PROVIDER_IS_HOME>/repository/conf/deployment.tomland add anoffsetvalue to increment the port values in theidentity provider ISso that there is no port conflict with theservice provider IS. Port conflicts occur when multiple WSO2 product instances run on the same machine.[server] ... offset=2 ...Note
To read more about new configurations, see New Configuration Model.
You have successfully setup the Identity Server instances. Now you can proceed to the the configuration steps.
Configure the federated identity provider
This section involves adding the service provider IS as a
service provider in the identity provider IS from the management
console.
- Start the
identity provider ISand access WSO2 Identity Server Management Console (https://<IS_HOST>:<PORT>/carbon). Refer [Run the Product(https://is.docs.wso2.com/en/6.0.0/deploy/get-started/run-the-product/). - Navigate to the Main > Identity > Service Providers > Click Add.
-
Fill in the Service Provider Name and provide a brief Description of the service provider.
NOTE: For this scenario, enter the Service Provider Name as
ServiceProviderSP_IS. -
Click Register to add the service provider.
- Expand the Inbound Authentication and SAML2 Web SSO Configuration sections and click Configure.
-
Configure the following properties.
Configurations to be done Description Issuer : travelocitySPThis must be the same as the value you enter for the Service Provider Entity Id when configuring the identity provider in the service provider IS.Assertion Consumer URL : https://localhost:9443/commonauthThis is the URL to which the browser should be redirected to after the authentication is successful. This is the Assertion Consumer Service (ACS) URL of the service provider. The identity provider redirects the SAML2 response to this URL. However, if the SAML2 request is signed and SAML2 request contains the ACS URL, the Identity Server will honor the ACS URL of the SAML2 request. It should be defined in this format: https://(host-name):(port)/acs.Enable Single Logout When single logout is enabled, the identity provider sends logout requests to all service providers. Basically, the identity provider acts according to the single logout profile. -
Click Register to save your changes.
Add an identity provider
This section involves adding the identity provider IS as an
identity provider in the service provider IS via a file.
Create a file named identityProviderIDP_IS.xml inside
the <SERVICE_PROVIDER_IS_HOME>/repository/conf/identity/identity-providers
directory and add the following content into it. These configurations
basically add the identity provider in the service provider IS. Additionally, this has
the configurations necessary for a federated authentication scenario.
identityProviderIDP_IS.xml
<IdentityProvider>
    <IdentityProviderName>identityProviderIDP_IS</IdentityProviderName>
    <DisplayName>identityProviderIDP_IS</DisplayName>
    <IdentityProviderDescription></IdentityProviderDescription>
    <Alias>https://localhost:9444/oauth2/token/</Alias>
    <IsPrimary></IsPrimary>
    <IsEnabled>true</IsEnabled>
    <IsFederationHub></IsFederationHub>
    <HomeRealmId></HomeRealmId>
    <ProvisioningRole></ProvisioningRole>
    <FederatedAuthenticatorConfigs>
        <saml2>
            <Name>SAMLSSOAuthenticator</Name>
            <DisplayName>samlsso</DisplayName>
            <IsEnabled>true</IsEnabled>
            <Properties>
                <property>
                    <Name>IdPEntityId</Name>
                    <Value>identiryProviderIDP</Value>
                </property>
                <property>
                    <Name>IsLogoutEnabled</Name>
                    <Value>true</Value>
                </property>
                <property>
                    <Name>SPEntityId</Name>
                    <Value>travelocitySP</Value>
                </property>
                <property>
                    <Name>SSOUrl</Name>
                    <Value>https://localhost:9444/samlsso/</Value>
                </property>
                <property>
                    <Name>isAssertionSigned</Name>
                    <Value>false</Value>
                </property>
                <property>
                    <Name>commonAuthQueryParams</Name>
                    <Value></Value>
                </property>
                <property>
                    <Name>IsUserIdInClaims</Name>
                    <Value>false</Value>
                </property>
                <property>
                    <Name>IsLogoutReqSigned</Name>
                    <Value>false</Value>
                </property>
                <property>
                    <Name>IsAssertionEncrypted</Name>
                    <Value>false</Value>
                </property>
                <property>
                    <Name>IsAuthReqSigned</Name>
                    <Value>false</Value>
                </property>
                <property>
                    <Name>IsAuthnRespSigned</Name>
                    <Value>false</Value>
                </property>
                <property>
                    <Name>LogoutReqUrl</Name>
                    <Value>false</Value>
                </property>
            </Properties>
        </saml2>
    </FederatedAuthenticatorConfigs>
    <DefaultAuthenticatorConfig>SAMLSSOAuthenticator</DefaultAuthenticatorConfig>
    <ProvisioningConnectorConfigs>
    </ProvisioningConnectorConfigs>
    <DefaultProvisioningConnectorConfig></DefaultProvisioningConnectorConfig>
    <ClaimConfig></ClaimConfig>
    <Certificate></Certificate>
    <PermissionAndRoleConfig></PermissionAndRoleConfig>
    <JustInTimeProvisioningConfig></JustInTimeProvisioningConfig>
</IdentityProvider>
Note
Here, travelocitySP must be the same value as the
value configured as the Issuer in the identity provider IS.
Tip
When studying the above configurations, you can identify the Service Provider Entity Id in the following code snippet.
<property>
    <Name>SPEntityId</Name>
    <Value>travelocitySP</Value>
</property>
Note
This configuration will only allow the file based identity
provider to be visible in file based service providers.
Additionally, it will only be visible to the super tenant. To make it
visible across tenants and in the SP registration UI, add the prefix
SHARED\_ before the identity provider name to the
<IdentityProviderName> element, as seen below.
<IdentityProviderName>SHARED_identityProviderIDP_IS</IdentityProviderName>
Adding this prefix allows this identity provider to be shared between the service providers. Consequently, it will also be shown in the UI drop down as a federated identity provider when configuring a service provider.
Add a certificate
Add the certificate value to the identityProviderIDP_IS.xml
file within the <Certificate> tag.
Note
The following is a sample command to export the public certificate in PEM format
in WSO2 Identity Server. Navigate to the <IDENTITY_PROVIDER_IS_HOME>/repository/resources/security folder and
use the following command.
keytool -exportcert -alias wso2carbon -keypass wso2carbon -keystore wso2carbon.jks -storepass wso2carbon -rfc -file ispublic_crt.pem
<Certificate> tag.
Note
Use the above command only if the identity provider is the WSO2
Identity Server. If the identity provider is a third party IDP, then you
can get the certificate in PEM format and read the value. You need to
copy the entire content of the PEM file and place it within the
<Certificate> tag.
Add a service provider
This section involves adding the travelocity.com application as a
service provider in the service provider IS via a file.
-
Open the
<SERVICE_PROVIDER_IS_HOME>/repository/conf/identity/sso-idp-config.xmlfile and add the following configuration under the<SSOIdentityProviderConfig>properties
<ServiceProviders>tag . This adds the travelocity application as a service provider.Additional configs to sso-idp-config.xml
<ServiceProvider>
    <Issuer>travelocity.com</Issuer>
    <AssertionConsumerServiceURLs>
      <AssertionConsumerServiceURL>http://wso2is.local:8080/travelocity.com/home.jsp</AssertionConsumerServiceURL>
    </AssertionConsumerServiceURLs>
    <DefaultAssertionConsumerServiceURL>http://wso2is.local:8080/travelocity.com/home.jsp</DefaultAssertionConsumerServiceURL>
    <EnableSingleLogout>true</EnableSingleLogout>
    <SLOResponseURL></SLOResponseURL>
    <SLORequestURL></SLORequestURL>
    <SAMLDefaultSigningAlgorithmURI>http://www.w3.org/2000/09/xmldsig#rsa-sha1</SAMLDefaultSigningAlgorithmURI>
    <SAMLDefaultDigestAlgorithmURI>http://www.w3.org/2000/09/xmldsig#sha1</SAMLDefaultDigestAlgorithmURI>
    <SignResponse>true</SignResponse>
    <ValidateSignatures>false</ValidateSignatures>
    <EncryptAssertion>true</EncryptAssertion>
    <CertAlias></CertAlias>
    <EnableAttributeProfile>true</EnableAttributeProfile>
    <IncludeAttributeByDefault>true</IncludeAttributeByDefault>
    <ConsumingServiceIndex>2104589</ConsumingServiceIndex>
    <EnableAudienceRestriction>false</EnableAudienceRestriction>
    <AudiencesList>
      <Audience></Audience>
    </AudiencesList>
    <EnableRecipients>false</EnableRecipients>
    <RecipientList>
      <Recipient></Recipient>
    </RecipientList>
    <EnableIdPInitiatedSSO>false</EnableIdPInitiatedSSO>
    <EnableIdPInitSLO>false</EnableIdPInitSLO>
    <ReturnToURLList>
      <ReturnToURL></ReturnToURL>
    </ReturnToURLList>
</ServiceProvider>
Tip
If the incoming SAML requests from the client (e.g.,
travelocity.com) are signed, and the service provider identity server instance needs to validate the signature included in the authentication and logout requests, do the following:- Import the public certificate of the client to the primary
keystore (e.g.,
wso2carbon.jks) - Add the corresponding certificate alias name to the
<CertAlias>property and set the<ValidateSignatures>property to true in thesso-idp-config.xmlfile.
In the above configuration, the single logout is supported by Back-Channel Logout. In order to use SAML Front-Channel Logout, add the following properties under
<ServiceProvider>tag.To enable SAML Front-Channel Logout with HTTP Redirect Binding
<EnableSingleLogout>true</EnableSingleLogout>
<EnableFrontChannelLogout>true</EnableFrontChannelLogout>
<FrontChannelLogoutBinding>HTTPRedirectBinding</FrontChannelLogoutBinding>
To enable SAML Front-Channel Logout with HTTP POST Binding
<EnableSingleLogout>true</EnableSingleLogout> <EnableFrontChannelLogout>true</EnableFrontChannelLogout> <FrontChannelLogoutBinding>HTTPPostBinding</FrontChannelLogoutBinding> - Import the public certificate of the client to the primary
keystore (e.g.,
-
Create a file named
travelocity.com.xmlin the<SERVICE_PROVIDER_IS_HOME>/repository/conf/identity/service-providersdirectory. Add the following configurations into thetravelocity.com.xmlfile you created. This adds the necessary SAML configurations to the travelocity service provider.travelocity.com.xml
Note
If you added the
SHARED\_prefix to the identity provider name when adding the identity provider, replace the<IdentityProviderName>value (found under the<LocalAndOutBoundAuthenticationConfig>element) in thetravelocity.com.xmlfile, with the following value.SHARED_identityProviderIDP_IS<ServiceProvider> <ApplicationID>3</ApplicationID> <ApplicationName>travelocity.com</ApplicationName> <Description>travelocity Service Provider</Description> <IsSaaSApp>true</IsSaaSApp> <InboundAuthenticationConfig> <InboundAuthenticationRequestConfigs> <InboundAuthenticationRequestConfig> <InboundAuthKey>travelocity.com</InboundAuthKey> <InboundAuthType>samlsso</InboundAuthType> <Properties></Properties> </InboundAuthenticationRequestConfig> </InboundAuthenticationRequestConfigs> </InboundAuthenticationConfig> <LocalAndOutBoundAuthenticationConfig> <AuthenticationSteps> <AuthenticationStep> <StepOrder>1</StepOrder> <LocalAuthenticatorConfigs> <LocalAuthenticatorConfig> <Name>BasicAuthenticator</Name> <DisplayName>basicauth</DisplayName> <IsEnabled>true</IsEnabled> </LocalAuthenticatorConfig> </LocalAuthenticatorConfigs> <FederatedIdentityProviders> <IdentityProvider> <IdentityProviderName>identityProviderIDP_IS</IdentityProviderName> <IsEnabled>true</IsEnabled> <DefaultAuthenticatorConfig> <FederatedAuthenticatorConfigs> <FederatedAuthenticatorConfig> <Name>SAMLSSOAuthenticator</Name> <DisplayName>samlsso</DisplayName> <IsEnabled>true</IsEnabled> </FederatedAuthenticatorConfig> </FederatedAuthenticatorConfigs> </DefaultAuthenticatorConfig> </IdentityProvider> </FederatedIdentityProviders> <SubjectStep>true</SubjectStep> <AttributeStep>true</AttributeStep> </AuthenticationStep> </AuthenticationSteps> <subjectClaimUri> <!--selected URI --> </subjectClaimUri> </LocalAndOutBoundAuthenticationConfig> <RequestPathAuthenticatorConfigs></RequestPathAuthenticatorConfigs> <InboundProvisioningConfig></InboundProvisioningConfig> <OutboundProvisioningConfig></OutboundProvisioningConfig> <ClaimConfig> <AlwaysSendMappedLocalSubjectId>true</AlwaysSendMappedLocalSubjectId> <LocalClaimDialect>true</LocalClaimDialect><ClaimMappings><ClaimMapping><LocalClaim><ClaimUri>http://wso2.org/claims/givenname</ClaimUri></LocalClaim><RemoteClaim><ClaimUri>http://wso2.org/claims/givenName</ClaimUri>ClaimUri></RemoteClaim><RequestClaim>true</RequestClaim></ClaimMapping></ClaimMappings></ClaimConfig> <PermissionAndRoleConfig></PermissionAndRoleConfig> </ServiceProvider> -
Restart the WSO2 Identity Server to apply the file-based configurations to the system.
Note
WSO2 Identity Server Management Console will not show the SP-related configuration information if it is loaded through a file
Run the travelocity application
Prerequisites
-
Download Apache Tomcat 8.x and install it. Tomcat server installation location will later be referred to as
<TOMCAT_HOME>in this guide. -
It is recommended that you use a hostname that is not
localhostto avoid browser errors. Modify your machine's/etc/hostsentry to reflect this.Info
Note that
wso2is.localis used in this documentation as an example, but you must modify this when configuring the authenticators or connectors with this sample application.
CORS configuration
SAML2 POST Binding requires CORS configurations to be set up.
Before configuring the service provider, add the following configurations to the deployment.toml file found in <IS_HOME>/repository/conf/. Adding this configuration allows HTTP POST requests.
``` toml
[cors]
allow_generic_http_requests = true
allow_any_origin = false
allowed_origins = [
    "http://localhost:8080"
]
allow_subdomains = false
supported_methods = [
    "GET",
    "POST",
    "HEAD",
    "OPTIONS"
]
support_any_header = true
supported_headers = []
exposed_headers = []
supports_credentials = true
max_age = 3600
tag_requests = false
```
Download the sample
To be able to deploy a WSO2 Identity Server sample, you need to download it onto your machine first.
Follow the instructions below to download the sample from GitHub.
-
Navigate to WSO2 Identity Server Samples.
-
Download the
travelocity.com.warfile from the latest release assets.
Deploy the sample web app
Deploy this sample web app on a web container.
-
Copy the
travelocity.com.warfile into thewebappsfolder. For example,<TOMCAT_HOME>/apache-tomcat-<version>/webapps -
Open a terminal window and add the following entry to the
/etc/hostsfile of your machine to configure the hostname.127.0.0.1 wso2is.local 127.0.0.1 localhost.comWhy is this step needed?
Some browsers do not allow you to create cookies for a naked hostname, such as
localhost. Cookies are required when working with SSO . Therefore, to ensure that the SSO capabilities work as expected in this tutorial, you need to configure theetc/hostfile as explained in this step.The
etc/hostfile is a read-only file. Therefore, you won't be able to edit it by opening the file via a text editor. Instead, edit the file using the terminal commands.
For example, use the following command if you are working on a macOS/Linux environment.sudo nano /etc/hosts -
Open the
travelocity.propertiesfile found in the<TOMCAT_HOME>/webapps/travelocity.com/WEB-INF/classesdirectory and configure the following property with the hostname (wso2is.local) that you configured above.#The URL of the SAML 2.0 Assertion Consumer SAML2.AssertionConsumerURL=http://wso2is.local:8080/travelocity.com/home.jsp -
Restart the Tomcat server.
To check the sample application, navigate to
http://<TOMCAT_HOST>:<TOMCAT_PORT>/travelocity.com/index.jsp
on your browser.
For example,
http://wso2is.local:8080/travelocity.com/index.jsp
Tip
If you wish to change properties like the issuer ID, consumer
URL, and IdP URL, you can edit the travelocity.properties file found
in the travelocity.com/WEB-INF/classes directory.
Also if the service provider is configured in a tenant you can use
"QueryParams" property to send the tenant domain.For example,
"QueryParams=tenantDomain=wso2.com".
This sample uses the following default values.
| Properties | Description |
|---|---|
SAML2.SPEntityId=travelocity.com |
A unique identifier for this SAML 2.0 service provider application |
SAML2.AssertionConsumerURL= http://wso2is.local:8080/travelocity.com/home.jsp |
The URL of the SAML 2.0 Assertion Consumer |
SAML2.IdPURL= https://localhost:9443/samlsso |
The URL of the SAML 2.0 identity provider |
SAML2.IsPassiveAuthn=true |
Set this to send SAML2 passive authentication requests |
If you edit the travelocity.properties file, restart the
Apache Tomcat server for the changes to take effect.
Note
Check whether you have enabled following configurations while adding the service provider
in the identity provider IS. You can check this by navigating to Main > Identity >
Service Providers > List > Click Edit in the corresponding SP >
Inbound Authentication Configuration > SAML2 Web SSO Configuration > Edit.

If you have not enabled the configs, add the following configs to travelocity as well.
- Stop tomcat if it is already running.
- Navigate to
<TOMCAT_HOME>/webapps/travelocity.com/WEBINF/classes/travelocity.propertiesfile and change the following configs tofalseif they are configured totrue.
#Specify if SAMLResponse element is signed
SAML2.EnableResponseSigning=false

#Specify if SAMLAssertion element is signed
SAML2.EnableAssertionSigning=false

#Specify if AuthnRequests and LogoutRequests should be signed
SAML2.EnableRequestSigning=false
Test with tenants
Now you can test if the configurations you have done work in a tenant scenario.
-
Create new tenants in the
service provider IS.Note
You cannot provide access to the service provider and identity provider for a specific tenant domain. This is accessible to all the tenants configured.
-
Open the
<TOMCAT_HOME>/webapps/travelocity.com/WEBINF/classes/travelocity.propertiesfile.Note
If the tomcat server is running, you need to stop the server.
Full contents of the travelocity.properties file
EnableSAML2SSOLogin=true EnableOpenIDLogin=true EnableOAuth2SAML2Grant=false #Url to do send SAML2 SSO AuthnRequest SAML2SSOURL=samlsso #Url to do initiate OAuth2 SAML2 Grant Request OAuth2SAML2GrantURL=token #Url to initiate OpenID Authentication Request OpenIdURL=openid #URIs to skip SSOAgentFilter; comma separated values SkipURIs=/travelocity.com/index.jsp #A unique identifier for this SAML 2.0 Service Provider application SAML2.SPEntityId=travelocity.com #The URL of the SAML 2.0 Assertion Consumer SAML2.AssertionConsumerURL=http://localhost:8080/travelocity.com/home.jsp #A unique identifier for this SAML 2.0 Service Provider application SAML2.IdPEntityId=localhost #The URL of the SAML 2.0 Identity Provider SAML2.IdPURL=https://localhost:9443/samlsso #Identifier given for the Service Provider for SAML 2.0 attributes #exchange #SAML2.AttributeConsumingServiceIndex=1701087467 #Specify if SingleLogout is enabled/disabled SAML2.EnableSLO=true #This is the URL that is used for SLO SAML2.SLOURL=logout #Specify if SAMLResponse element is signed SAML2.EnableResponseSigning=false #Specify if SAMLAssertion element is signed SAML2.EnableAssertionSigning=false #Specify if SAMLAssertion element is encrypted SAML2.EnableAssertionEncryption=false #Specify if AuthnRequests and LogoutRequests should be signed SAML2.EnableRequestSigning=false #Specify if SAML request is a passive SAML2.IsPassiveAuthn=false #Password of the KeyStore for SAML and OpenID KeyStorePassword=wso2carbon #Alias of the IdP's public certificate IdPPublicCertAlias=wso2carbon #Alias of the SP's private key PrivateKeyAlias=wso2carbon #Private key password to retrieve the private key used to sign #AuthnRequest and LogoutRequest messages PrivateKeyPassword=wso2carbon #OAuth2 token endpoint URL OAuth2.TokenURL=https://localhost:9443/oauth2/token #OAuth2 Client ID OAuth2.ClientId=Qn5DQHCYfshxeZh6R9SL1HM2lsMa #OAuth2 Client Secret OAuth2.ClientSecret=cbkAs1gajdwPAMbrSR54hPAIcz0a #OpenId Provider Url OpenId.ProviderURL=https://localhost:9443/openid/ #openid.return_to parameter OpenId.ReturnToURL=http://localhost:8080/travelocity.com/home.jsp #Custom SAML post binding request page #SAML.PostBinding.RequestPage=path/to/the/html #Additional request parameters #QueryParams=tenantDomain=-1234 #SAML2.IsForceAuthn=true #Specify whether the consumer requests user attributes from the provider OpenId.EnableAttributeExchange=true #Specify whether the consumer runs in dumb mode OpenId.EnableDumbMode=false -
In the
travelocity.propertiesfile updatetenantDomainquery param with the newly created tenant domain.QueryParams=tenantDomain=tenant.domainTip
You can uncomment values in this file by removing the
\#. -
In order to enable response signature validation from the Travelocity side, first, you need to download the public certificate of the tenant.
Note
If you have not enabled signature validation, proceed to the next step.
-
Log in using tenant credentials to WSO2 Identity Server Management Console (
https://<IS_HOST>:<PORT>/carbon) and navigate to Main > Manage > Keystores > List. Click onPublic Keylink to download the certificate.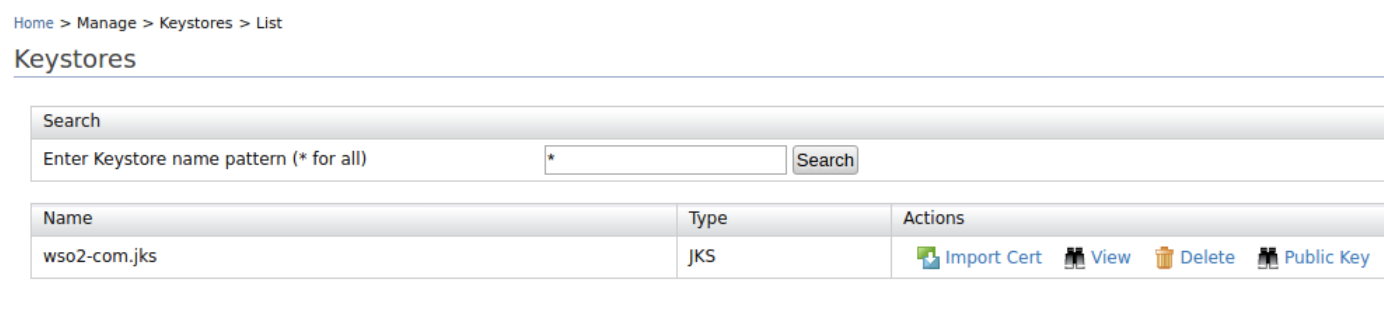
-
Now you need to import this public certificate to
<APACHE_HOME>/webapps/travelocity.com/WEB-INF/classes/wso2carbon.jksfile using the following command.keytool -import -alias <key_alias> -file <download_file> -keystore wso2carbon.jksNote
Default password of the
wso2carbon.jksiswso2carbon. -
Update the
IdPPublicCertAliasproperty in<APACHE_HOME>/webapps/travelocity.com/WEB-INF/classes/travelocity.propertieswith provided alias in the previous step.Note
It is possible to disable response signature validation from the Travelocity application using the
SAML2.EnableResponseSigningproperty available in the<APACHE_HOME>/webapps/travelocity.com/WEB-INF/classes/travelocity.propertiesfile.
-
-
If you have made any changes to the port offset, you must ensure that this change is reflected in the port value of the following property in the
travelocity.propertiesfile.SAML2.IdPURL=https://localhost:9443/samlsso -
Restart Apache Tomcat and access the travelocity application. You will be able to log in using the identity provider credentials regardless of the tenant domain you are using. Access the travelocity application using
http://wso2is.local/travelocity.com/index.jsp.
Related topics