Encrypt ID Tokens
This page guides you through configuring token encryption for ID tokens.
Register a service provider
To register your application as a service provider in the WSO2 Identity Server:
-
Log in to the WSO2 Identity Server Management Console using administrator credentials.
-
Go to Main > Identity > Service Providers > Add.
-
Enter a Service Provider Name. Optionally, enter a Description.
-
Click Register.
Configure the service provider
Make the following changes to the created service provider.
-
Expand Inbound Authentication Configuration > OAuth/OpenID Connect Configuration and click Configure.
-
Enter the Callback Url.
Note
The Callback Url is the exact location in the service provider's application to which an access token will be sent. This URL should be the URL of the page that the user is redirected to after successful authentication.
-
Click Enable ID Token Encryption to enable id_token encryption.
Once you enable id_token encryption, two select boxes will be visible to choose your preferred encryption algorithm and encryption method.
-
Encryption Algorithm: Asymmetric encryption algorithm that is used to encrypt the Content Encryption Key (CEK), using the public key of the service provider.
-
Encryption Method: Symmetric encryption algorithm that is used to encrypt the JWT claims set using the CEK.
Leave these values as they are if you do not have any specific requirements.
-
-
Click Add
Tip
To configure more advanced configurations, see OAuth/OpenID Connect Configurations.
Configure the public certificate
The following steps describe how to configure a service provider public certificate.
-
Create a new keystore.
keytool -genkey -alias wso2carbon -keyalg RSA -keysize 2048 -keystore testkeystore.jks -dname "CN=*.test.com,OU=test,O=test,L=MPL,ST=MPL,C=FR" -storepass wso2carbon -keypass wso2carbon -validity 10950 -
Create a file and name it as the client ID of the OAuth application service provider. Export the public key of the new keystore to the file you created.
keytool -export -alias wso2carbon -file <client-id> -keystore testkeystore.jks -
Get the cert in X509 format.
keytool -printcert -rfc -file <client-id>You will see the public certificate in X509 format in the console.
-
Copy the content of the certificate. A sample output is shown below.
-----BEGIN CERTIFICATE----- MIIDVzCCAj+gAwIBAgIETCZA8zANBgkqhkiG9w0BAQsFADBcMQswCQYDVQQGEwJG UjEMMAoGA1UECBMDTVBMMQwwCgYDVQQHEwNNUEwxDTALBgNVBAoTBHRlc3QxDTAL BgNVBAsTBHRlc3QxEzARBgNVBAMMCioudGVzdC5jb20wHhcNMTgwMjE0MDYzNjE3 WhcNNDgwMjA3MDYzNjE3WjBcMQswCQYDVQQGEwJGUjEMMAoGA1UECBMDTVBMMQww CgYDVQQHEwNNUEwxDTALBgNVBAoTBHRlc3QxDTALBgNVBAsTBHRlc3QxEzARBgNV BAMMCioudGVzdC5jb20wggEiMA0GCSqGSIb3DQEBAQUAA4IBDwAwggEKAoIBAQCz Gc/BcXCiIagLhXs1g90H+PbfZyXLzwFJ+YmsKMikcffhyopDD+fnFjHb1+XXSnUh 4XzQlFba6m2vIOK8uquMhZKMv/E7Vxkl/ADTuw/BgpZRut4p88Fn8OWZlrJfoi3o hvgfxSMratvxLMp1Qe0BzjwoBDB9r+h9pj8kCpHC824eUGIR0FZsW9lnoJP2LegL nAcOJuNBoeWC0wwNu0sgIJwjsKp3G3glm8B4GdZvbF8aW1QRAk36sh8+0GXrRnAz aGcRAqt7CjeZmt5Dsuy0lfp5i1xf5myPOH7MwKHqQQ56Wu9O479NdDVLkJ0xne2r ZTCwMeGhQQH5hI+SYlxjAgMBAAGjITAfMB0GA1UdDgQWBBTzS+bja//25xb+4wcP gMN6cJZwoDANBgkqhkiG9w0BAQsFAAOCAQEAdhZ8romzQQKF9c8tJdIhUS4i7iJh oSjBzN+Ex9+OJcW6ubcLb8pai/J3hcvMadAybR1A17FkETLFmG9HkuEN9o2jfU7c 9Yz5d0pqO8qNKXSqHky5c+zA4vzLZGsgKyDZ5a0p9Qpsat3wnA3UGZPRoVGV5153 Mb0J1n1uubxGobEEzR2BXaKO9YEWAMQwGRdQCGBaIeGUOpqSUJMLYirDXL03je3g mYzWclLTEHpIYy+a66tmF9uTGgyys33LPm2pQ+kWd8FikWolKKBqp+IPU5QdUQi1 DdFHsyNqrnms6EOQAY57Vnf91RyS7lnO1T/lVR6SDk9+/KDBEL1b1cy7Dg== -----END CERTIFICATE----- -
Click Service Providers > List and Edit the service provider you created.
-
Select Upload SP Certificate under Select SP Certificate Type.
-
Paste the certificate content copied in step 4 as the Application Certificate.
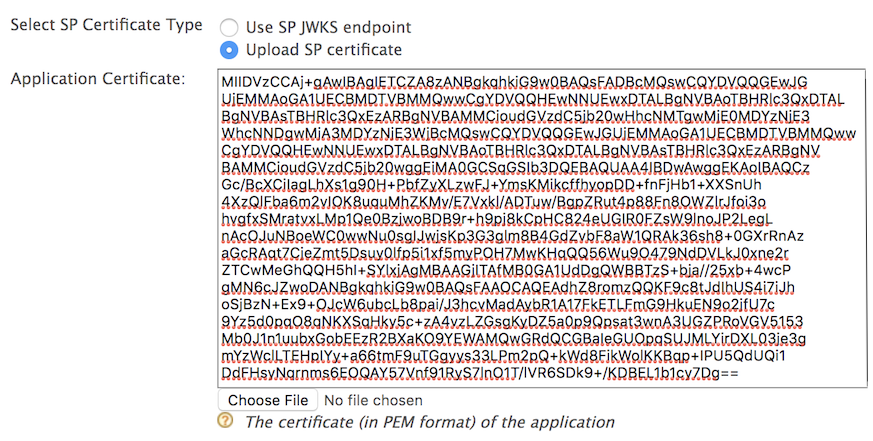
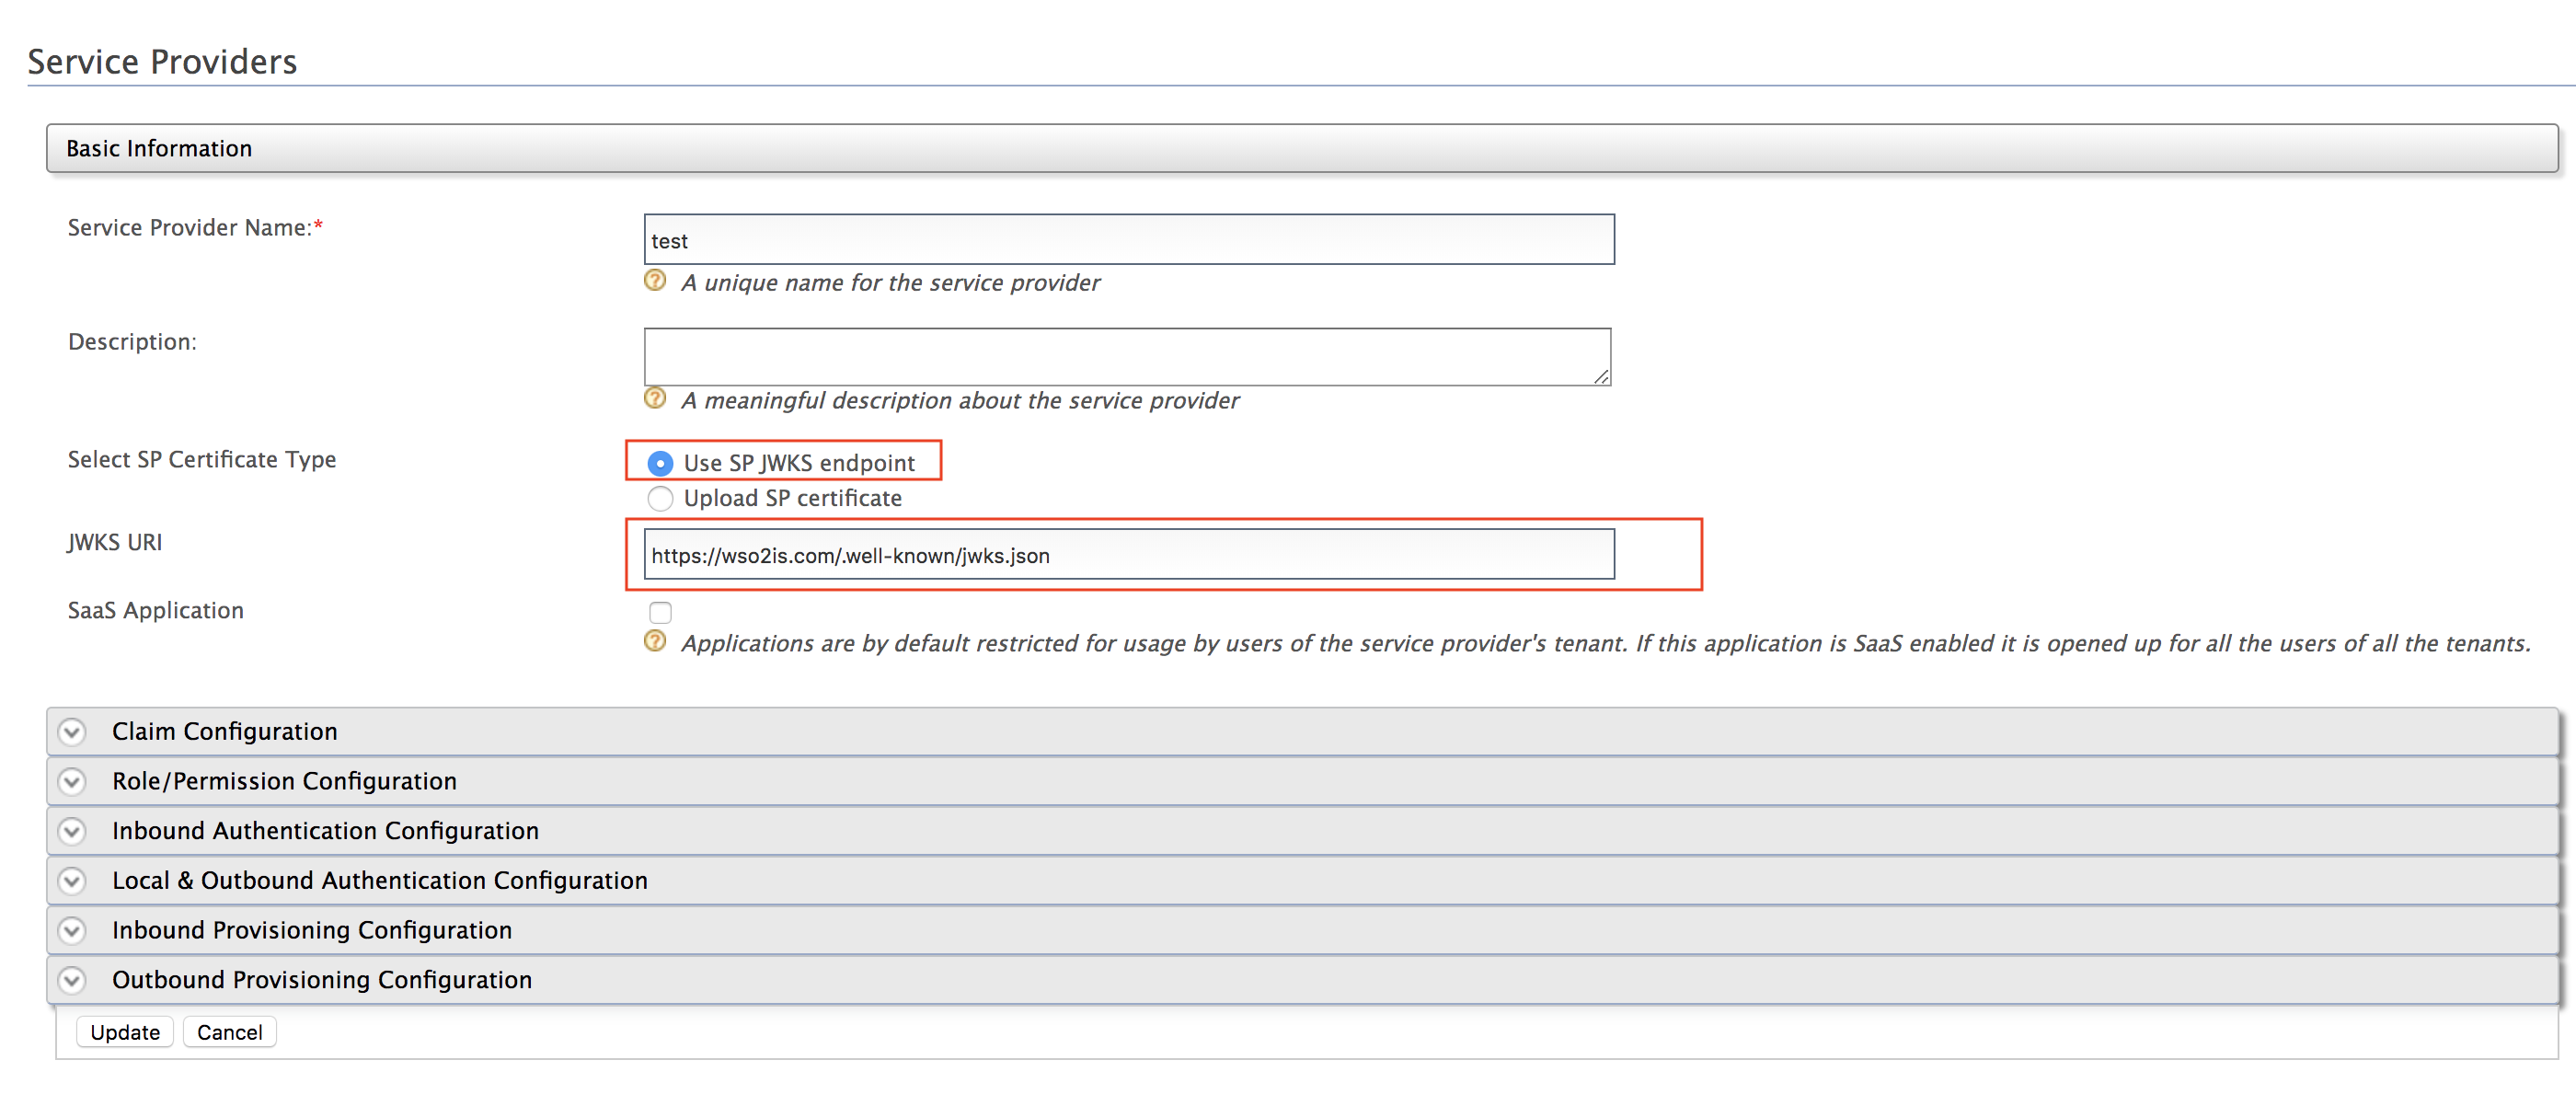
Note
Instead of uploading the service provider certificate as shown above, you can choose to use the JWKS enpoint as shown below and add the relevant JWKS URI.
-
Click Update.
Try it
This section guides you through obtaining an encrypted ID token and decrypting it using the WSO2 IS playground sample application. Alternatively, you can use a simple java program to decrypt the token. For instructions, see Decrypt the ID token.
-
See OAuth Grant Types and try out one of the grant types with the
openidscope to obtain an access token. -
You will receive an access token and an encrypted ID token.
-
To decrypt the ID token, provide the private key of the client.
-
Import JKS into a PKCS12 formatted store.
keytool -importkeystore -srckeystore testkeystore.jks -destkeystore testkeystore.p12 -srcstoretype JKS -deststoretype PKCS12 -srcstorepass wso2carbon -deststorepass wso2carbon -srcalias wso2carbon -destalias wso2carbon -srckeypass wso2carbon -destkeypass wso2carbon -
Extract the private key into a file named
key.pem.openssl pkcs12 -in testkeystore.p12 -out key.pem -passin pass:wso2carbon -passout pass:wso2carbon -nodes -nocerts -
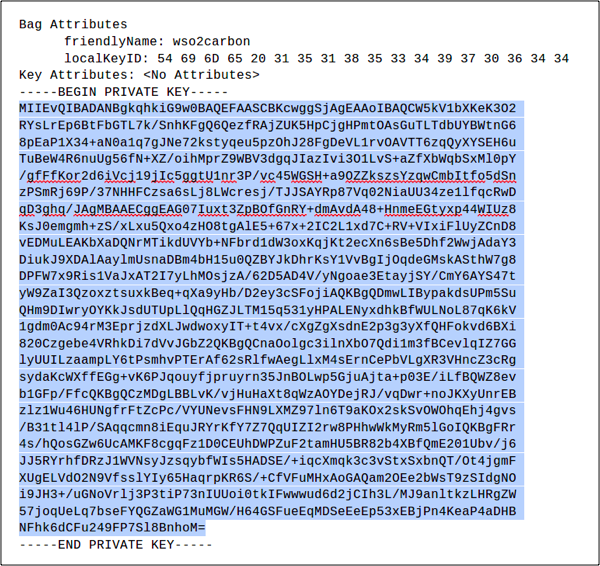
Open the created
key.pemfile using a text editor and you will see the extracted private key. -
Copy only the key string as shown in the sample below.
-
Paste the copied private key in the Client Private Key text area.
-
Click Decrypt and the details of the decrypted ID Token will be displayed.
-
Related topics