Enable Single Sign-On for an OIDC Web Application
This page guides you through configuring single sign-on authentication between two OIDC web applications. This is demonstrated using two sample applications called Pickup Dispatch and Pickup Manager.
Scenario
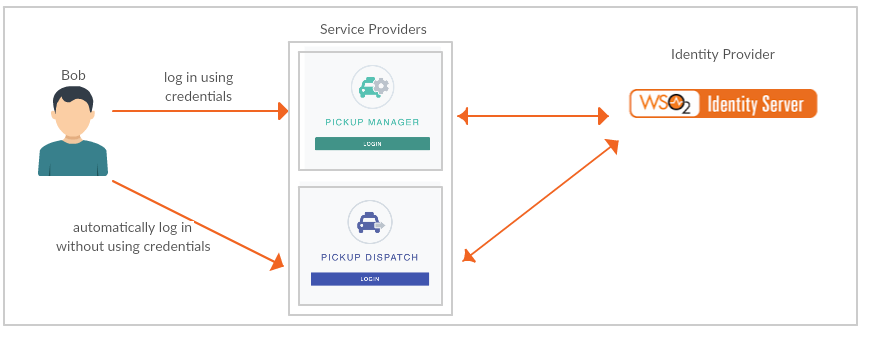
Pickup is a cab company that has two OIDC web applications called pickup-dispatch and pickup-manager. Both applications use WSO2 Identity Server (IS) as the identity provider. When SSO is configured for both these applications, a user is only required to provide their credentials to the first application and the user will be automatically logged in to the second application.
Follow the steps below to deploy the sample applications and see how this works.
Register the services providers
You need to register the two sample applications as service providers in WSO2 Identity Server.
Pickup Dispatch
-
Log in to the Management Console (
https://<IS_HOST>:<PORT>/carbon) using admin/admin credentials. -
Click Service Providers > Add.
-
Enter
pickup-dispatchas the Service Provider Name. -
Click Register.
-
Expand Inbound Authentication Configuration and then OAuth/OpenID Connect Configuration.
-
Click Configure.
-
Select the relevant grant types that you wish to try out from the Allowed Grant Types list.
-
Enter
http://wso2is.local:8080/pickup-dispatch/oauth2clientas the Callback Url.Tip
For more information on
Callback Urlfield and other advanced configurations refer, Advanced OpenID Connect Configurations -
Click Add. Note that the OAuth Client Key and Client Secret get generated. You will need these values later on when deploying the sample application.
-
Click Update to save the changes.
Pickup Manager
-
Access the Management Console (
https://<IS_HOST>:<PORT>/carbon). -
Navigate to Main>Identity>Service Providers and click Add.
-
Enter pickup-manager in the Service Provider Name text box, and click Register.
-
In the Inbound Authentication Configuration section, click Configure under the OAuth/OpenID Connect Configuration section.
-
Enter the following value as the Callback URL:
http://localhost.com:8080/pickup-manager/oauth2clientTip
The callback URL is the service provider URL to which the authorization codes are sent. Upon successful authentication, the browser should be redirected to this URL.
-
Click Add. Note the OAuth Client Key and Client Secret that is displayed. You will need these values later on when deploying the sample application.
Tip
For more information on the advanced configurations refer, Advanced OAuth/OpenID Connect Configurations.
-
Click Update to save the changes.
Set up the samples
Let's set up and configure the sample applications:
Pickup Dispatch
-
Download the pickup-dispatch.war sample.
-
Extract the
pickup-dispatch.warfile and open thedispatch.propertiesfile located in the<EXTRACT>/WEB-INF/classesfolder. -
Replace the
consumerKeyandconsumerSecretvalues with the OAuth Client Key and Client Secret values that were generated for the newly created service provider.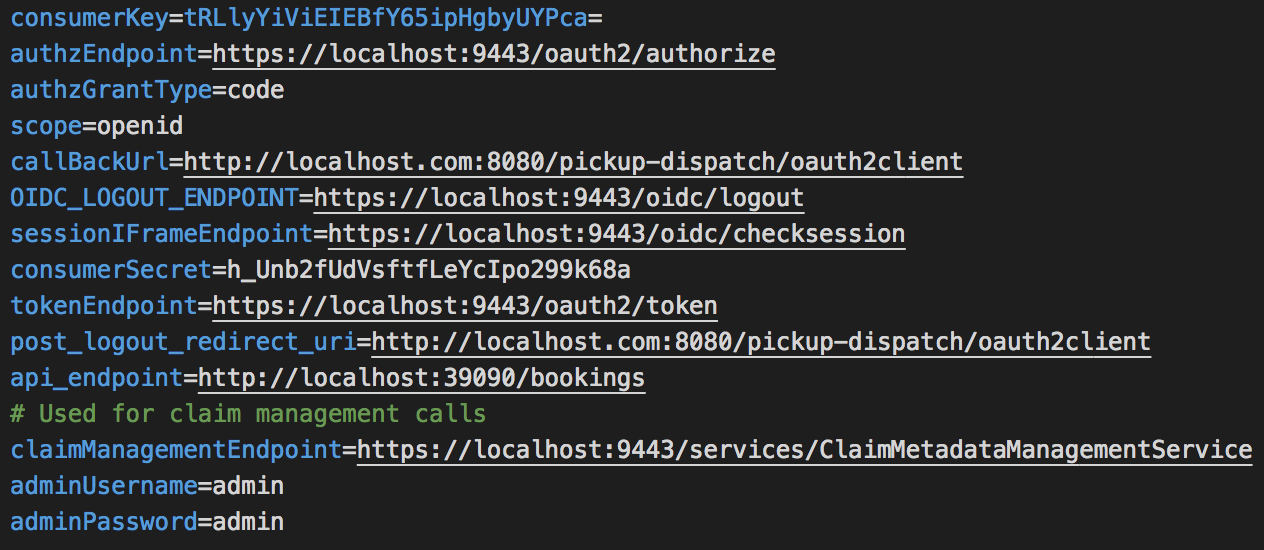
Pickup Manager
-
Download the pickup-manager.war sample.
-
Extract the
pickup-manager.warfile and open themanager.propertiesfile located in the<EXTRACT>/WEB-INF/classesfolder. -
Replace the
consumerKeyandconsumerSecretvalues with the OAuth Client Key and Client Secret values that were generated for the newly created service provider.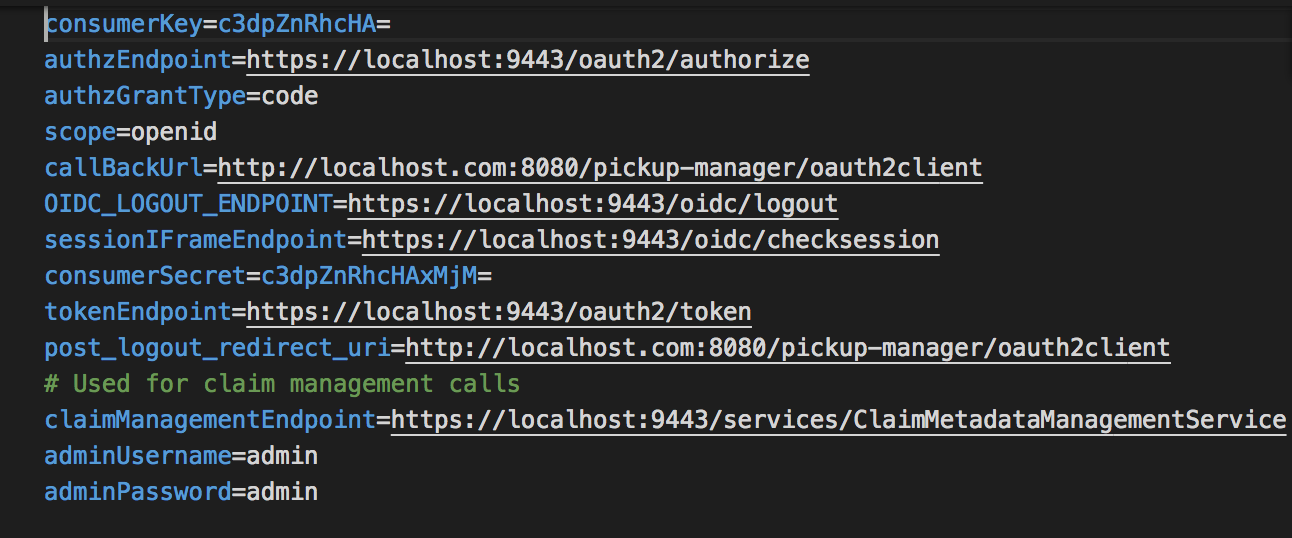
Deploy the samples
Next, deploy the sample web apps on a web container.
-
Download Apache Tomcat 8.x from here and install. Tomcat server installation location will be referred as
<TOMCAT_HOME>later in this guide.Info
It is recommended that you use a hostname that is not
localhostto avoid browser errors. Modify the/etc/hostsentry in your machine to reflect this. Note thatwso2is.localis used in this documentation as an example, but you must modify this when configuring the authenticators or connectors with this sample application. -
Next, copy the extracted and modified
pickup-managerandpickup-dispatchfolders to the<TOMCAT_HOME>/webappsfolder.
You are now ready to try out OpenID Connect SSO with the Pickup Dispatch and Pickup Manager sample web applications.
Try it
Let's try SSO with the two application.
-
Navigate to
http://wso2is.local:8080/pickup-dispatchon your browser and click Login.
-
You will be redirected to the login page of WSO2 IS. Log in using your WSO2 IS credentials (admin/admin). Provide the required consent. You will be redirected to the Pickup Dispatch application home page.
-
Now, if you navigate to
http://wso2is.local:8080/pickup-managerand click Login, you can see that user has been automatically logged in to this application without being prompted for user credentials.
You have successfully configured OpenID Connect single sign-on for two web applications using WSO2 IS as the identity provider.
Related topics