Writing a XACML 3.0 Policy Using XPath
XPath is a major element in the XSLT standard and it is a syntax for defining parts of an XML document. XPath can be used to navigate through elements and attributes in an XML document.
XPath plays an important role in XACML when policies are evaluated for XML-based data. When XML data is passed across nodes, PEP can be an interception point that calls the PDP with parsing XML data. Based on the XML data, PDP can take decisions. Let's see how we can develop a simple policy that can be used to evaluate XML data.
Sample scenario
- There is a healthcare application called "Medicom" where the online registered user (patient, doctor, etc.) can examine patients' data.
- The patient datastore returns the data that is requested for the given patient id, regardless of the logged in user of the application.
- Medicom has an authorization interceptor (PEP) between their web application and patient data store. PEP would authorize the requested data by calling to a PDP.
- The authorization rule here is that users can only read their own patients' data.
Sample XACML policy
According to our usecase, it says “Users can only read their own patients' data”. For example, if you log in to the Medicom web application with patient id “alex” then you can only read the data that is stored for “alex”.
The code given below shows a sample policy that is written to match the resources relevant to a specific patientId.
Note
Here, the XPath evaluation is done with respect to the content element and it checks for a matching value. The content element has been bound to the custom namespace and prefix eg: Path="//ak:record/ak:patient/ak:patientId/text()"
Policy: XML
<?xml version="1.0" encoding="UTF-8"?>
<Policy xmlns="urn:oasis:names:tc:xacml:3.0:core:schema:wd-17" PolicyId="medi-xpath-test-policy" RuleCombiningAlgId="urn:oasis:names:tc:xacml:1.0:rule-combining-algorithm:first-applicable" Version="1.0">
   <Description>XPath evaluation is done with respect to content elementand check for a matching value. Here content element has been bounded with custom namespace and prefix</Description>
   <PolicyDefaults>
      <XPathVersion>http://www.w3.org/TR/1999/REC-xpath-19991116</XPathVersion>
   </PolicyDefaults>
   <Target>
      <AnyOf>
         <AllOf>
            <Match MatchId="urn:oasis:names:tc:xacml:1.0:function:string-regexp-match">
               <AttributeValue DataType="http://www.w3.org/2001/XMLSchema#string">read</AttributeValue>
               <AttributeDesignator MustBePresent="false" Category="urn:oasis:names:tc:xacml:3.0:attribute-category:action" AttributeId="urn:oasis:names:tc:xacml:1.0:action:action-id" DataType="http://www.w3.org/2001/XMLSchema#string" />
            </Match>
         </AllOf>
      </AnyOf>
   </Target>
   <Rule RuleId="rule1" Effect="Permit">
      <Description>Rule to match value in content element using XPath</Description>
      <Condition>
         <Apply FunctionId="urn:oasis:names:tc:xacml:1.0:function:any-of">
            <Function FunctionId="urn:oasis:names:tc:xacml:1.0:function:string-equal" />
            <Apply FunctionId="urn:oasis:names:tc:xacml:1.0:function:string-one-and-only">
               <AttributeDesignator Category="urn:oasis:names:tc:xacml:1.0:subject-category:access-subject" AttributeId="urn:oasis:names:tc:xacml:1.0:subject:subject-id" DataType="http://www.w3.org/2001/XMLSchema#string" MustBePresent="false" />
            </Apply>
            <AttributeSelector MustBePresent="false" Category="urn:oasis:names:tc:xacml:3.0:attribute-category:resource" Path="//ak:record/ak:patient/ak:patientId/text()" DataType="http://www.w3.org/2001/XMLSchema#string" />
         </Apply>
      </Condition>
   </Rule>
   <Rule RuleId="rule2" Effect="Deny">
      <Description>Deny rule</Description>
   </Rule>
</Policy>
Deploy and publish the policy
-
Start WSO2 Identity Server and Log in to the management console.
-
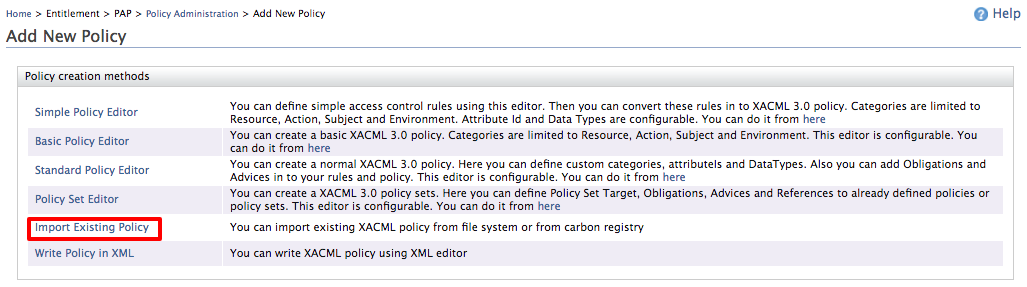
Go to Policy Administration under PAP in Main and click on Add New Entitlement Policy.
-
Next click on Import Existing Policy.
-
Save the above sample policy to a file and import it as follows by clicking upload.

-
Once it is uploaded, you can see the added policy in the policy view. Publish it to PDP so that we can evaluate the policy with sample requests.

Evaluate the Policy
The easiest way to evaluate the poilcy is to use the Try It tool available in our Tools menu in WSO2 Identity Server.
Note
You can follow the steps given here to try this using the Try It tool.