Customize the Authentication Endpoint
The authentication endpoint is the authentication URL used in authentication requests. The following sections discuss methods of customizing this endpoint for various scenarios.
Customize the authentication endpoint URL
The authentication endpoint URL is the location in your web application that contains authentication related pages.
Follow the steps below to customize the authentication endpoint URL:
-
Add the following configurations to the
<IS_HOME>/repository/conf/deployment.tomlfile, and change the value of the login_url parameter depending on the URL on which the web application should run.[authentication.endpoints] login_url="/sso/login" -
Run the web application on the new authentication endpoint URL.
Control the request parameters going to the authentication endpoint
Additional request parameters can be added and customized for the
request sent to the authentication endpoint. To customize this,
add the following configurations in the
<IS_HOME>/repository/conf/deployment.toml
file.
[authentication.endpoint.query_params]
filter_policy = exclude
filter_parameters = [username]
filter_parameters = [password]
Note
In the above configuration, username and password are just given as examples. You can configure any query parameter here for your request and customize it according to your specifications.
Load tenants into the dropdown in the login page of the authentication endpoint web application
This section is useful in scenarios where there are multiple tenants used, where users can login to web applications with their credentials for their specified tenants. For instance, for a user in the test.com tenant with the username test1, the user would have to enter the full username as "[email protected]" in order to login. Enabling this feature will load all the available active tenants onto a dropdown list on the login page of the web application that the authentication endpoint points to. This means that the test1 user mentioned above can simply select the tenant he/she belongs to (test.com) from the dropdown list and only needs to enter the username (i.e., test1) in the username textbox on the login page, without having to type it with "@tenant-domain".
Configure the following to enable this feature.
-
Add the following configuration to the
<IS_HOME>/repository/conf/tomcat/deployment.tomlfile. This is done to disable the certificate authentication on certain occasions (like when working on mobile apps). This makes two-way SSL authentication optional.[transport.https.properties] clientAuth="want" -
Open the
<IS_HOME>/repository/conf/deployment.tomlfile and add the following parameter to enable the Mutual SSL Authenticator.[admin_console.authenticator.mutual_ssl_authenticator] enable = true -
If the
saml_sso_authenticatoris enabled in the<IS_HOME>/repository/conf/deployment.tomlfile, set its priority to 0. Otherwise ignore this step.[admin_console.authenticator.saml_sso_authenticator] enable = true priority = 0 -
Add the following configuration into the
<IS_HOME>/repository/conf/deployment.tomlfile.[tenant] data_listener_urls = ["url1","url2"] [tenant.domain_drop_down] enable = trueNote
When configuring the
data_listener_urlsproperty in the above configuration, note the following.-
In a clustered setup that has multiple authentication endpoint web applications hosted, list all of them under the
data_listener_urlsproperty. -
For authentication endpoint web applications hosted outside the WSO2 Identity Server or in other nodes of a cluster, add the absolute URL within the
data_listener_urlsproperty.
-
-
Restart the server using one of the following commands.
-
Windows :
wso2server.bat -
Linux/Unix :
sh wso2server.sh
-
-
Once the server is restarted, the authenticationendpoint.war file is deployed. The
<IS_HOME>/repository/conf/deployment.tomlfile has to be configured with the required values for properties. The following are the default values for the properties to be used in this file.[identity.auth_framework.endpoint] tenant_list_enabled="false" hostname_verification_enabled="true" mutual_ssl_username="admin" client_keystore="wso2carbon.jks" carbon_security_keystore_password="wso2carbon" client_truststore="client-truststore.jks" carbon_security_truststore_password="wso2carbon" identity_server_service_url="https://localhost:9443" username_header="UserName"Do the following updates to this configuration.
- Set
tenant_list_enabledtotruein order to enable the tenants to display as a list. -
For the
mutual_ssl_usernameproperty, set the username that is to be used for mutual SSL authentication. This user needs to have permission to list down tenants. You can add a new username here provided that you create a user with that username and grant the following permissions to the role of the user.Super Admin Permissions > Manage > Monitor > Tenants > List
-
Paths for client keystore and truststore can be relative paths or absolute paths. The default paths point to the keystore and truststore of the Identity Server itself. A new keystore can be created and used for the client if necessary. However, you must set the passwords for
carbon_security_keystore_passwordandcarbon_security_truststore_passwordappropriately.
Note
If you are hosting the
autheticationendpoint.warwebapp outside the Identity Server (i.e in a different Tomcat or WSO2 Application Server), then you cannot use the<IS_HOME>/repository/conf/deployment.tomlfile because the webapp does not have access to this file. Instead, the same property file can be found at<WEBAPP_HOME>/authenticationendpoint/WEB-INF/classes/EndpointConfig.properties.The following are the default values for the properties to be used in this file.
tenantListEnabled=false
mutualSSLManagerEnabled=true
hostname.verification.enabled=true
mutual.ssl.username=admin
client.keyStore=./repository/resources/security/wso2carbon.jks
Carbon.Security.KeyStore.Password=wso2carbon
client.trustStore=./repository/resources/security/client-truststore.jks
Carbon.Security.TrustStore.Password=wso2carbon
identity.server.serviceURL=https://localhost:9443/services/
username.header=UserName
key.manager.type=SunX509
trust.manager.type=SunX509
tls.protocol=TLSv1.2
app.name=dashboard
app.password=dashboard
identity.server.origin=${carbon.protocol}://${carbon.host}:${carbon.management.port}
In this scenario, do the following:
-
Provide the full URL to WSO2 Identity Server’s admin services endpoint in the
identity.server.serviceURLproperty following the format below.identity.server.serviceURL=https://<ip>:<port>/services -
Set
tenantListEnabledtotruein order to enable the tenants to display as a list. - For the
mutual.ssl.usernameproperty, set the username that is to be used for mutual SSL authentication. This user needs to have permission to list down tenants. You can add a new username here provided that you create a user with that username and grant the following permissions to the role of the user.
**Super Admin Permissions** \> **Manage** \> **Monitor** \> **Tenants** \> **List**- Paths for client keystore and truststore can be relative paths
or absolute paths. The default paths point to the keystore and
truststore of the Identity Server itself. A new keystore can be
created and used for the client if necessary. However, you
must set the passwords for
Carbon.Security.KeyStore.PasswordandCarbon.Security.TrustStore.Passwordappropriately.
For more information about hosting the authentication endpoint on a different server, refer here.
- Set
-
For mutual SSL authentication, the public certificate of the Identity Server has to be imported to the truststore of the client and the public certificate of the client has to be imported to the client-truststore of Identity Server.
Sample commands
The following two commands are examples if you are using the keystore and client-truststore of the Identity Server itself for the client. This is executed from the
<IS_HOME>/repository/resources/securitydirectory.keytool -export -alias wso2carbon -file carbon_public2.crt -keystore wso2carbon.jks -storepass wso2carbonkeytool -import -trustcacerts -alias carbon -file carbon_public2.crt -keystore client-truststore.jks -storepass wso2carbonNote
If you are not using mutual SSL authentication, you can stop the MutualSSLManager from loading the keystore by setting the
mutual_ssl_manager_enabledproperty in the<IS_HOME>/repository/conf/deployment.tomlfile to false. This property is enabled by default.mutual_ssl_manager_enabled="false"Alternatively, if the authentication endpoint is hosted externally, then set the
mutualSSLManagerEnabledproperty to false in<WEBAPP_HOME>/authenticationendpoint/WEB-INF/classes/EndpointConfig.propertiesfile.mutualSSLManagerEnabled=falseMake sure to restart the server to apply the configuration changes.
Remove the tenant list from the login page
If it is required to remove the tenant domain dropdown list in SSO Login page, follow the steps below.
-
Shutdown the server if it is already started.
-
Navigate to
<IS_HOME>/repository/conf/deployment.tomlfile. -
Set the
tenant_list_enabledproperty to false.[identity.auth_framework.endpoint] tenant_list_enabled = "false"Note
Alternatively, if the authentication endpoint is hosted externally, then set the
tenantListEnabledproperty to false in<WEBAPP_HOME>/authenticationendpoint/WEB-INF/classes/EndpointConfig.propertiesfile.tenantListEnabled=false -
Set following parameter to
false.[tenant.domain_drop_down] enable = false -
If the
MutualSSLAuthenticatoris only used for the purpose of listing tenant domains in the drop down, disable it in the<IS_HOME>/repository/conf/deployment.tomlfile.[admin_console.authenticator.mutual_ssl_authenticator] enable = false -
Restart the server.
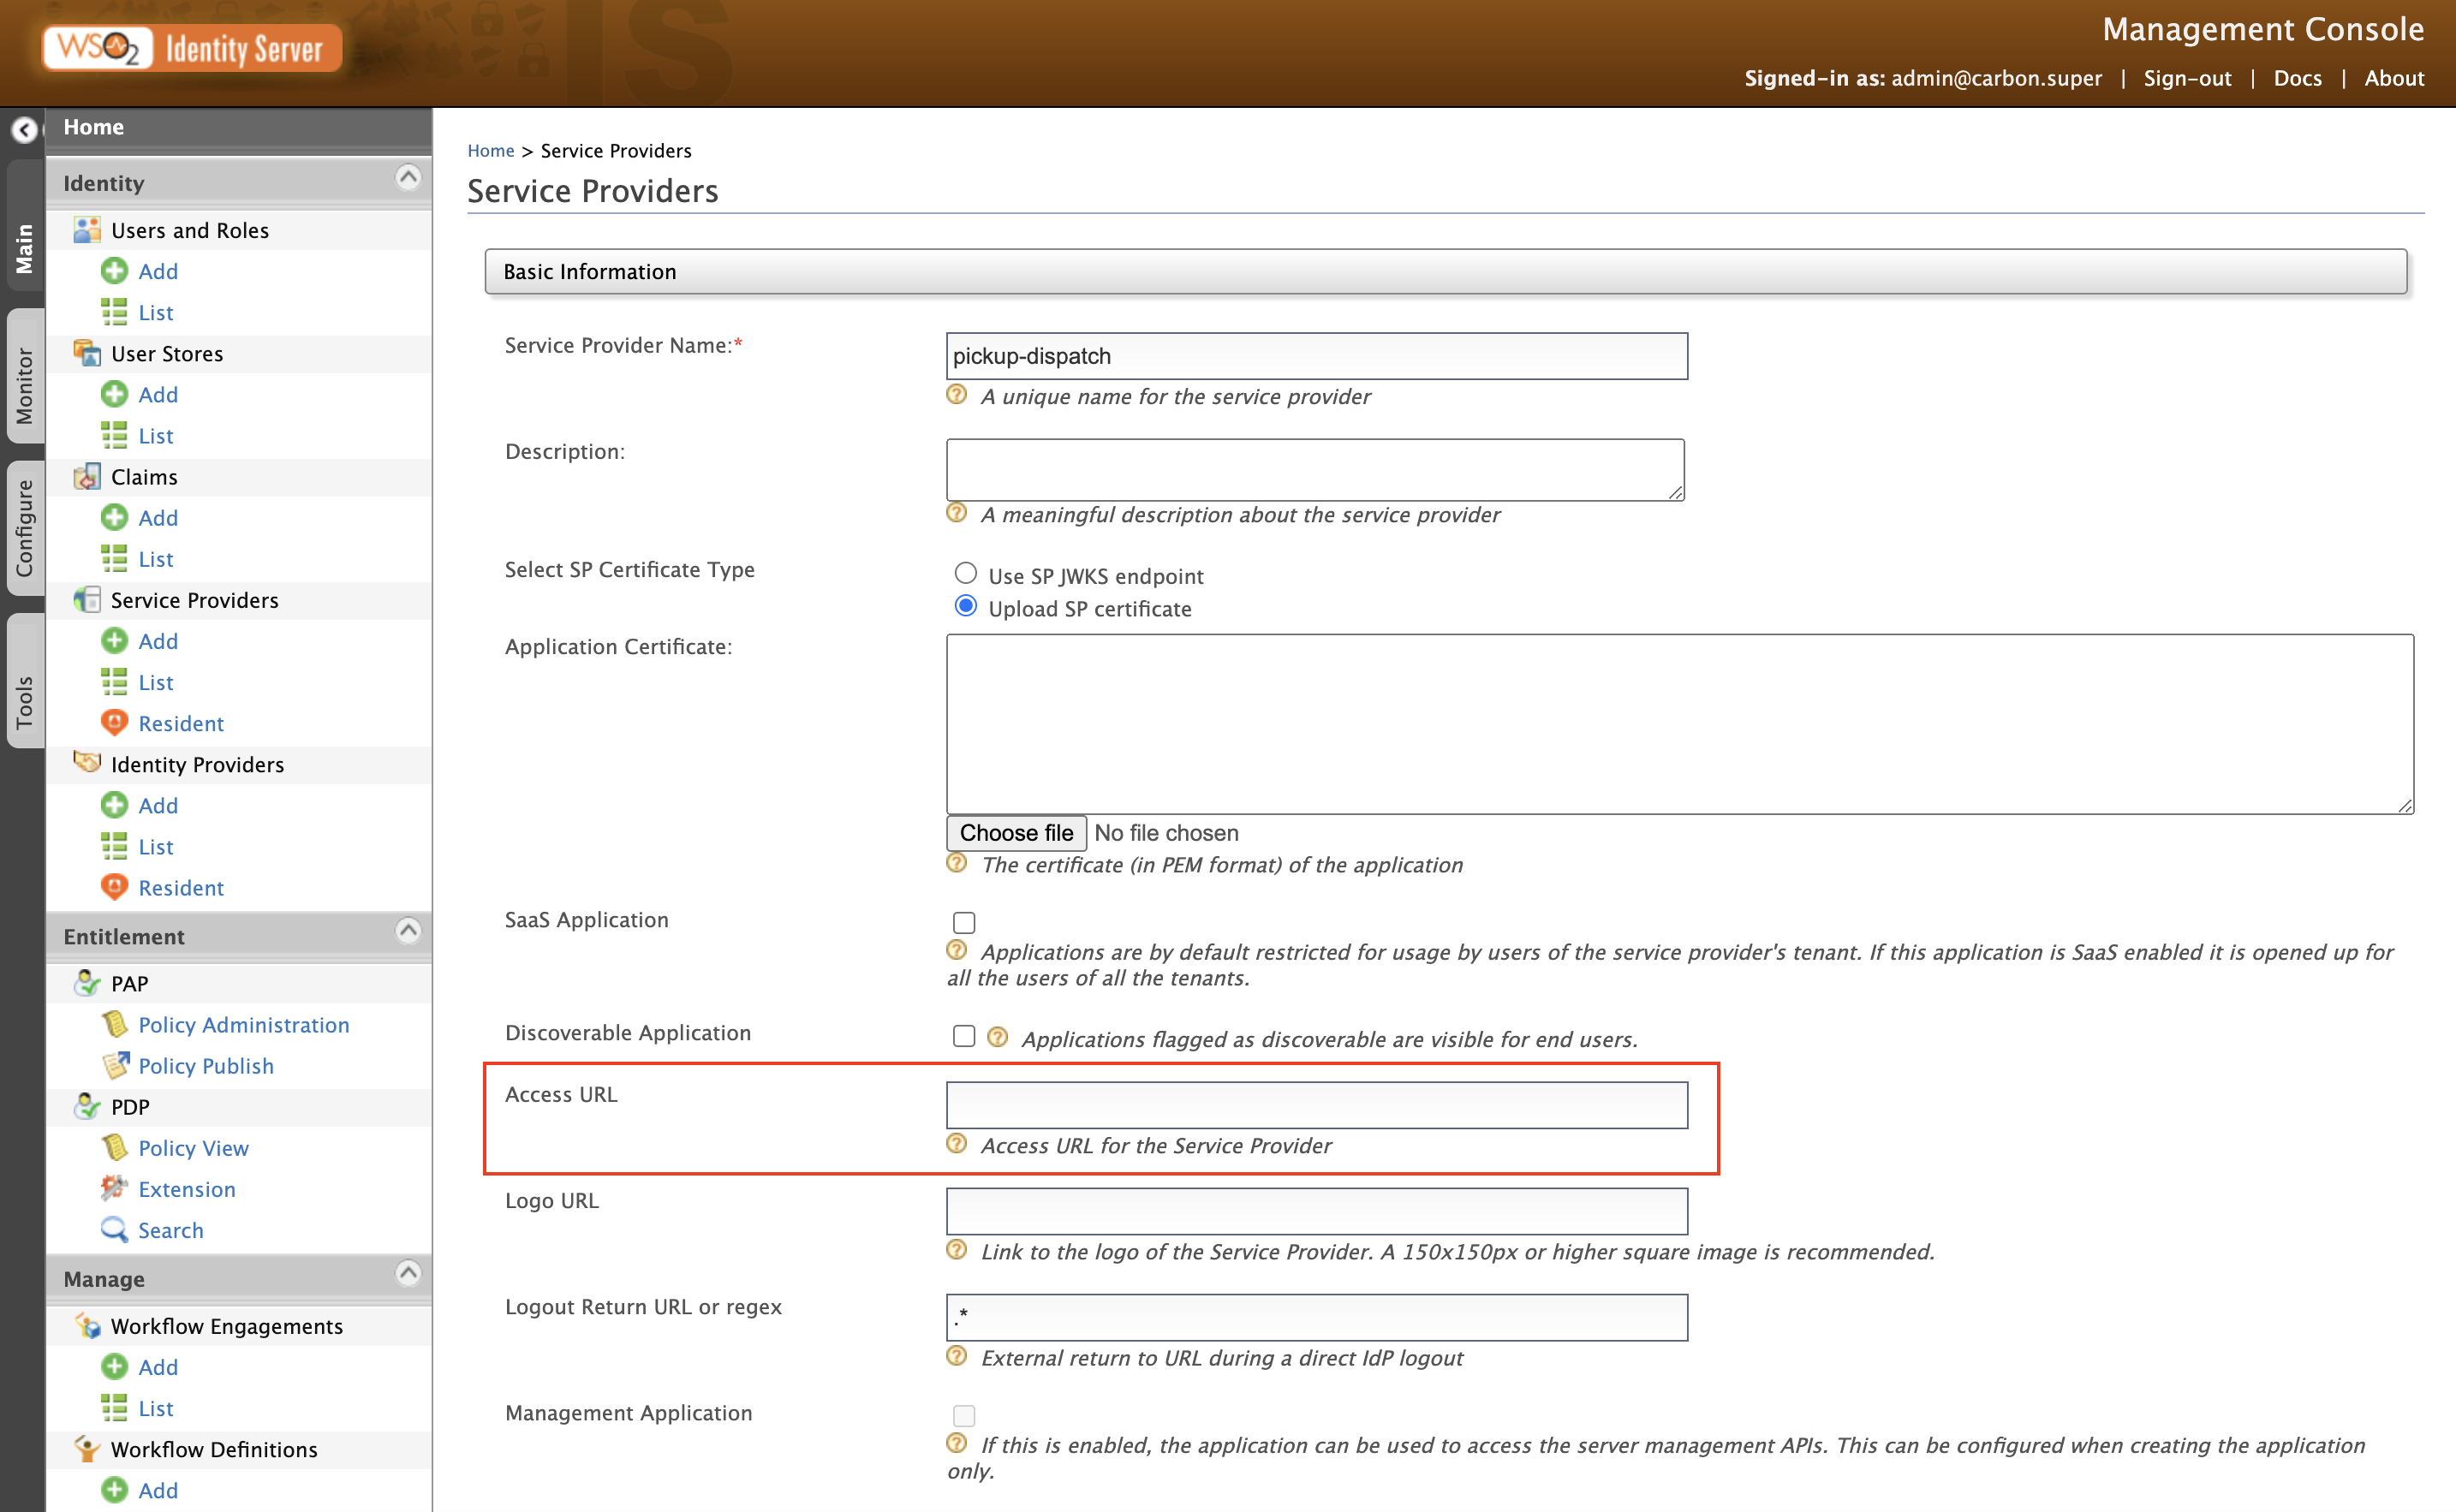
Handle the browser back button and bookmarked login page
This section describes how to enhance the usability of the authentication endpoint web app with different user behavioral patterns. For example, the user may click the back button from the authenticated application or keep the endpoint login page URL bookmarked. In such situations, the user should be directed to the access URL specified for the application.
Follow the steps below to ensure that the access URL is configured for your application:
-
Start WSO2 IS and log in to the Management Console.
-
On the Management Console, go to Main > Identity > Service Providers, and select the service provider registered for your application.
-
Specify the access URL of your application as shown below.