Configuring multi-factor authentication for the management console
This guide walks you through configuring multi-factor authentication for the Identity Server's Management Console.
MFA configuration for the management console contains two configuration sections as follows:
Prerequisites
You need to create a service provider.
Configure the service provider
To configure MFA for the management console, initially:
-
On the management console, go to Main > Identity > Service Providers > List.
-
Click Edit on the service provider you wish to configure.
Claim configurations
To configure claims for the service provider:
-
Expand Claim Configurations.
-
Select
http://wso2.org/claims/usernameas the Subject Claim URI.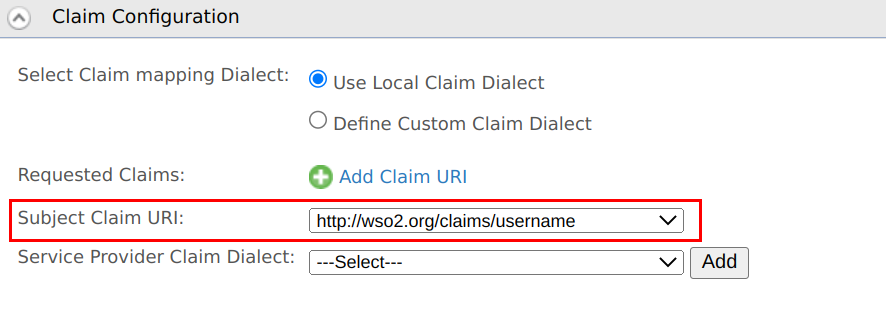
-
Click Update to save the configurations.
Inbound authentications configurations
To configure inbound authentication for the management console:
-
Expand Inbound Authentication Configuration > SAML2 Web SSO Configuration and click Configure.
-
Enter the following details under Manual Configuration:
Field name Value Issuer carbonServer Assertion Consumer URLs https://localhost:9443/acs Enable Response Signing Selected -
Click Register to save the configurations.
Local and outbound Authentication configurations
To configure local and outbound authentication for the management console:
-
Expand Local and Outbound Authentication Configuration and click Advanced Configuration.
-
Click Add Authentication Step to add an authentication step.
-
For both authentication steps, select the authenticator from Local Authenticators and click + Add Authenticator to add the authenticator.
Info
- Use subject identifier from this step and Use attributes from this step will be selected by default. If you wish to set multiple steps, you can have only one step as the subject step and one as the attribute step.
- Note that you cannot use
JWT Basicoption as an authentication step.
-
Click Update to save the configurations.
-
Enable the following options:
- Use tenant domain in local subject identifier
- Use user store domain in local subject identifier
Info
Leave the default configurations as it is.
-
Click Update to save the configurations.
Configure WSO2 IS
To configure the local configuration on the IS:
-
Shut down the Identity server, and open the
deployment.tomlfile in the<IS_HOME>/repository/conf/directory. -
Add the following configuration to the
deployment.tomlfile:[admin_console.authenticator.saml_sso_authenticator] enable=true priority="1" assertion_consumer_service_url = "https://localhost:9443/acs" identity_provider_sso_service_url = "https://localhost:9443/samlsso" -
Save the configurations.
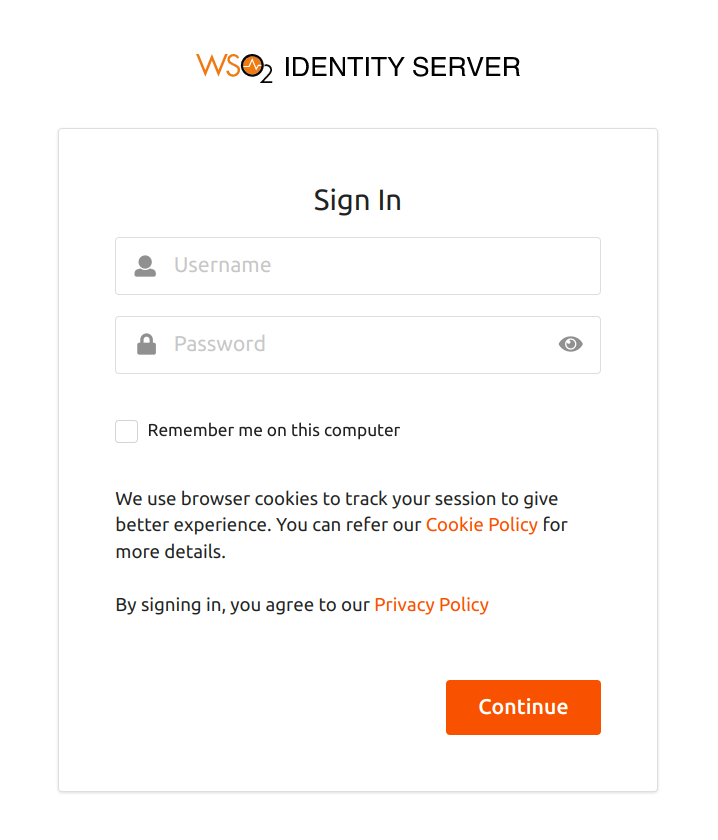
Try it out
-
Start the Identity Server.
-
Access the following URL:
https://localhost:9443/ -
Enter your user credentials for the first authentication step.
-
On successful authentication, you will be prompted for the second authentication step. Enter the TOTP code and click Continue.
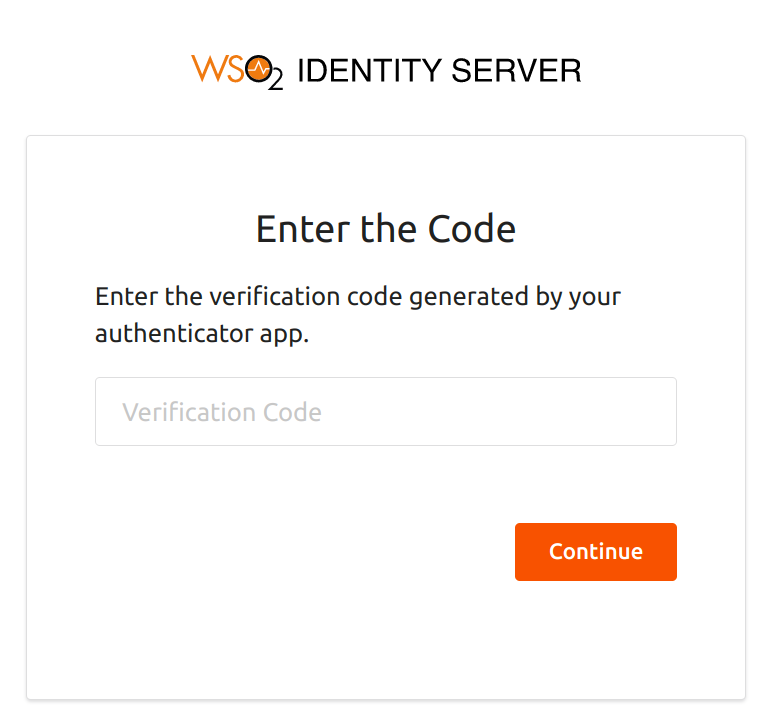
Info
If this is the first time you use the TOTP authentication method for the application, you need to scan the QR from an authenticator application of your choice.
You will now be successfully logged into the management console.
Top