Customize Login Pages
You can customize the layout and branding of user interfaces like the login page, register page, username and password recovery pages, and single sign-on pages.
All UIs are available in the authenticationendpoint, accountrecoveryendpoint, and x509certificateauthenticationendpoint apps located in the <IS_HOME>/repository/deployment/server/webapps folder.
General components of the UI
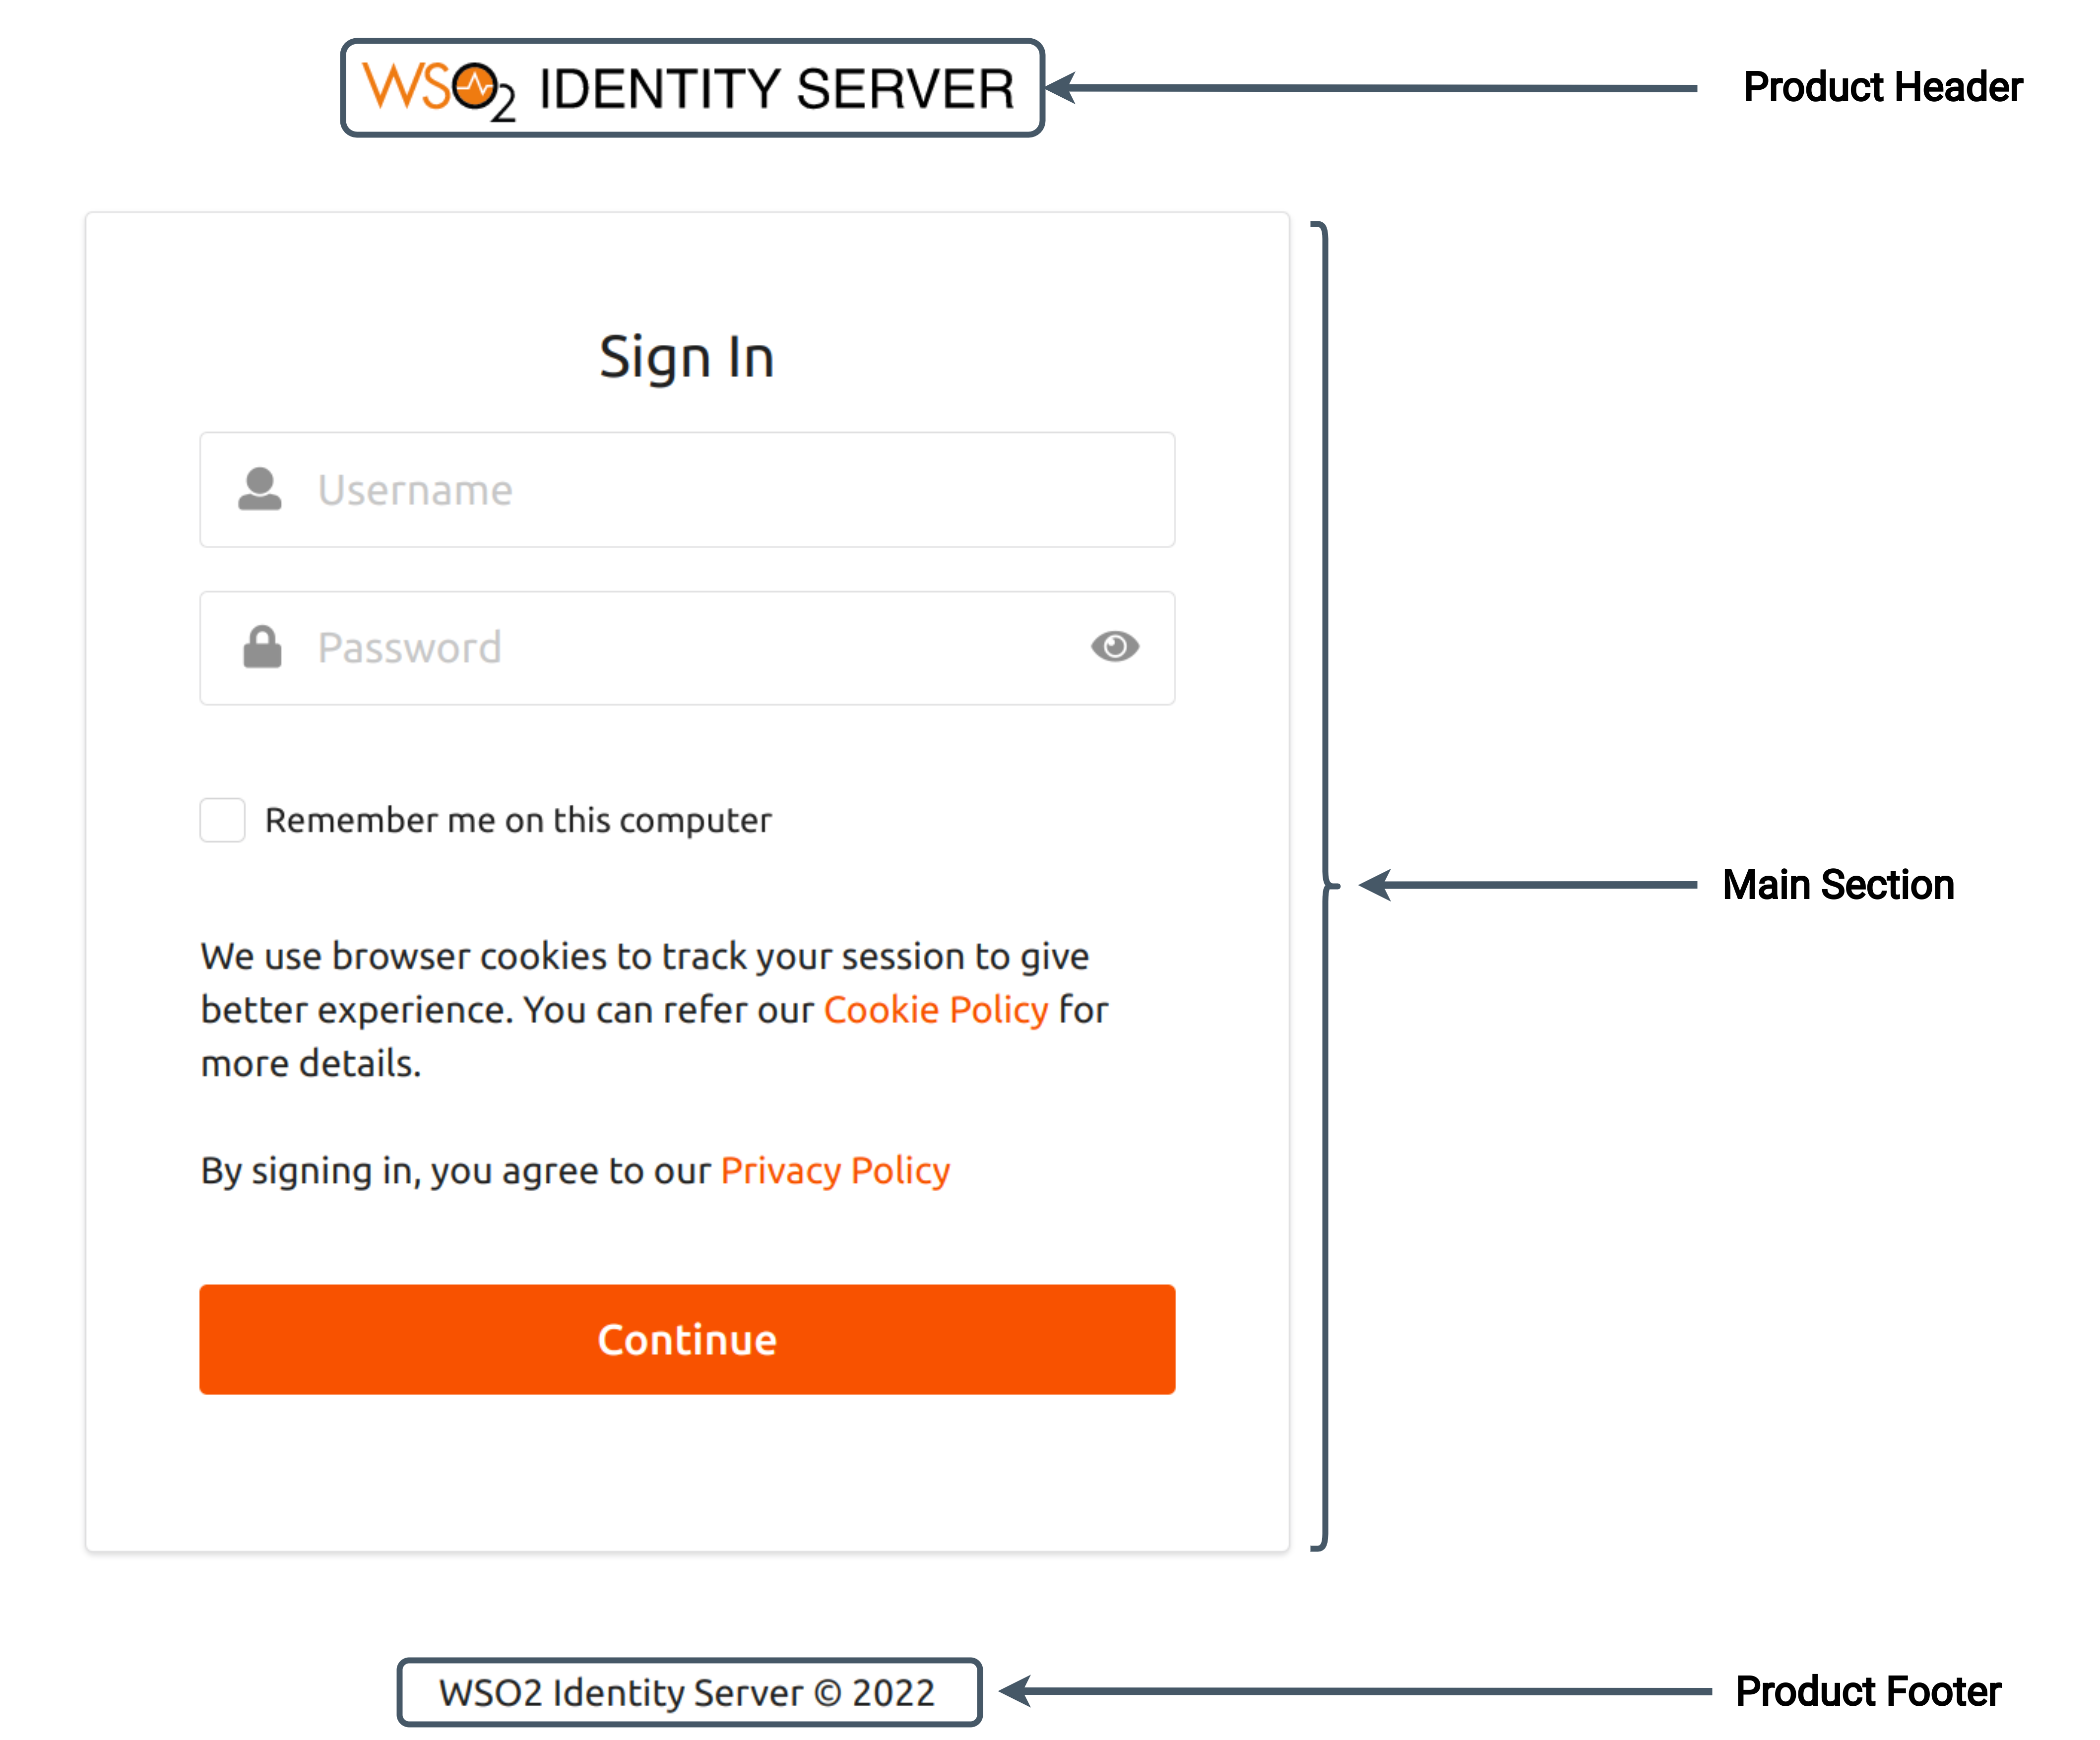
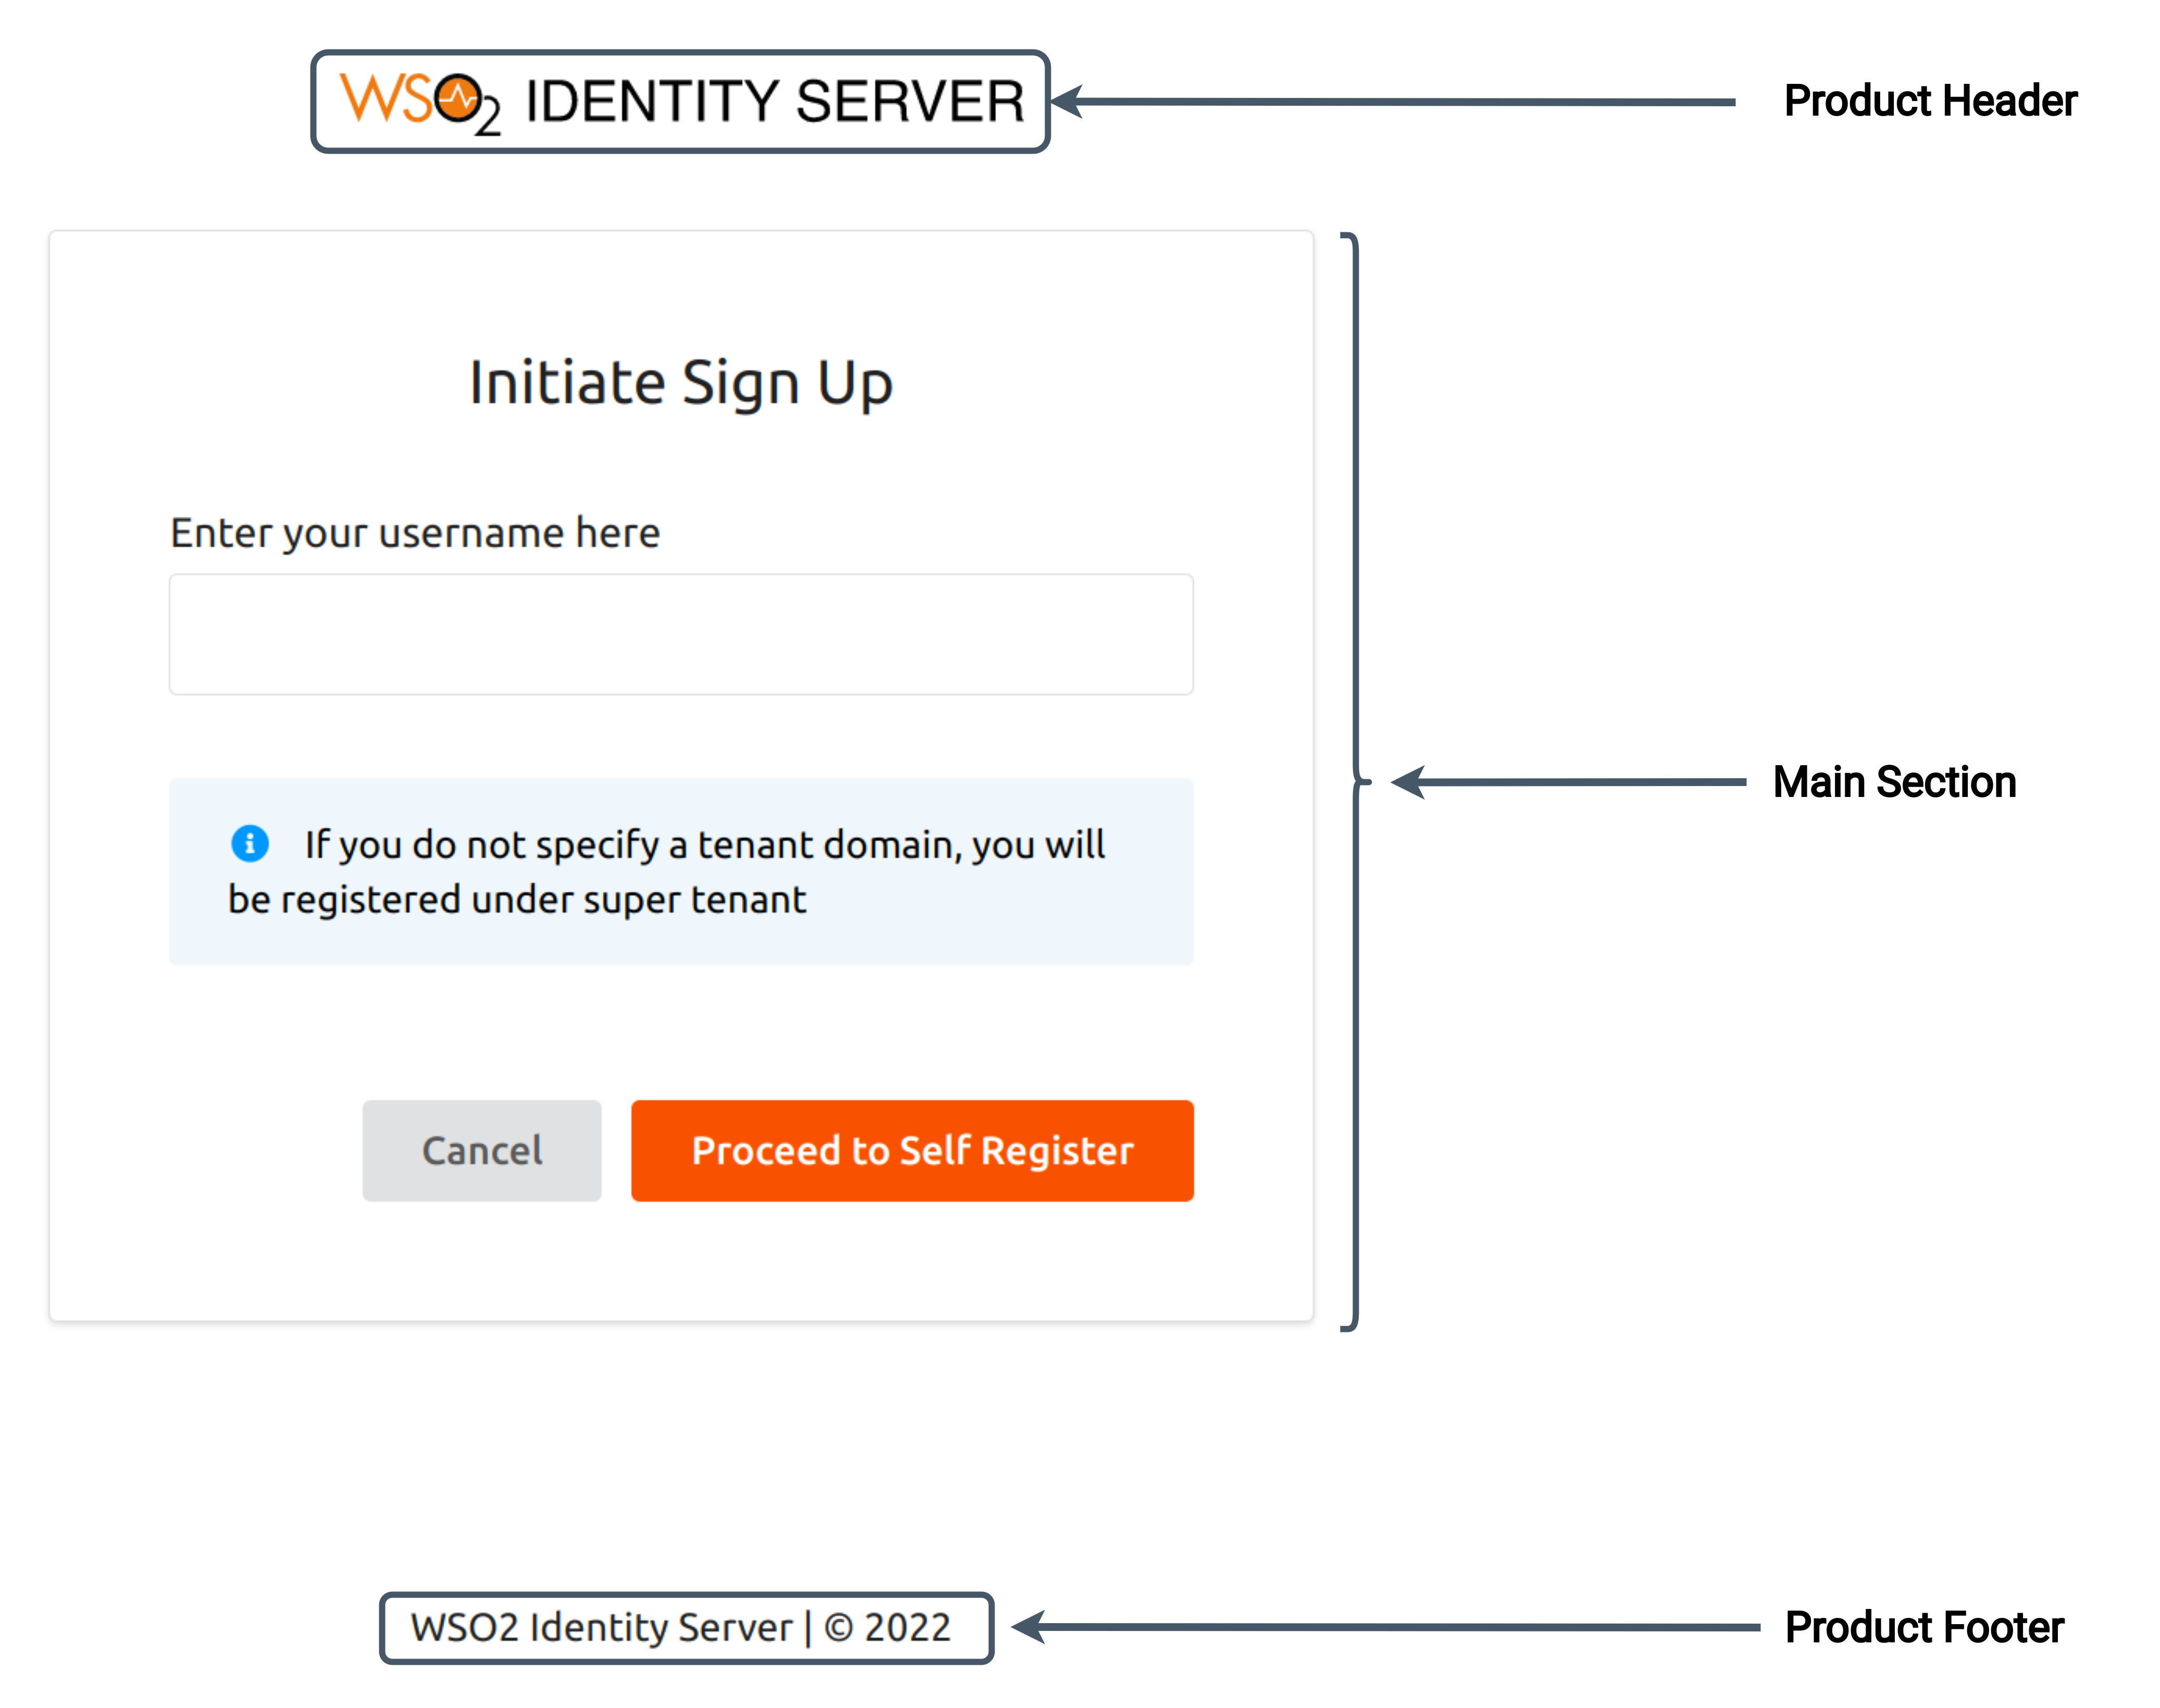
All pages of WSO2 Identity Server are separated into three general components as shown below. You can reference these components when you write the custom layout using a special notation.
-
Login page
-
Register page
Layout syntaxes
This section includes details about the special syntax that can be used when writing a custom layout code.
-
Condition block
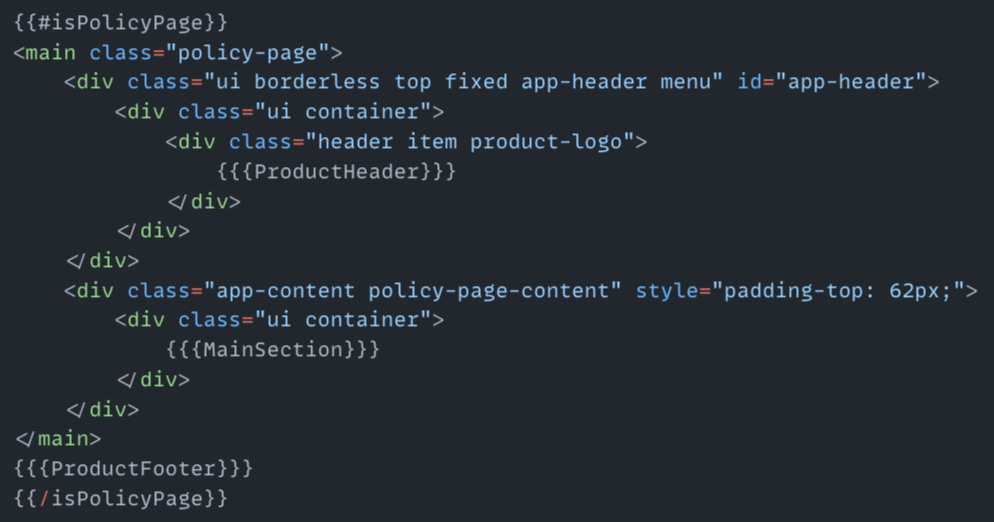
This is similar to an
IFblock. This condition block will activate or deactivate according to the value of theisPolicyPagevariable.- If the value of
isPolicyPageistrueor any non-empty string, then the content inside the block will be executed. - For all other values including null and undefined, the content of the block will not be executed.
- If the value of
-
Not Condition Block
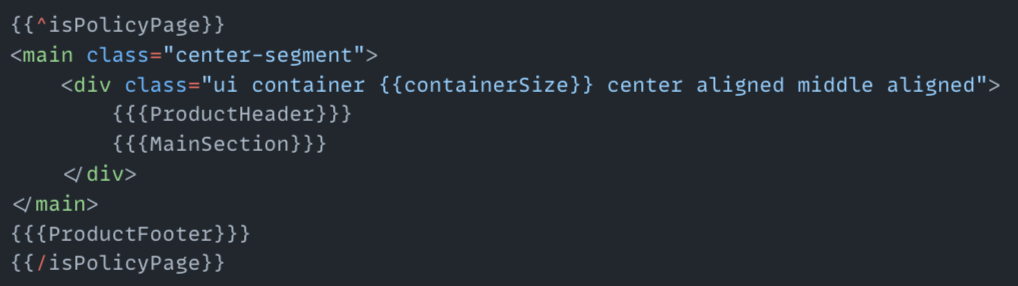
This is similar to an
IFblock with a NOT condition.- If the value of
isPolicyPageisfalse, an empty string, null or undefined, the content inside the block will be executed. - For all other values, the content of the block will not be executed.
- If the value of
-
Component Syntax
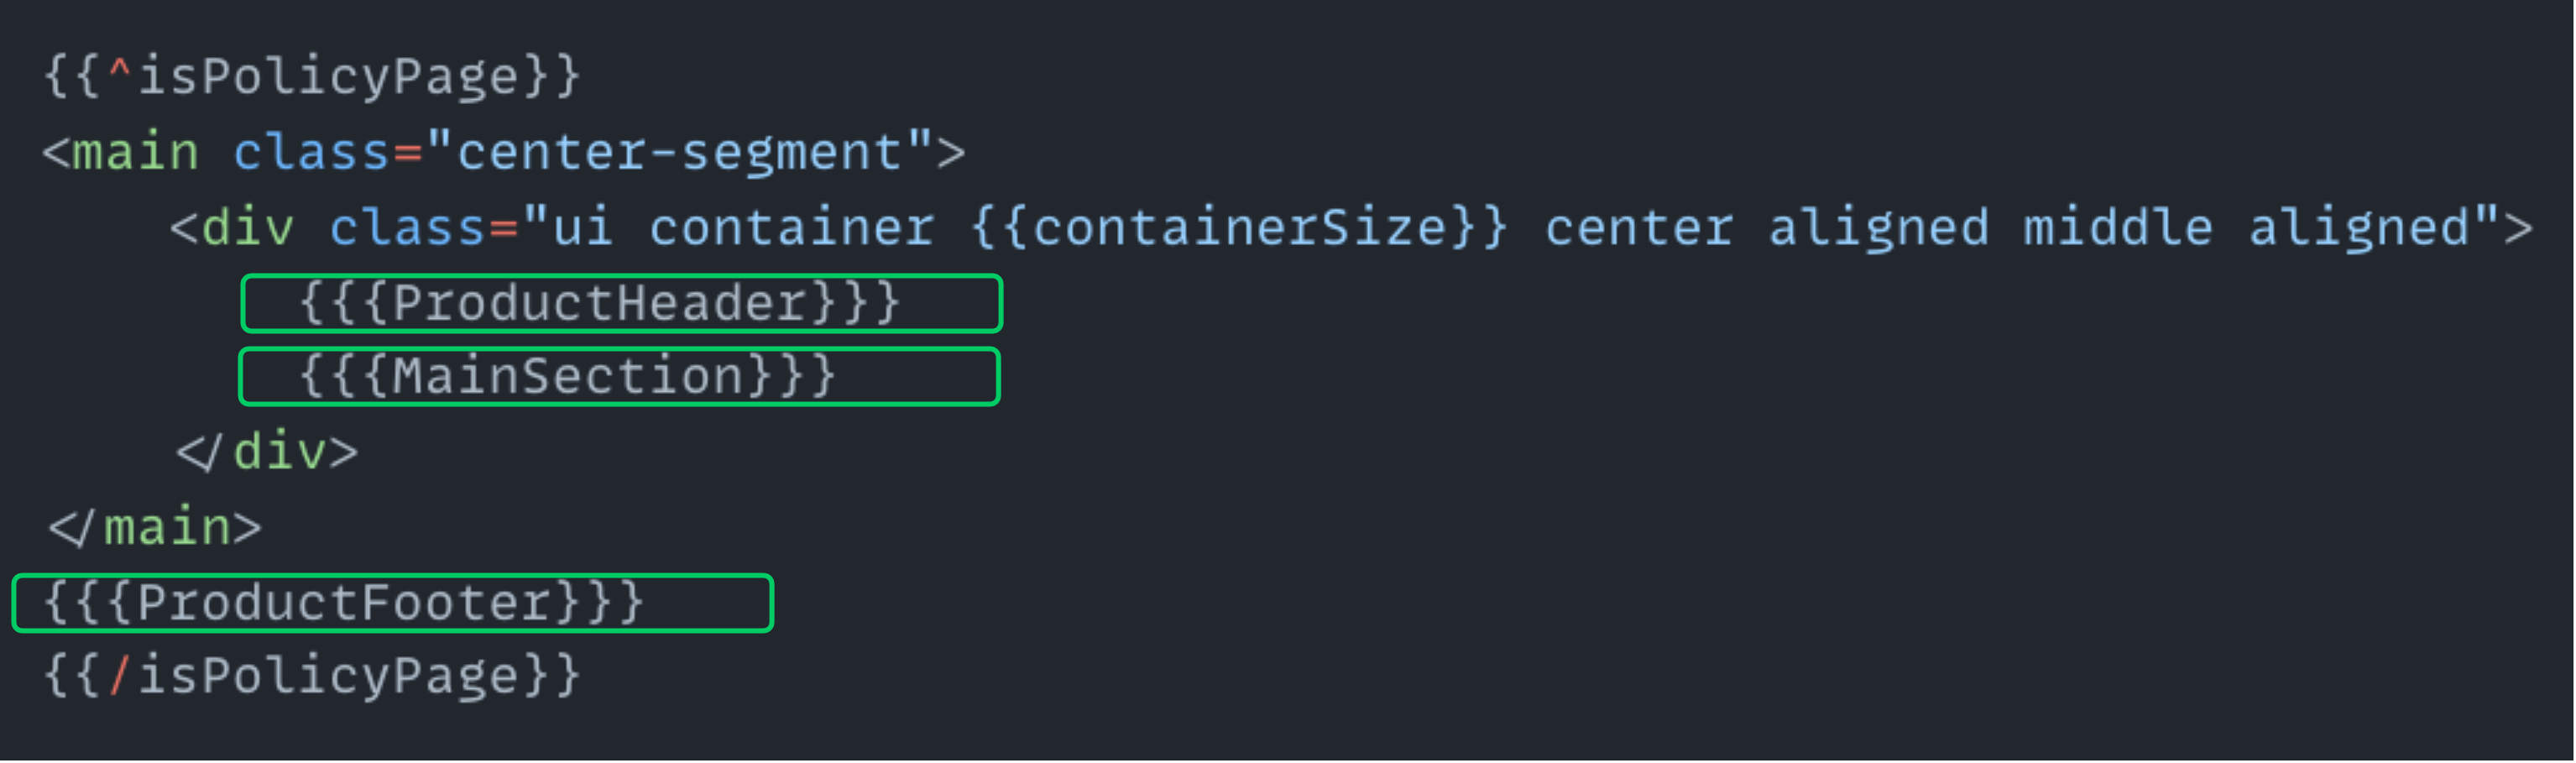
This syntax will be used to indicate the position of the general component in the custom layout code. The component syntaxes will be replaced with actual content at runtime.
-
Data Syntax
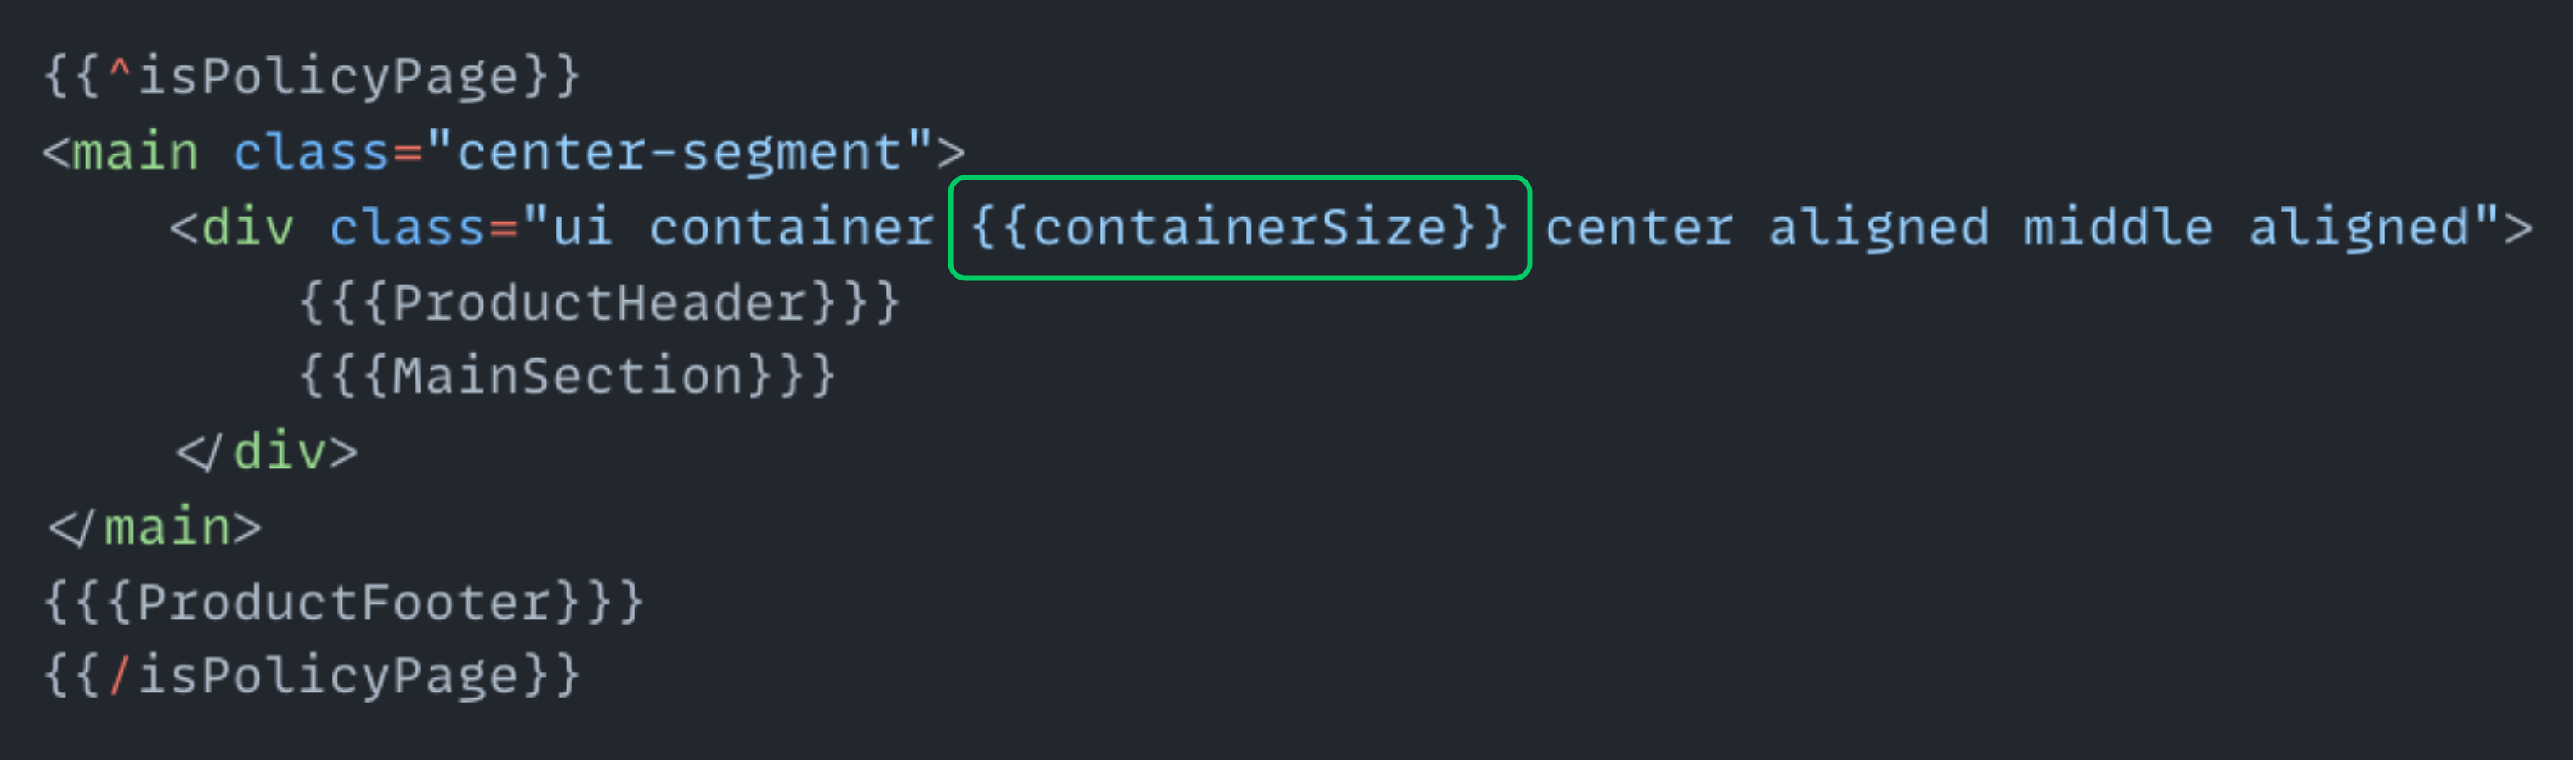
This syntax can be used to add data to the layout code. The value stored in the
containerSizevariable will be converted to a string and placed in the corresponding location at runtime. All data syntax values will be sanitized before adding to the layout code.
Info
All these variables will be provided by JSP pages. To get more data from JSP pages, add the data into the layoutData map object from each JSP page. This layoutData map object can be found on each JSP page.
Add a custom layout for the authentication/recovery pages
To customize these pages, follow the steps below.
Note
On this page, we will be referring to <IS_HOME>/repository/deployment/server/webapps/ as the webapps folder.
Step 1: Create the extensions folder
Navigate to webapps/authenticationendpoint and create a new folder named extensions.
Note
Repeat the above step for accountrecoveryendpoint and x509certificateauthenticationendpoint as well.
Step 2: Create the basic custom layout resources
To create the basic custom layout resources:
-
In the
authenticationendpointfolder, navigate to the createdextensionsfolder and create thelayoutsandcustomfolders recursively.└── extensions └── layouts └── custom -
Navigate to the
webapps/authenticationendpoint/includes/layouts/defaultfolder, copy thebody.htmlfile, and add it to the createdcustomfolder. -
Create the following files and folder inside the
customfolder:styles.cssfilescript.jsfileassetsfolder
Note
Repeat the above steps for accountrecoveryendpoint and x509certificateauthenticationendpoint as well.
Step 3: Add a custom layout design
To add a custom layout to the login page:
-
Navigate to
webapps/authenticationendpoint/extensions/layouts/custom/and follow the instructions provided below:-
Copy the code snippet from the html file into the
body.htmlfile. -
Copy the code snippet from the css file into the
styles.cssfile. -
Copy the code snippet from the javascript file into the
script.jsfile. -
Copy the illustration.svg file into the
assetsfolder.
-
-
Navigate to the
webapps/authenticationendpoint/includesfolder and copy theproduct-title.jspandproduct-footer.jspfiles to thewebapps/authenticationendpoint/extensionsfolder as follows:-
Copy content from the
jspfile containing the project title to thewebapps/authenticationendpoint/extensions/product-title.jspfile of the app. -
Copy content from the
jspfile containing the project footer to thewebapps/authenticationendpoint/extensions/product-footer.jspfile of the app.
Note
Repeat the above steps for
accountrecoveryendpointandx509certificateauthenticationendpointas well. You will be copying the following files: -
-
Build the source code.
-
Copy the
<IS_HOME>/repository/deployment/server/webapps/authenticationendpoint/extensions/layouts/customdirectory and place it into the<IDENTITY_APPS_HOME>/components/login-portal-layouts/layoutsdirectory. -
Navigate to
<IDENTITY_APPS_HOME>/components/login-portal-layoutsdirectory and build the source code usingmvn clean installcommand (Build should be succeeded for further steps). -
Copy
<IDENTITY_APPS_HOME>/apps/authentication-portal/src/main/webapp/extensions/layouts/customfolder (Compiled version of the layout source code) and paste it into the<IS_HOME>/repository/deployment/server/webapps/authenticationendpoint/extensions/layoutsdirectory.
-
-
Refresh the browser and check out the added custom layout.
Tip
In certain cases, the server might stop working after adding changes. In such cases, restart the server to check the changes.
The custom layout will be moved to the corresponding locations of authenticationendpoint, accountrecoveryendpoint, and x509certificateauthenticationendpoint apps.
Best Practices
Use the following best practices when creating a custom layout:
-
Add a prefix for the new CSS classes so that the newly added classes will not conflict with existing classes.
-
Set
cache="false"when developing a custom layout. Be sure to remove thecache="false"in production code.