Enroll Multi-Factor Authentication
MFA creates a layered defense and makes it more difficult for an unauthorized person to access a target such as a physical location, computing device, web service, network, or database. If one factor is compromised or broken, the attacker still has at least one more barrier to breach before successfully breaking into the target. WSO2 Identity Server allows configuring multi-step authentication where you can define an authentication chain containing different authenticators in different steps. For more information on MFA, see Multi-factor Authentication.
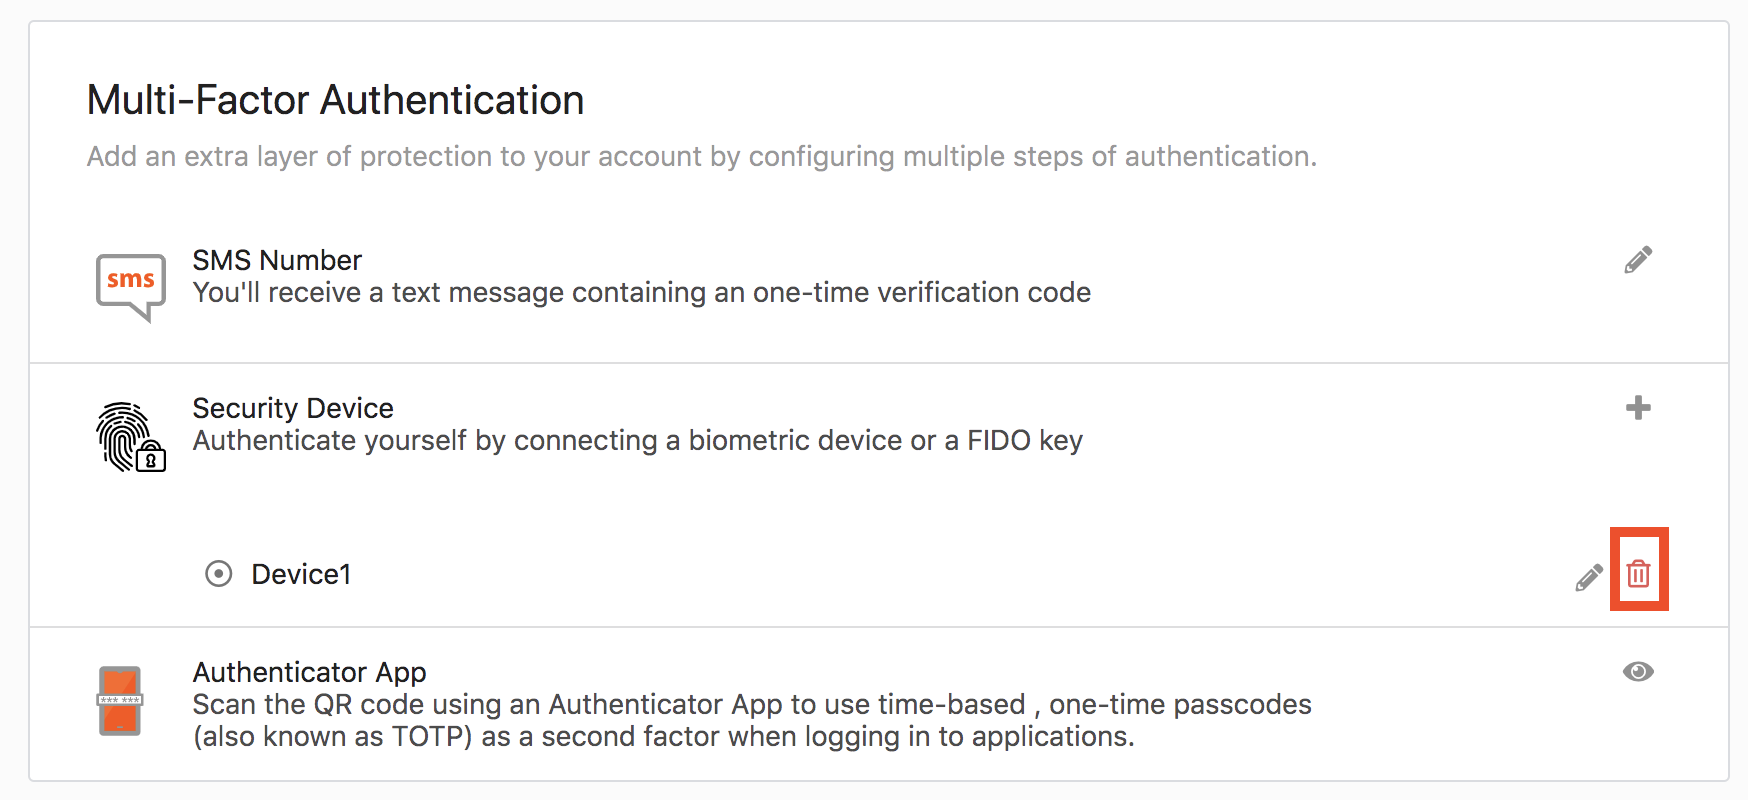
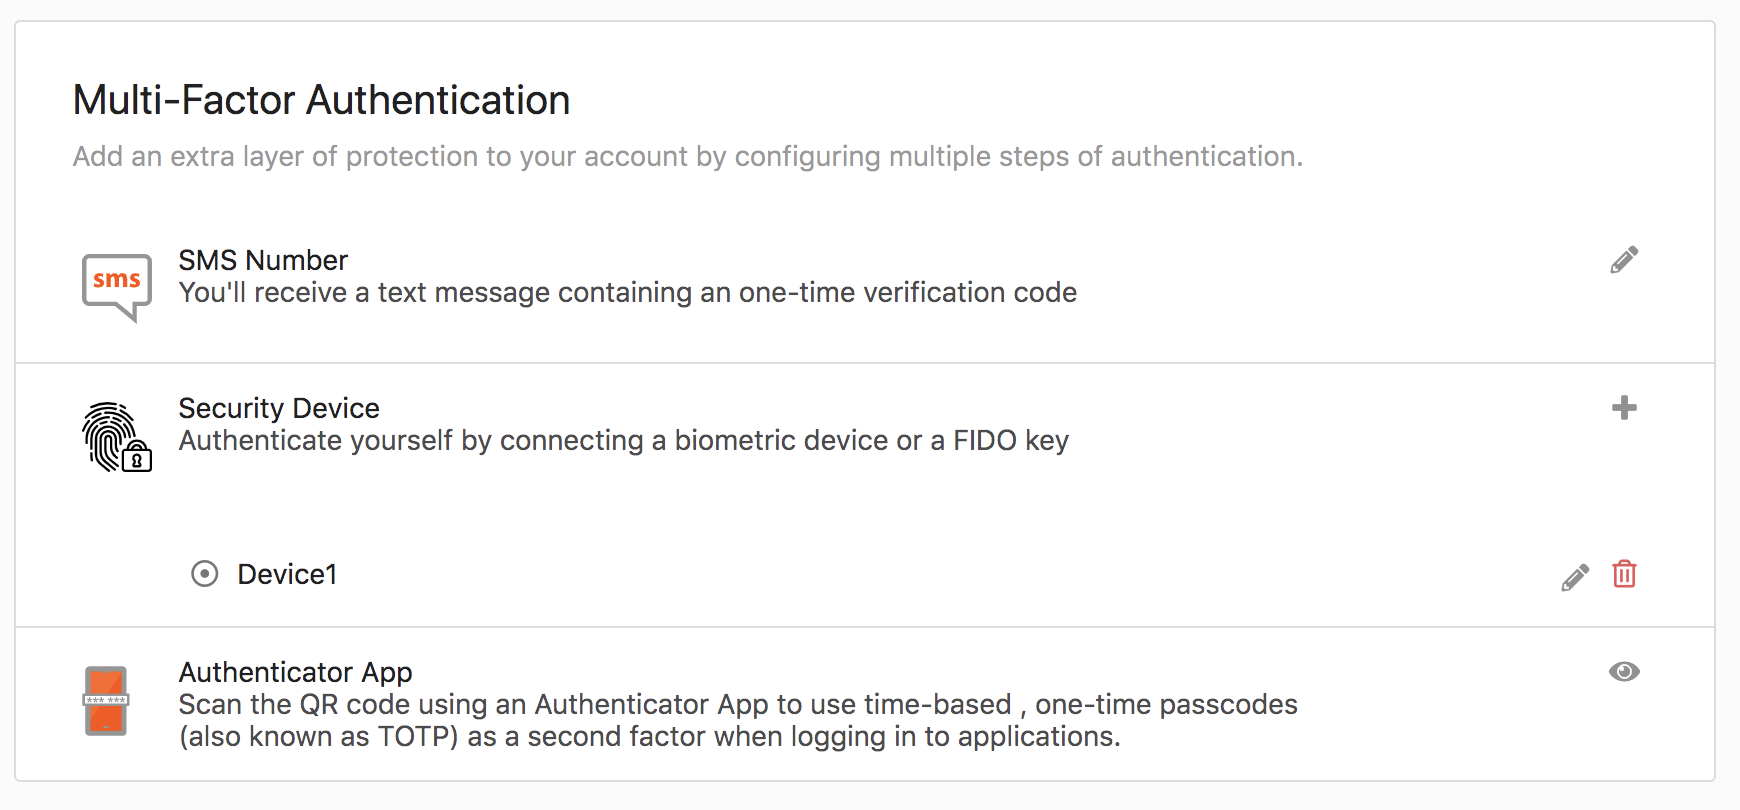
Using the latest My Account application, users can update their mobile numbers through which they can authenticate themselves using the one-time verification code. Also, they can add inherent factors like Security Key/Biometrics (FIDO) devices and fingerprint sensors. The following section will provide instructions on how to configure MFA options in WSO2 IS using My Account.
Via SMS
- Access My Account (
https://<IS_HOST>:<PORT>/myaccount). - Click the Security tab on the side panel.
- Under the Multi-factor authentication section, click on the edit icon aligning with the SMS Number section.
-
Enter the mobile number that needs to be added as the MFA factor and click update.
Info
This will also update the mobile number in the user profile.
Via security device
Info
This is supported by only a few browsers namely Chrome, Mozilla Firefox, and Microsoft Edge.
Add security device
- Access My Account (
https://<IS_HOST>:<PORT>/myaccount). - Click the Security tab on the side panel.
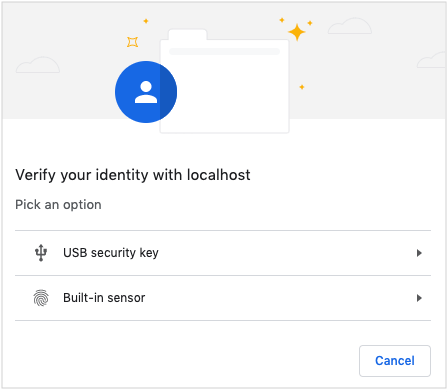
- Under the Multi-factor authentication section, click on the add icon aligning with the via security device section.
-
Select an option depending on whether to add a USB security key or a built-in sensor.
-
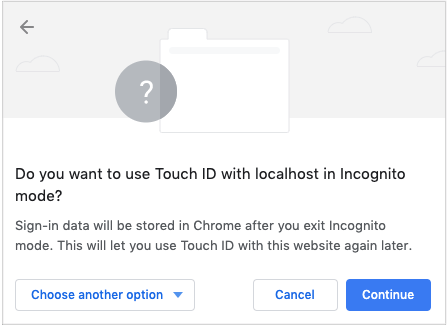
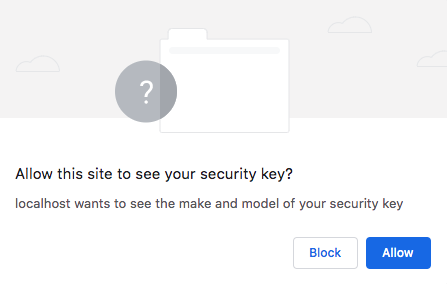
Click on Continue. Alternatively, click on the Choose another option dropdown to switch your option.
-
Click on Continue. Alternatively, click on the Choose another option dropdown to switch your option.
-
Add the preferred device name.
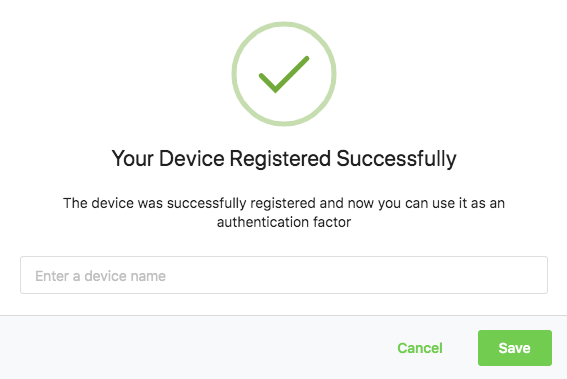
-
Once the device is successfully added, the registered device will be listed along with its name.
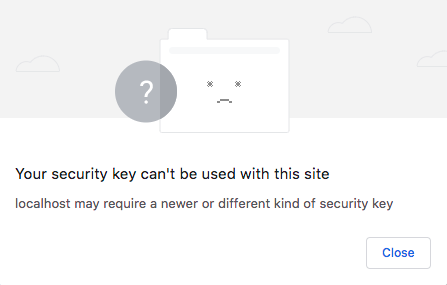
Using an older FIDO device
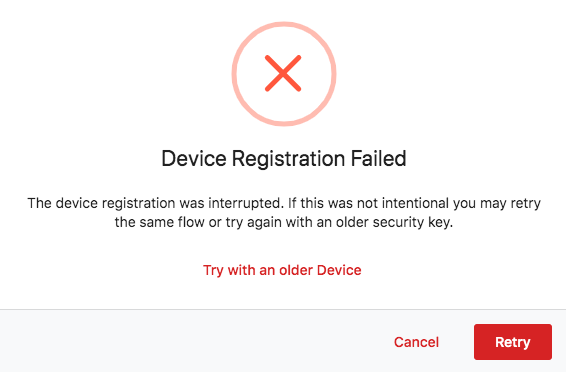
If an older FIDO device is used when registering the device, an error message mentioning that the device cannot be used will be displayed. This means the device is not capable of performing passwordless authentication and can only be used as a second factor. The device will have to be added as an "Older Device".
Follow the steps given below to add the device as an older device.
-
Click close.
-
Click Try with an older Device.
-
From this point onwards, the steps to register the device are the same as the steps given in Add security device.
Delete security device
Any security device registered under MFA can be simply removed by clicking the delete icon.