Customize Automated Emails
The WSO2 Identity Server provides the means of customizing automated emails sent to the user. This is particularly useful in the case of tenant users as they can customize their emails specifically for users configured under the tenant. Furthermore, tenants do not have access to underlying configuration files, therefore, this customization is now possible directly through the management console.
Add an email template type
- Sign in to WSO2 Identity Server Management Console (
https://<IS_HOST>:<PORT>/carbon). - On the Main tab, click Manage > Email Templates > Add.
- Click Add Email Template Type.
- Enter the name that you want to be displayed for the new email template type in the Template Type Display Name text box.
- Click Add.
Add an email template
This allows you to add a new email template for a specific email template type and language. As a result, there may be multiple email for a specific email template type based on the language of the email template.
- Sign in to WSO2 Identity Server Management Console (
https://<IS_HOST>:<PORT>/carbon). - On the Main tab, click Manage > Email Templates > Add.
- Click Add Email Template.
-
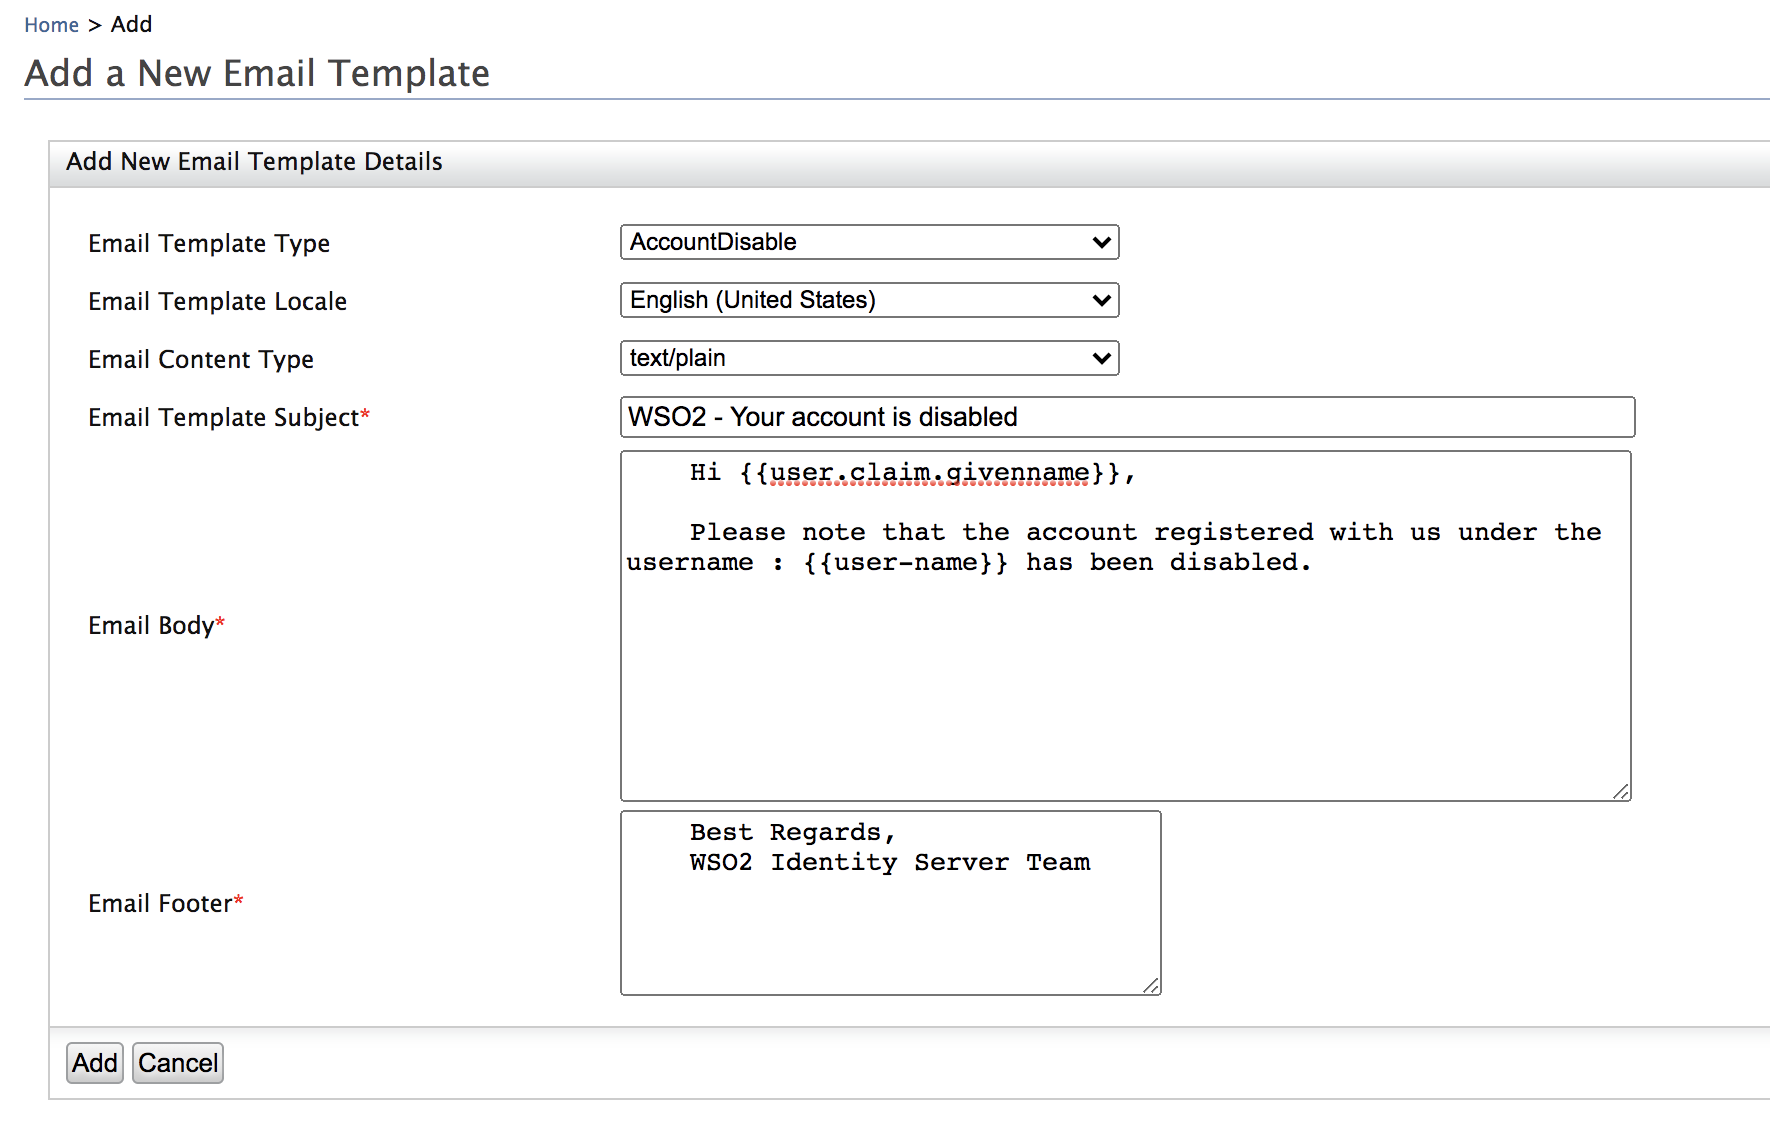
Select/enter the email template details.
- Select Email Template Type : You can select the type of email template you wish to customize using the dropdown.
- Subject : This is the subject of the email that is sent to the user.
- Email Body : This is the body of the email that is sent to
the user. Custom information like
{first-name}and{user-id}are populated from the user store configured for this tenant. -
Email Footer : This is the footer of the email.
Warning
Ensure that you do not use the "|" character in your Subject, Email Body or Email Footer as this is not supported.
Placeholders and Custom Claim Dialects
You can set different placeholders in order to populate custom information such as
{first-name}and{user-id}in the subject, body and footer of the email template.You can also specify any custom claim URI created in the WSO2 claim dialect:
-
If it is an identity claim, specify the claim accordingly. For example, the claim
http://wso2.org/claims/identity/homeAddressshould be specified as{{'{{user.claim.identity.homeAddress}}'}} -
If it is a normal claim, specify the claim accordingly. For example, for the claim
http://wso2.org/claims/homeAddress, it should be specified as{{'{{user.claim.homeAddress}}'}}.
Before sending the email, WSO2 Identity Server will retrieve the user details from the user store configured for this tenant and replace the placeholders with the corresponding values of the user.
Note
When you are using an identity claim as a placeholder in the Account Confirmation template for User Self Registration, you need to use the notation
{{'{{claimName}}'}}instead of using{{'{{user.claim.identity.claimName}}'}}. Additionally you need to send the respective value for the placeholder in the API request payload, under thepropertiessection. A sample request payload is given below.{ ... "properties": [ ... { "key": "claimName", "value": "Value for the claim" } ... ] } -
Click Add to add a new email template.
Delete an email template type
Warning
This deletes all the email templates that correspond to the selected email template type together with the email template type.
- Sign in to WSO2 Identity Server Management Console (
https://<IS_HOST>:<PORT>/carbon). - On the Main tab, click Manage > Email Templates > List.
- Select the email template type.
- Click Delete Template Type and click ok.
Edit an email template
- Sign in to WSO2 Identity Server Management Console (
https://<IS_HOST>:<PORT>/carbon). - On the Main tab, and click Manage > Email Templates > List.
-
Select/enter the email template details based on the fields that you want to update in the email template.
- Select Email Template Type : You can select the type of email template you wish to customize using this dropdown.
- Subject : This is the subject of the email that is sent to the user.
- Email Body : This is the body of the email that is sent to the user. Custom information like
{first-name}and{user-id}are populated from the user store that is configured for this tenant. -
Email Footer : This is the footer of the email.
Note
Ensure that you do not use the "|" character in your Subject, Email Body or Email Footer as this is not supported.
Placeholders and Custom Claim Dialects
You can set different placeholders in order to populate custom information such as
{first-name}and{user-id}in the subject, body and footer of the email template.You can also specify any custom claim URI created in the WSO2 claim dialect:
-
If it is an identity claim, specify the claim accordingly. For example, the claim
http://wso2.org/claims/identity/homeAddressshould be specified as{{'{{user.claim.identity.homeAddress}}'}} -
If it is a normal claim, specify the claim accordingly. For example, for the claim
http://wso2.org/claims/homeAddress, it should be specified as{{'{{user.claim.homeAddress}}'}}.
Before sending the email, WSO2 Identity Server will retrieve the user details from the user store configured for this tenant and replace the placeholders with the corresponding values of the user.
Note
When you are using an identity claim as a placeholder in the Account Confirmation template for User Self Registration, you need to use the notation
{{'{{claimName}}'}}instead of using{{'{{user.claim.identity.claimName}}'}}. Additionally you need to send the respective value for the placeholder in the API request payload, under thepropertiessection. A sample request payload is given below.{ ... "properties": [ ... { "key": "claimName", "value": "Value for the claim" } ... ] } -
Click Save to update.
Delete an email template
Using the following steps you can delete a specific email template that corresponds to an email template type.
- Sign in to WSO2 Identity Server Management Console (
https://<IS_HOST>:<PORT>/carbon). - On the Main tab, and click Manage > Email Templates > List.
- Select the email template type and the respective email template.
- Click Delete Template and click ok.
Update the locale of a user
Once you have set the template language for the user, it is also necessary to specify the locale for the user. Do the following steps to configure this.
- Click on List under Claims and select
http://wso2.org/claims. - Select the Local claim and click Edit. Select the Supported by Default checkbox and click Update.
- Logout as admin and login as a user with user profile management permissions.
- Click on List under Users and Roles and then select Users.
- Click on the User Profile button corresponding to the logged in user.
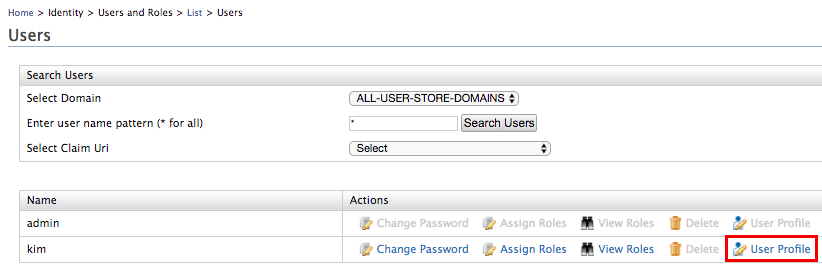
-
Enter the locale code for the Local field and click Update.
Tip
For example, use fr_fr for the French locale, pt_br for Brazil locale and it_it for the Italian locale. This is the format used for country locales in the Identity Server. For more information on country locales, see Locale codes.
Note
If the locale value is not defined for the user, the default locale value will be
en_US. From update level 6.0.0.83, you can change the default locale value using the following configuration:[identity_mgt.notification] default_locale = "<locale>"If the above configuration is added to the
deployment.tomlfile, the specified value will be used as the locale for both SMS and email flows; otherwise, the default value (en_US) will be assigned.Note that if the registry doesn't have the template related to the newly configured locale, the configuration will not be considered, and the configurations will be reverted to the default locale.
Now that this is done, any email notifications you receive will be in the language you specified.
Related topics