Map OpenID Connect Scopes and Claims
This page guides you through mapping OpenID Connect (OIDC) scopes and claims.
This means that when you request for an OIDC token, you can specify a single scope value that is bound to a set of multiple claims. When that OIDC token is sent to the UserInfo endpoint, only the claims which are common in both the OIDC scope config file and the SP claim configuration (i.e., the intersection of claims in both these configurations) will be returned.
Add scopes
-
Log in to the WSO2 Identity Server Management Console (
https://<IS_HOST>:<PORT>/carbon) using administrator credentials (admin:admin). -
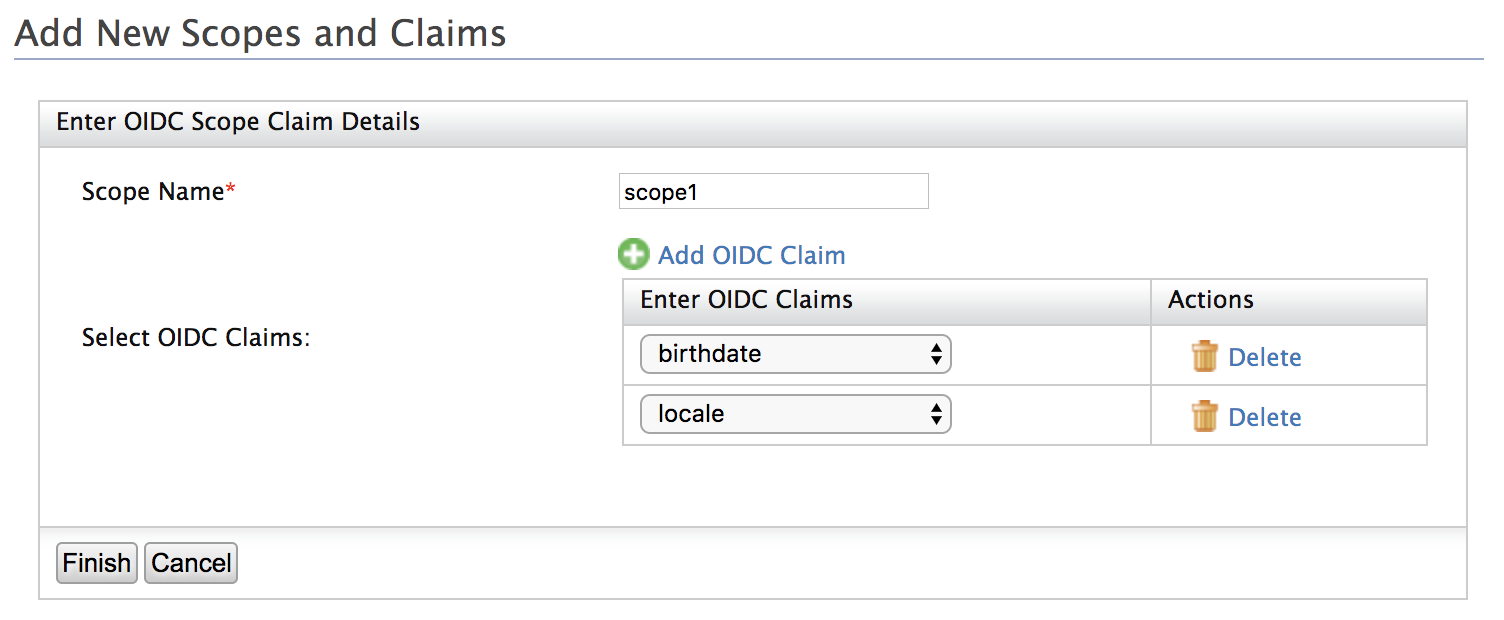
Under Manage, click OIDC Scopes > Add.
-
Enter a Scope Name.
-
Click Add OIDC Claim and select claims from the dropdown of available OIDC claims.
-
Click Finish to add the new scope claim mapping.
Edit or list scopes
-
Log in to the WSO2 Identity Server Management Console (
https://<IS_HOST>:<PORT>/carbon) using administrator credentials (admin:admin). -
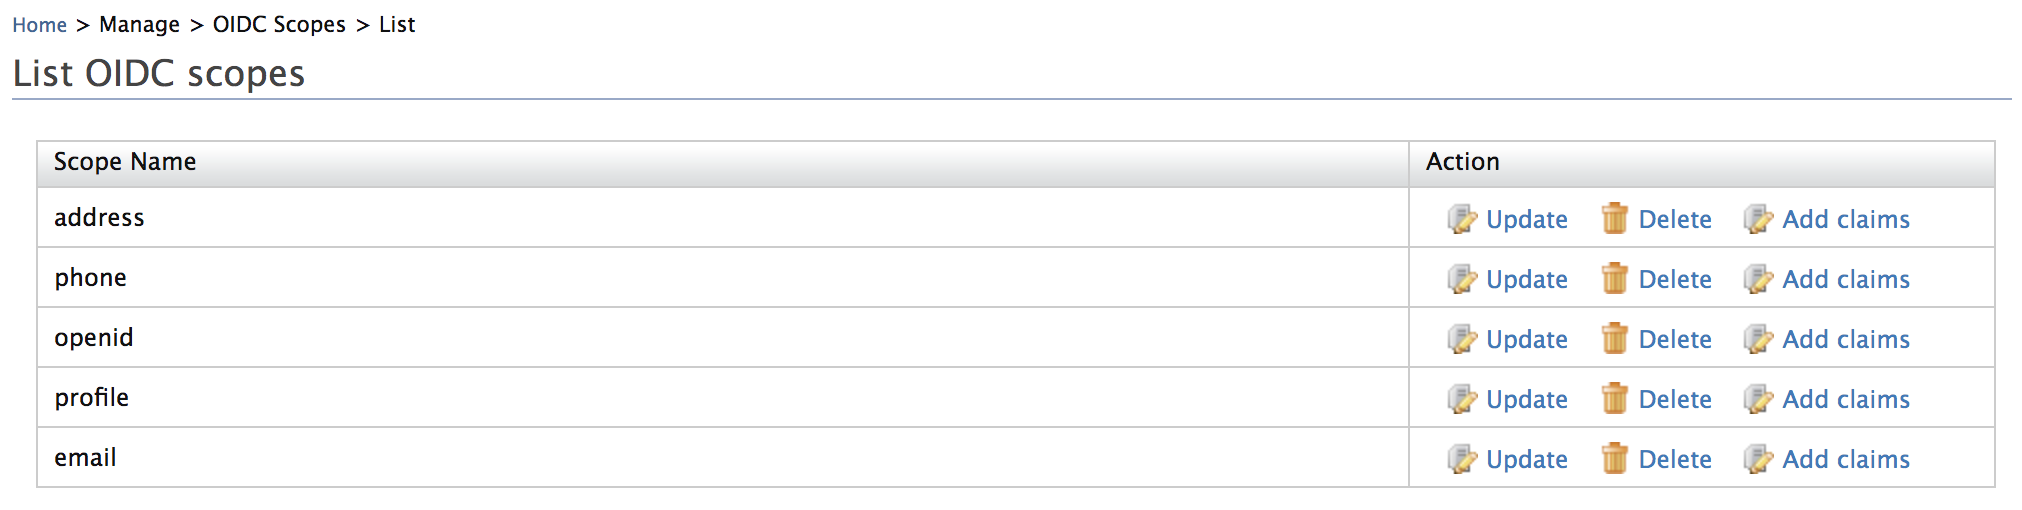
Under Manage, click OIDC Scopes > List.
-
Select one of the following actions.
- Click Add claims to add claims to a scope.
- Click Update to remove claims from a scope.
- Click Delete to delete the scope mapping.
Add custom claims to OIDC scope
When the existing claim mappings are not enough for your requirement and if you need to add a custom OIDC claim to a scope, then follow the steps below.
- Add a custom claim to the local dialect (https://wso2.org/claims)
-
Add an external claim to the
http://wso2.org/oidc/claimdialect referring the local claim created in step 1. -
Click OIDC Scopes > List and add the new OIDC claim under the desired scope.
Tip
For a sample use case, see Handling Custom OIDC Claims.
Handling claims that are JSON objects
OIDC considers address as a JSON object. Therefore, if you want to pass an address using a different claim other than the address claim that is already available, you can do it using any of the following methods:
Info
The values do not have to be added in complex object format.
-
Without using the
address.prefix.- Register a scope named
addressin the WSO2 Identity Server's registry. - Add the value as the street or lane or any preferred value.
- Register a scope named
-
Create a new external claim using the
addressprefix.- Click Add under Claims.
- Click Add External Claim.
- Select
http://wso2.ord/oidc/claimas the value for Dialect URI. -
Enter
address.streetas the value for External Claim URI.Info
You can enter any value with the prefix
address., such asaddress.country,address.lane, and much more. -
Map the claim you are creating to any claim within WSO2 Identity server.
Info
For example, you can map it to
http://wso2.org/claims/location.
Now you can see the claim you created being listed. It is created as a JSON object in WSO2 Identity Server.
About oidc-scope-config.xml
The oidc-scope-config.xml file enables grouping of claims that are bound to a scope value in OpenID Connect (OIDC).
By default, the oidc-scope-config.xml file is located inside the <IS_HOME>/repository/conf/identity directory.
In the very first server start-up, the scopes and claims values defined in this file will be stored in the database.
Thereafter the changes made to this file will not be applicable.