Configuring Office365 WS-Federation with WSO2 IS
This tutorial guides you through configuring WS-Federation authentication for Office365 with WSO2 Identity Server (WSO2 IS). Follow the instructions in the sections below to set this up.
Prerequisites
-
Office 365 Business Account with access to the Office 365 Admin Portal.
Tip
If you do not already have an account, you can use a 30-day trial version to try out this feature.
-
Add a new domain to Office 365 using the Office 365 Admin Portal. For instructions on how to do this, see Add A Domain to Office 365 in the Microsoft documentation.
Tip
Office 365 SSO requires an internet-resolvable domain name to use as the suffix in each user’s username. You cannot federate the default domain that is provided by Microsoft that ends with " onmicrosoft.com ".
You can register a free domain using a site such as www.dot.tk if you do not already have a registered domain name.
-
A Windows platform Windows Azure Active Directory Powershell installed. If you do not already have the Azure AD module, run the following commands to install the required modules.
#uninstall any existing older version of the AzureAD module
uninstall-module AzureAD

install-module AzureAD
install-module AzureADPreview
install-module MSOnline
Configuring the WSO2 IS issuer
-
Navigate to
<IS_HOME>/bin/and run the following command to start WSO2 Identity Server.- Windows
.\wso2server.bat- Linux/Unix
sh wso2server.sh -
Access the following URL and log in to the management console: https://localhost:9443/carbon/
-
Click Resident Identity Provider under Identity Providers on the Main tab.
- Expand the Inbound Authentication Configuration section and then expand WS-Federation (Passive) Configuration.
-
Enter "
wso2.microsoft" as the Identity Provider Entity Id value.
Configuring the claims
-
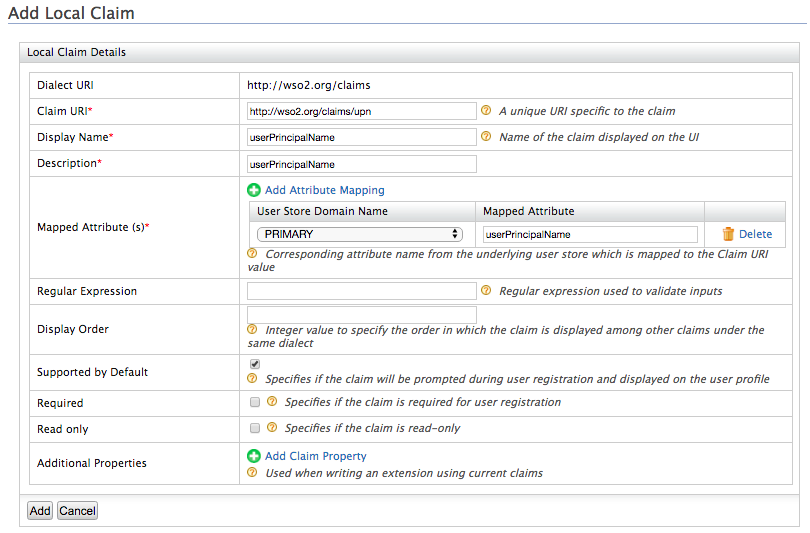
Click Add under Claims and then click Add Local Claim.
Add the following local claims.Field Sample value Dialect URI
http://wso2.org/claims
Claim URI
http://wso2.org/claims/upn
Display Name *
userPrincipalName
Description *
userPrincipalName
Mapped Attribute (s) *
User Store Domain Name: PRIMARY
Mapped Attribute: userPrincipalName
Supported by Default
true
Field Sample value Dialect URI
http://wso2.org/claims
Claim URI
http://wso2.org/claims/objectguid
Display Name *
ObjectGuid
Description *
ObjectGuid
Mapped Attribute (s) *
User Store Domain Name: PRIMARY
Mapped Attribute: objectGuid
Supported by Default
true 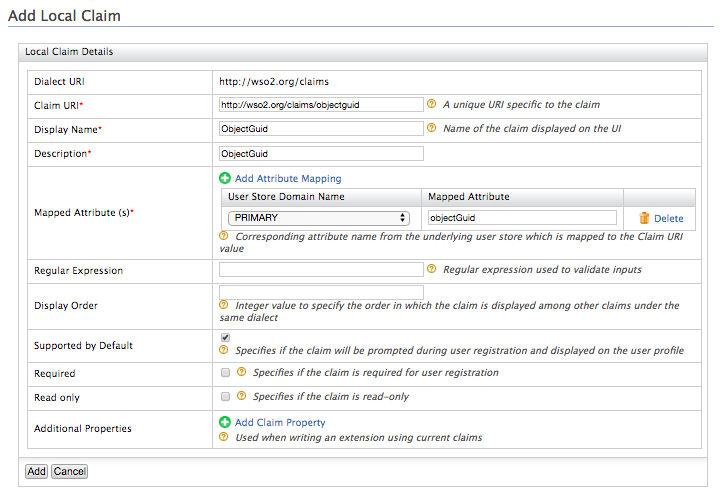
Remove unsupported claims
The following attributes are not supported by Active Directory by default. Disable the following claims in WSO2 Identity Server to avoid errors when updating the user profile.
To disable the claims, do the following.
- Click List under Claims and select the http://wso2.org/claims dialect.
- Click Edit next to the following claims and unselect the Supported
by Default checkbox to disable the claim.
- Country
- Organization
- IM
Configuring the service provider
- Click Add under Service Providers and create a new service provider called 'Office365'.
-
Expand Inbound Authentication Configuration and then expand WS-Federation (Passive) Configuration.
Configure the following fields and leave the rest of the default configurations as it is.Field Sample value Passive STS Realm urn:federation:MicrosoftOnline Passive STS WReply URL https://login.microsoftonline.com/login.srf 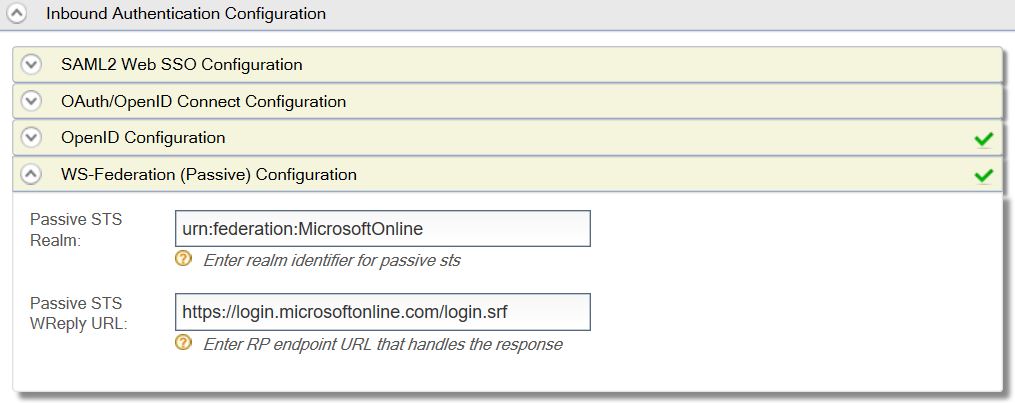
-
Expand Claim Configuration and select Define Custom Claim Dialect.
-
Click Add Claim URI and add the following claims.
Service Provider Claim Local Claim Requested Claim http://schemas.microsoft.com/ws/2008/06/identity/claims/role http://wso2.org/claims/role Selected (True) http://schemas.microsoft.com/LiveID/Federation/2008/05/ImmutableID http://wso2.org/claims/objectguid Selected (True) http://schemas.xmlsoap.org/claims/UPN http://wso2.org/claims/upn Selected (True) 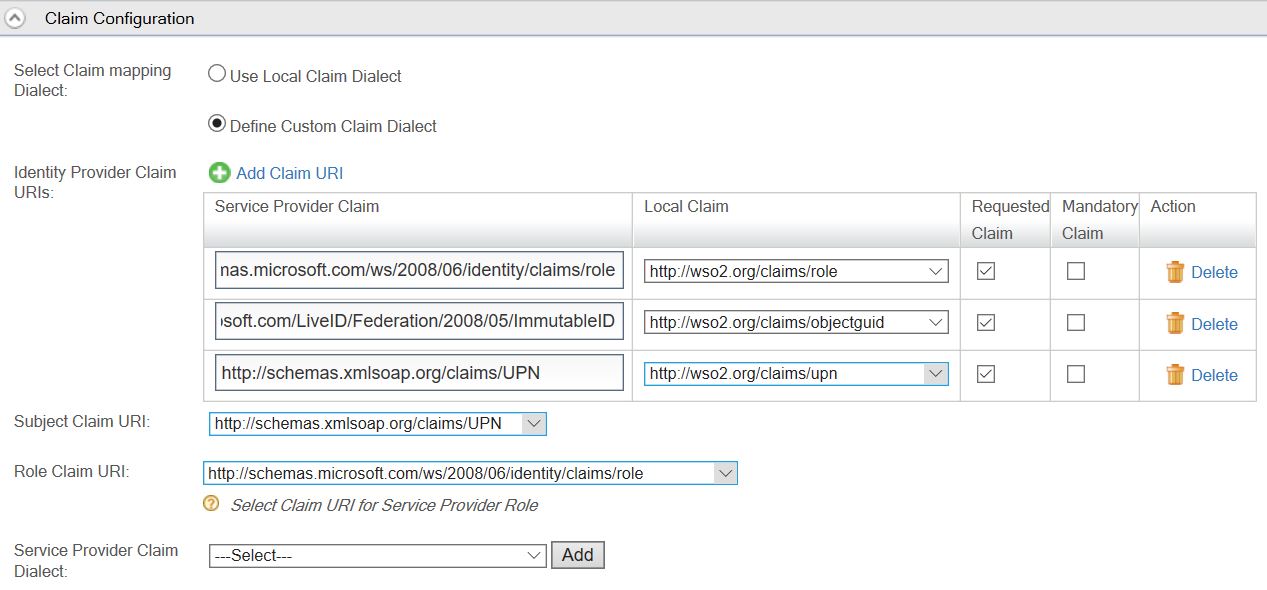
-
Set
http://schemas.xmlsoap.org/claims/UPNas the Subject Claim URI andhttp://schemas.microsoft.com/ws/2008/06/identity/claims/roleas the Role Claim URI. -
Click Update to save changes.
Configure Azure AD to trust WSO2 IS
- Log in to a Windows machine and start Windows Azure Active Directory Powershell.
-
Run the following command. It prompts for the Azure AD admin credentials.
$cred=Get-Credential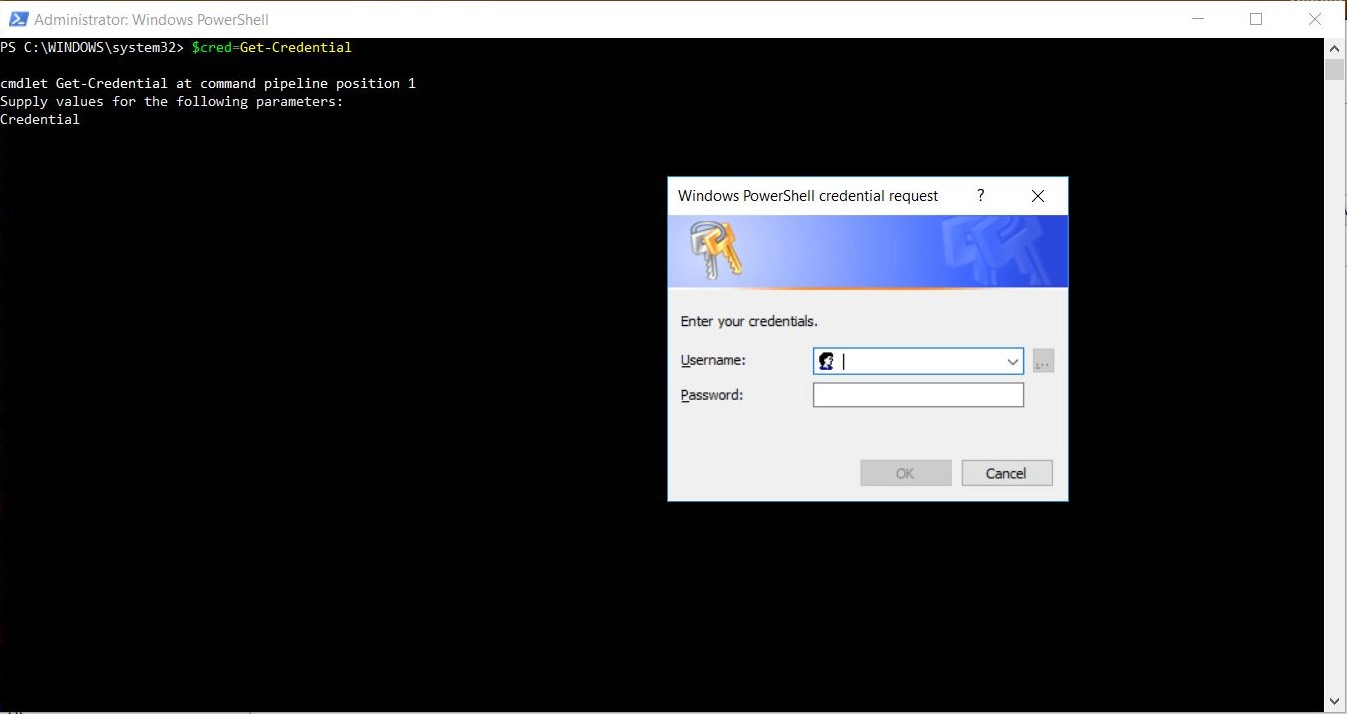
-
Enter the credentials and click OK. Run the following command to connect to the service with the stored credentials.
Connect-MsolService –Credential $cred -
Run the following command to verify the availability of the validated domain.
The ‘Status’ of the domain should be ‘Verified’, and ‘Authentication’ should be ‘Managed’.Get-MsolDomain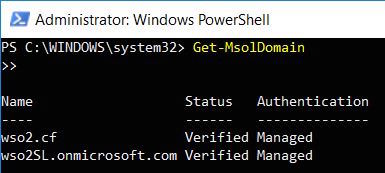
-
Configure the domain as a federated domain by providing the respective federation settings that match the WSO2 IS IdP. Store the federation settings in parameters.
-
Store your domain.
$dom = "wso2.cf" $brandname = "wso2" -
Set the Passive STS endpoint URL of the IdP (i.e., the Passive STS endpoint URL of WSO2 IS).
$passiveLogonUri = "https://wso2office.is.com:9443/passivests" -
Set the MetaData Exchange endpoint URL of the IdP.
$mex = "https://wso2office.is.com:9443/services/mex-ut" -
Set the issuer ID of the IdP. This value should be the
Identity Provider Entity Idthat you configured in the WS-Federation configuration of the Resident IdP of WSO2 IS.$issueruri = "wso2is.microsoft"Tip
If you will be configuring Office365 Active STS clients (complying with the WS-Trust protocol) through WSO2 Identity Server as well, do the following configuration along with these configurations.
Set the Active STS Endpoint URL of the IdP. This should be the Security Token Service endpoint of the WSO2 Identity server. Note that this endpoint is specific to WS-Trust and will not be used for the Passive STS use case.
$activeLogonUri="https://aysh.is.com:9443/services/wso2carbon-sts.wso2carbon-stsHttpsSoap12Endpoint" -
Store the IdP certificate. Enter the Base64 encoded signing certificate of WSO2 IS.
For the default key store configured in WSO2 IS, the certificate is as given below.Tip
Note that the certificate value should be given in a single line without a break.
$cert = "MIICNTCCAZ6gAwIBAgIES343gjANBgkqhkiG9w0BAQUFADBVMQswCQYDVQQGEwJVUzELMAkGA1UECAwCQ0ExFjAUBgNVBAcMDU1vdW50YWluIFZpZXcxDTALBgNVBAoMBFdTTzIxEjAQBgNVBAMMCWxvY2FsaG9zdDAeFw0xMDAyMTkwNzAyMjZaFw0zNTAyMTMwNzAyMjZaMFUxCzAJBgNVBAYTAlVTMQswCQYDVQQIDAJDQTEWMBQGA1UEBwwNTW91bnRhaW4gVmlldzENMAsGA1UECgwEV1NPMjESMBAGA1UEAwwJbG9jYWxob3N0MIGfMA0GCSqGSIb3DQEBAQUAA4GNADCBiQKBgQCUp/oV1vWc8/TkQSiAvTousMzOM4asB2iltr2QKozni5aVFu818MpOLZIr8LMnTzWllJvvaA5RAAdpbECb+48FjbBe0hseUdN5HpwvnH/DW8ZccGvk53I6Orq7hLCv1ZHtuOCokghz/ATrhyPq+QktMfXnRS4HrKGJTzxaCcU7OQIDAQABoxIwEDAOBgNVHQ8BAf8EBAMCBPAwDQYJKoZIhvcNAQEFBQADgYEAW5wPR7cr1LAdq+IrR44iQlRG5ITCZXY9hI0PygLP2rHANh+PYfTmxbuOnykNGyhM6FjFLbW2uZHQTY1jMrPprjOrmyK5sjJRO4d1DeGHT/YnIjs9JogRKv4XHECwLtIVdAbIdWHEtVZJyMSktcyysFcvuhPQK8Qc/E/Wq8uHSCo="
-
-
Run the following command to establish trust.
Set-MsolDomainAuthentication -DomainName $dom -Authentication Federated -ActiveLogOnUri $activeLogonUri -IssuerUri $issuerUri -SigningCertificate $cert -LogOffUri $passiveLogonUri -FederationBrandName $brandname -MetadataExchangeUri $mex -PassiveLogOnUri $passiveLogonUri -PreferredAuthenticationProtocol WsFed -
Run the following command to verify the federation settings.
Get-MsolDomainFederationSettings -Domain $dom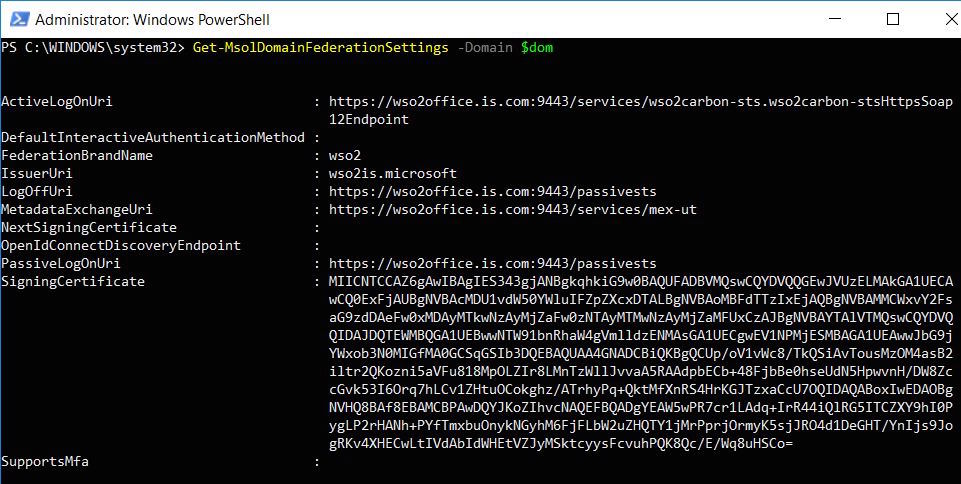
You have now successfully set up trust between the on-premise identity provider of WSO2 IS and the Azure Active Directory.
Tip
If you wish to redo the configurations, do the following:
-
Run the following command to first move your domain back to the 'Managed' authentication mode.
Set-MsolDomainAuthentication -DomainName $dom -Authentication Managed -
Re-set the parameters as listed in step 5 and then set the authentication method again as shown in step 6.
What's next?
To see how this feature works, try out the Configuring On-Demand Provisioning with Azure AD tutorial to provision users directly to Azure AD at the point of authentication.
Top