Configuring reCaptcha for Single Sign On
This topic guides you through configuring reCaptcha for the single sign on flow. By configuring reCaptcha, you can mitigate or block brute force attacks.
Info
- For more information on configuring single sign on, see Configuring Single Sign-On.
- For more information on brute force attacks, see Mitigating Brute Force Attacks.
-
Set up reCaptcha with the WSO2 Identity Server. For instructions on how to do this and more information about reCaptcha, see Setting Up ReCaptcha.
Note
Note: To modify the filter mapping for reCaptcha, open the
web.xmlfile located in the<IS_HOME>/repository/conf/tomcat/carbon/WEB-INFdirectory and find the following filter. You can modify the relevant URL patterns if required.<filter> <filter-name>CaptchaFilter</filter-name> <filter-class>org.wso2.carbon.identity.captcha.filter.CaptchaFilter</filter-class> </filter> <filter-mapping> <filter-name>CaptchaFilter</filter-name> <url-pattern>/samlsso</url-pattern> <url-pattern>/oauth2</url-pattern> <url-pattern>/commonauth</url-pattern> <dispatcher>FORWARD</dispatcher> <dispatcher>REQUEST</dispatcher> </filter-mapping> -
Start the WSO2 IS Server and login to the management console.
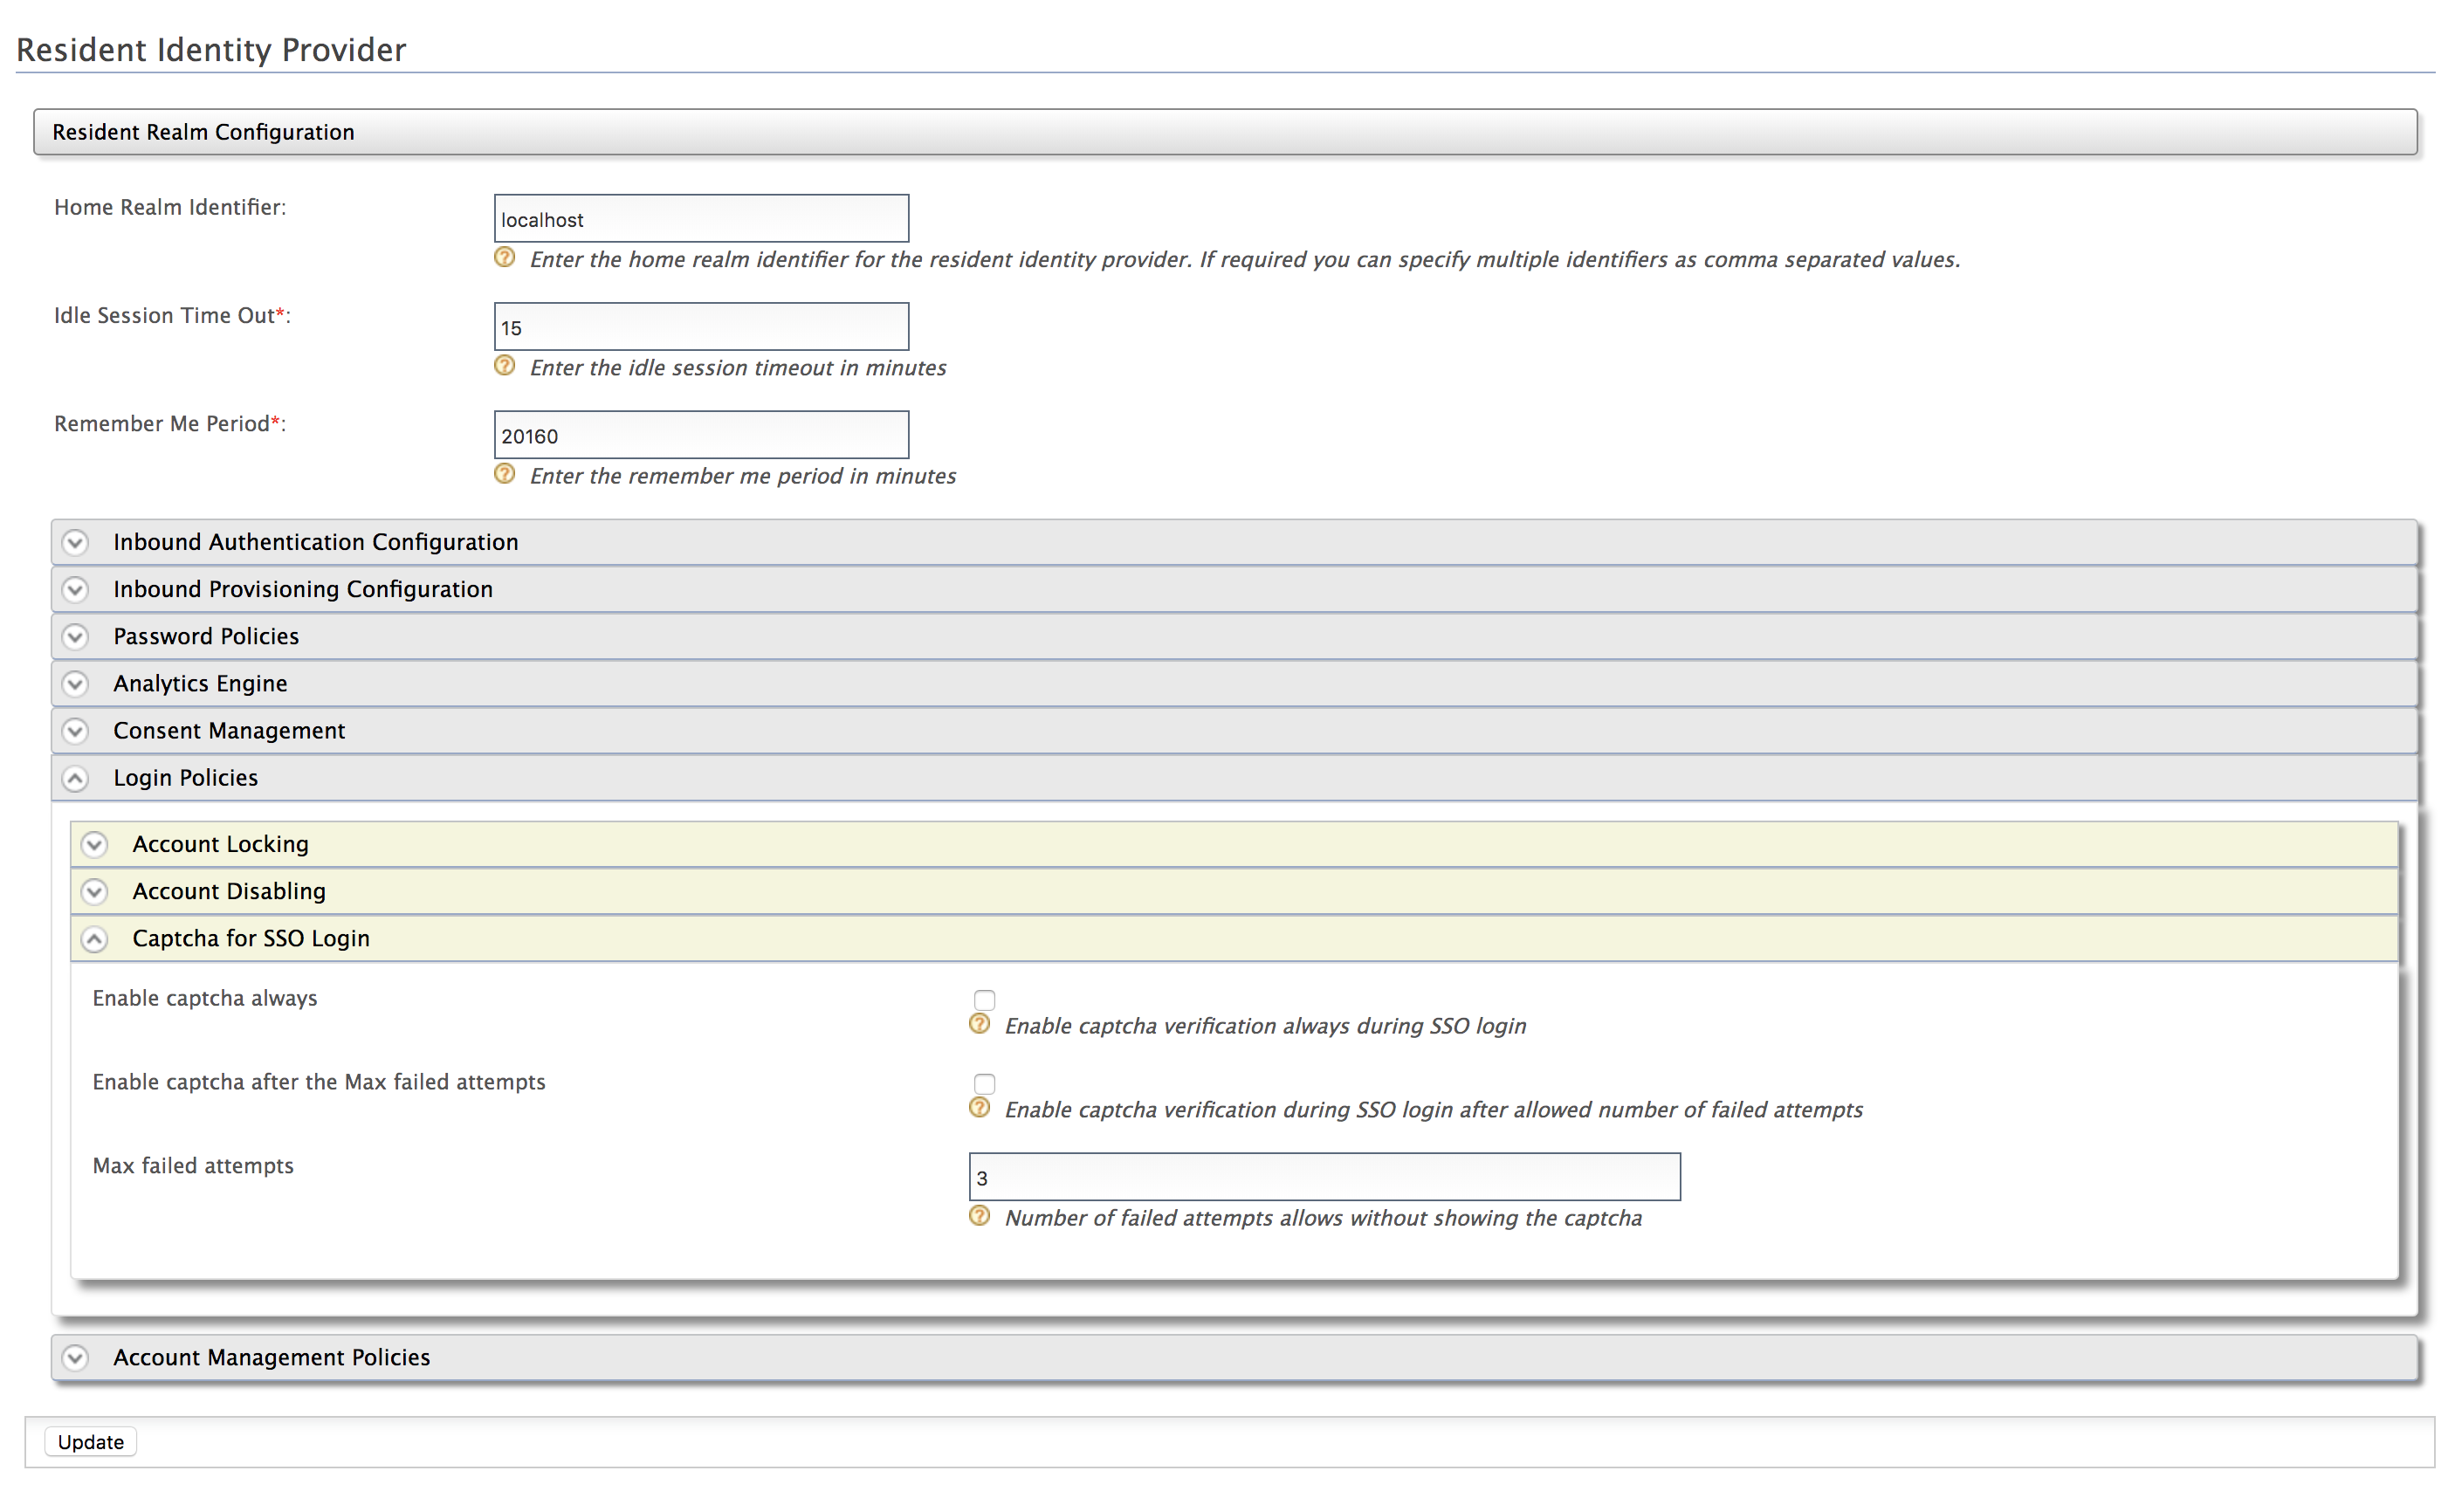
- Click List under Identity Providers found in the Main tab.
- Click Resident Identity Provider and expand the Login Policies tab. Then, expand the Captcha for SSO Login tab.
-
Select Enable and enter a value for the Max failed attempts field. For example, if you enter 3, reCaptcha will be re-enabled after 3 failed attempts.
Note
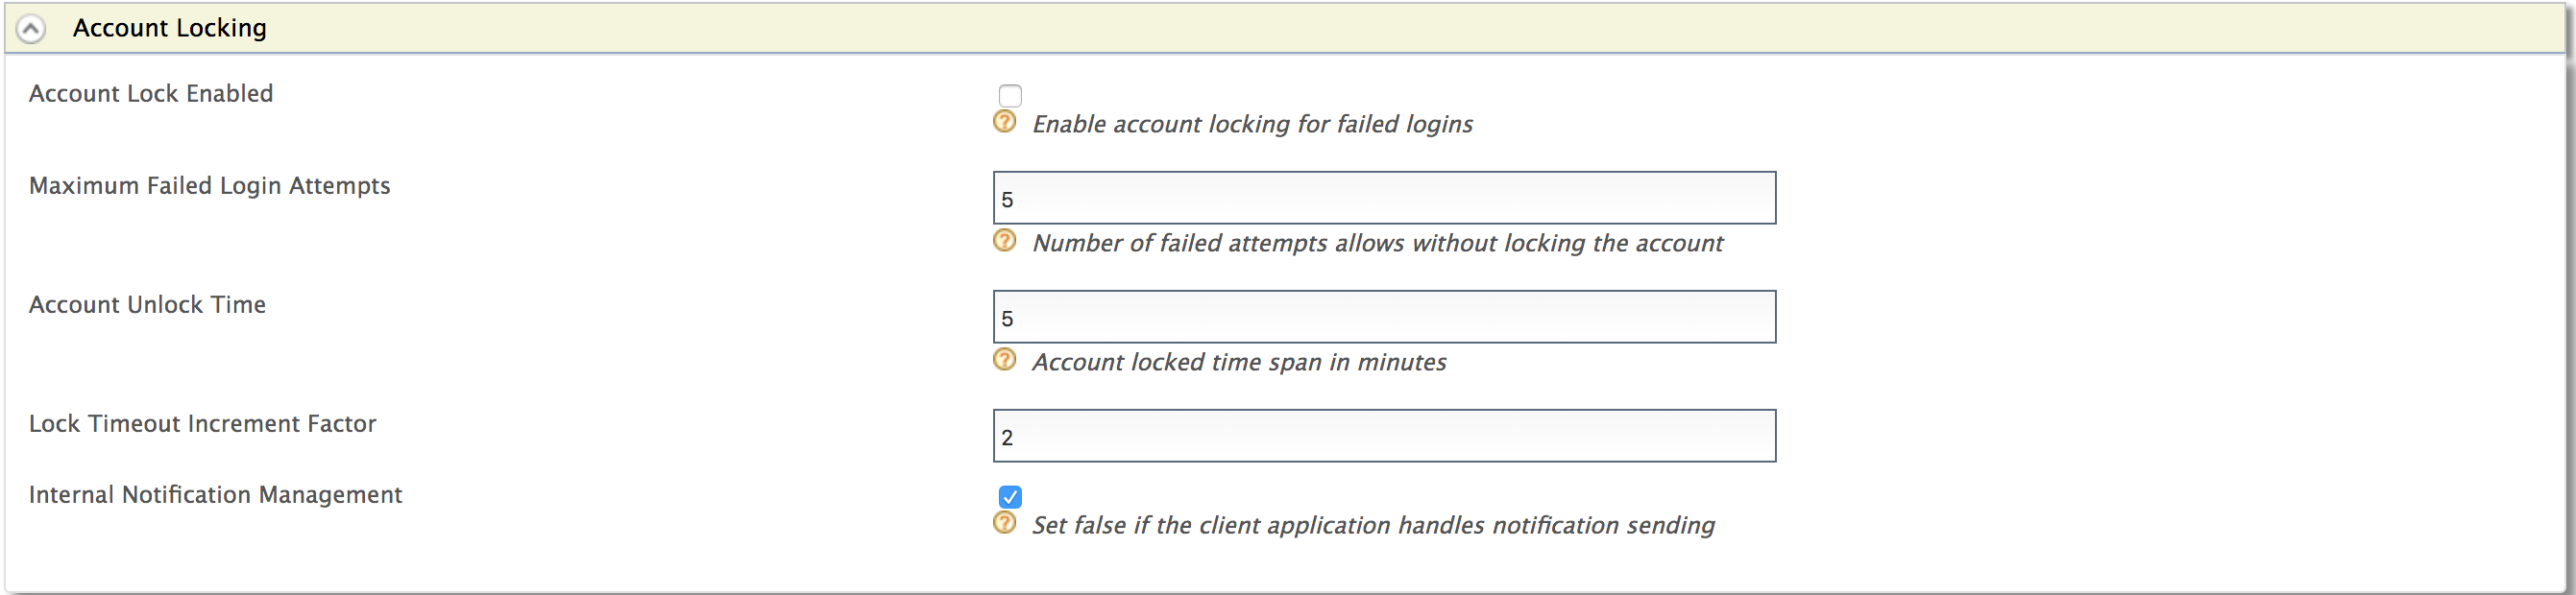
Note: This value should be less than the number of failed attempts configured in the account locking connector.
-
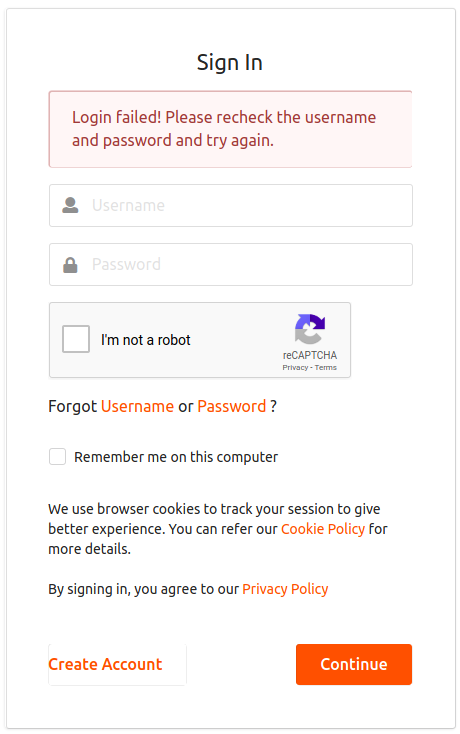
You have now successfully configured reCaptcha for the single sign on flow. If the number of failed attempts reaches the maximum configured value, the following reCaptcha window appears.