Configuring Multi-factor Authentication for WSO2 Identity Server's Management Console
- Start WSO2 Identity Server and sign in to the Management Console.
- On the Main tab, click Service Providers > Add.
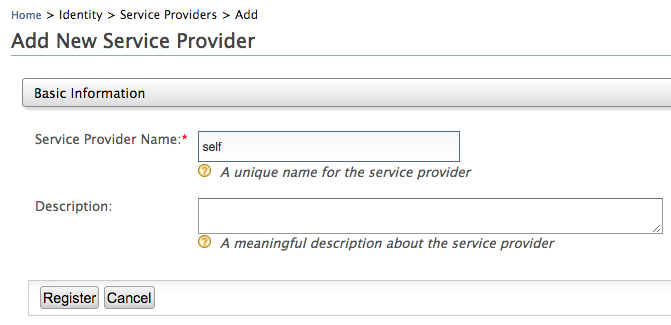
- Enter a
service provider nameand click Register. As the service provider is for the WSO2 Identity Server itself, in this tutorial the service provider is referred to asself.
- Under Inbound Authentication Configuration section, expand SAML2 Web SSO Configuration and click Configure.
-
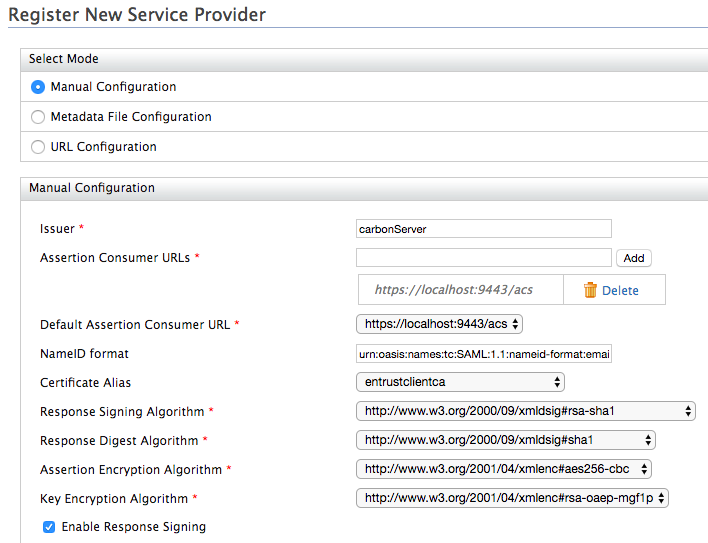
Select Manual Configuration and enter the following details and click Register.
- Issuer:
carbonServer - Assertion Consumer URLs:
https://localhost:9443/acs -
Enable Response Signing:
trueTip
When configuring single-sign-on for Management Console, "Issuer" value of the SAML request is defaulted to carbonServer as mentioned above. You can change this value by adding following configuration to the
<IS_HOME>/repository/conf/deployment.tomlfile.[admin_console.authenticator.saml_sso_authenticator] service_provider_id = "CustomCarbonServerIssuer"
- Issuer:
-
Expand Local & Outbound Authentication Configuration and select Advanced Configuration to configure MFA.
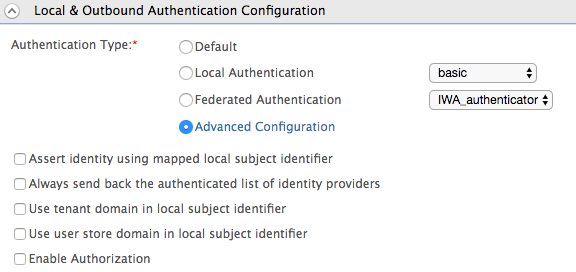
There are two types of MFA that you can configure here.
- Multi-option authentication
- This can be configured by clicking Add Authenticator.
- Clicking this again will enable you to create another authentication option.
- These can be either local or federated authenticators.
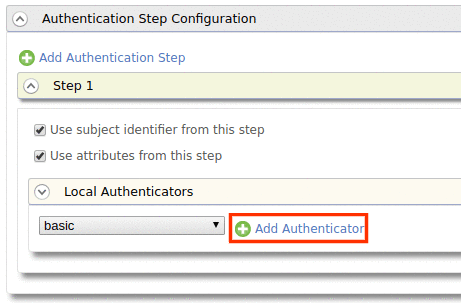
- Multi-step authentication
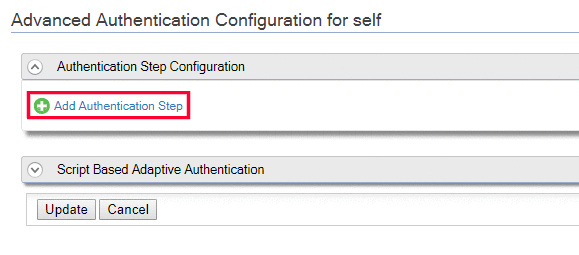
- This is configured by clicking Add Authentication Step.
- Clicking this again will enable you to create another authentication step.
- These can be either local or federated authenticators.
- Multi-option authentication
-
To add a Local Authenticator, click Add Authenticator.
- You can choose the type of authenticator using the dropdown.
- Clicking Add Authenticator again will enable you to add a second local authenticator and configure multi-option authentication using two local authenticators.
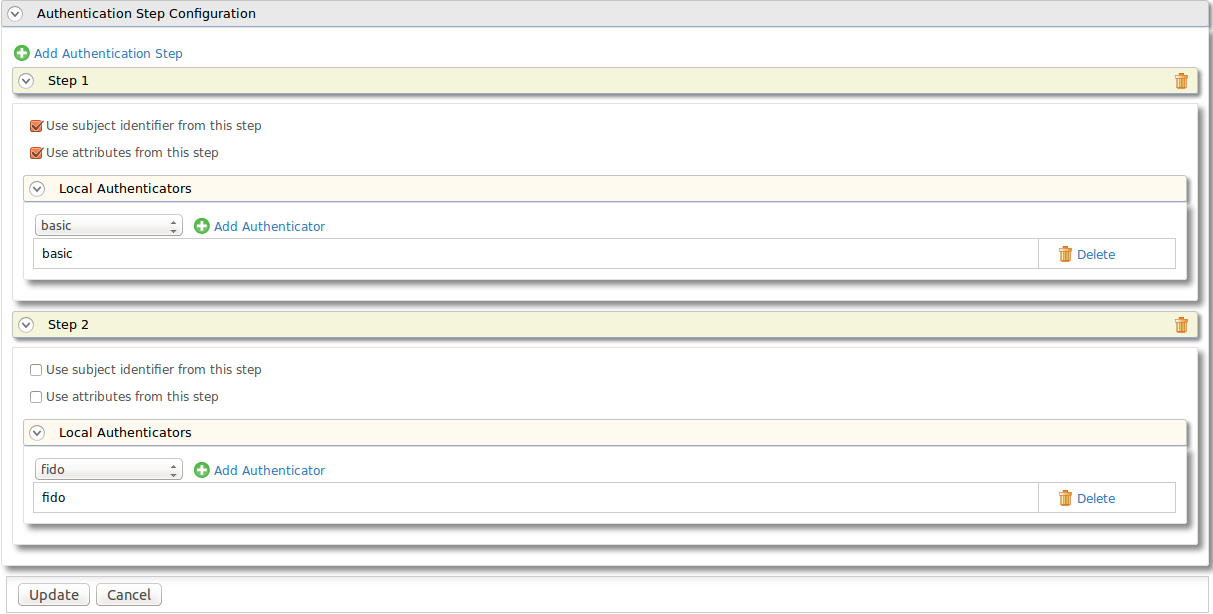
- Alternatively, you can click Add Authentication Step and configure a Local Authenticator in one step by selecting the local authenticator from the dropdown and clicking Add Authenticator. You can do the same for the second step.
As an example for this scenario, basic and fido are used as the two authenticators. Basic authentication allows you to authenticate users from the enterprise user store while FIDO authenticates you externally.
Tip
If you are adding FIDO as an authenticator, see Multi-factor Authentication using FIDO for more information and follow the instructions given in the topic to configure it.
-
Select Use subject identifier from this step, Use attributes from this step or both. In the case of multiple steps, you can have only one step as the subject step and one as the attribute step.
- Click the Update.
-
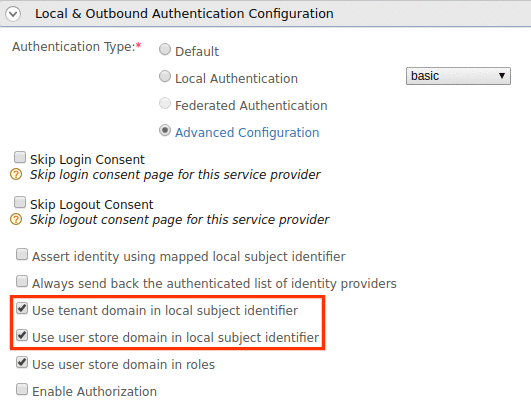
This navigates you to the previous screen with your newly configured authentication steps. Enable Use tenant domain in local subject identifier and Use user store domain in local subject identifier under Local & Outbound Authentication Configuration.
-
Click Update again to save changes.
- Shutdown WSO2 Identity Server and open the
deployment.tomlfile in the<IS_HOME>/repository/conf/folder. -
Enable the
admin_console.authenticator.saml_sso_authenticatoras follows.[admin_console.authenticator.saml_sso_authenticator] enable=true -
Set the value of
priorityto 1.[admin_console.authenticator.saml_sso_authenticator] priority="1" -
Set
assertion_consumer_service_urlandidentity_provider_sso_service_url.[admin_console.authenticator.saml_sso_authenticator] assertion_consumer_service_url = "https://localhost:9443/acs" identity_provider_sso_service_url = "https://localhost:9443/samlsso" -
Save and close the
deployment.tomlfile.
Try it out
- Start WSO2 Identity Server.
- Access the
https://localhost:9443/URL. Note that you will be prompted for extra steps of authentication depending on the authentication options and steps you added above.
You have now successfully configured MFA for the WSO2 Identity Server Management Console.
Top