Passwordless authentication using Email OTP
WSO2 Identity Server supports passwordless authentication using Email OTP. It allows users to log in by providing a one-time passcode sent to their email instead of entering a password.
Info
This capability is available as an update in WSO2 IS 5.10.0 from update level 5.10.0.247 onwards (Updates 2.0 model). See the instructions on updating WSO2 products.
Follow the instructions in the sections below to configure passwordless authentication using Email OTP:
Deploying travelocity sample application
In this guide, we will be using travelocity.com as a sample application. To deploy the travelocity sample application, follow the steps in Deploying the travelocity.com Sample App.
Configure the email OTP provider
You can use WSO2 Identity Server as the email OTP provider or you can configure Gmail or SendGrid as the email OTP provider using Gmail or SendGrid APIs. Follow the instructions in one of Option1 or Option2 to set up the email OTP provider.
Option1: Configure WSO2 IS as the email OTP provider
Expand this section to follow the steps to configure WSO2 IS to send emails once the Email OTP is enabled.
-
Enable the email-sending configurations of the WSO2 Identity Server as explained here.
Tip
The email template used to send this email notification is the EmailOTP template.
You can edit and customize the email template. For more information on how to do this, see Customizing Automated Emails.
-
Add the following configuration to the
deployment.tomlfile in the<IS_HOME>/repository/conf/directory.[server] disable_addressing = true [authentication.authenticator.email_otp] name ="EmailOTP" enable=true
Option2: Configure Gmail as the email OTP provider
Expand this section to send the One Time Password (OTP) using Gmail APIs or using SendGrid.
Follow the steps given below to configure Gmail APIs as the mechanism to send the OTP.
- Create a Google account at https://gmail.com.
- Go to https://console.developers.google.com and click ENABLE APIS AND SERVICES.
- Search for Gmail API and click on it.
-
Click Enable to enable the Gmail APIs.
Why is this needed?
If you do not enable the Gmail APIs, you will run into a 401 error when trying out step13.
-
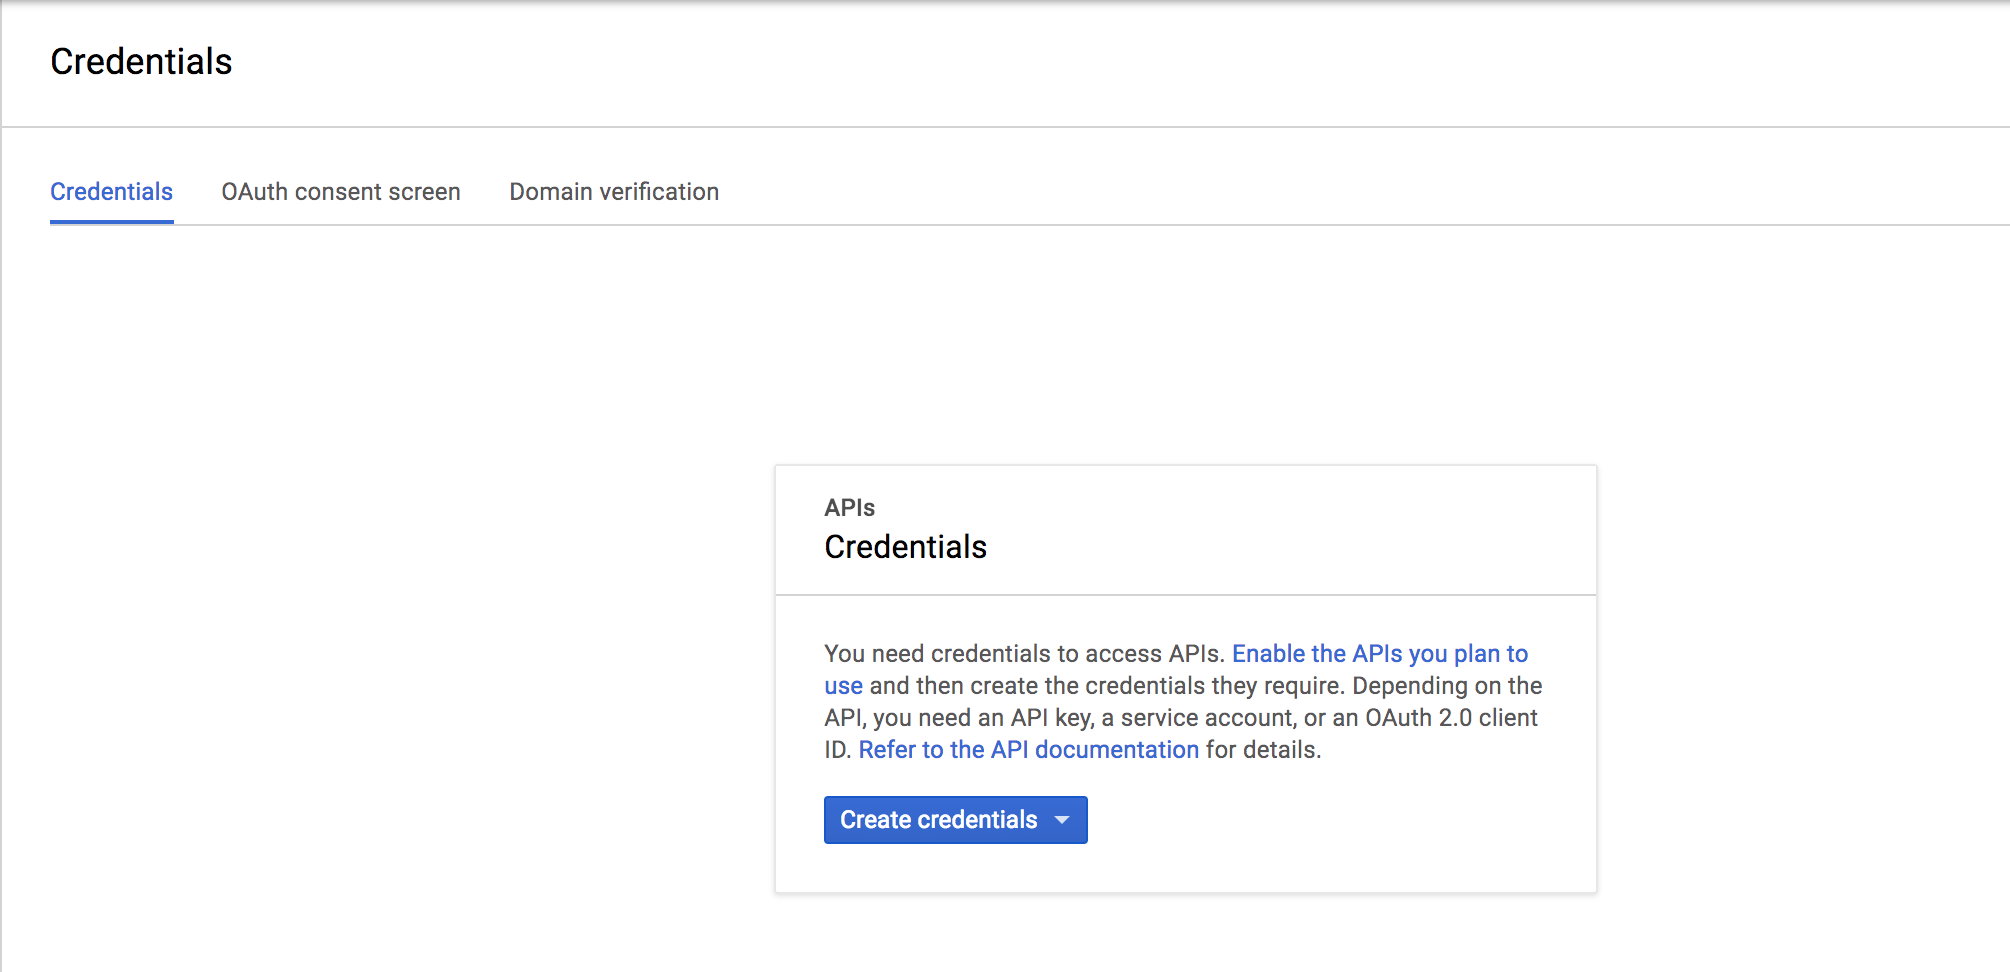
Click Credentials and click Create to create a new project.
-
Click Credentials and click the Create credentials drop-down.
-
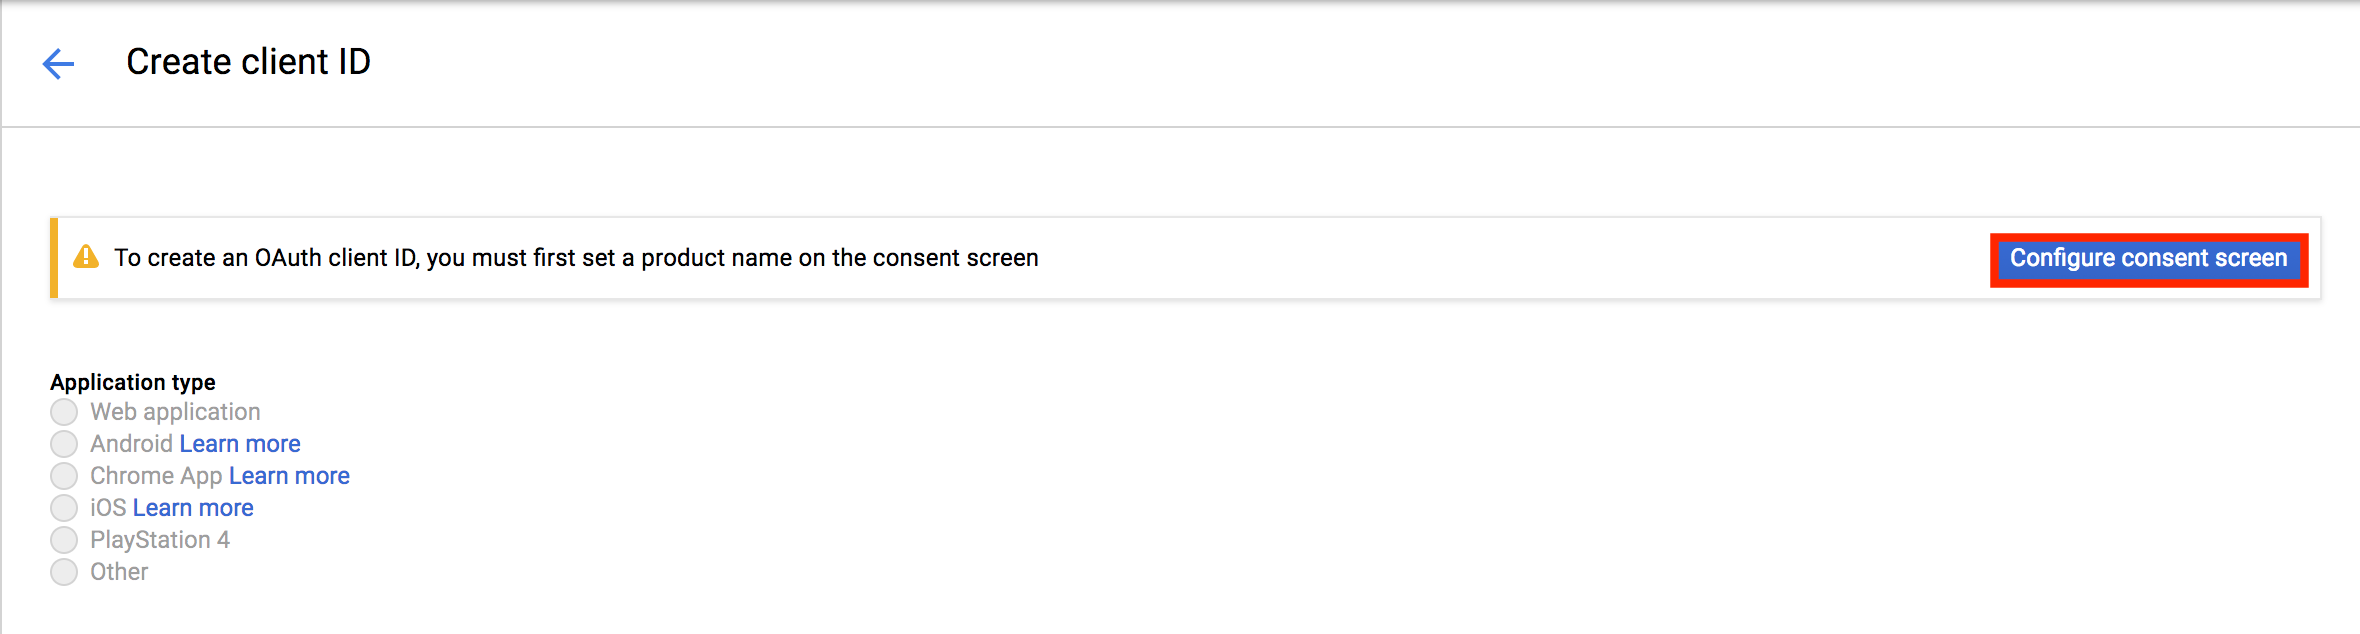
Select OAuth client ID option.
-
Click Configure consent screen.
-
Enter the Product name that needs to be shown to users, enter values to any other fields you prefer to update and click Save.
-
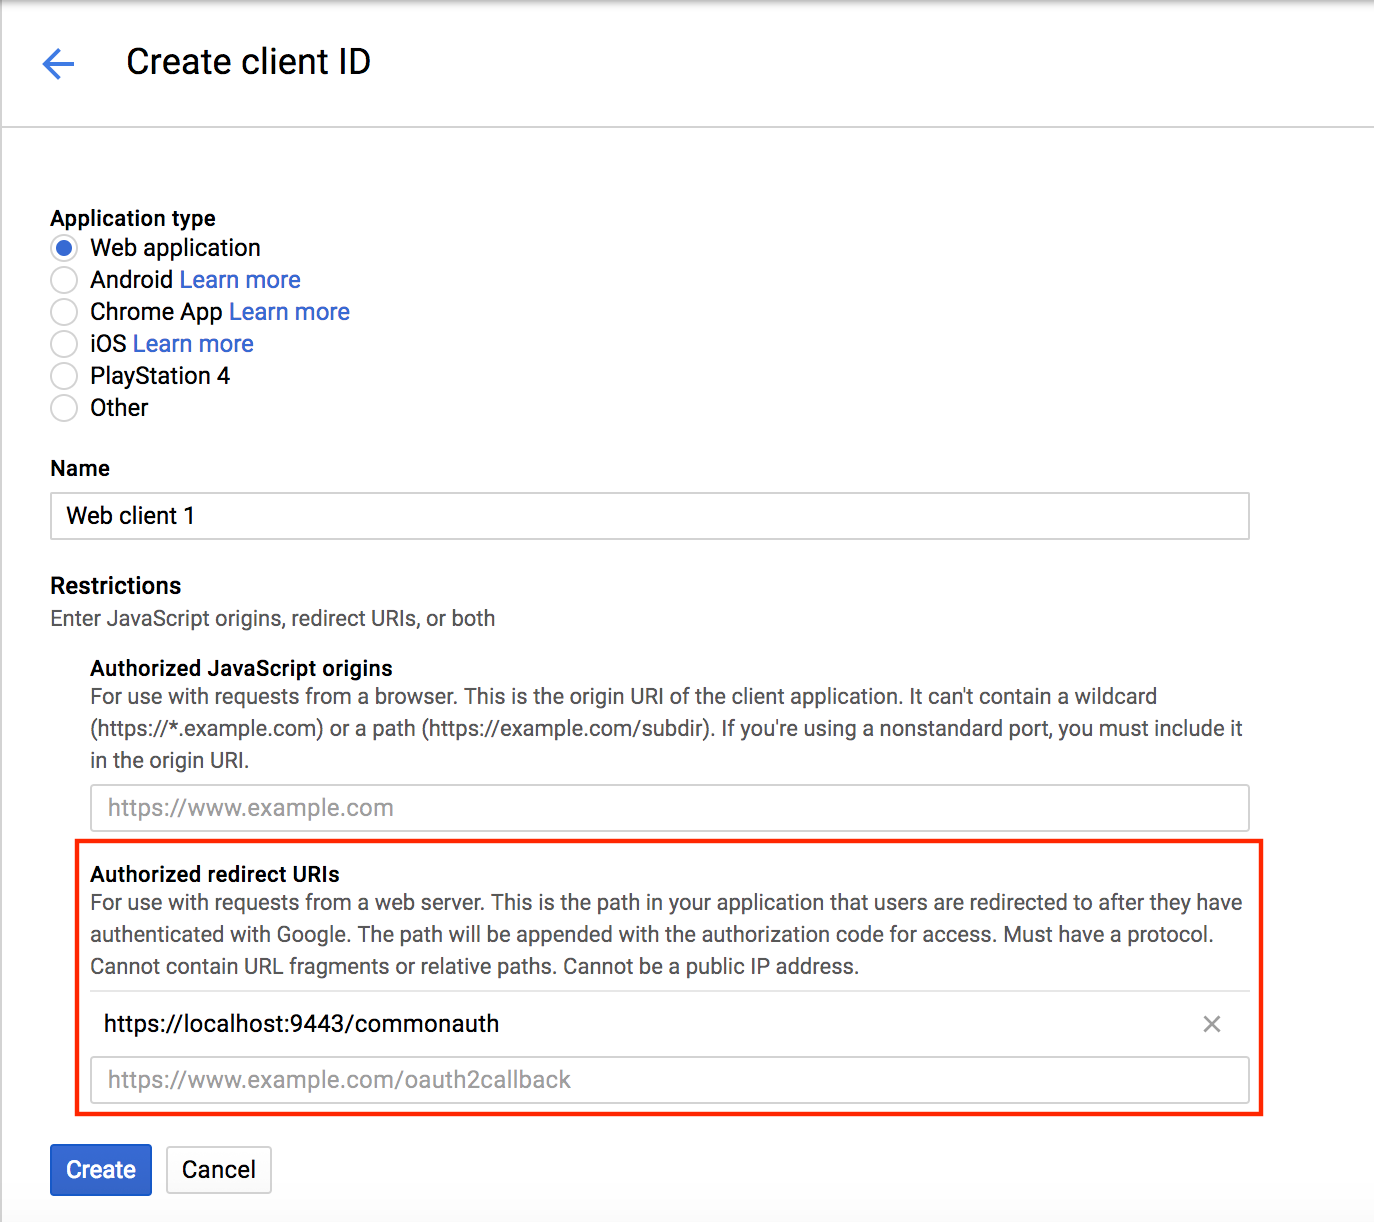
The
client IDand theclient secretare displayed. Copy the client ID and secret and keep it in a safe place as you require it for the next step.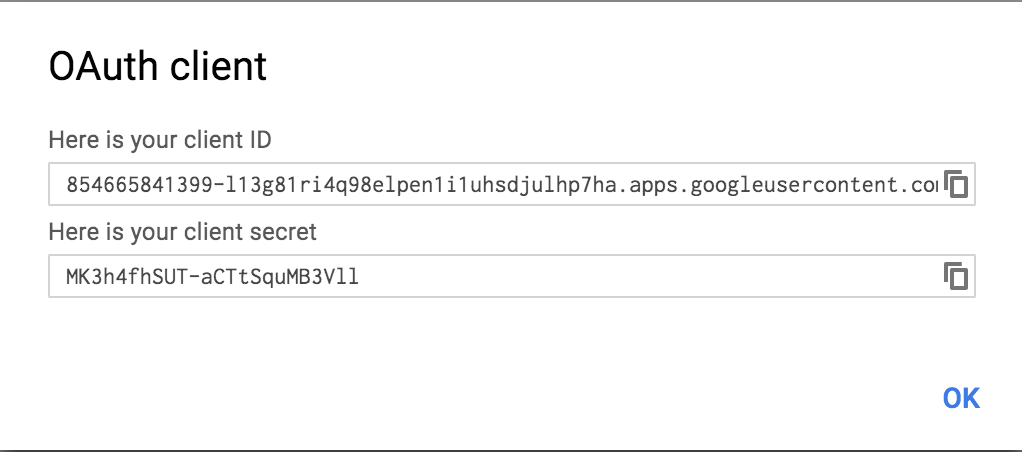
-
Copy the URL below and replace the
<ENTER_CLIENT_ID>tag with the generatedClient ID. This is required to generate the authorization code.Format
https://accounts.google.com/o/oauth2/auth?redirect_uri=https%3A%2F%2Flocalhost%3A9443%2Fcommonauth&response_type=code&client_id=<ENTER_CLIENT_ID>&scope=http%3A%2F%2Fmail.google.com&approval_prompt=force&access_type=offlineExample
https://accounts.google.com/o/oauth2/auth?redirect_uri=https%3A%2F%2Flocalhost%3A9443%2Fcommonauth&response_type=code&client_id=854665841399-l13g81ri4q98elpen1i1uhsdjulhp7ha.apps.googleusercontent.com&scope=http%3A%2F%2Fmail.google.com&approval_prompt=force&access_type=offline -
Paste the updated URL into your browser.
-
Select the preferred Gmail account with which you wish to proceed.
-
Click Allow.
-
Obtain the
authorization codeusing a SAML tracer on your browser.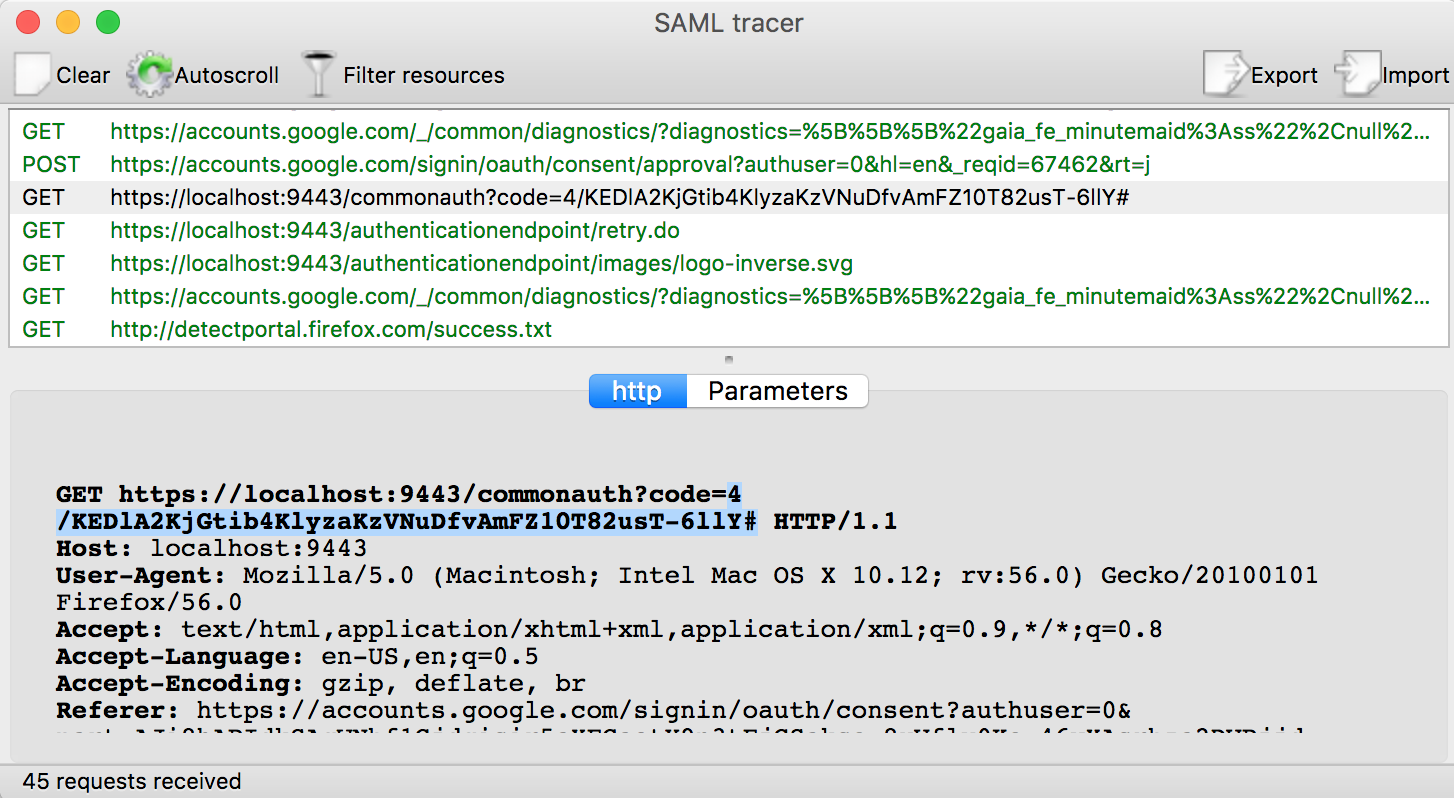
-
-
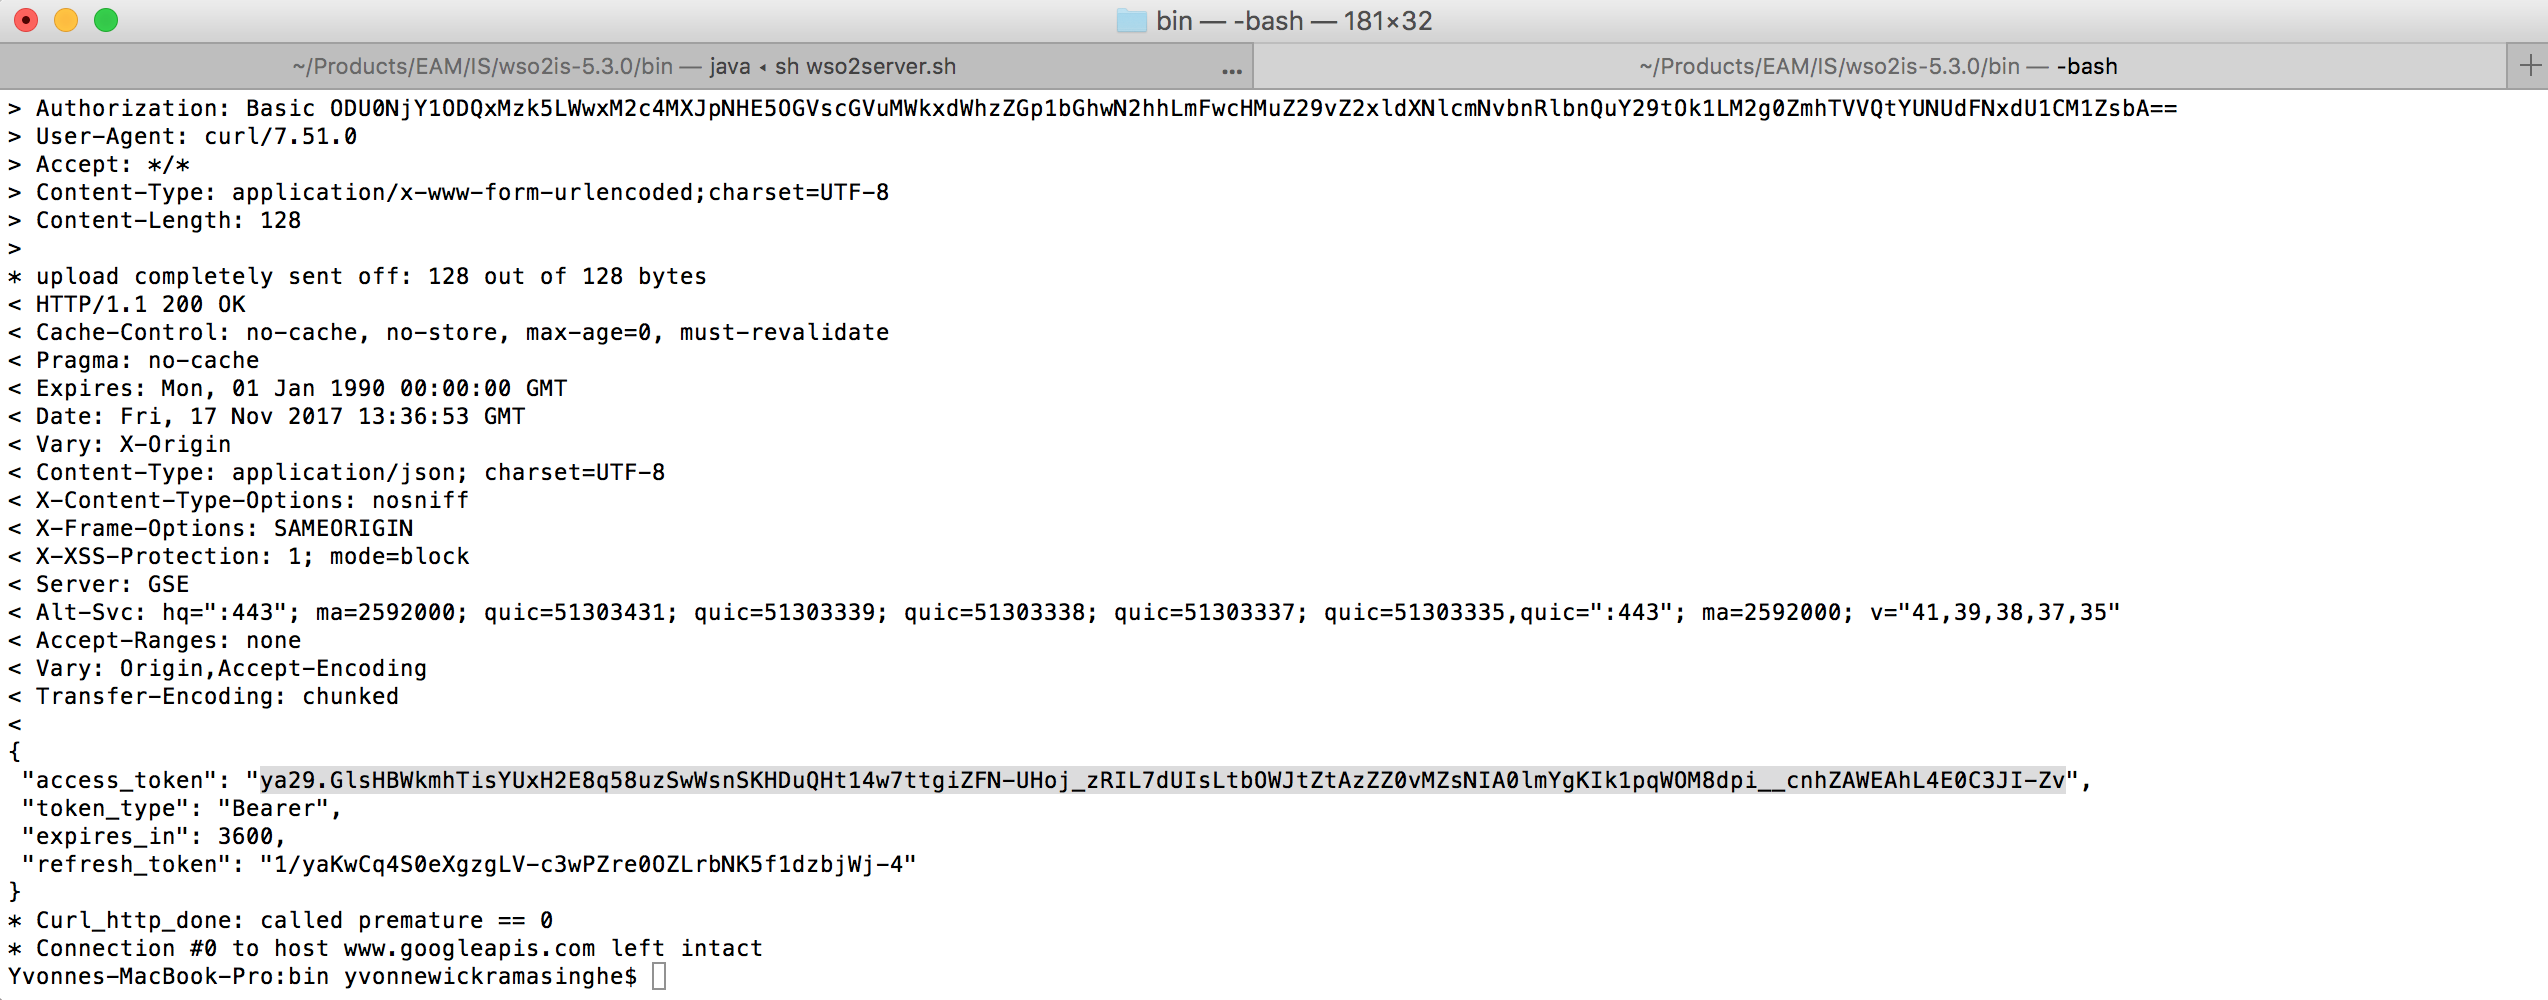
To generate the access token, copy the following cURL command and replace the following placeholders:
-
<CLIENT-ID>: Replace this with theclient IDobtained in Step 10 above. -
<CLIENT_SECRET>: Replace this with theclient secretobtained in Step 10 above. -
<AUTHORIZATION_CODE>: Replace this with the authorization code obtained in Step 12 above.
Format
curl -v -X POST --basic -u <CLIENT-ID>:<CLIENT_SECRET> -H "Content-Type: application/x-www-form-urlencoded;charset=UTF-8" -k -d "grant_type=authorization_code&code=<AUTHORIZATION_CODE>&redirect_uri=https://localhost:9443/commonauth" https://www.googleapis.com/oauth2/v3/tokenExample
curl -v -X POST --basic -u 854665841399-l13g81ri4q98elpen1i1uhsdjulhp7ha.apps.googleusercontent.com:MK3h4fhSUT-aCTtSquMB3Vll -H "Content-Type: application/x-www-form-urlencoded;charset=UTF-8" -k -d "grant_type=authorization_code&code=4/KEDlA2KjGtib4KlyzaKzVNuDfvAmFZ10T82usT-6llY#&redirect_uri=https://localhost:9443/commonauth" https://www.googleapis.com/oauth2/v3/tokenSample Response
> POST /oauth2/v3/token HTTP/1.1
> Host: www.googleapis.com
> Authorization: Basic OTk3NDE2ODczOTUwLWY4Y2N1YnJobW1ramdkYXNkNnZkZ2tzOGxoaWExcnRhLmFwcHMuZ29vZ2xldXNlcmNvbnRlbnQuY29tOkJkNlBoY3ZVWXFrM1BhdnA4ZjBZcUQtMw==
> User-Agent: curl/7.54.0
> Accept: */*
> Content-Type: application/x-www-form-urlencoded;charset=UTF-8
> Content-Length: 127
>
< HTTP/1.1 200 OK
< Cache-Control: no-cache, no-store, max-age=0, must-revalidate
< Pragma: no-cache
< Expires: Mon, 01 Jan 1990 00:00:00 GMT
< Date: Wed, 10 Jan 2018 08:29:57 GMT
< Vary: X-Origin
< Content-Type: application/json; charset=UTF-8
< X-Content-Type-Options: nosniff
< X-Frame-Options: SAMEORIGIN
< X-XSS-Protection: 1; mode=block
< Server: GSE
< Alt-Svc: hq=":443"; ma=2592000; quic=51303431; quic=51303339; quic=51303338; quic=51303337; quic=51303335,quic=":443"; ma=2592000; v="41,39,38,37,35"
< Accept-Ranges: none
< Vary: Origin,Accept-Encoding
< Transfer-Encoding: chunked
<
{
 "access_token": "ya29.Gls-BbTUseE2f-Lrc9q0QtdlvIoYFTg2zkYPsXHwgob4pHAFlE66GMgJjwTHT9eHfivhVcATROzU8FaUgt0wVL1sz-7IsC2Slfpdm6i3uFcurNTFbTlABk3jKJ--",
 "token_type": "Bearer",
 "expires_in": 3600,
 "refresh_token": "1/8pMBx_lrUyitknmGzzH-yOcvoPIZ1OqhPeWvcYJOd0U"
}
Paste the updated cURL command in your terminal to generate the OAuth2 access token, token validity period, and refresh token.
-
-
Update the following configurations in the
<IS_HOME>/repository/conf/identity/deployment.tomlfile.Sample configuration when using Identity Server as Email OTP Provider
[authentication.authenticator.email_otp]
name = "EmailOTP"
enable= true

[authentication.authenticator.email_otp.parameters]
GmailClientId = "<gmail_client_id>"
GmailClientSecret = "<gmail_client_secret>"
GmailRefreshToken = "<refresh_token>"
GmailEmailEndpoint = "https://www.googleapis.com/gmail/v1/users/<mail_address>/messages/send"
accessTokenRequiredAPIs = "Gmail"
GmailAuthTokenType = "Bearer"
GmailTokenEndpoint = "https://www.googleapis.com/oauth2/v3/token"
Tip
- If you need to send the content in a payload, you can introduce a property in a format \<API> Payload and define the value. Similarly, you can define the Form Data.FormdataforSendgridAPIisgivenasan example.
- You can use \<API> URLParams, \<API>AuthTokenType,\<API>Failure and \<API>TokenEndpoint property formats to specify the URL parameters, Authorization token type, Message to identify failure and Endpoint to get access token from refresh token respectively.
- Value of \<API> URLParams should be like; api_user=\<API_USER>&api_key=\<API_KEY>&data=\<DATA>&list\<LIST>
Property Description GmailClientIdEnter the Client ID you got in step 10 .
Example:501390351749-ftjrp3ld9da4ohd1rulogejscpln646s.apps.googleusercontent.comGmailClientSecretEnter the client secret you got in step 10 .
Example:dj4st7_m3AclenZR1weFNo1VSendgridAPIKeyThis property is only required if you are using the Sengrid method. Since you are using Gmail APIs, keep the default value. GmailRefreshTokenEnter the refresh token that you got as the response in step 13. Example: 1/YgNiepY107SyzJdgpynmf-eMYP4qYTPNG_L73MXfcbvGmailEmailEndpointEnter your username of your Gmail account in place of the [userId]placeholder. Example:https://www.googleapis.com/gmail/v1/users/[email protected]/messages/sendSendgridEmailEndpointThis property is only required if you are using the Sengrid method. Since you are using Gmail APIs, keep the default value. accessTokenRequiredAPIsUse the default value.
apiKeyHeaderRequiredAPIsThis property is only required if you are using the Sengrid method. Since you are using Gmail APIs, keep the default value.
SendgridFormData=toThis property is only required if you are using the Sengrid method. Since you are using Gmail APIs, keep the default value. SendgridURLParamsThis property is only required if you are using the Sengrid method. Since you are using Gmail APIs, keep the default value. GmailAuthTokenTypeUse the default value. GmailTokenEndpointUse the default value. SendgridAuthTokenTypeThis property is only required if you are using the Sengrid method. Since you are using Gmail APIs, keep the default value.
Configure the Identity Provider
Follow the steps below to add an identity provider:
-
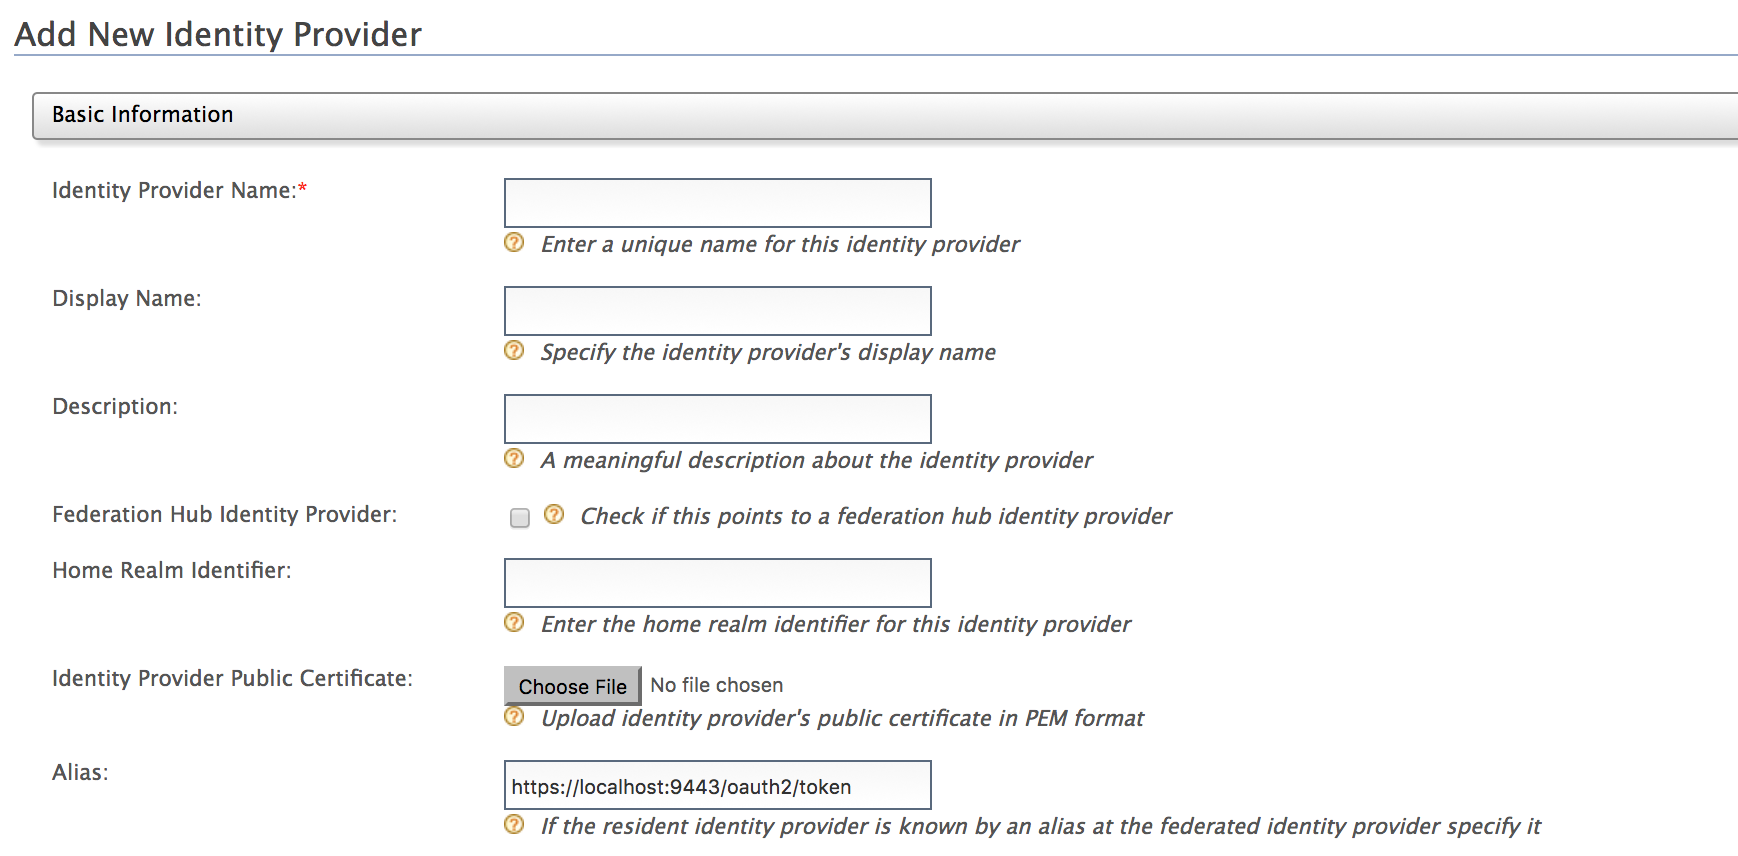
Click Add under Main > Identity > Identity Providers.
-
Provide a suitable name for the identity provider.
-
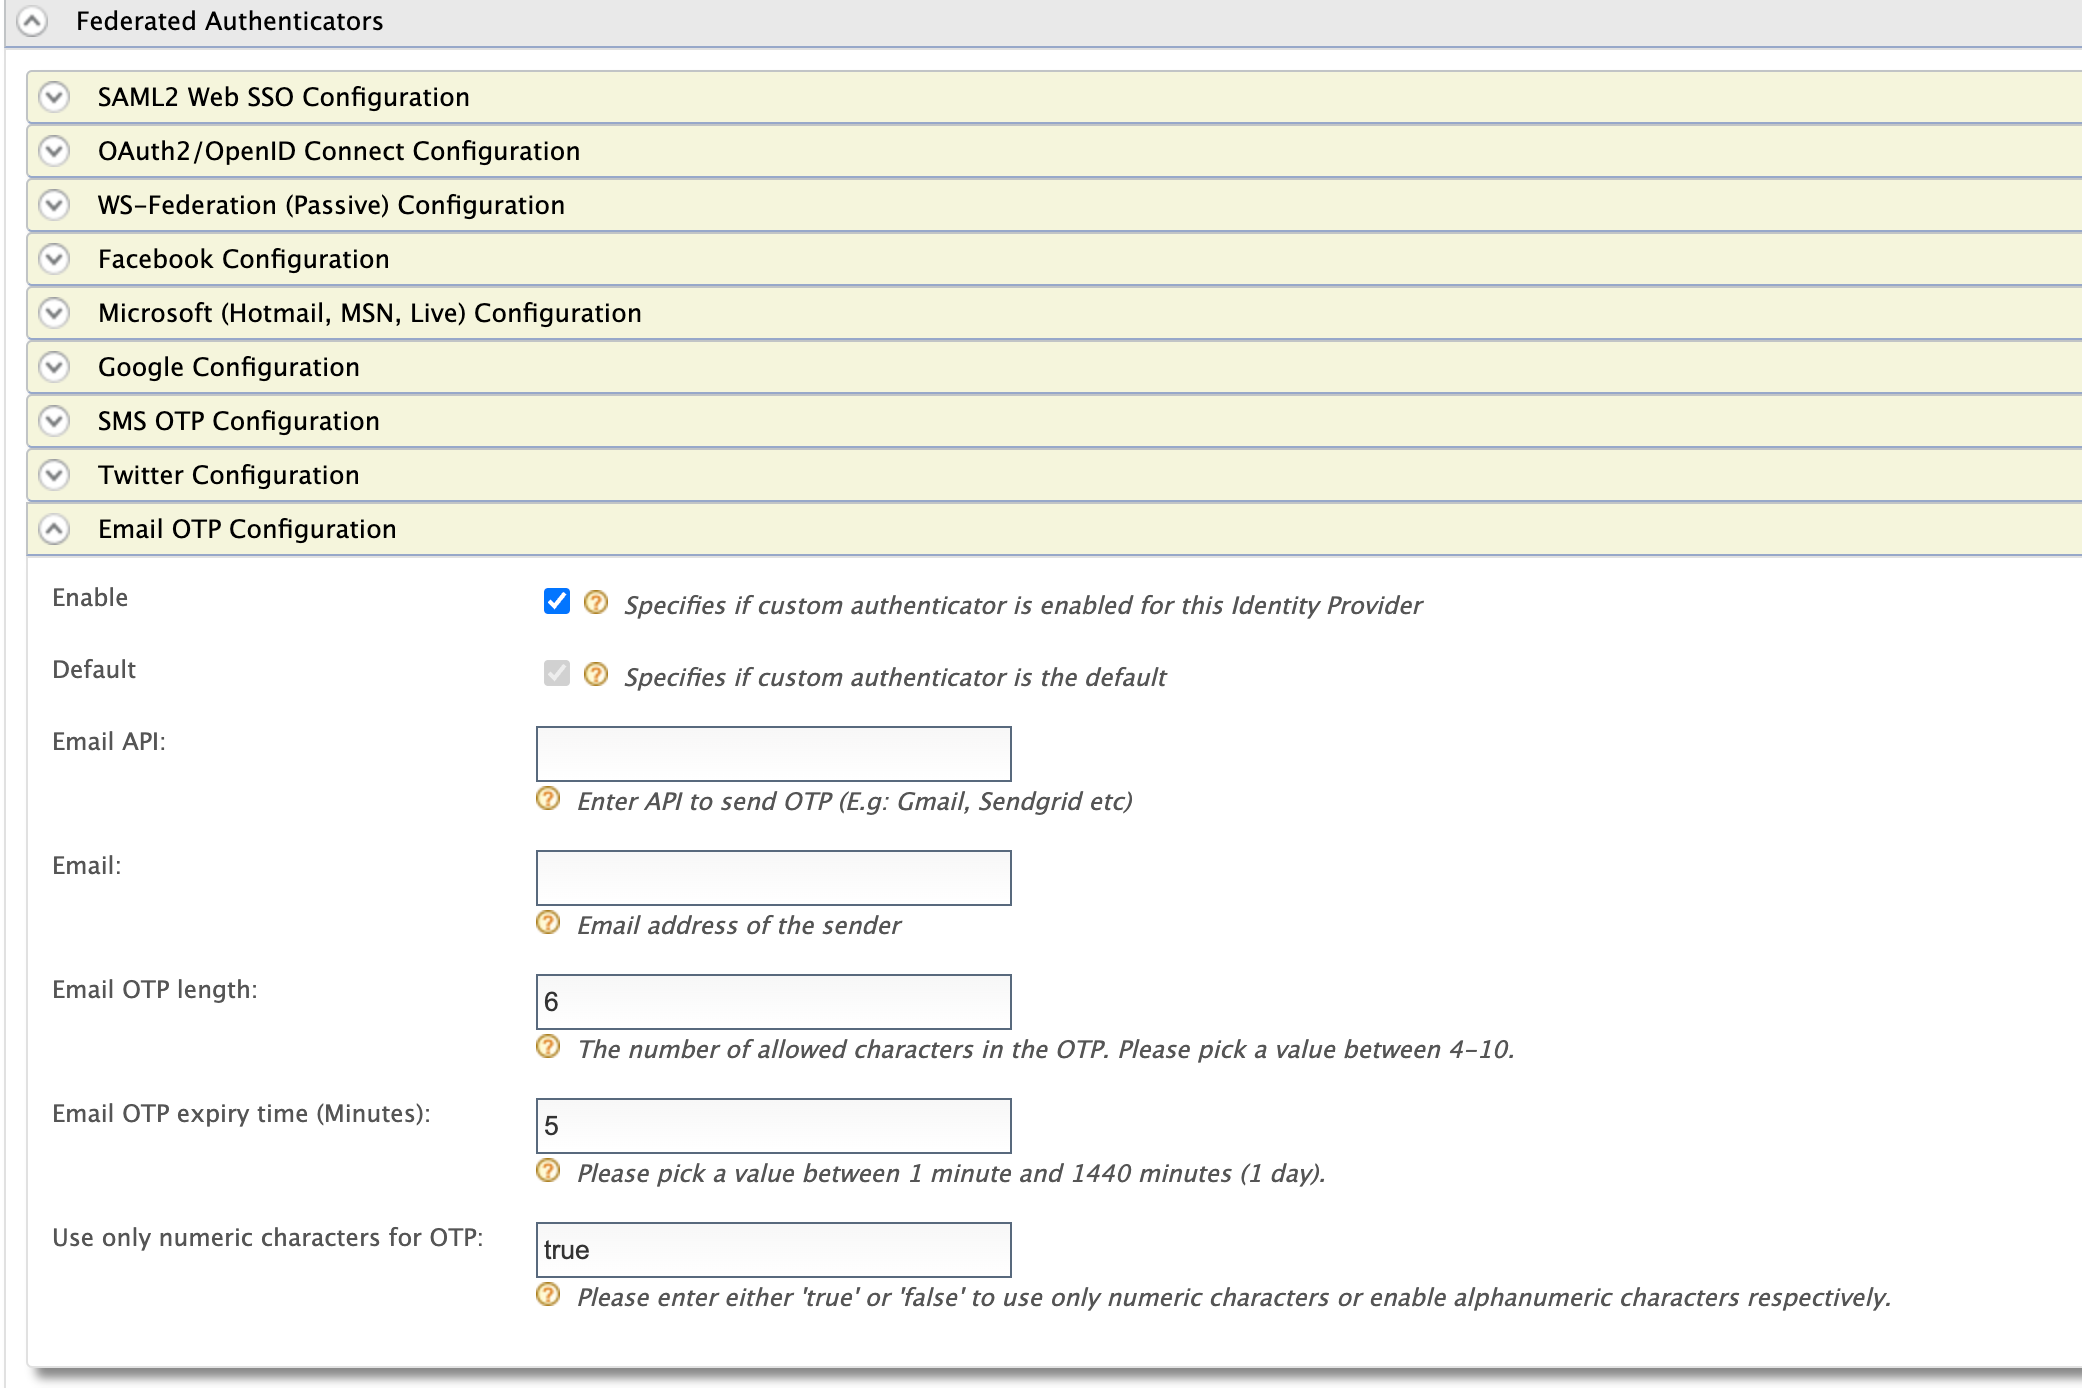
Expand the EmailOTPAuthenticator Configuration under Federated Authenticators.
-
Select the Enable and Default check boxes(If you are using Gmail or Sendgrid as the email OTP provider, provide values for Email API, Email, Email OTP length, Email OTP expiry time, and Use only numeric characters fields for OTP as well).
-
Click Register.
You have now added the identity provider.
-
Configure the Service Provider
In the Deploying travelocity sample application section you have configured a service provider to register the travelocity.com as an application in the WSO2 Identity Server.
Follow the steps below to modify the same service provider in order to configure Email OTP as the first authentication step.
-
Return to the Management Console home screen.
-
Click List under Main > Identity > Service Providers and locate the above created service provider and click Edit.
-
Go to Claim Configuration and select the http://wso2.org/claims/emailaddress claim.

-
Go to Local and Outbound Authentication Configuration section.
-
Select the Advanced configuration radio button option.
-
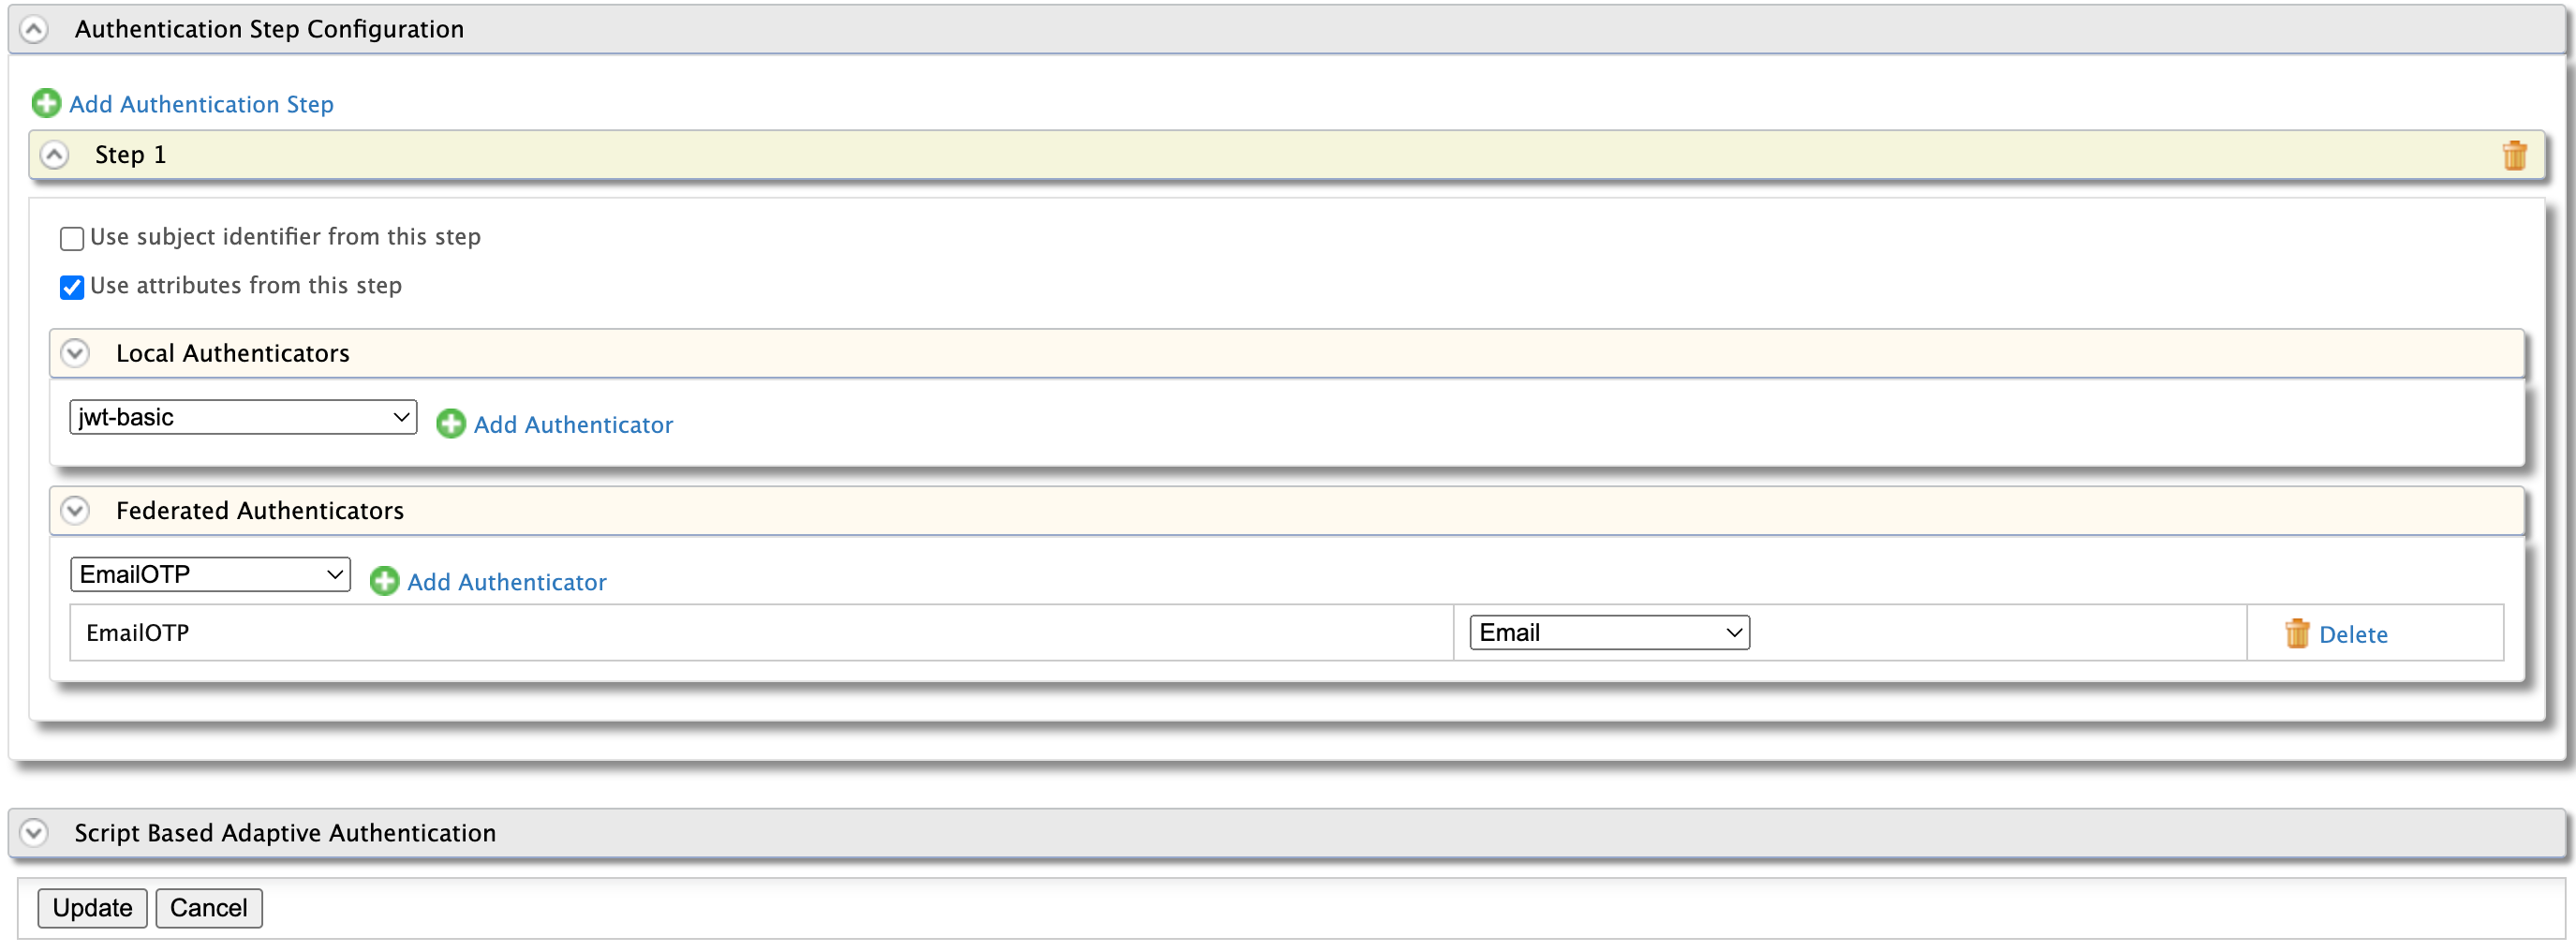
Click Add Authentication Step.
-
Click Add Authenticator that is under Federated
Authenticators of Step 1 to add the Email OTP as the first step. Also, select the Use attributes from this step option.
Note
You cannot directly use Email OTP authenticator from Federated Authentication under Local and Outbound Authentication Configuration. You need to select Advanced configuration and configure the first step.
-
-
Click Update.
You have now added and configured the service provider.
Note
For more information on service provider configuration, see Configuring SAML2 Web Single Sign-On.
Update the email address of the user
Follow the steps given below to update the user's email address.
- Return to the WSO2 Identity Server Management Console home screen.
-
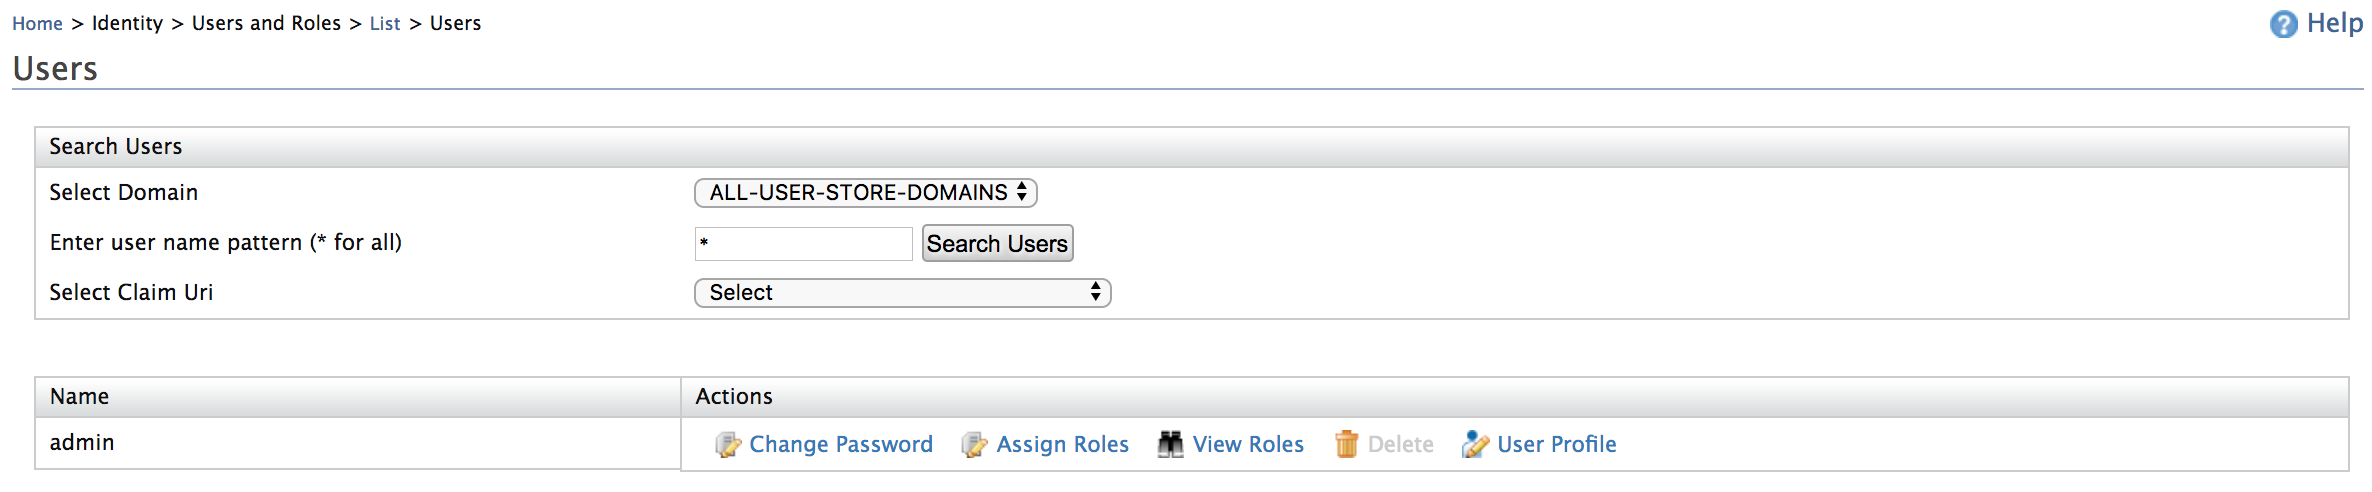
Click List under Add under Main > Identity > Users and Roles.
-
Click Users.

-
Click User Profile under Admin.
-
Update the email address.
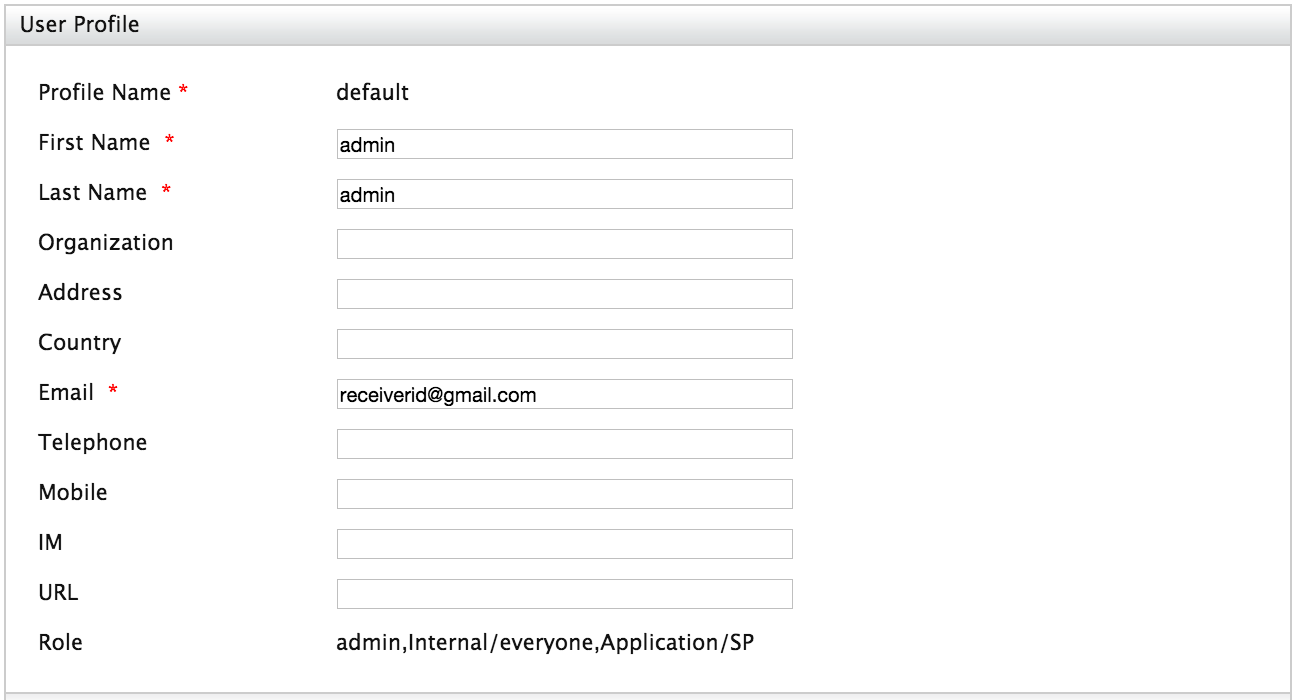
-
Click Update.
-
Test the sample
-
To test the sample, go to the following URL: http://wso2is.local:8080/travelocity.com
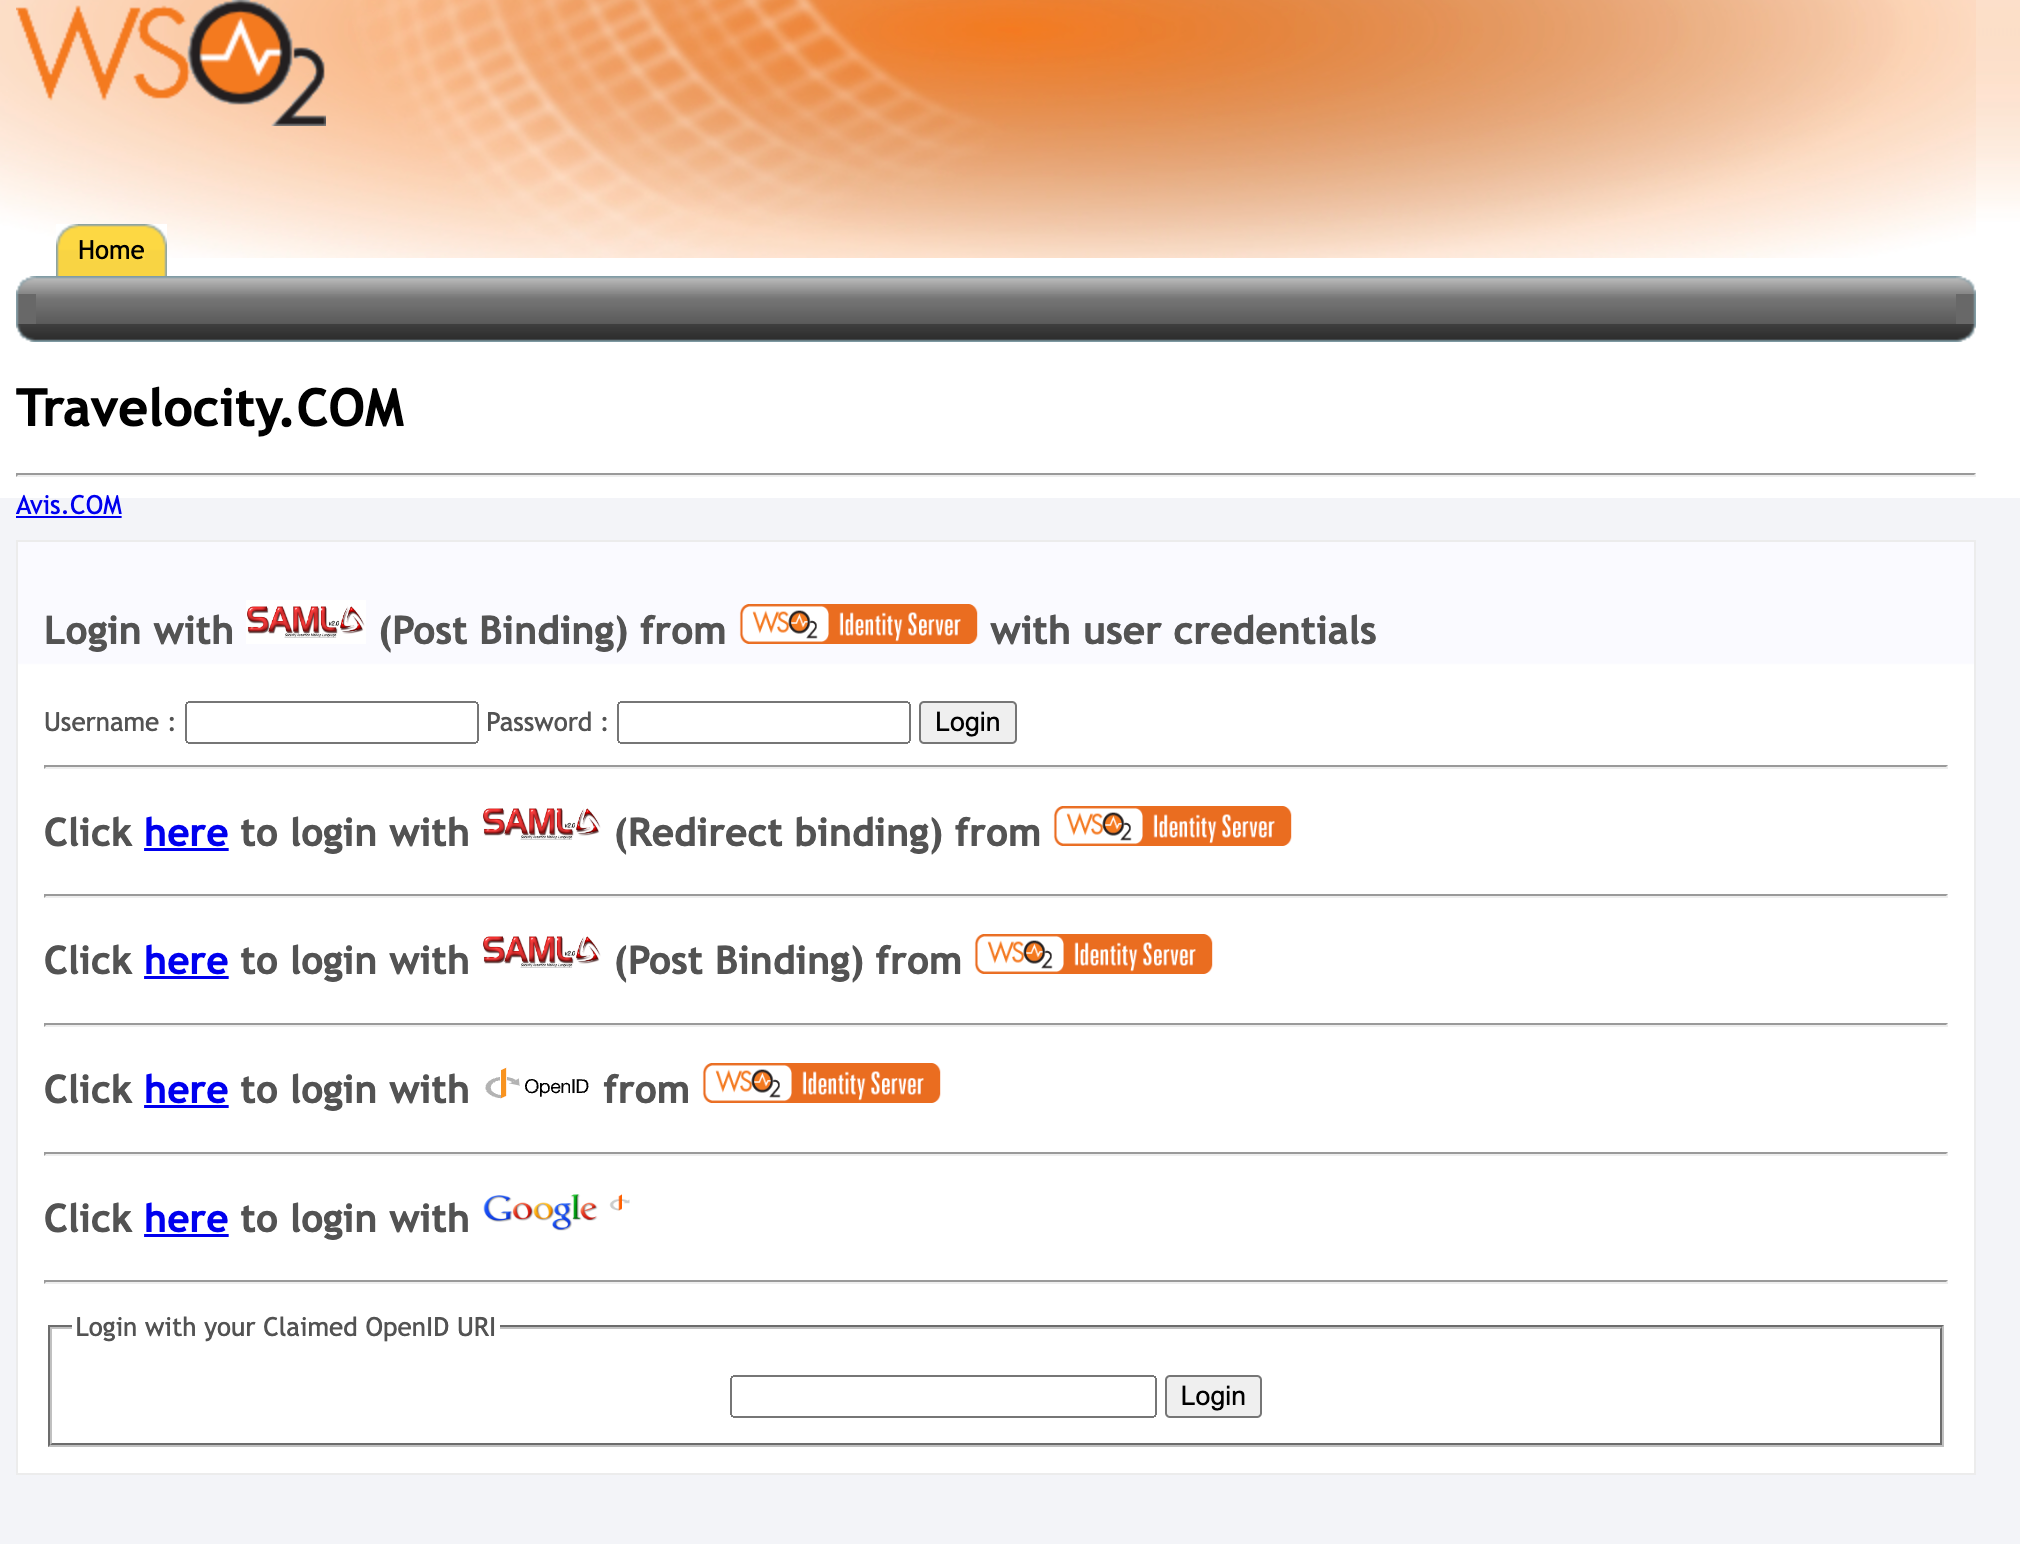
-
Click the link to log in with SAML(Post Binding) from WSO2 Identity Server.
-
The login page will appear and enter the username.
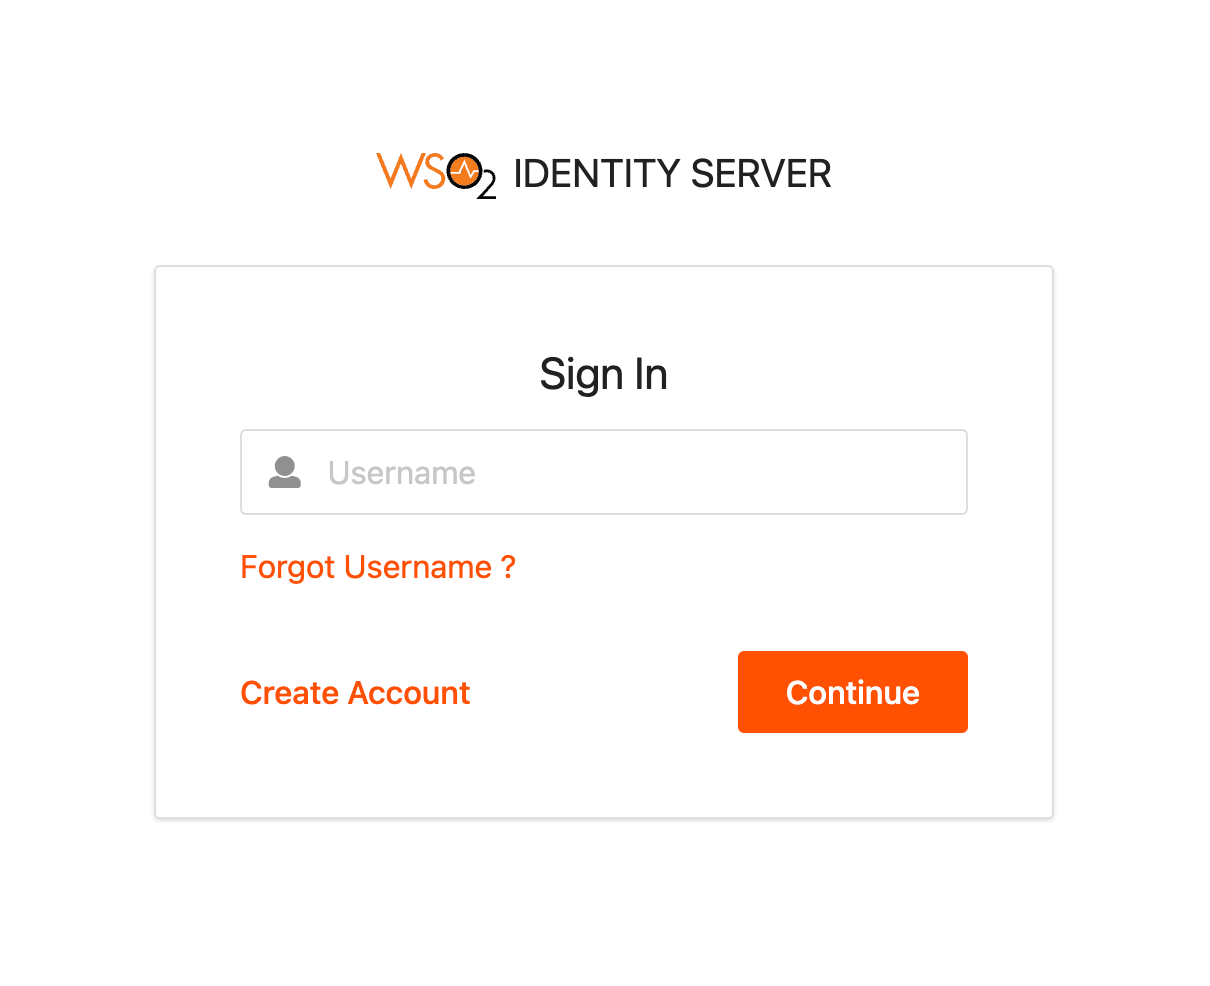
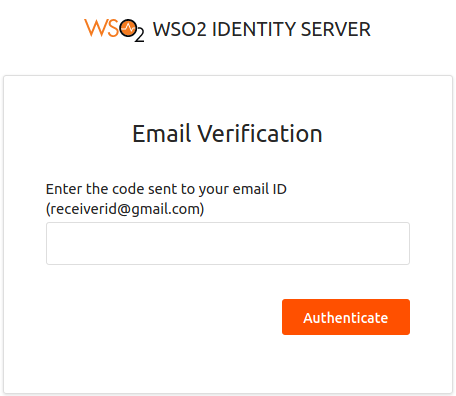
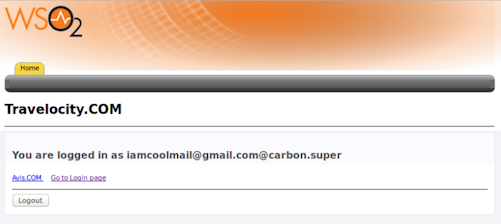
-
You receive a token to your email account. Enter the code to authenticate. If the authentication is successful, you are taken to the home page of the travelocity.com app.