Logging in to Magento using the WSO2 Identity Server
Magento is one of the most popular open-source e-commerce systems in the world. This topic provides instructions on connecting your Magento store with WSO2 Identity Server (WSO2 IS) to enable users to log in to Magento using their WSO2 Identity Server credentials.
Magento doesn't support SAML protocol out of the box and in this tutorial, we're going to use the MiniOrange SAML Single Sign on (SSO) plugin to get support for SAML.
Before you begin!
You need to have Magento 2+ installation to proceed with this tutorial.
Let's get started!
Installing Magento SSO Plugin
-
We need to install a third-party plugin created by MiniOrange. You can download the plugin from here.
-
Extract the downloaded plugin to a temporary folder. Inside the folder, you will find a folder named SP.
-
Go to the Magento installation directory and navigate to app/code.
Note
If you haven’t installed any plugins before, you might not have the code directory inside the app. In that case, go ahead and create it in.
-
Inside the code directory, create a new directory named MiniOrange and copy the SP folder downloaded above, to it. Your folder structure inside the app directory should look similar to the one given below.
app ├── code │ └── MiniOrange │ └── SP -
Now to install the plugin, execute the following command from the Magento root directory.
php bin/magento setup:upgradeNote
For Magento cloud, after installing the module, delete the file magento-root-directory/generated/metadata/global.php.
After the installation is successful, you should see the plugin listed in the Magento admin panel.
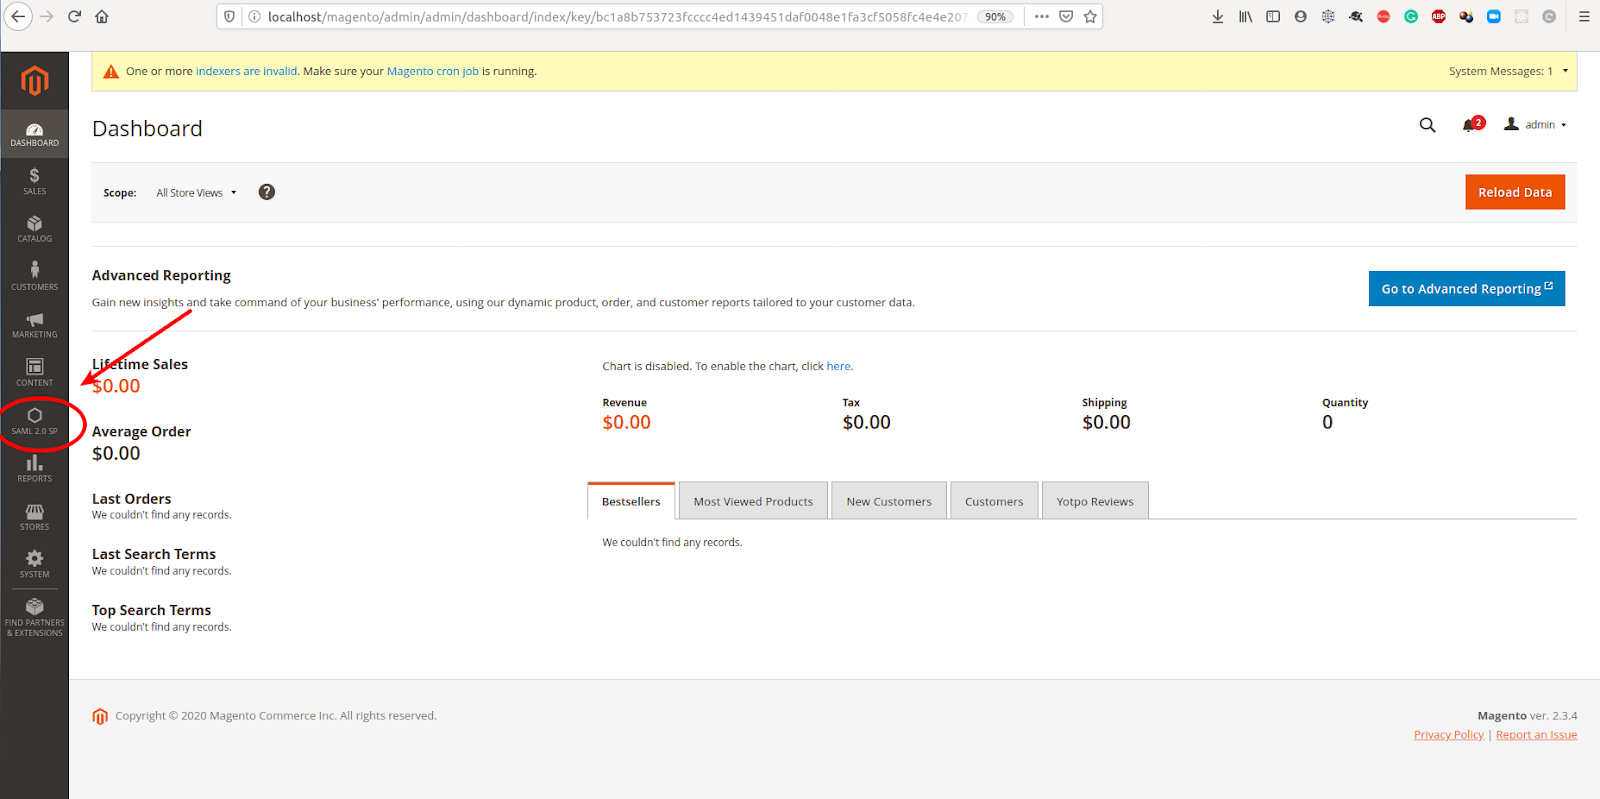
Setting up WSO2 Identity Server
-
As the next step, we need to create a service provider in the WSO2 Identity Server to communicate with Magento. Once the server is started, log in to the management console as the administrator (default credentials admin:admin) and click on Add under Service Providers.
-
Provide a suitable name to the service provider and click Register to complete the process.
-
You’ll be redirected to the edit page of the newly created service provider. Expand the Inbound Authentication Configuration section and then SAML2 Web SSO Configuration and click on Configure to add the SAML related settings.
-
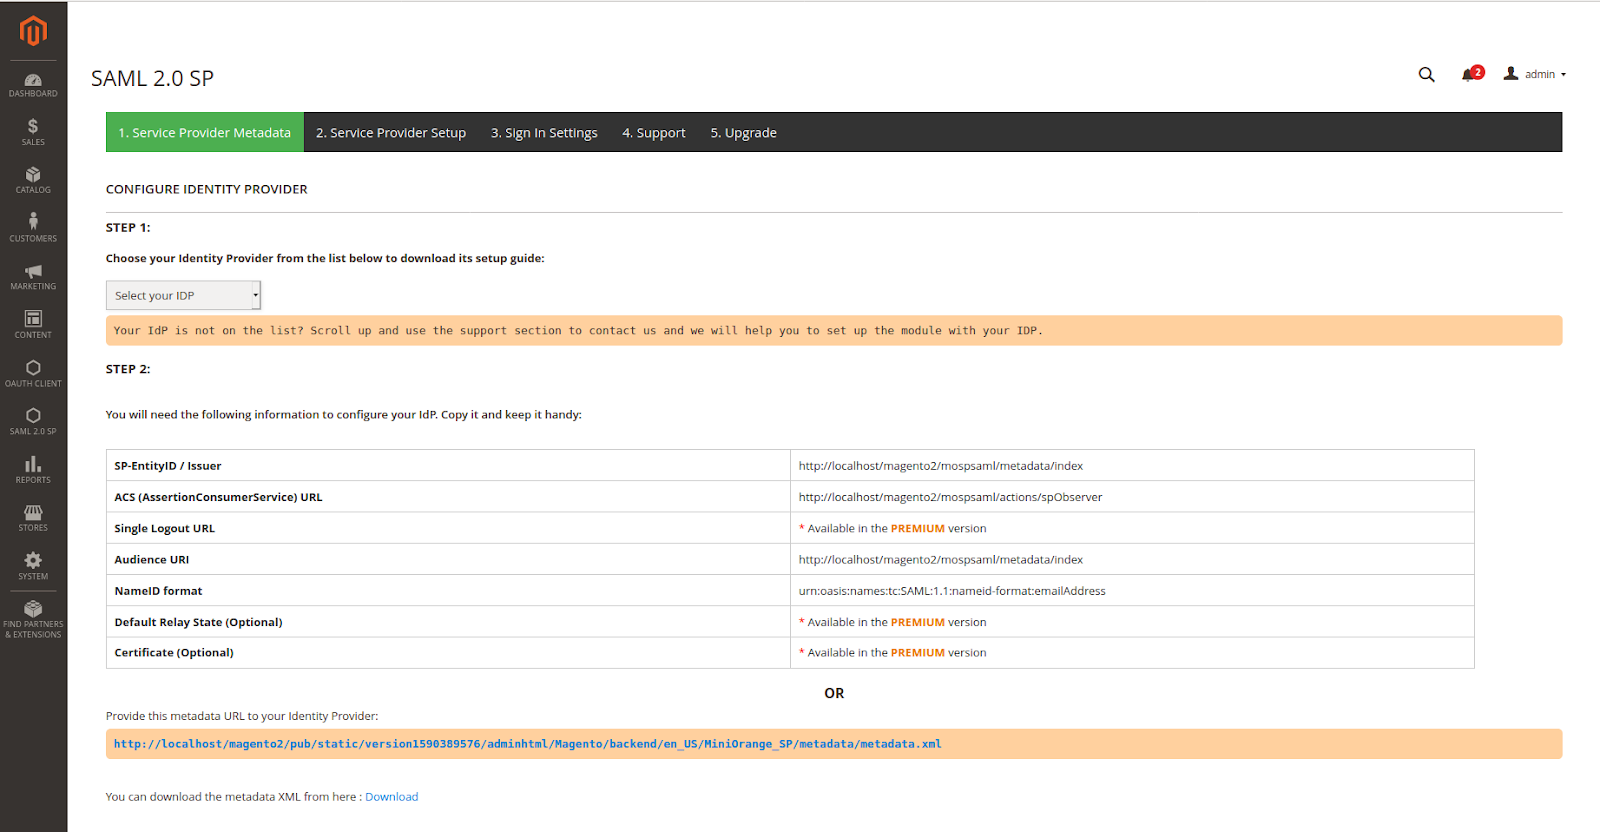
We can extract the values to be filled in this section from the MiniOrange SAML SSO plugin itself. Log in to your Magento admin page and click on the Service Provider Metadata section of the SAML plugin. You should see the configuration values such as issues and ACS URL there.
-
Now go back to Identity Server SP settings and add the following values, which were extracted from the above page.
- Issuer
- Assertion Consumer URL
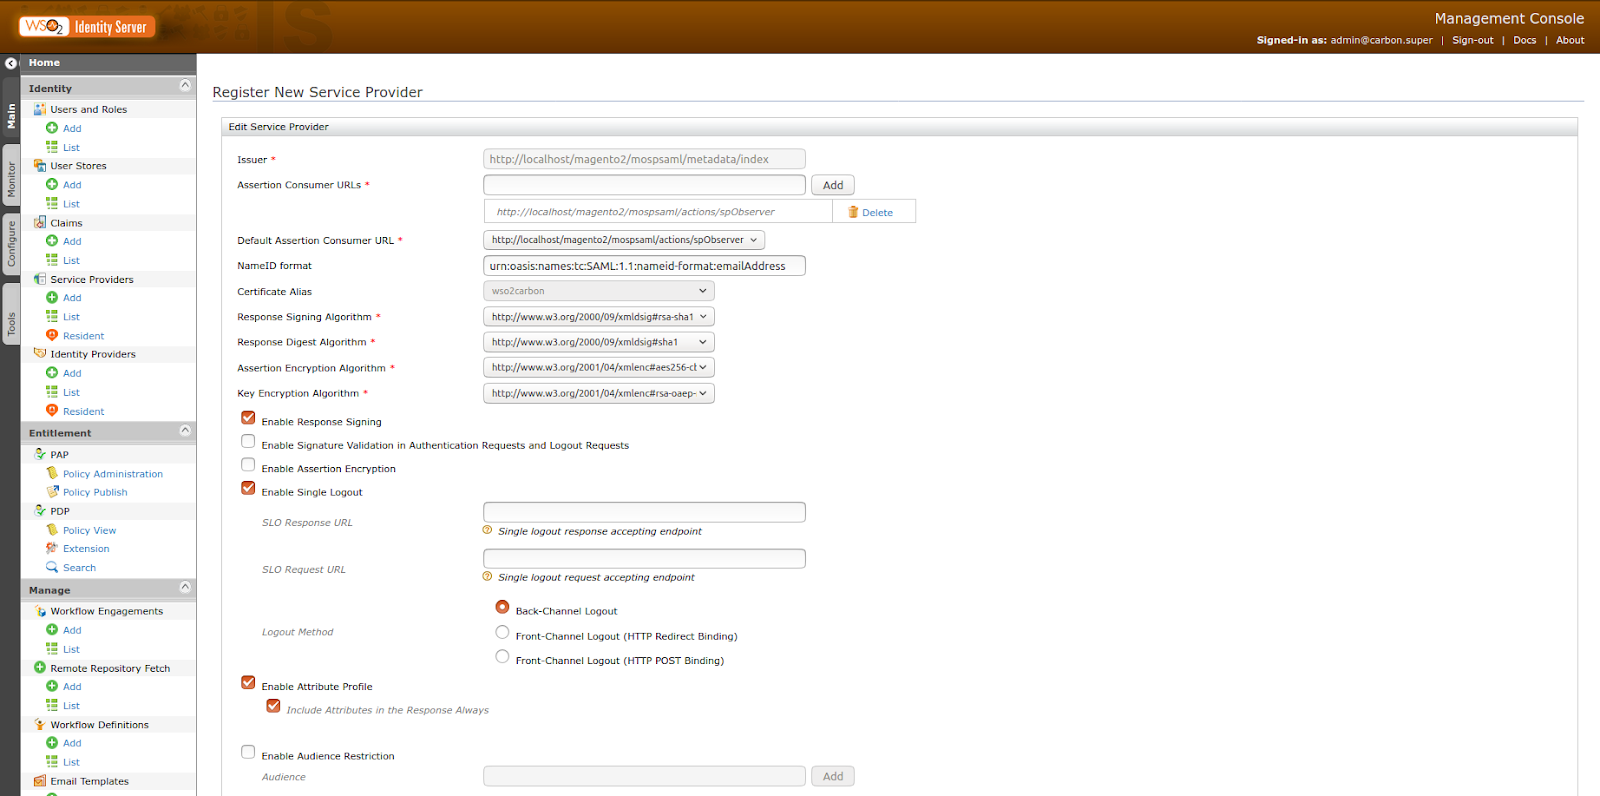
- Untick Enable Signature Validation in Authentication Requests and Logout Requests for the moment.
-
Once completed, the settings page should look similar to this.
-
Click on the Download IDP Metadata button to download the metadata XML file, which we will need when configuring the SAML SSO plugin.
-
Click on the Update button at the bottom to save.
We have one more configuration left to do on the Identity Server side. Magento expects an email as the user identifier and we need to configure our service provider to send the email address as the subject on successful authentication, instead of the username. Expand the Claim Configuration section and set the Subject Claim URI to http://wso2.org/claims/emailaddress.
- Click on the Update to save the configuration.
Configuring MiniOrange SAML SSO Plugin
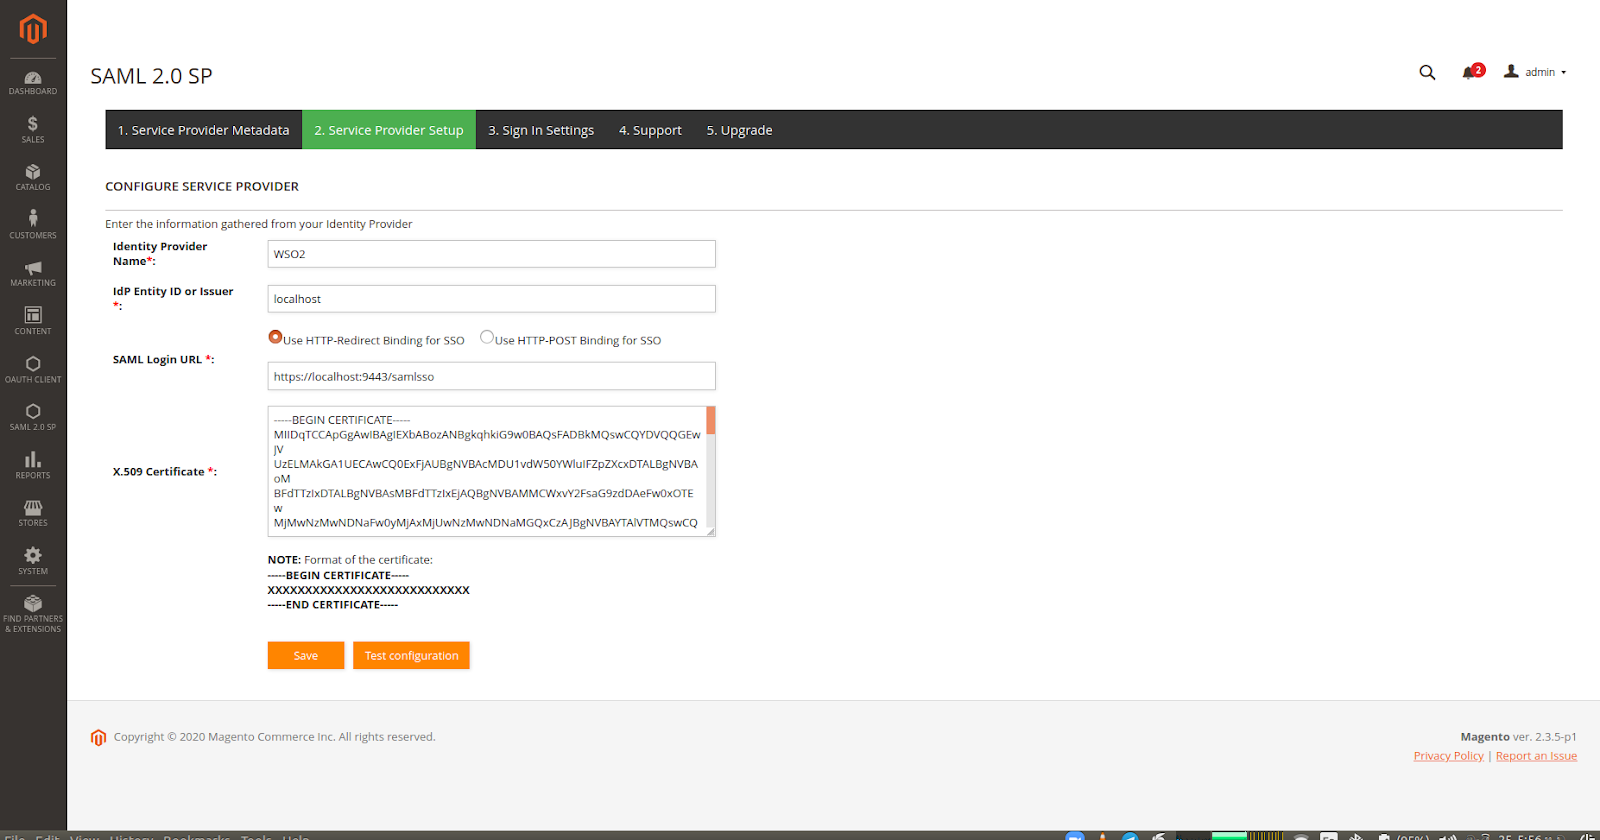
Login to the Magento admin portal and click on the Service Provider Setup option of the SAML plugin. We need to provide the following values on this page to complete the setup.
- Identity Provider Name: WSO2
- This will be used in your Magento login page in the SSO login button, with the text Login with xxx
- IdP Entity ID or Issuer: localhost
- SAML Login URL: https://localhost:9443/samlsso
- X.509 Certificate
- You can extract the certificate from the metadata XML file we downloaded earlier. Make sure to paste the certificate content in between —–BEGIN CERTIFICATE—– and —–END CERTIFICATE—– tags, as instructed.
Once completed, the settings page should look like this.
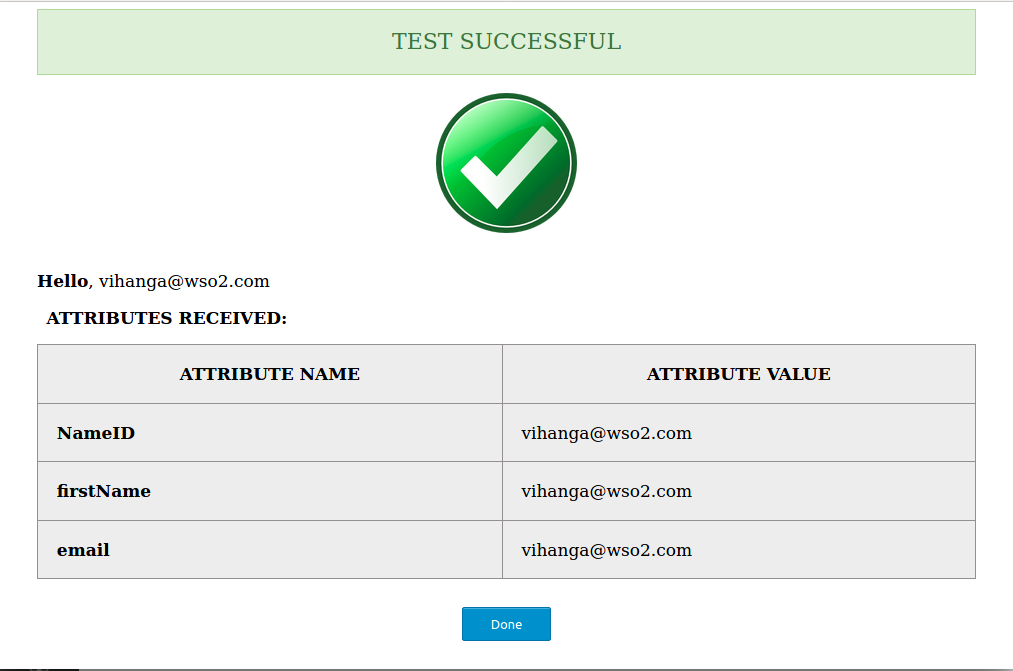
Click on the Test configuration button. This will load the SAML authentication on a new browser window
and you should see the WSO2 Login page as a result. Once login there, you’ll be redirected back to Magento and a
Test Successful screen should appear.
Now Save the configurations added and click on the Sign in Settings tab. Tick the checkbox Show the Login Link on the default customer login page so that the SSO option would be displayed on your Magento login page. Save the configurations and we’re done.
Testing
We need to create a new user in the WSO2 Identity Server to login to your Magento store with SSO. Log in to the Identity Server management console and click on Add under Users and Roles and then select Add New User. Provide a username and a password as appropriate and click on finish.
Since Magento needs the email address of the user, we need to add it to the newly created user’s profile. Click on the User Profile link on the Users page and add an email address to your user.
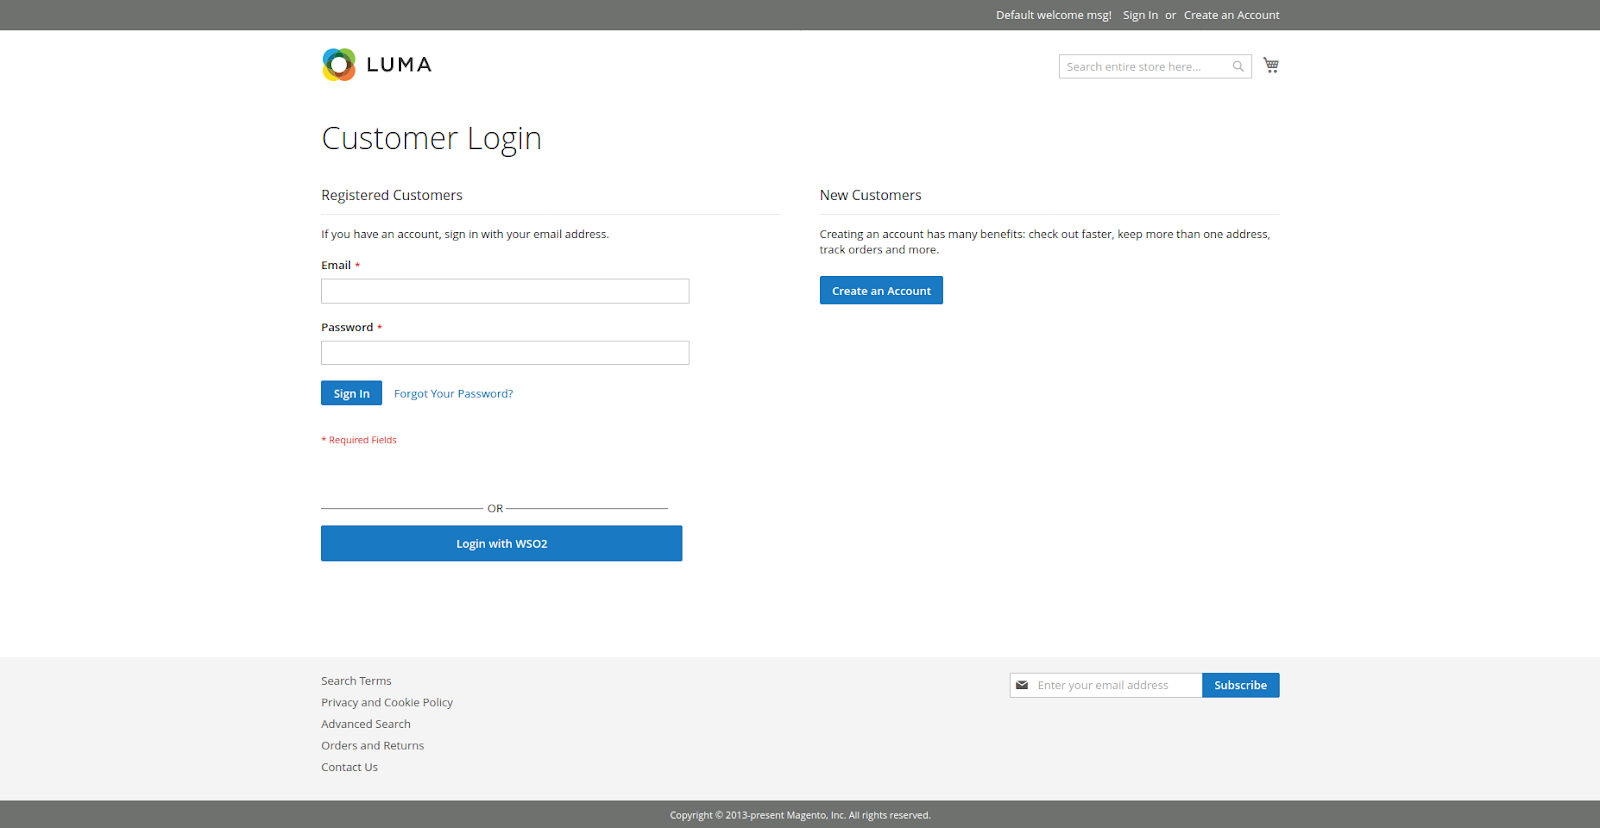
Now access your Magento store and once clicked on Sign in, the Login with WSO2 button should appear as shown below.
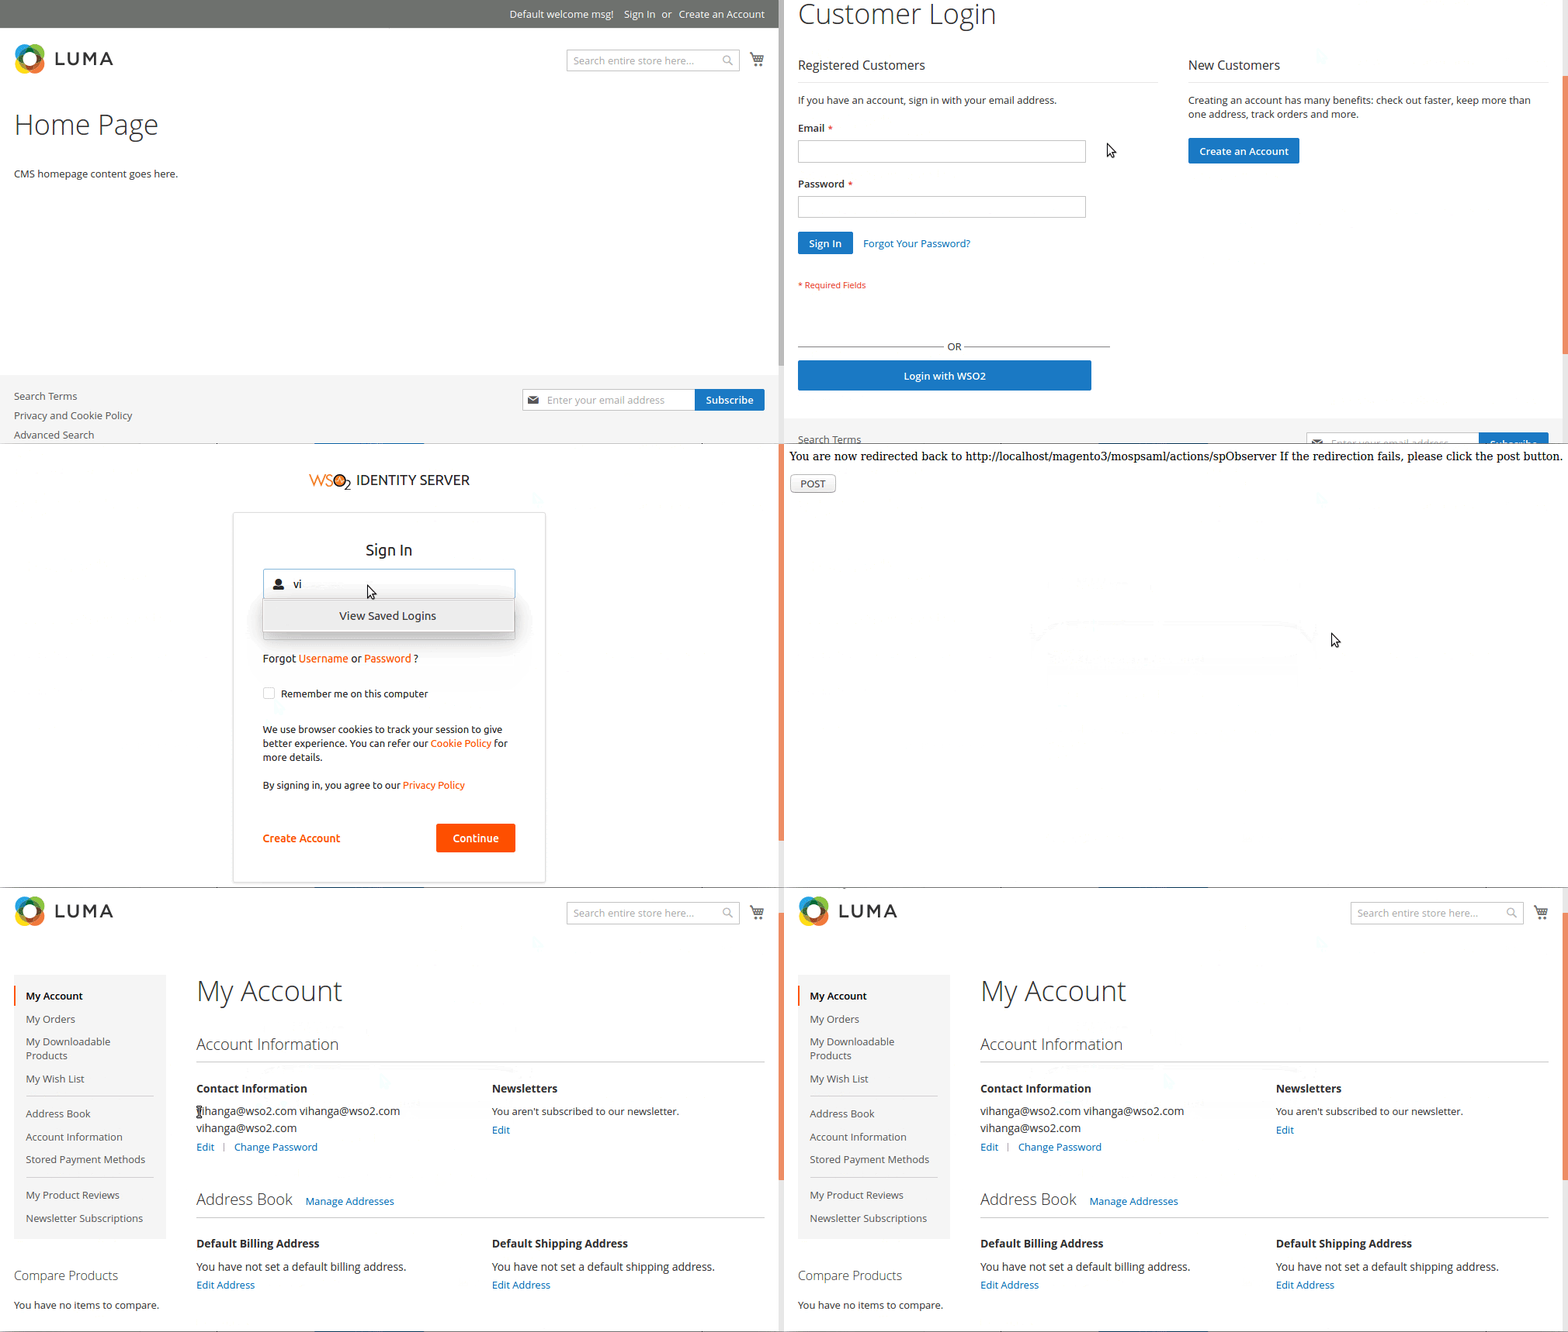
Once clicked on that button, you’ll be redirected to the WSO2 Identity Server login page and you can log in using the credentials of the newly created user.
Troubleshooting
-
You might get the error shown below when accessing the admin pages after plugin installation.
- PHP Fatal error: Uncaught ReflectionException: Class Magento\Framework\App\ResourceConnection\Proxy does not exist…
- Solution: Execute the following commands from the Magento root directory.
sudo chown -R www-data:www-data .
sudo chmod 777 -R var generated app/etc
sudo rm -rf var/cache/* var/page_cache/* var/generation/*
bin/magento setup:di:compile;
-
Admin pages are accessible but the plugin pages are not.
- Solution: Delete the file,
<Magento-root>/generated/metadata/global.php
- Solution: Delete the file,
Limitations
- The free version of the MiniOrange plugin only supports the email attributes of the user. If you need other attributes such as Firstname to be pulled from the Identity server, you need to buy the premium version.
- In the free version of the MiniOrange SAML SSO Plugin, single logout functionality is not available. This means when a user is logged out from your Magento store, he/she will not be logged out from the WSO2 Identity Server.