Authentication for organization APIs
To access the management APIs of organizations in WSO2 Identity Server, you must first get an access token from your organization for the API operations you want to execute. You can then use this access token to invoke those API operations securely.
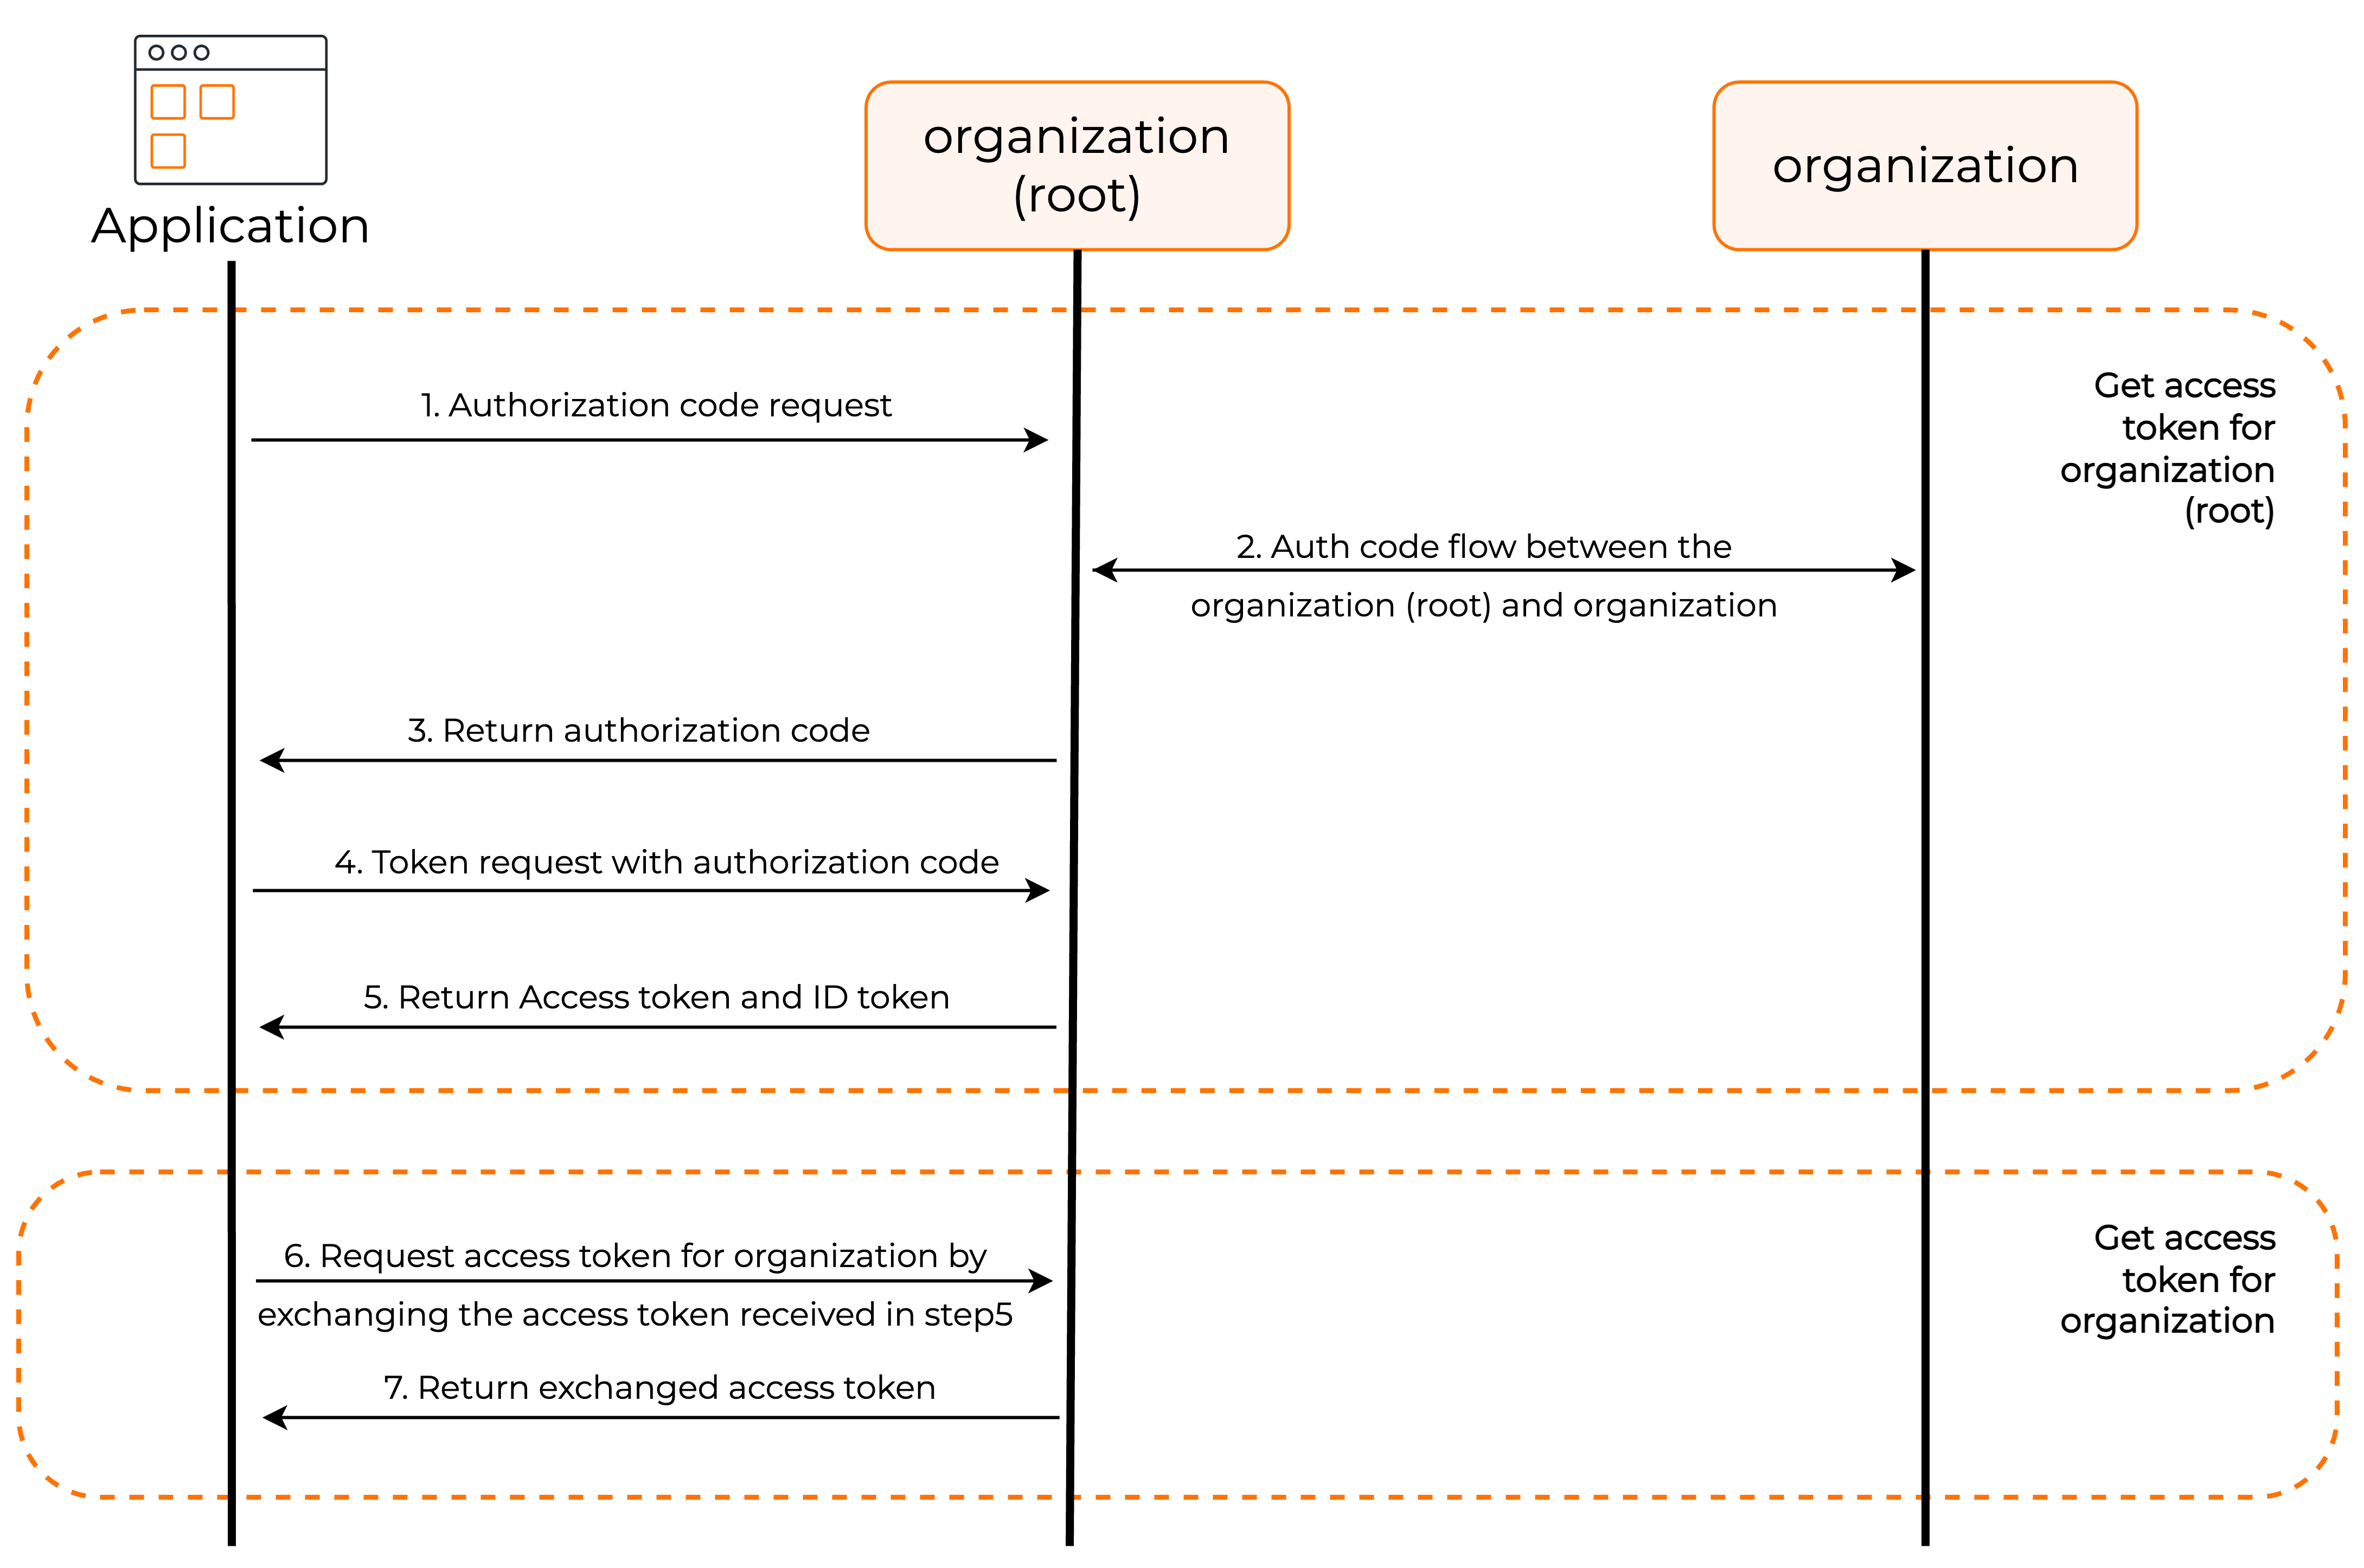
The following is a high-level diagram of how to authenticate to organization APIs.

Follow the steps given below to get an access token with the required permissions.
- Register an OIDC application
- Authorize APIs to application
- Request for authorization code
- Request an access token against the organization (root)
- Request an access token against the organization
Register an OIDC application
Use the standard-based app type to register an OIDC app:
- On the WSO2 Identity Server Console, go to Applications.
-
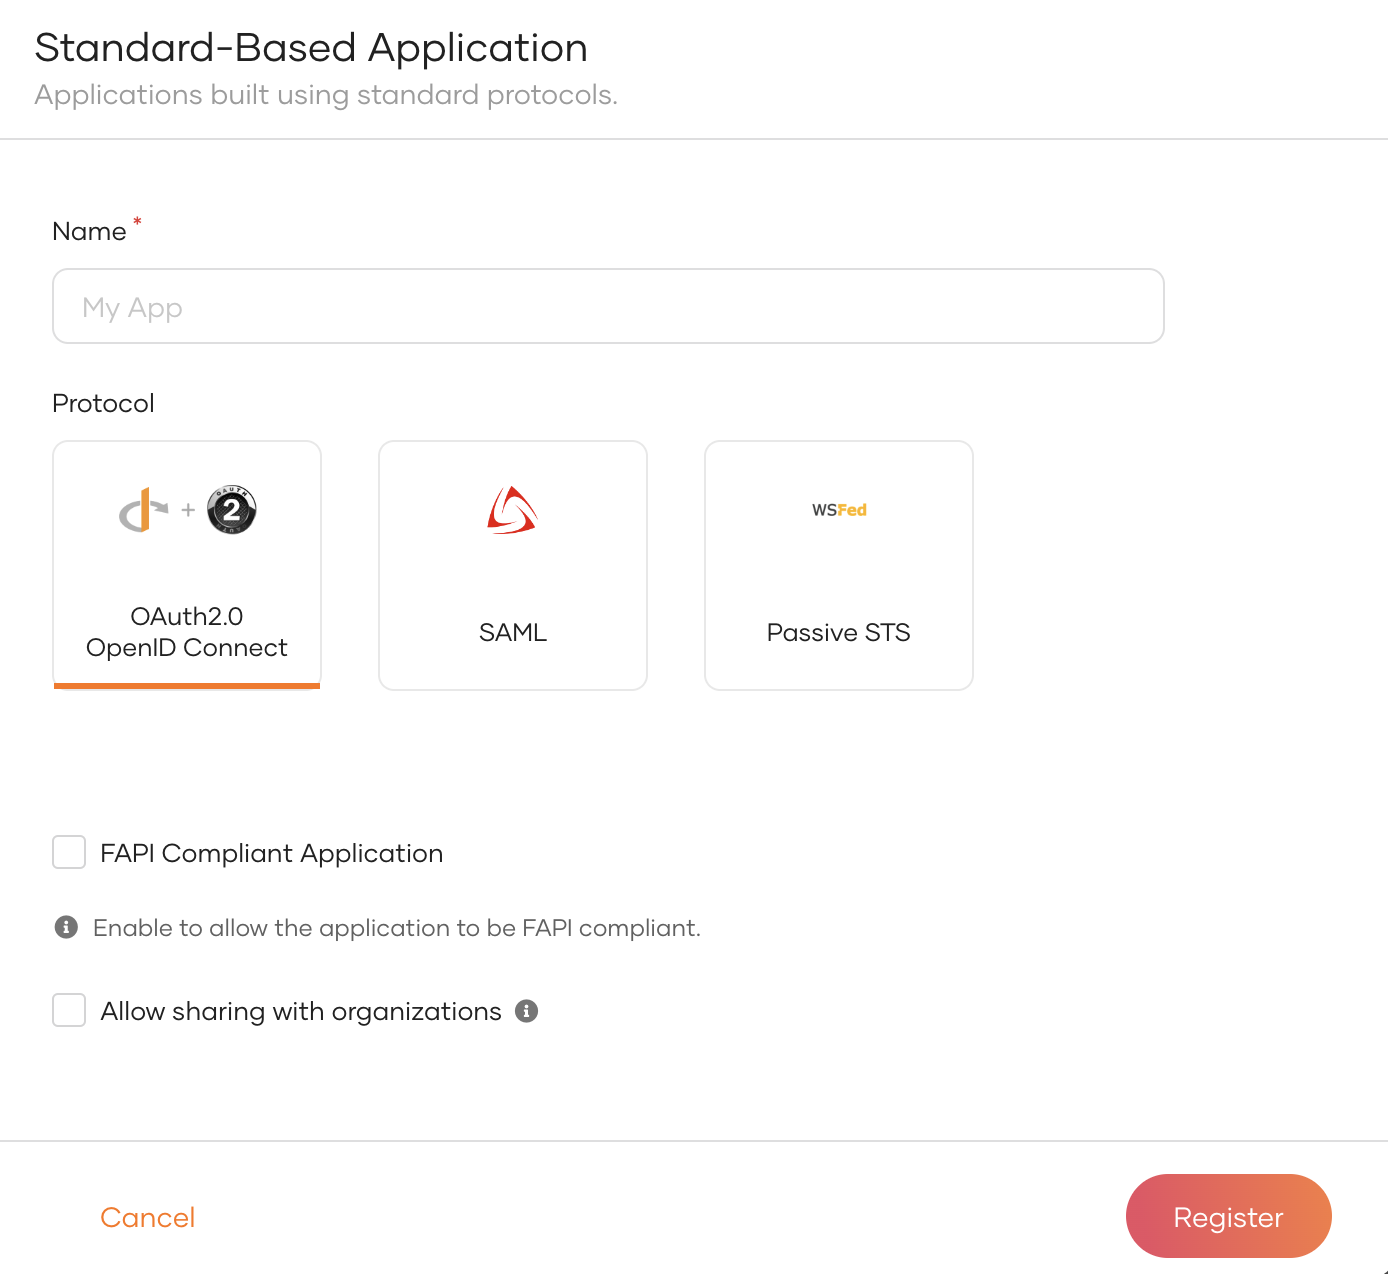
Click New Application and select Standard-Based Application to open the following:

-
Provide an application name.
-
Select OIDC Standard-Based Application as the application type.
Note
Learn more about OIDC configurations.
-
Click Register to complete the registration.
- Click Share Application to share the application with organizations.
- Go to the Protocol tab and select Authorization Code and Organization Switch as the grant types for the application.
- Configure Authorized redirect URLs.
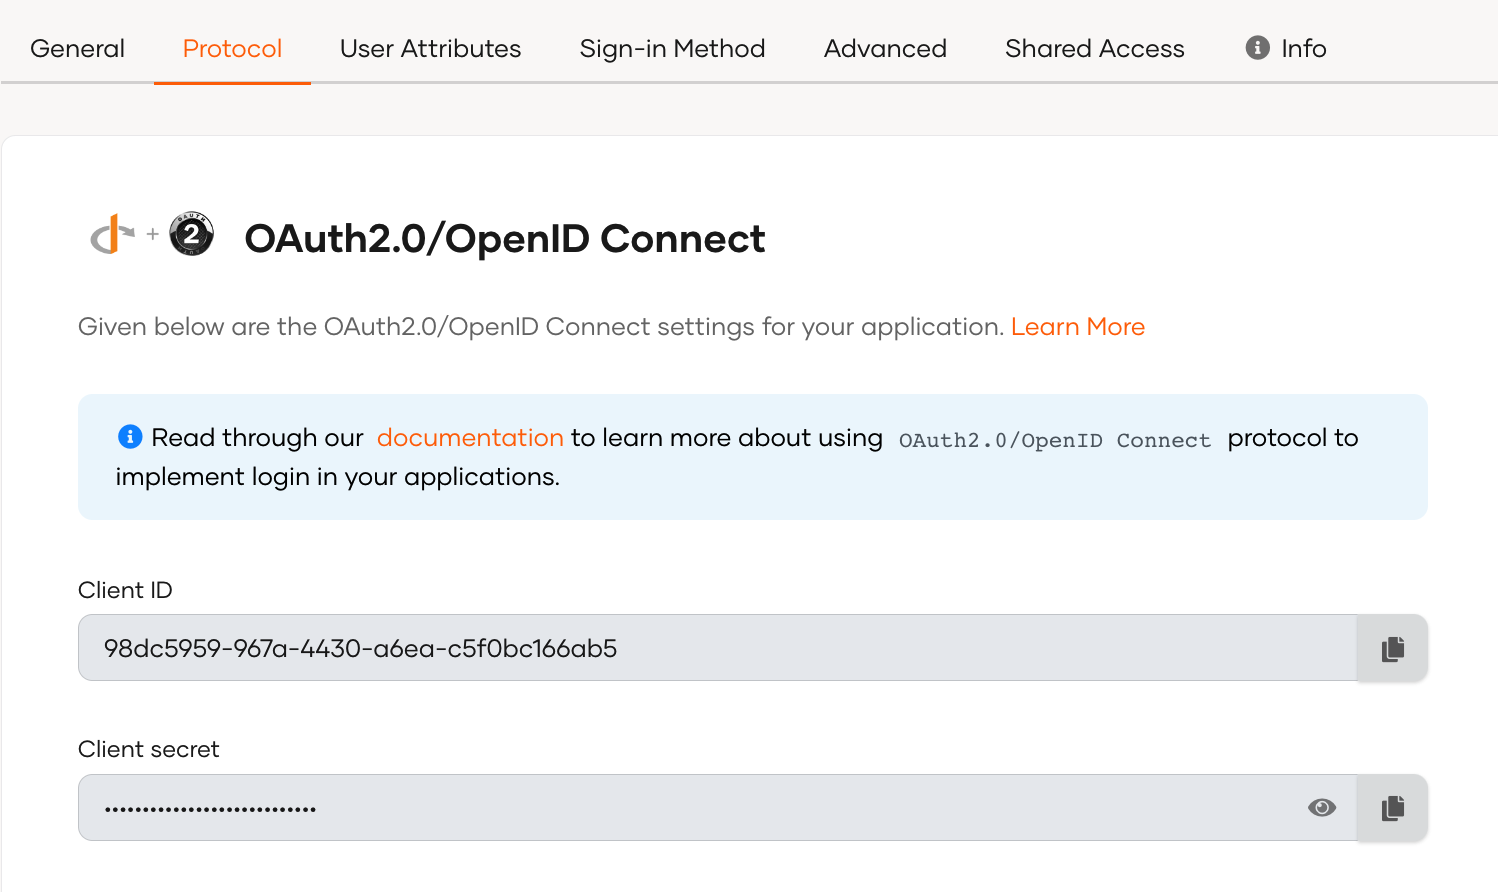
The client credentials for your application are displayed in the protocol tab, as shown below.

Note
The client ID and client secret are sensitive information that must be protected. See the best practices before you proceed.
Authorize APIs to application
- Go to the Authorized API tab of the created application.
- Authorize the organization APIs you intend to invoke.
Note
Learn more about Authorize API to application.
Assign roles to application
- Go to the Roles tab of the created application.
- Select Role Audience and associate roles with the necessary permissions for API invocation.
Note
The user seeking authentication must possess the necessary privileges to invoke APIs within the organization. This user should be a member of a role that has the required permissions, and this role should be associated with the application in the organization that accesses the API.
Get the authorization code
First, your application must initiate a login request to the authorization endpoint of WSO2 Identity Server. After redirecting to WSO2 Identity Server, the user should be prompted with a login page if the user is not authenticated.
Request Format
https://localhost:9443/oauth2/authorize?response_type=code&redirect_uri={redirect_uri}&client_id={client_id}
| Request Parameter | Description |
|---|---|
response_type |
Required grant type. Use code to represent the authorization code grant type. |
redirect_uri |
This is where the response is redirected to at the end of the process. This needs to be the same as one of the URLs given in the registered apps. |
client_id |
The client ID obtained when registering the application in WSO2 Identity Server. |
Get access tokens
In this flow, the application needs to get tokens for the organization and exchange the obtained token to get an access token for the organization.
Let's see how this works:
Step 1: For the organization (root)
After receiving the authorization code, the application has to exchange it to get the tokens given below:
access_tokenid_token
The application has to provide its credentials and get the tokens.
Token request
curl --location --request POST 'https://localhost:9443/oauth2/token' \
--header 'Content-Type: application/x-www-form-urlencoded' \
--data-urlencode 'code=<authorization_code>' \
--data-urlencode 'grant_type=authorization_code' \
--data-urlencode 'client_id=<client_id>' \
--data-urlencode 'client_secret=<client_secret>' \
--data-urlencode 'redirect_uri=<redirect_uri>'
This token request has the following parameters:
| Request Parameter | Description |
|---|---|
code |
The authorization code received from the authorization request. |
grant_type |
The grant type. Here we are using the authorization_code grant. |
redirect_uri |
This is where the response is redirected to at the end of the process. |
Step 2: For the organization
You can now request an access token from the token endpoint by exchanging the access token of the organization (root) and specifying the internal scopes (permission level) you require to access the API.
Note
See the relevant API reference docs for the list of internal scopes for each API.
Use the following cURL command format in your request:
curl -X POST \
'https://localhost:9443/oauth2/token' \
--header 'Authorization: Basic <base64 Encoded (clientId:clientSecret)>' \
--header 'Content-Type: application/x-www-form-urlencoded' \
--data-urlencode 'grant_type=organization_switch' \
--data-urlencode 'token=<access token from step 1>' \
--data-urlencode 'scope=<required scopes>' \
--data-urlencode 'switching_organization=<organization id>'
Replace the following variables in the above request.
| Variable | Description |
|---|---|
client_id |
Client ID of your application. This is generated when registering the application in WSO2 Identity Server. |
client_secret |
Client secret of your application. This is generated when registering the application in WSO2 Identity Server. |
token |
The access token obtained for the root organization. |
scope |
The scope corresponding to the API you want to use. See the relevant API reference docs for the list of internal scopes for each API. |
switching_organization |
The organization ID of the organization you are switching to. |
Best practices
When invoking the management APIs, we recommend the following best practices:
- If the
client_idandclient_secretare compromised, anyone can use them to invoke the client credentials grant and get an access token with all the access levels of the admin. Therefore, we highly recommend not sharing the client id and client secret. - If required, the administrator can set a higher expiry time for the application token through the application configurations in the WSO2 Identity Server Console.
- When you request an access token, be sure it is specific to the scopes required for a specific task. This allows you to mitigate the risk of token misuse when you share it with other developers.