Try a B2B use case
The following guide is a complete end-to-end use case on how to manage B2B (Business-to-Business) applications in WSO2 Identity Server.
Scenario
-
Happy Tails Veterinary Clinic is a veterinary institution that wants a unified platform to perform its internal operations, such as managing doctors and staff, and external operations, such as scheduling appointments and facilitating doctor channeling for pet owners.
-
To meet these needs, Happy Tails uses the Pet Care application which has integrated WSO2 Identity Server to fulfill its identity and access management needs.
-
Pet Care application supports personalized experiences based on the role assigned to the user.
- Administrators can manage users, assign roles, configure enterprise Identity Providers (IdPs), and customize login flows for their organization.
- Doctors can manage appointments, view pet information, update medical records, and communicate with pet owners.
- Pet Owners can book appointments, manage their pets' profiles, and view their appointment history.
As an administrator of Pet Care, you are tasked with implementing this scenario. The following guides explain how you can use WSO2 Identity Server to achieve this.
Onboard the organization
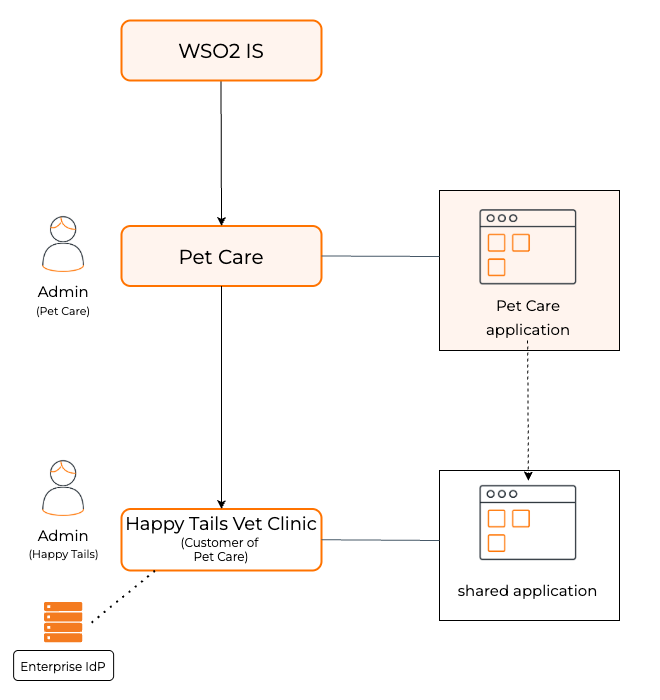
Pet Care, as the service provider, is the root organization of this business. Happy Tails, as a customer of Pet Care, is a child organization of Pet Care.
Follow the create an organization guide and create this organization hierarchy.
Create the API resources
Pet Care application uses many API resources for its functionality. Users, based on the role, should be able to perform various actions on these API resources as permitted by the role. To provide correct access control to these API resources, we need to first define these API resources and actions in WSO2 Identity Server.
Note
Learn more about API authentication.
To do so,
-
On the WSO2 Identity Server Console, go to API Authorization.
-
Click New API Resource and add the following API resources and permissions (scopes).
Display Name Identifier Permissions (Scopes) Channel Service http://localhost:9091- list_doctors
- create_doctor
- view_doctor
- update_doctor
- delete_doctor
- list_bookings
- view_appointment
- view_profile
- create_bookings
- view_booking
- update_booking
- delete_booking
- view_org_info
- update_org_info
Pet Management Service http://localhost:9092- list_pets
- create_pet
- view_pet
- update_pet
- delete_pet
- view_user_settings
- update_user_settings
Personalization Service http://localhost:9093- create_branding
- update_branding
- delete_branding
Register the application
The next step is to integrate the Pet Care application with WSO2 Identity Server. To do so,
Step 1: Register the application
To register the application,
-
Log in to the root organization.
-
Register a standard-based application in your root organization with the following settings:
Application Name Add a name for the application. Pet Care AppProtocol The authentication protocol to use. OpenID ConnectAuthorized redirect URLs WSO2 Identity Server sends the authorization code to this URL and once users logout, they will be redirected to this URL. http://localhost:3002/api/auth/callback/wso2isAdminhttp://localhost:3002
Step 2: Share the application with organizations
When you share an application with your child organizations, Sign In with SSO appears as a login option in the application. Child organization users can then use this option to successfully log in to the application.
Follow the instructions in share applications with organizations and share the application with the Happy Tails organization.
Step 3: Configure the application
The following configurations are essential for the application to work seamlessly with child organization logins. You can find these settings by navigating to the Applications section and selecting the registered application.
Protocol Configurations
-
Go to the Protocol tab of the application, and configure the following values.
Allowed Grant Types Select the following grant type: - Code
- Refresh Token
- Organization Switch
Authorization Redirect URLs The URLs to which the authorization code is sent upon authentication and where the user is redirected upon logout. http://localhost:3002/api/auth/callback/wso2isAdminhttp://localhost:3002
Allowed Origins Enter the allowed origins. http://localhost:3002Public Client Enable the application as a public client. Access Token Type Select JWTas the access token type. -
Click Update and take note of the
client_idandclient_secretgenerated for your application.
User Attribute Configurations
-
Go to the User Attributes tab of the application.
-
Mark the following attributes as mandatory so that users are required to have values for them. If not, users are asked to enter the values during log in:
EmailFirst NameLast NameRoles
-
Click Update to save the changes.
Authorize API Resources
In this step, we will provide access for the application to consume API resources. This includes the custom API resources we defined above and other standard API that is required for the functionality of the application.
-
Go to the API Authorization tab of the application.
-
Click on Authorize an API Resource.
-
Authorize the application to consume all the API resources and permissions that we defined in the Create the API resources step.
-
Additionally, authorize the application to consume the following standard APIs and all of the corresponding permissions (scopes).
Important
Standard APIs come in two types:
- Management APIs govern B2C use cases.
- Organization APIs govern B2B use cases.
Be sure to select the corresponding organization API for the following APIs. Refer to the API documentation for more details.
API Resource Endpoint SCIM2 Users API /o/scim/UsersSCIM2 Roles API /o/scim2/RolesSCIM2 Groups API /o/scim2/GroupsIdentity Provider Management API /o/api/server/v1/identity-providersApplication Management API /o/api/server/v1/applicationsClaim Management API /o/api/server/v1/claim-dialectsBranding Preference Management API /o/api/server/v1/branding-preferenceChannel Service API http://localhost:9091Pet Management Service API http://localhost:9092Personalization Service API http://localhost:9093
Role Configurations
The application should support three distinct roles: Administrator, Doctor, and Pet Owner. Each role will have different levels of access to API resources, ensuring that each user receives a personalized user experience tailored to their specific use cases.
Note
Learn more about roles in manage roles.
To create these roles,
-
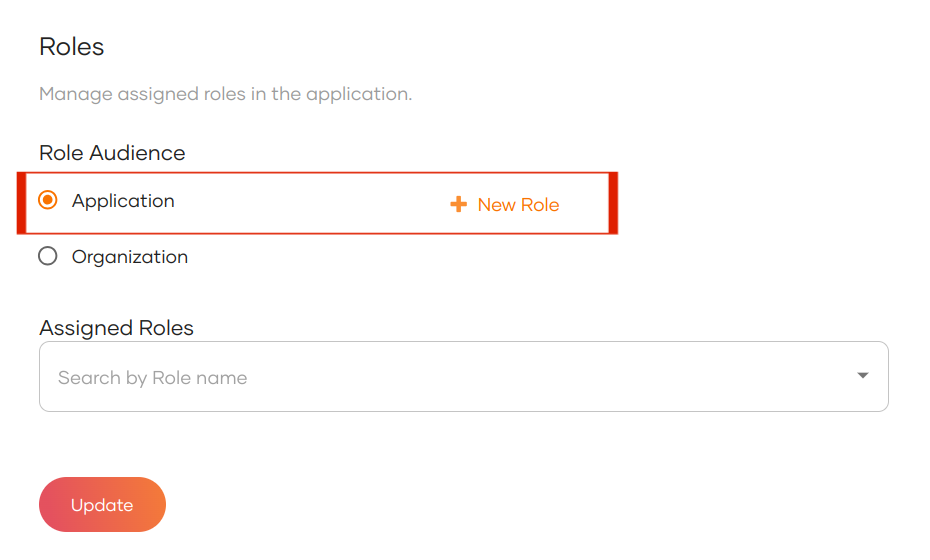
Navigate to the Roles tab of the application.
-
Select the Role Audience as Application and click New Role.
-
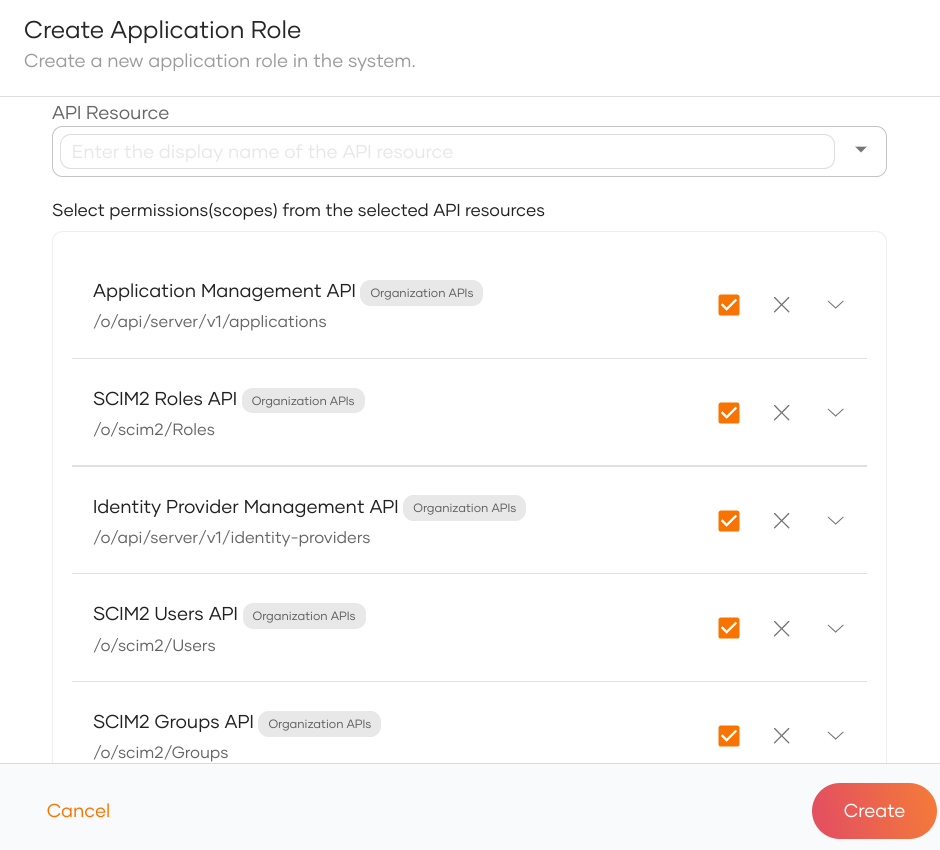
Create the following application roles and assign the corresponding permissions (scopes):
Role Name API Resource Authorized Scopes pet-care-adminSCIM2 Users API All Scopes SCIM2 Roles API All Scopes SCIM2 Groups API All Scopes Identity Provider Management API All Scopes Application Management API All Scopes Claim Management API All Scopes Branding Preference Management API All Scopes Channel Service API - list_doctors
- view_org_info
- update_org_info
- create_doctor
Personalization Service API - create_branding
- update_branding
- delete_branding
pet-care-doctorChannel Service API - view_profile
- list_bookings
- view_doctor
- update_doctor
Pet Management Service API - list_pets
pet-care-pet-ownerChannel Service API - list_bookings
- list_doctors
- view_doctor
- create_bookings
Pet Management Service API - create_pet
- view_pet
- list_pets
-
After entering the role names and assigning the appropriate API resources and scopes, click Create.
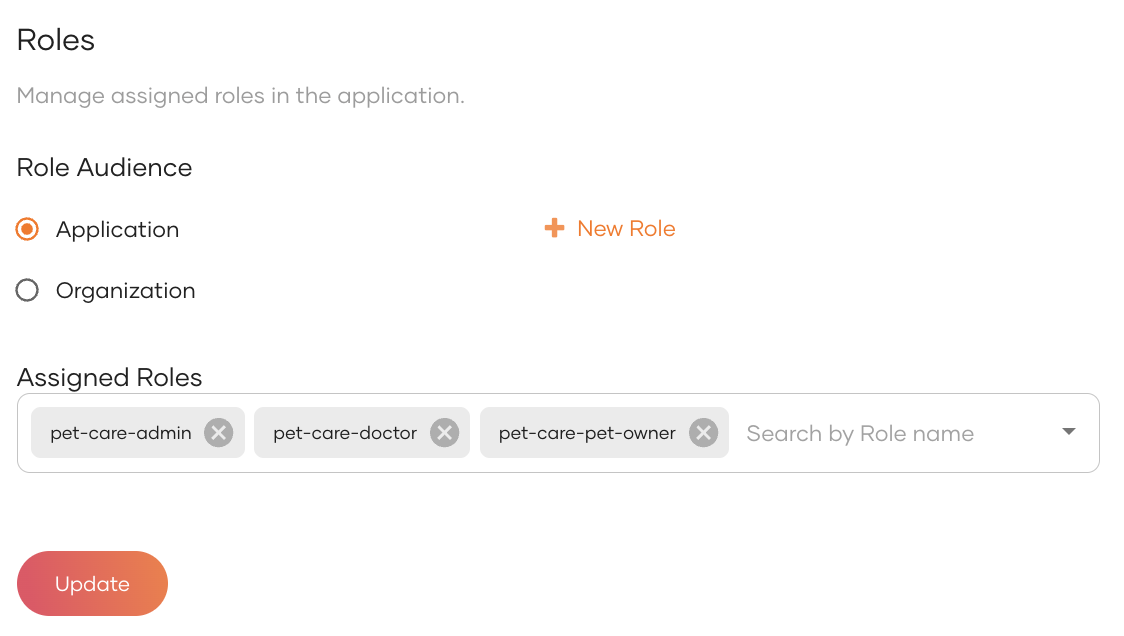
-
Upon successful creation, the new application roles will appear under the Assigned Roles list.
Step 4: Create a user and assign the administrator role
Now that we have configured the application and have shared the application with the Happy Tails organization, it is time for us to create an administrator for the Happy Tails child organization. This administrator is responsible for managing the Happy Tails organization.
To do so,
-
On the WSO2 Identity Server Console, navigate to Organizations and switch to the Happy Tails organization.
-
On the organization Console, navigate to User Management > Users.
-
Click Add User and create a user.
- Username:
[email protected] - Email:
[email protected] - Password: Set a secure password or use the autogenerated option.
- Username:
-
Click Create.
-
From the organization Console, navigate to User Management > Roles.
-
Click on the
pet-care-adminadministrator role you created earlier and go to its Users tab. -
Click Assign Users, select the created user and click Assign.
Now that we assigned the pet-care-admin role to the [email protected] user, this user can log in to the Pet Care admin portal and manage the Happy Tails organization's users, applications, and configurations.
Step 5: Configure Branding for the organization
The Happy Tails organization administrator can now customize the login screens of the organization to align with the Pet Care application's theme.
To do so,
- On the Happy Tails organization's Console, navigate to Branding > Styles & Text.
- Go to the Design tab.
-
Expand the Images section and set the following:
-
Logo URL:
https://user-images.githubusercontent.com/35829027/241967420-9358bd5c-636e-48a1-a2d8-27b2aa310ebf.png -
Logo Alt Text:
Pet Care App Logo -
Favicon URL:
https://user-images.githubusercontent.com/1329596/242288450-b511d3dd-5e02-434f-9924-3399990fa011.png
-
-
Expand the Color Palette section and set:
- Primary Color:
#4f40ee
- Primary Color:
This customizes the login and self-service UIs to match the Pet Care application's branding.
Set up the client applications
Before you begin
- Install Ballerina 2201.5.0
- Install Node.js v16 LTS (Tested with v16.13.0)
Step 1: Clone the repository
Clone the samples-is GitHub repository to your local machine. The Pet Care sample application is available under the petcare-sample directory.
Step 2: Deploy the API Services
Let's now run each of the services of the Pet Care application. In each of the commands below, <SAMPLES_HOME> refers to the root directory of the cloned repository.
To do so, run each of the following services in a separate terminal:
-
To start the Channel Service, navigate to the
<SAMPLES_HOME>/petcare-sample/b2b/web-app/petvet/apis/ballerina/channel-servicedirectory and run, -
To start the Pet Management Service, navigate to the
<SAMPLES_HOME>/petcare-sample/b2b/web-app/petvet/apis/ballerina/pet-management-servicedirectory and run, -
To start the Personalization Service, navigate to the
<SAMPLES_HOME>/petcare-sample/b2b/web-app/petvet/apis/ballerina/personalization-servicedirectory and run,
Note
By default, the services store data in memory. Alternatively, you can connect them to a MySQL database. To do so,
-
Create a
Config.tomlfile in the root folder of each service. -
Add the following DB configurations to each of the files:
The SQL schemas are available at: <SAMPLES_HOME>/petcare-sample/b2b/web-app/petvet/dbscripts
Step 3: Set Up the Frontend Application
To set up the frontend application,
-
Navigate to the
<SAMPLES_HOME>/petcare-sample/b2b/web-app/petvet/web/nextjs/apps/business-admin-appdirectory. -
Create a
.envfile and add the following environment variables to it:NEXTAUTH_URL=http://localhost:3002 BASE_URL=https://localhost:9443 BASE_ORG_URL=https://localhost:9443/t/<PRIMARY_ORG_HANDLE> CHANNELLING_SERVICE_URL=http://localhost:9091 PET_MANAGEMENT_SERVICE_URL=http://localhost:9092 PERSONALIZATION_SERVICE_URL=http://localhost:9093 HOSTED_URL=http://localhost:3002 SHARED_APP_NAME="Pet Care App" CLIENT_ID=<CLIENT_ID_OF_PET_CARE_APP> CLIENT_SECRET=<CLIENT_SECRET_OF_PET_CARE_APP> NODE_TLS_REJECT_UNAUTHORIZED=0
Step 4: Start the Application
To start the application,
-
Navigate to
<SAMPLES_HOME>/petcare-sample/b2b/web-app/petvet/web/nextjsdirectory which is the root directory of the frontend application. -
Run the following commands:
-
Visit the application at http://localhost:3002
Tip
Use the following URL to directly access the login page of an organization.:
http://localhost:3002?orgId=<suborg_Id>
Try it out
The following sections show how the application log in experience looks like and how the experience changes for users logging in with each of the three roles of the application; administrators, doctors, and pet owners.
Try out sign-in with SSO
Follow the steps below to see how organization login works for a user in the Happy Tails organization when accessing the Pet Care application.
-
Navigate to
http://localhost:3002/in your browser.
-
Click Sign In to navigate to the WSO2 Identity Server login screen.
-
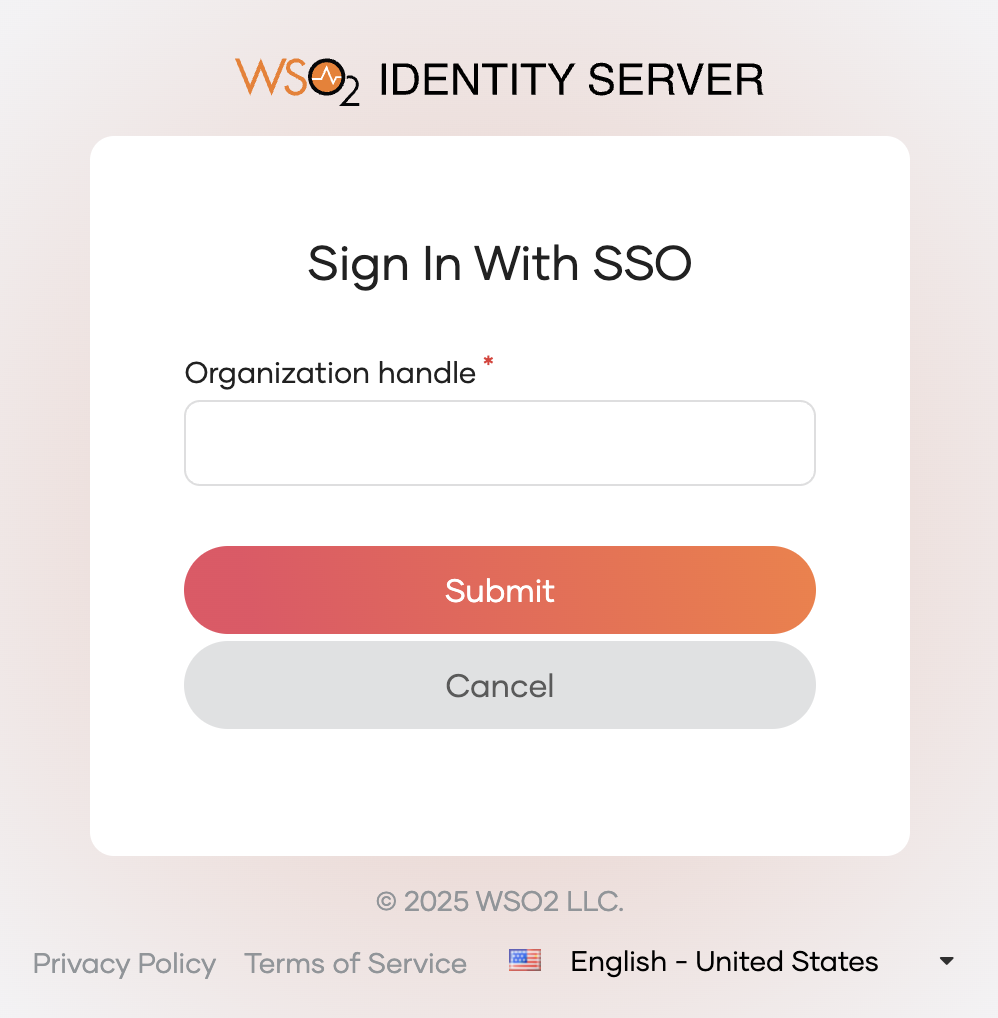
Click Sign In with SSO to specify the organization to which you are signing in.
-
Enter the Organization Handle of the organization and click Submit.
-
Enter the username and password of a user onboarded to Happy Tails (e.g.,
[email protected]or a doctor/pet owner you created). -
Click Sign In and provide the necessary consent.
You have now successfully logged into the Pet Care application as a user of the Happy Tails organization.
Try out the administration features
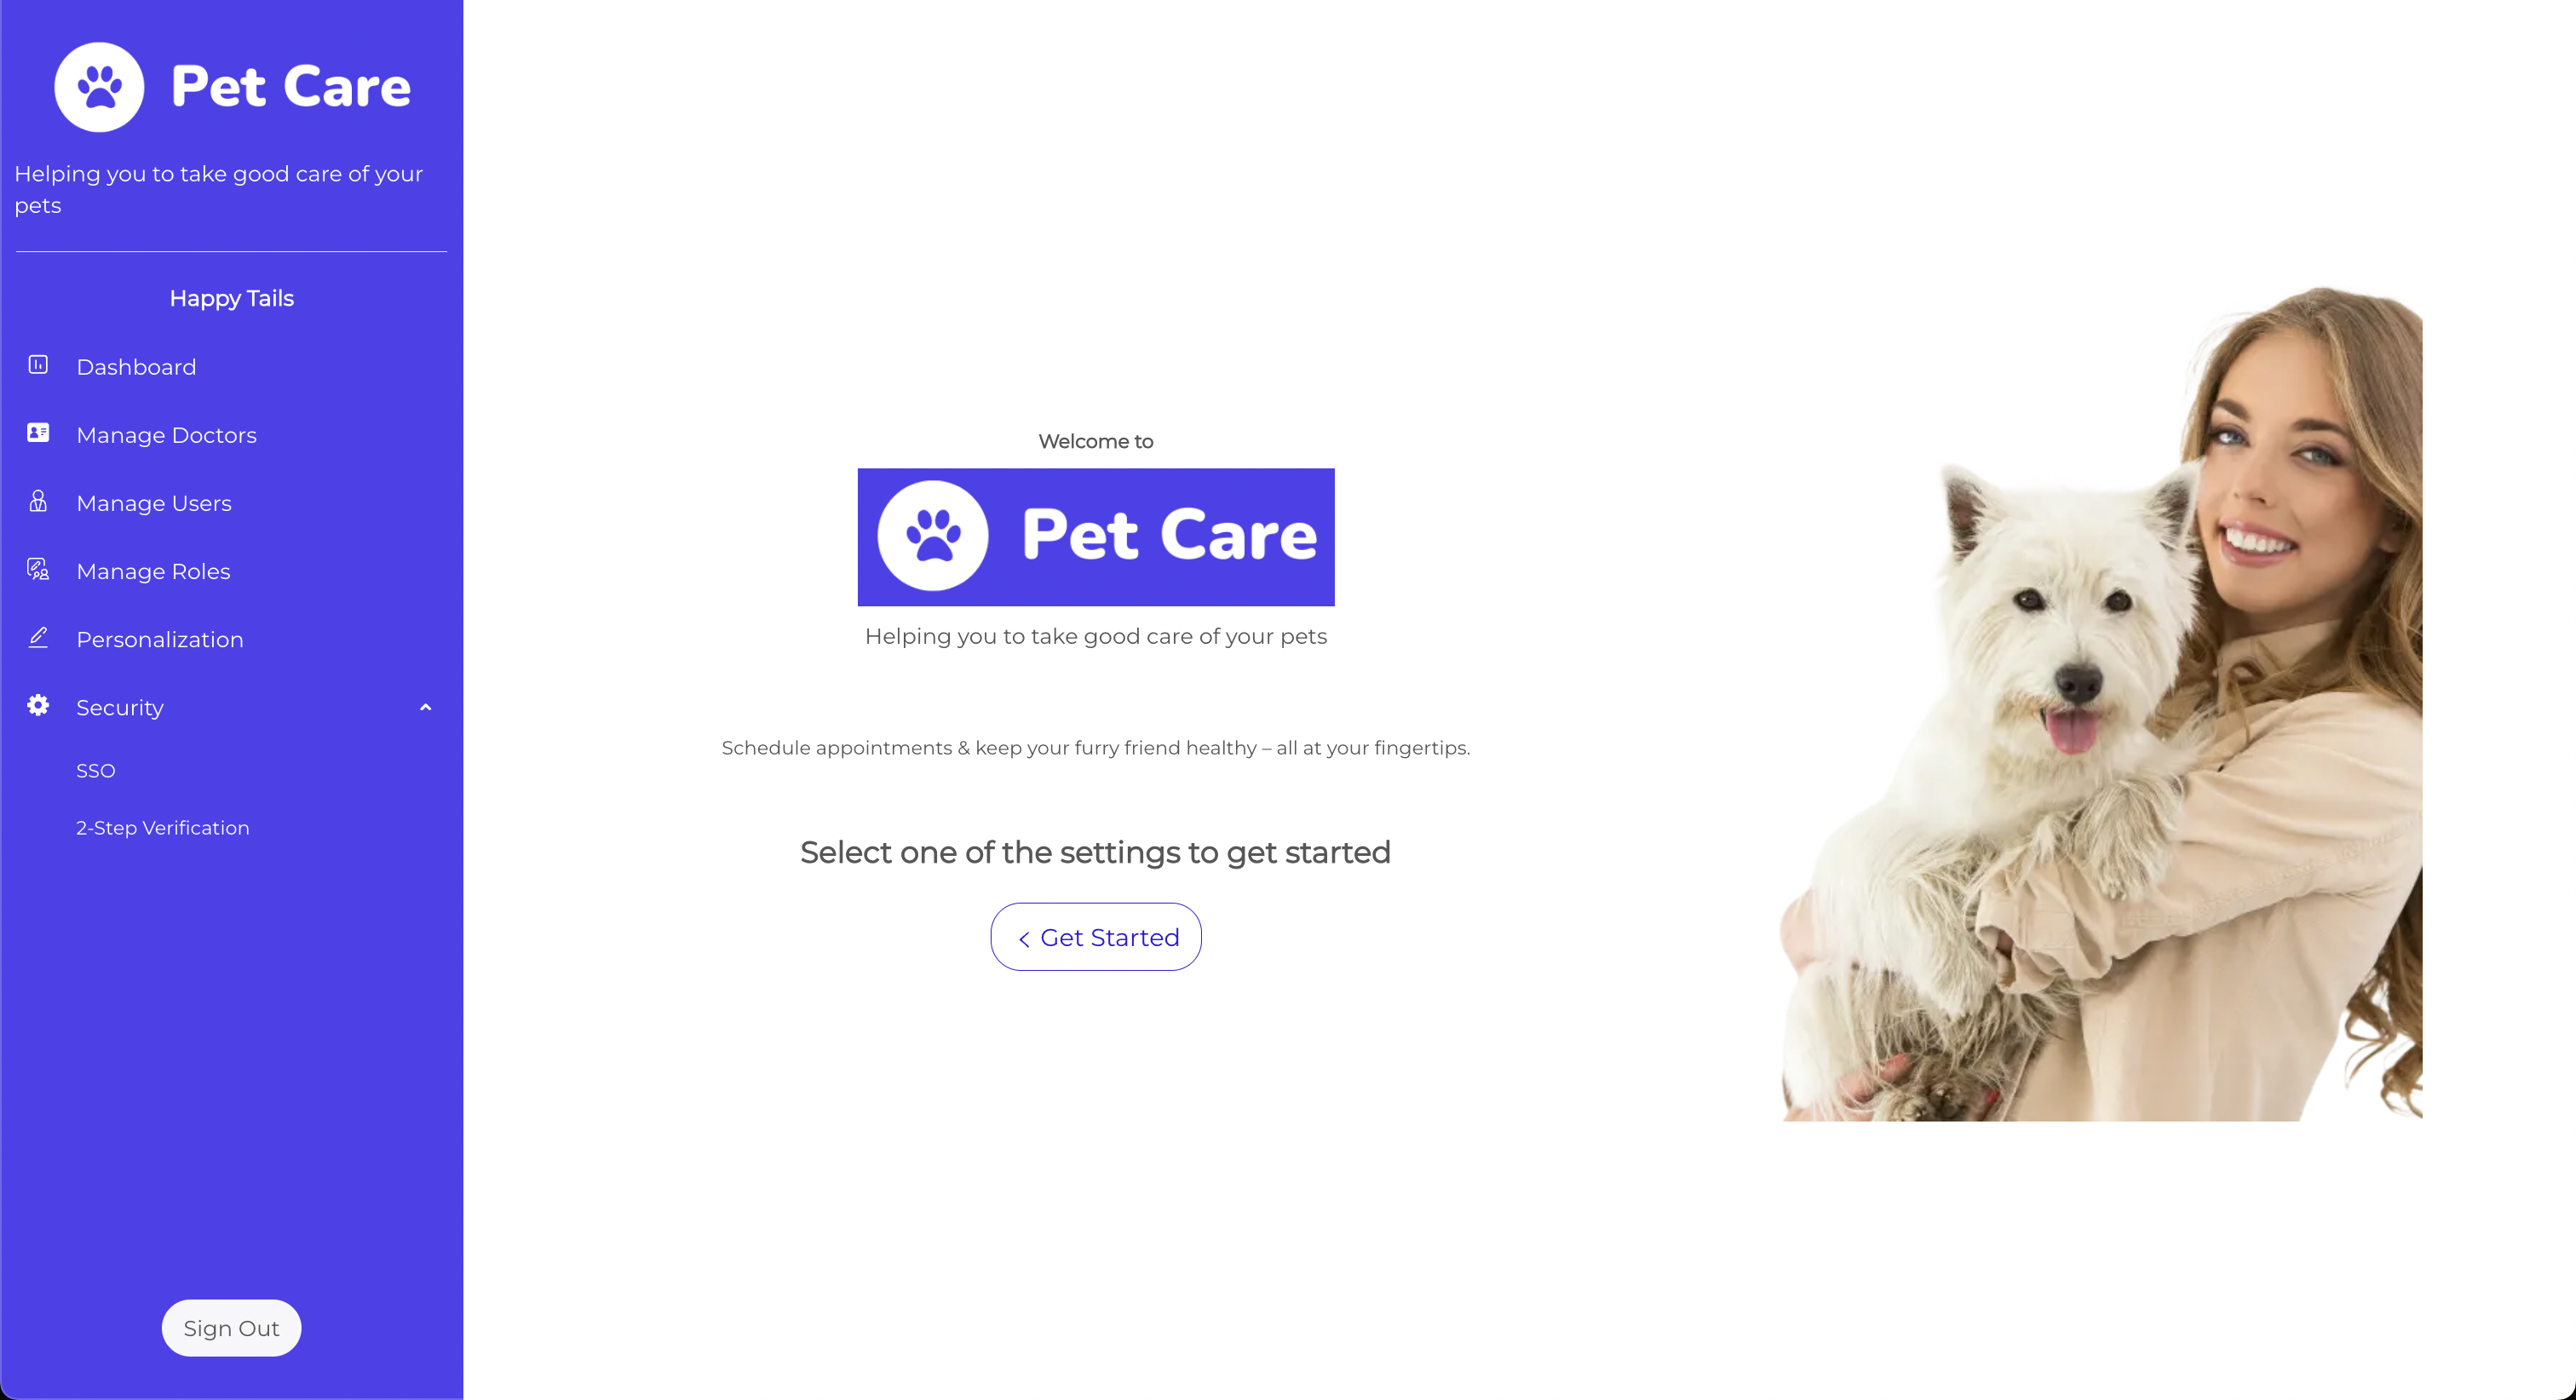
When a user assigned to the pet-care-admin role logs in, the user has access to administration features such as.
- Dashboard: View a summary of the organization activity and key metrics.
- Manage Doctors: Onboard, view, and update doctor profiles.
- Manage Users: Add, remove, or update users across roles (doctors, pet owners, etc.).
- Manage Roles: View and assign predefined application roles like
pet-care-admin,pet-care-doctor, andpet-care-pet-owner. - Personalization: Customize the organization's branding, including logo, color palette, and taglines.
- SSO: Configure federated login for the organization.
-
2-Step Verification: Enable or configure MFA options for users.
Note
Learn how to build an administration portal for your B2B application in the implement an administration portal section.
Try out the doctor experience
When a user with the pet-care-doctor role logs in, the user can access pages relevant to the daily veterinary tasks. These include:
- Profile: View and update personal details and specialty.
- Appointments: See upcoming appointments and manage personal schedule.
- Assigned Pets: Access a list of pets under the user's care, along with each pet's medical history and notes.
Doctors can view and manage information related to their appointments and the pets they treat. They don’t have access to administrative features such as user management or branding configurations.
Try out the pet owner experience
Users with the pet-care-pet-owner role, typically customers of the veterinary clinic, have access to pet-related services such as:
- Book Appointment: Find available doctors and schedule appointments for their pets.
- My Pets: Add, view, and manage details about their pets, including breed, age, and health records.
- Appointment History: Track past and upcoming appointments.
- Settings: Manage account details and preferences.
Pet owners see a simplified version of the app, designed to help them easily manage their pets’ information and interact with the clinic.