Role Based Access Control (RBAC) for API Authorization
WSO2 Identity Server allows organizations to authorize user access to an application's API resources based on the application associated roles assigned to the users or user groups.
The following are the terms used in the API authorization context:
| Term | Description |
|---|---|
| API resources | Used to group the API scopes/permissions that your applications can consume. |
| Permissions | Interchangeably known as scopes. Permissions represent an action an application can perform on behalf of a user. These are the scopes an application need to request to obtain a token capable of accessing the API resource. |
| Roles | Used to map the permissions of the API resource to a persona in the application. See manage roles for more information. |
| User Groups | A collection of users with the same privileges to access resources in an organization. A group is user store specific. See manage groups for more information. |
| IdP Groups | Groups of the configured external identity providers. See IdP groups for more information. |
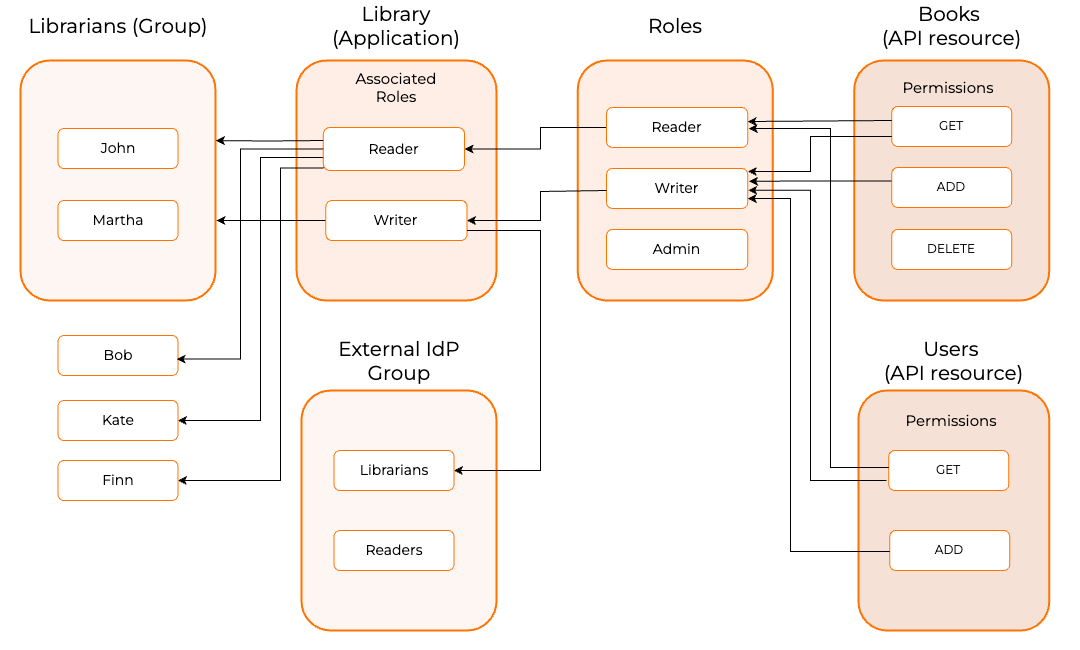
The relationship between these entities is as follows:
- API resources come with specific scopes(permissions).
- Roles are formed by collecting scopes (permissions) from different APIs.
- Applications can be linked to specific sets of roles and set of API resources.
- Roles can be assigned to individual users, user groups or external IdP groups.
- Users get access to an application's API resources based on the resolved user assigned roles based on the authenticated mechanism and the application.
How it works
Administrators in an organization have the authority to either allow unrestricted access or enforce controlled access to the API resources.
If administrators choose to skip authorization, all application users will be authorized to access the API resources without any limitations.
However, if authorization is mandated for the API resources, the following flow occurs:
- The user attempts to access an application with controlled access to API resources.
- WSO2 Identity Server retrieves the user's roles associated to the application by checking the direct user-to-roles assignments and user's group-to-role assignments.
- WSO2 Identity Server evaluates the permissions associated with the user's roles.
- Based on the assigned permissions, WSO2 Identity Server grants or denies the user with controlled access to the API resources.
To summarize, WSO2 Identity Server validates the user's role assignment (direct or via groups), examines the permissions associated with the roles, and decides whether to permit or restrict the user's access to the API resources.
Register an API resource
WSO2 Identity Server allows administrators to register API resources with scopes(permissions).
To register an API resource on WSO2 Identity Server,
- On the WSO2 Identity Server Console, go to API Resources.
- Click + New API to register a new API resource.
-
Enter the following details:
Parameter Description Identifier This is an identifier for your API resource. This can be any value, but WSO2 Identity Server recommends using the URI of the API resource as the identifier. This value will be used as the audclaim in the issued JWT token.Display Name A meaningful name to identify your API resource in WSO2 Identity Server. -
Click Next and enter the following details:
Parameter Description Scope (Permission) The value that acts as the scope when requesting an access token. This value should be similar to the scope value in your application. Display Name A meaningful name for your scope (permission). This will be displayed on your application's user consent page. Description A description for your scope (permission). This will be displayed on your application's user consent page. -
Click + Add Scope. Note that you can add multiple scopes according to your requirements.
-
Click Next and enable Requires authorization if the users consuming your API should be authorized before they get access, else you can proceed without an authorization policy.
-
Click Finish to complete the API resource registration.
Authorize the API resources for an app
Note
Before you register any APIs in the organization (root), Management APIs and Organization APIs are already exist. To learn more about the features and endpoint of the Management and Organization API, see API section.
Once you have registered API resources in your organization, you can authorize applications in your organization to access those API resources. This is done by connecting the API resources to the relevant applications. Users of an application will have access to the API resource depending on the authorization settings you have configured. If an API resource requires authorization, RBAC will be applied before granting users access.
WSO2 Identity Server allows administrators to connect API resources to applications. To authorize an API resource for an application:
-
On the WSO2 Identity Server Console, go to Applications.
-
Select the application to which you wish to authorize the registered API resource and go to API Authorization.
Warning
Note that you cannot authorize API resources for a SAML application.
-
Click + Authorize an API Resource.
-
Enter the following details:
Parameter Description API Resource Select the API resource you wish to integrate with your application. Authorized Scopes Select the scopes. Authorization Policy Select the authorization policy. If you have selected Requires Authorization when adding the API resource, RBAC will be selected by default, else you have the option to select between Role-Based Access Control (RBAC)andNo Authorization Policy. -
Click Finish.
Configure RBAC for API resources
If RBAC is enabled as the authorization policy for the API resource, users accessing the API through an application will have role-based access.
Define scopes for an API resource
If you didn't specify all the permissions for the API resource when registering the API resource, follow the steps given below to add permissions.
- On the WSO2 Identity Server Console, go to API Resources.
- Select the API resource and go to the Scopes tab.
- Click + Add Scope and enter the following details:
Parameter Description Scope (Permission) The value that acts as the scope when requesting an access token. This value should be similar to the scope value in your application. Display Name A meaningful name for your scope (permission). This will be displayed on your application's user consent page. Description A description for your scope (permission). This will be displayed on your application's user consent page. - Click Finish.
Associate roles to the application
The scopes (permissions) of your API resource should be assigned to a role and associate that role to the application.
- Create a role and assign scopes (permissions) to the role. See create a role for more information.
- If you create a role with the
Applicationaudience, the role will be associated to the selected application during role creation. If you create a role inOrganizationaudience, you need to associate the role to the application. See associate roles to an application for more information.
Assign users or groups to roles
Grant permissions of the roles to users by assign users to role or assign user's groups to roles.
Try it out
Follow the steps given below to try out the RBAC flow:
Note
Note that we are using WSO2 Identity Server's React sample application for this scenario.
Request scopes for the user
To request scopes for the user:
-
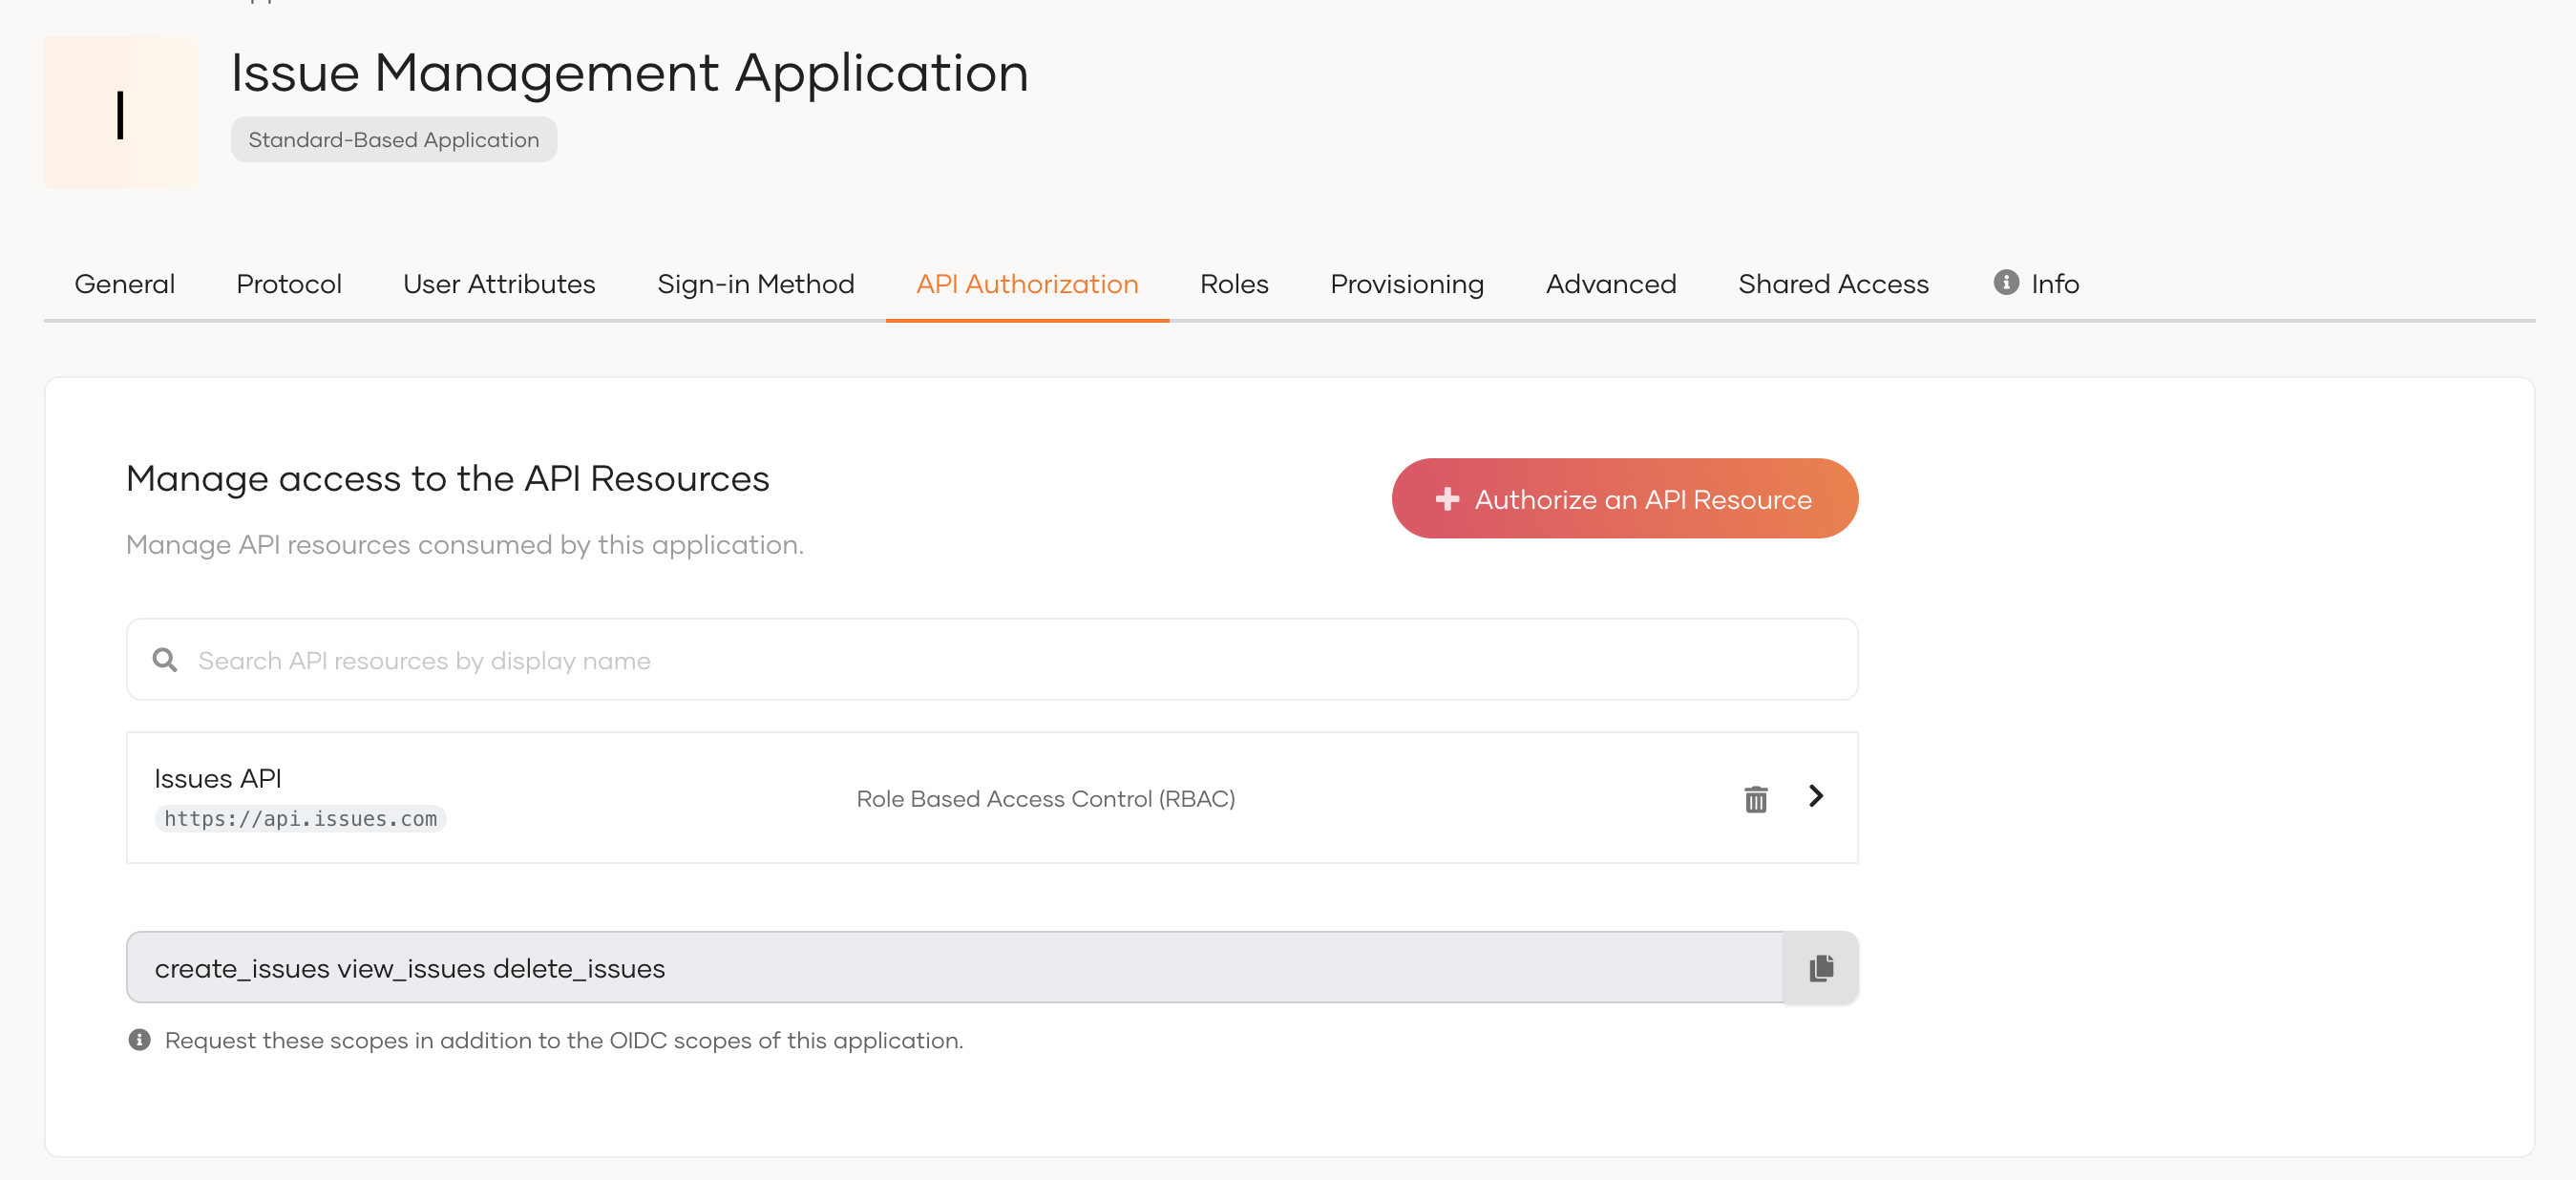
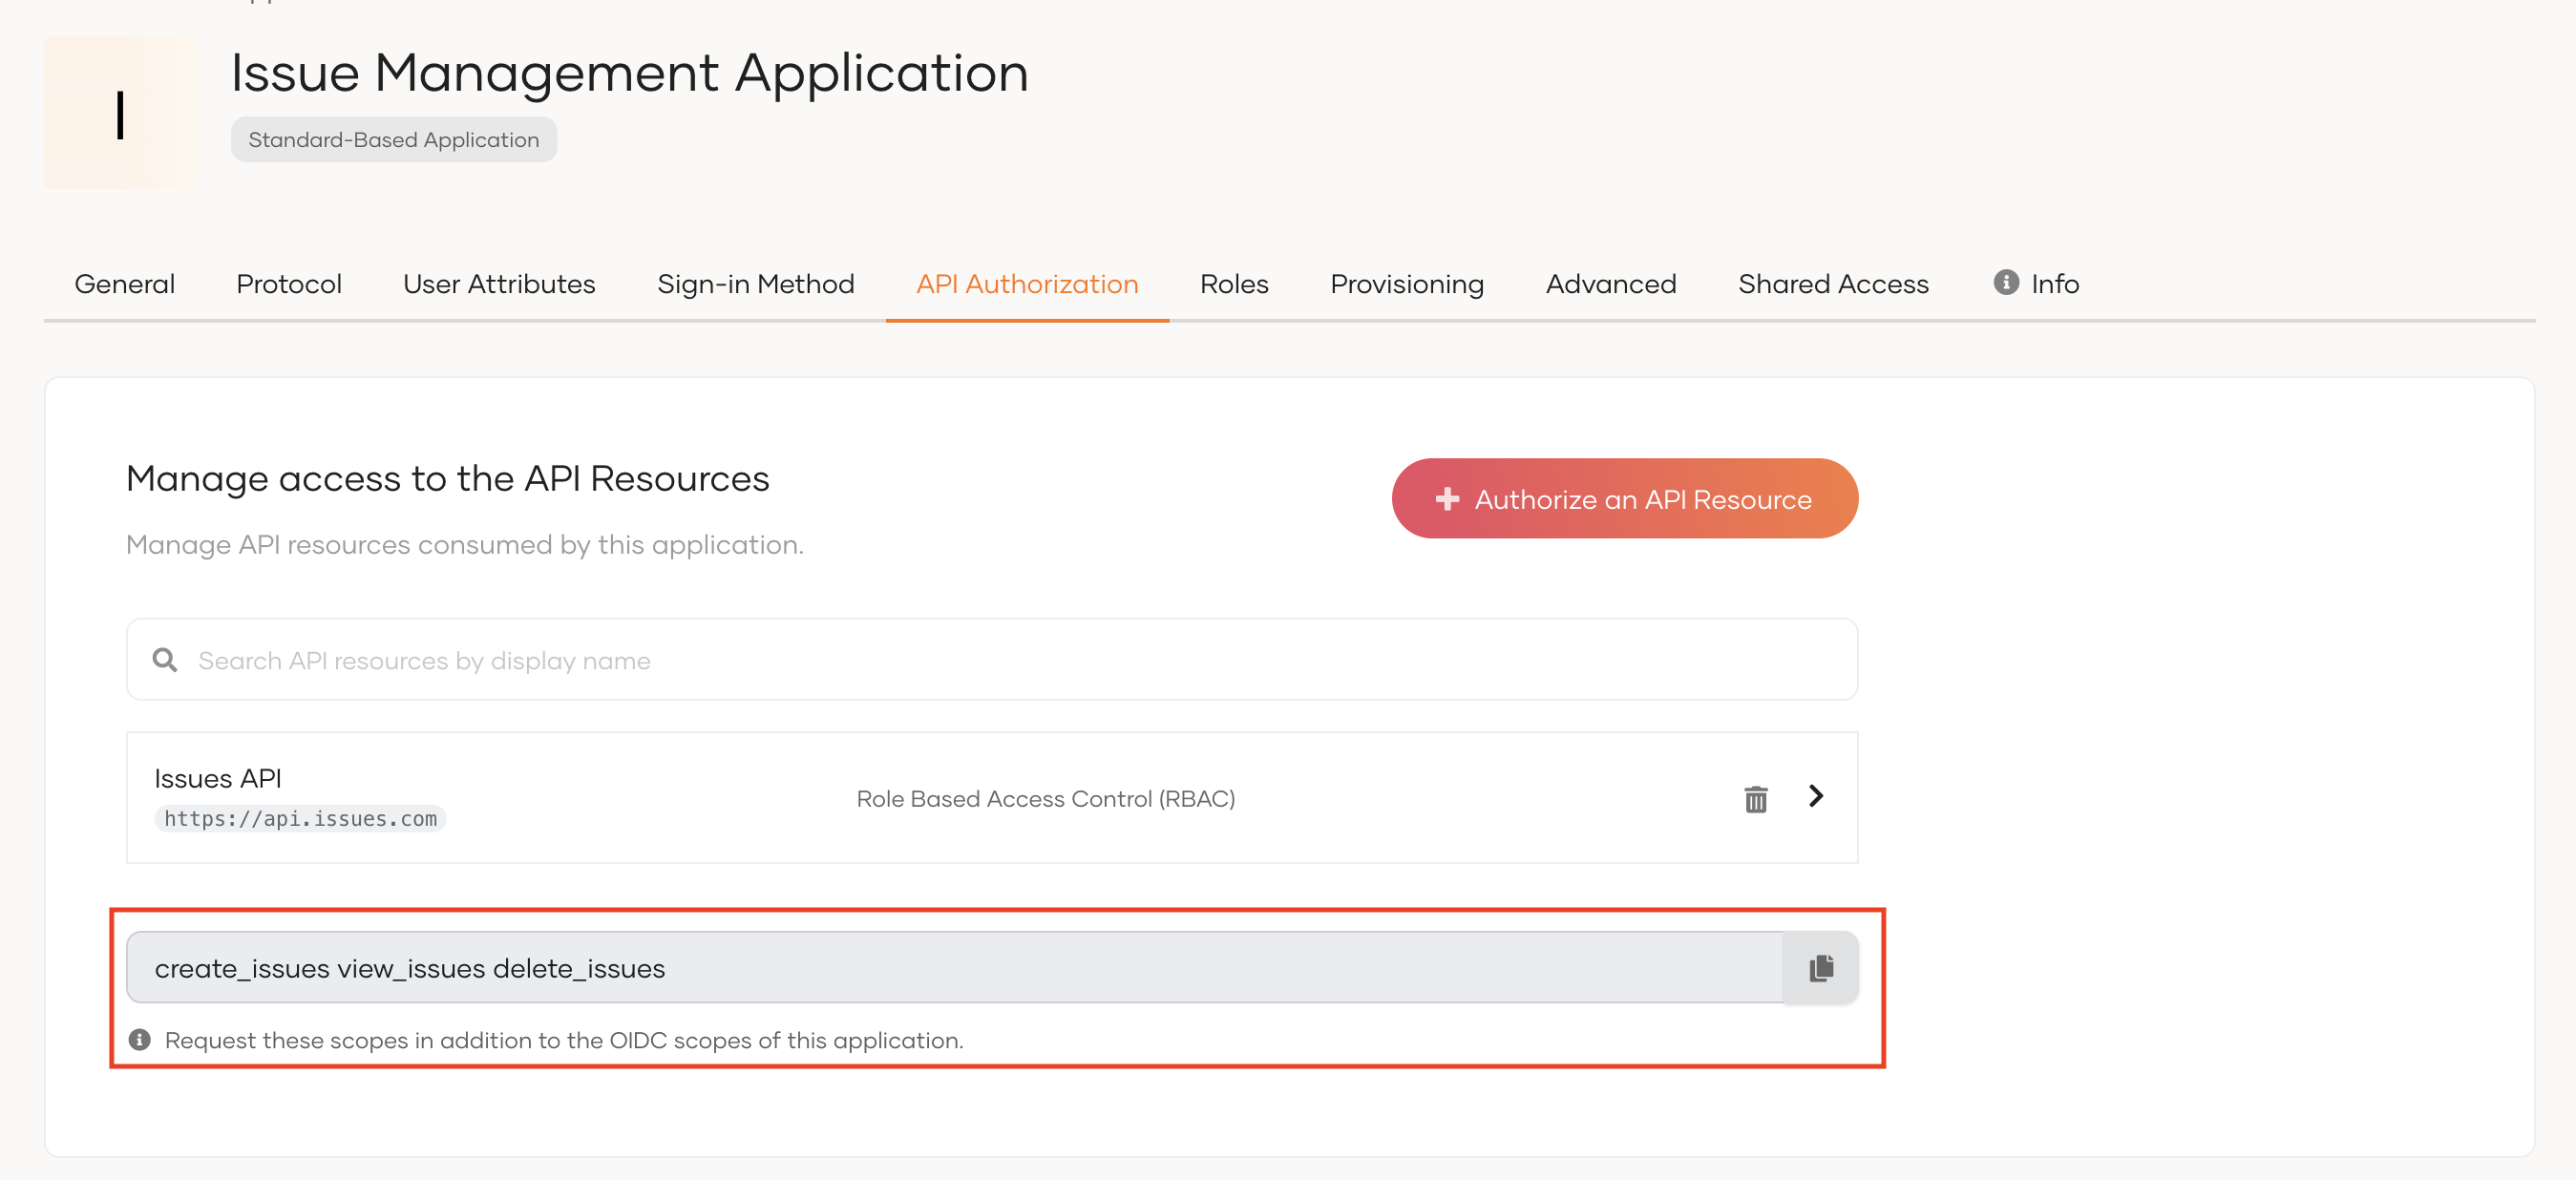
Add the new scopes to the configuration file of your SDK. You need to request these new scopes in addition to the OIDC scopes of your application.
To get the scopes:
- On the WSO2 Identity Server Console, go to Applications and select your application.
-
Copy the scopes listed at the end of the API Authorization section.
Tip
When you add scopes to the configuration file of your SDK, add them as comma-separated values.
-
Access the application URL.
-
Try to log in as a user who has permissions to access the API resource.
If you have disabled
Skip login consentin your application's settings, upon successful login you will see the permission (scopes) allowed for the user on the user consent page.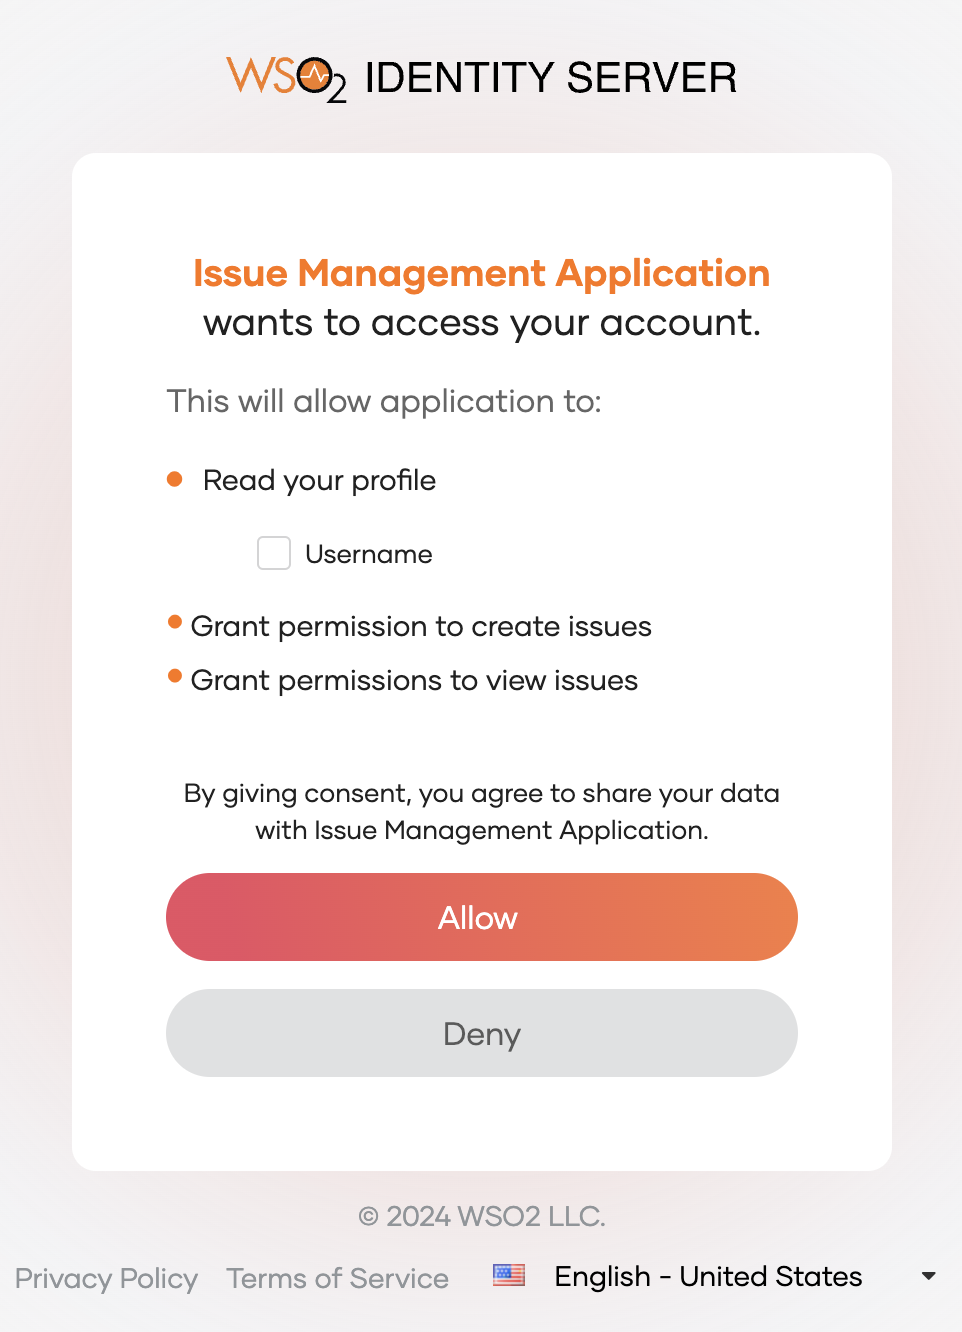
Click Allow. You will now be redirected to the application.
-
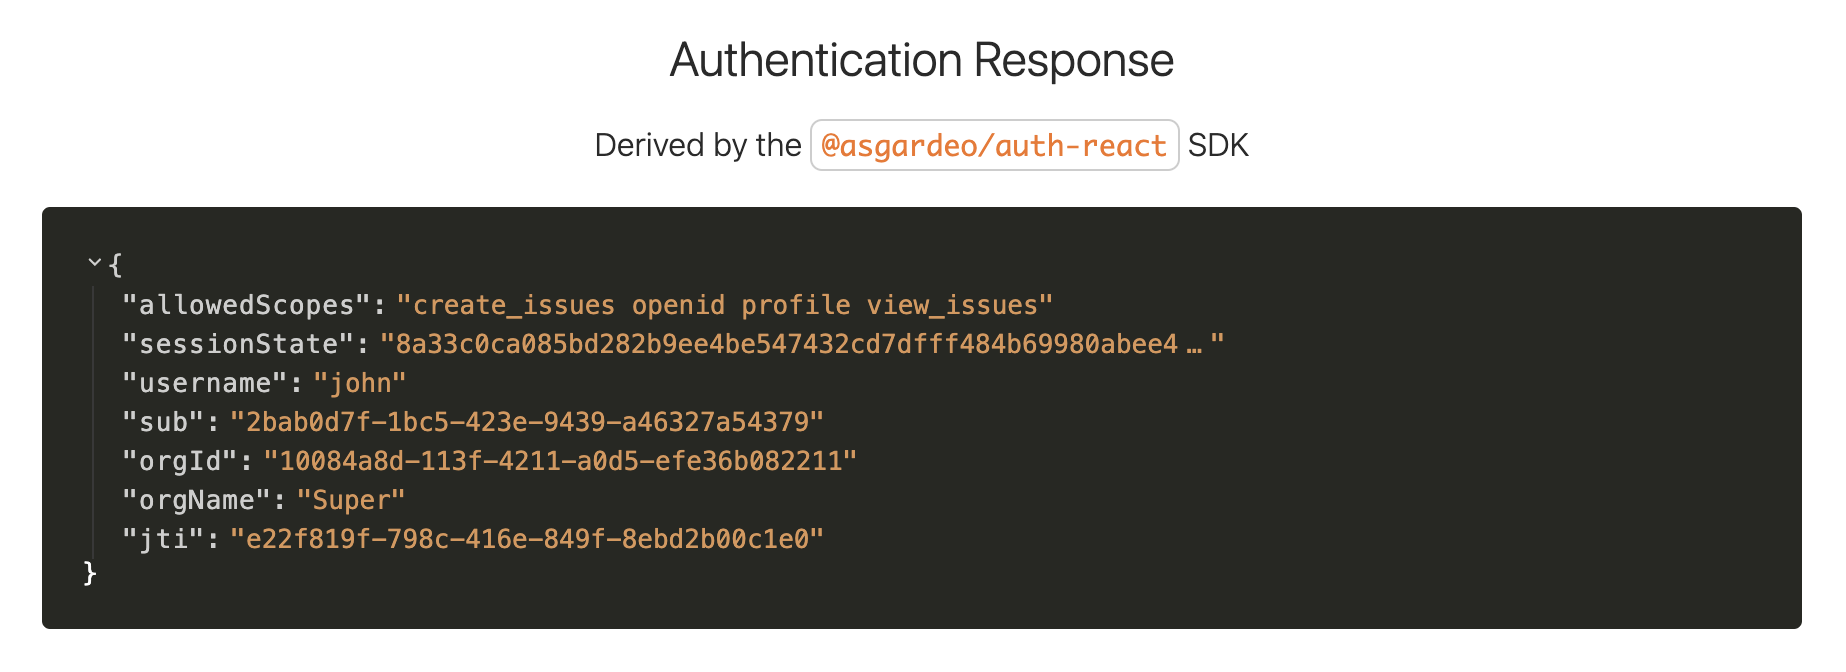
You will be able to see the assigned scopes (permissions) on the
allowedScopesparameter of the authentication response.