Add MFA with SMS OTP
SMS OTP (One-Time Password) is a security mechanism where a password is sent to the user's registered mobile number, which they must enter during the login process. This password is typically valid for a short period.
During SMS OTP authentication, the user must access their mobile device to retrieve the OTP. This method ensures that only the person who has access to the registered mobile number can log in, providing an additional layer of security.
Follow the instructions given below to configure Multi-Factor Authentication (MFA) using SMS OTP in WSO2 Identity Server.
Prerequisites
- To get started, you need to register an application with WSO2 Identity Server. You can register your own application or use one of the sample applications provided.
- Update the user profile of the users with an mobile number to which the user will receive the OTP.
Info
You can use SMS OTP for multi-factor authentication only if a previous authentication step is configured with username and password or another factor that can validate user credentials.
Set up SMS OTP
WSO2 Identity Server has some default settings for SMS OTP, which are sufficient for most cases. If required, you can change the default settings, as explained below.
To update the default SMS OTP settings:
- On the WSO2 Identity Server Console, go to Connections and select SMS OTP.
-
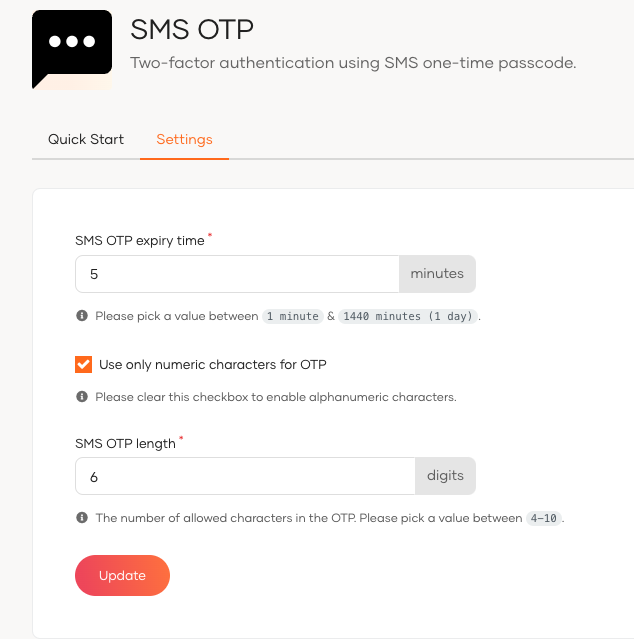
Update the following parameters in the Settings tab:

3. Once you update the SMS OTP settings, click Update.Field Description SMS OTP expiry timeSpecifies the expiry time of the OTP. The generated OTP will not be valid after this expiry time. Use only numeric characters for OTPSpecifies whether to use only numeric characters in the OTP. If this is selected, the generated OTP contains only digits (0-9). If this option is not selected, the OTP will contain alphanumeric characters. SMS OTP lengthSpecifies the number of characters allowed in the OTP.
Configuring SMS Providers
Configurations related to SMS providers are located under the Email & SMS section.
Supported Providers
WSO2 Identity Server supports Twilio, Vonage, or custom SMS providers by default. To learn how to configure each provider, please see the relevant section.
Configuring Twilio
To configure Twilio as your SMS provider, follow the steps below:
- Go to Twilio and create an account.
- After signing up for your account, navigate to the Phone Numbers page in your console. You’ll see the phone number that has been selected for you. Note the phone number’s capabilities, such as "Voice", "SMS", and "MMS".
- After signing up, navigate to the Phone Numbers page in your console and note the phone number’s capabilities.
- Get your first Twilio phone number and use that as the “Sender” in the settings. For more information, see this tutorial in the Twilio documentation.
- Copy the Account SID and Auth Token from the Twilio console dashboard.
- Go to SMS Provider section in the WSO2 Identity Server Console and click the Twilio tab and fill the required fields.
| Name | Description | Example |
|---|---|---|
| Twilio Account SID | Account SID received in the previous step. | YourAccountSID |
| Twilio Auth Token | Auth token received in the previous step. | YourAuthToken |
| Sender | Phone number that you received when creating the Twilio account. | +1234567890 |
Configuring Vonage
To configure Vonage as your SMS provider, follow the steps below:
- Login to Vonage and create an account.
- Fill in the required fields and create the account.
- Login to the Vonage dashboard and copy the API Key and API Secret.
- Go to SMS Provider section in the WSO2 Identity Server Console and click the Vonage tab and fill the required fields.
| Name | Description | Example |
|---|---|---|
| Vonage API Key | Use the API Key from the previous step. | YourAPIKey |
| Vonage API Secret | Use the API Secret from the previous step. | YourAPISecret |
| Sender | The number that the receiver will see when you send an SMS. | +1234567890 |
Configuring a Custom Provider
If you are not using either Twilio or Vonage as the SMS provider, you can configure a custom SMS provider. Custom SMS provider configuration will pass the SMS data to the given URL as an HTTP request.
To configure a custom SMS provider, in the SMS Provider section click the Custom tab and fill the required fields.
| Name | Description | Example |
|---|---|---|
| SMS Provider URL | URL of the SMS gateway where the payload should be published. | https://api.example.com/api/v1 |
| Content Type | Content type of the payload. Possible values are JSON or FORM (Optional). |
JSON |
| HTTP Method | HTTP method that should be used when publishing the payload to the provider URL. Possible values: PUT, POST (Optional). |
POST |
| Payload Template | How the payload template should be. Placeholders: {{ body }} - Generated body of the SMS. (Example - This can be the OTP). {{ mobile }} - Number that this sms should be sent to. |
Example JSON payload template: {“content”: {{ body }},“to”: {{ mobile }}}}({{ mobile }} and {{ body }} will be replaced with the corresponding values at the runtime.) |
| Headers | Custom static headers need to be passed. If multiple headers need to be passed, they should be comma separated. (Optional) | authorisation: qwer1234asdfzxcv, x-csrf: true, x-abc: some-value |
Enable SMS OTP for an app
To enable SMS OTP for MFA, you need to add SMS OTP in the authentication flow of the application.
Follow the steps given below.
- On the WSO2 Identity Server Console, go to Applications.
- Select the application to which you wish to add SMS OTP.
-
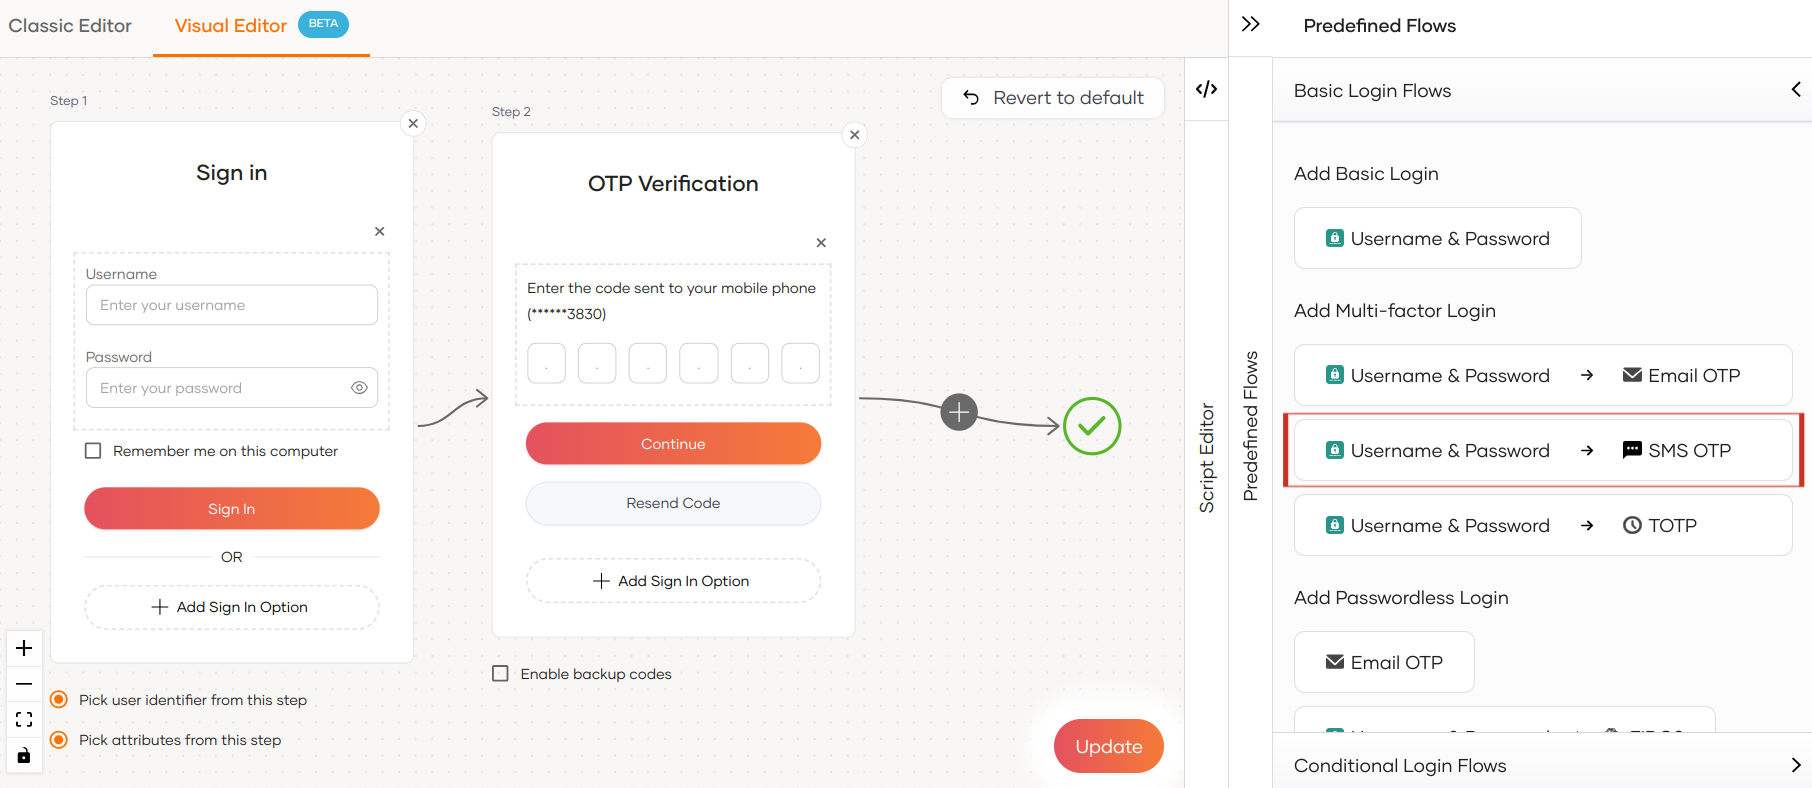
Go to the Login Flow tab of the application and add the SMS OTP authenticator from your preferred editor:
-
Go to Predefined Flows > Add Multi-factor Login.
-
Select Username + Password -> SMS OTP.
-
Click Confirm to add passwordless login with email OTP to the sign-in flow.

-
Select Enable backup codes if you wish to allow users to use backup codes to log in to the application. Learn more about configuring backup codes for users.
-
-
Click Update to save your changes.
How it works
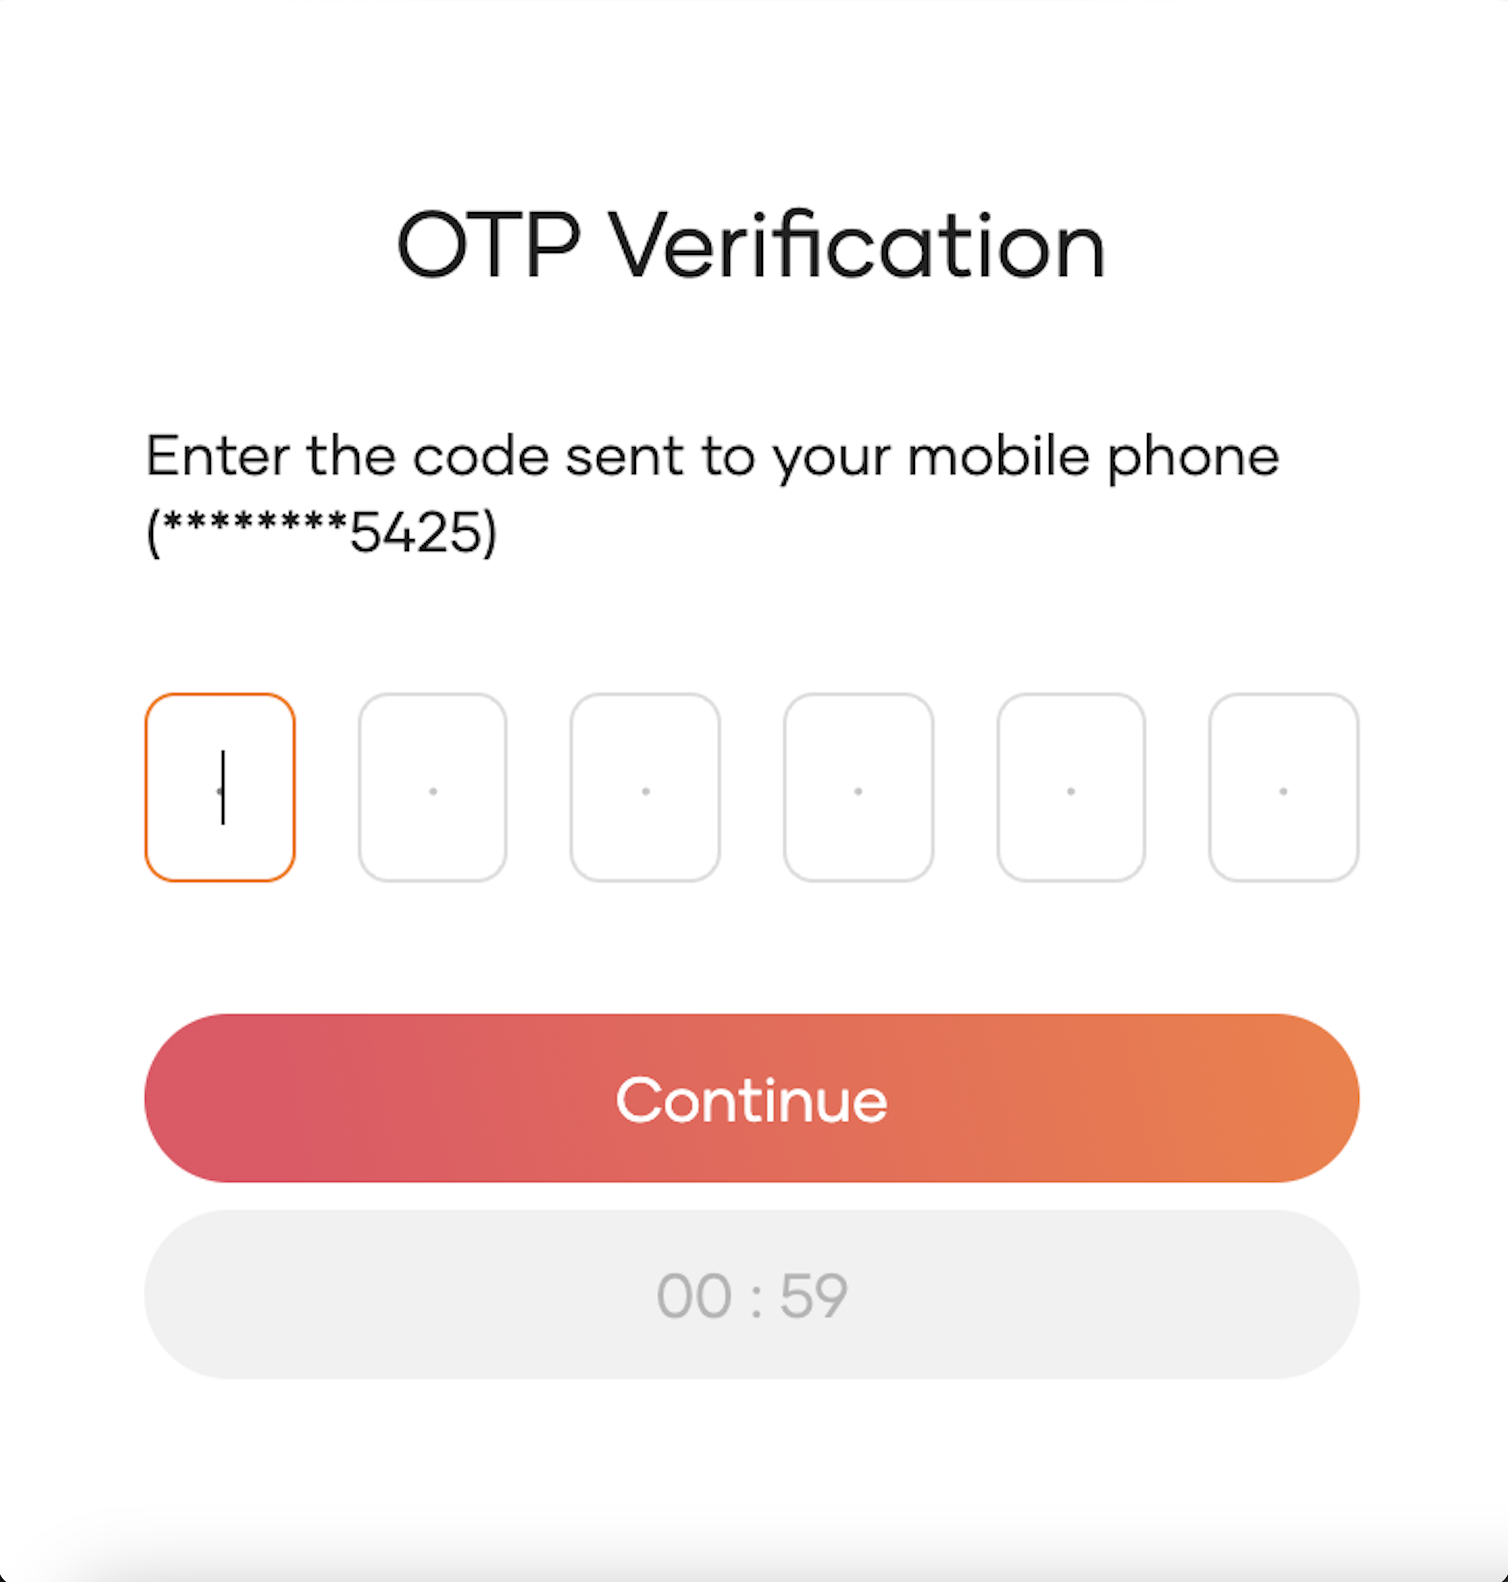
When SMS OTP is enabled in the login flow of your application, the application user will be prompted with the SMS OTP authentication step once the first authentication step is completed. Given below are the high-level steps that follow:
- WSO2 Identity Server sends the OTP to the user's mobile number.
-
WSO2 Identity Server prompts the user to enter the OTP code.

-
If required, the user can request WSO2 Identity Server to resend the OTP. The new OTP invalidates the previously sent OTP.
- The user enters the OTP and clicks Continue.
- If the authentication is successful, the user can access the application.