Configure conditional authentication
Given below are the high-level steps for enabling conditional authentication in your applications.
Note
-
ECMAScript Compliance: Adaptive scripts currently comply with ECMAScript 2022 (ES13).
-
Limitations: Adaptive scripts do not support
Log.warnlogs or stringifying Java objects usingJSON.stringify().
Prerequisites
Register your application on the WSO2 Identity Server Console.
Enable conditional authentication
Follow the steps given below.
- On the WSO2 Identity Server Console, click Applications.
- Select the application for which you wish to apply a conditional login flow and go to its Login Flow tab.
- Click Start with default configuration to define the login flow starting with the
username and passwordlogin. -
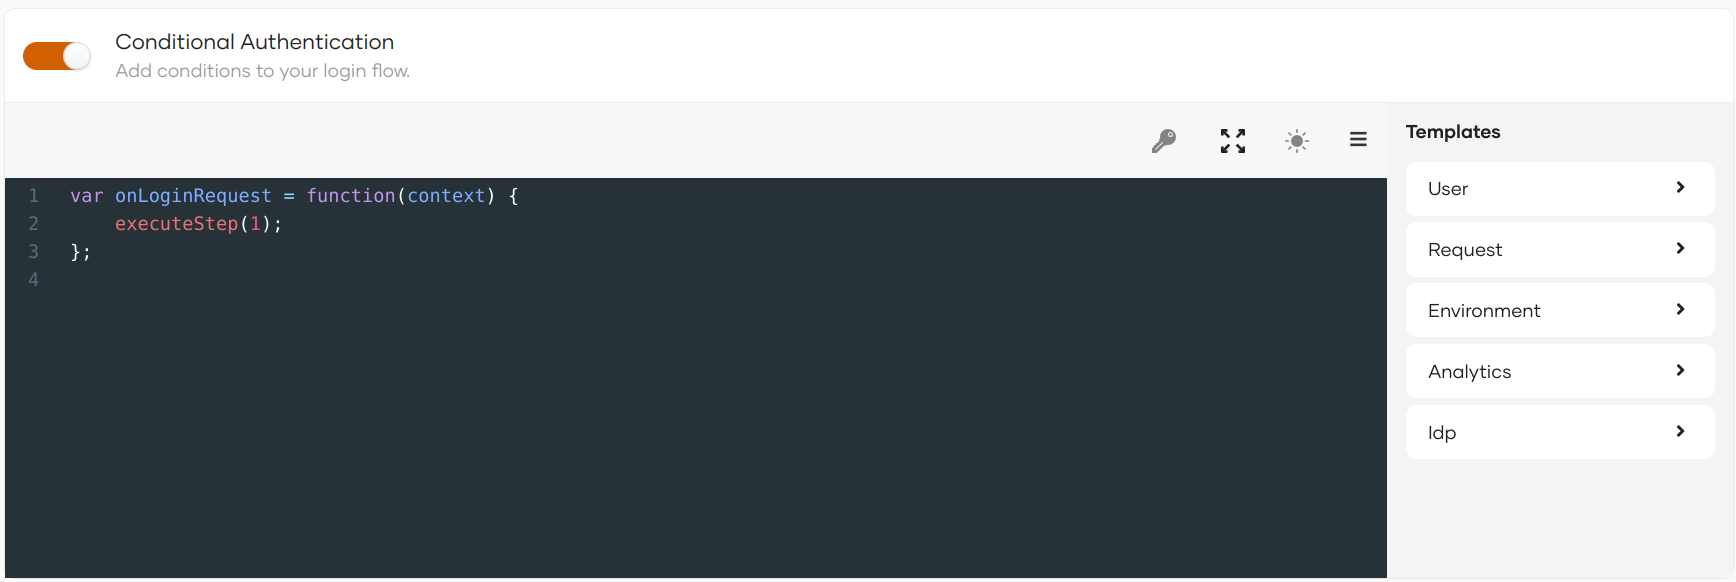
Turn on Conditional Authentication by switching the toggle on. You can define your conditional authentication script in the editor.
Warning
As a security measure, WSO2 Identity Server does not allow the usage of two consecutive periods (
..) in authentication scripts.
Add conditional authentication script
There are two ways to add a conditional authentication script:
- Use a predefined template.
- Write a new conditional auth script.
Before you proceed
When working with conditional authentication scripts, never log secrets or sensitive information within your authentication flows.
Add a secret to the script
Secrets securely store values associated with external APIs. These secret values are used in conditional authentication scripts when WSO2 Identity Server is required to interact with an external API (service endpoint) during the authentication process.
You can securely store these secret values on the WSO2 Identity Server Console and retrieve them whenever required for conditional authentication script.
Create a new secret
To add a new secret:
-
On the WSO2 Identity Server Console, go to Applications.
-
Select your application and go to the Login Flow tab .
-
Add a new secret from your preferred editor:
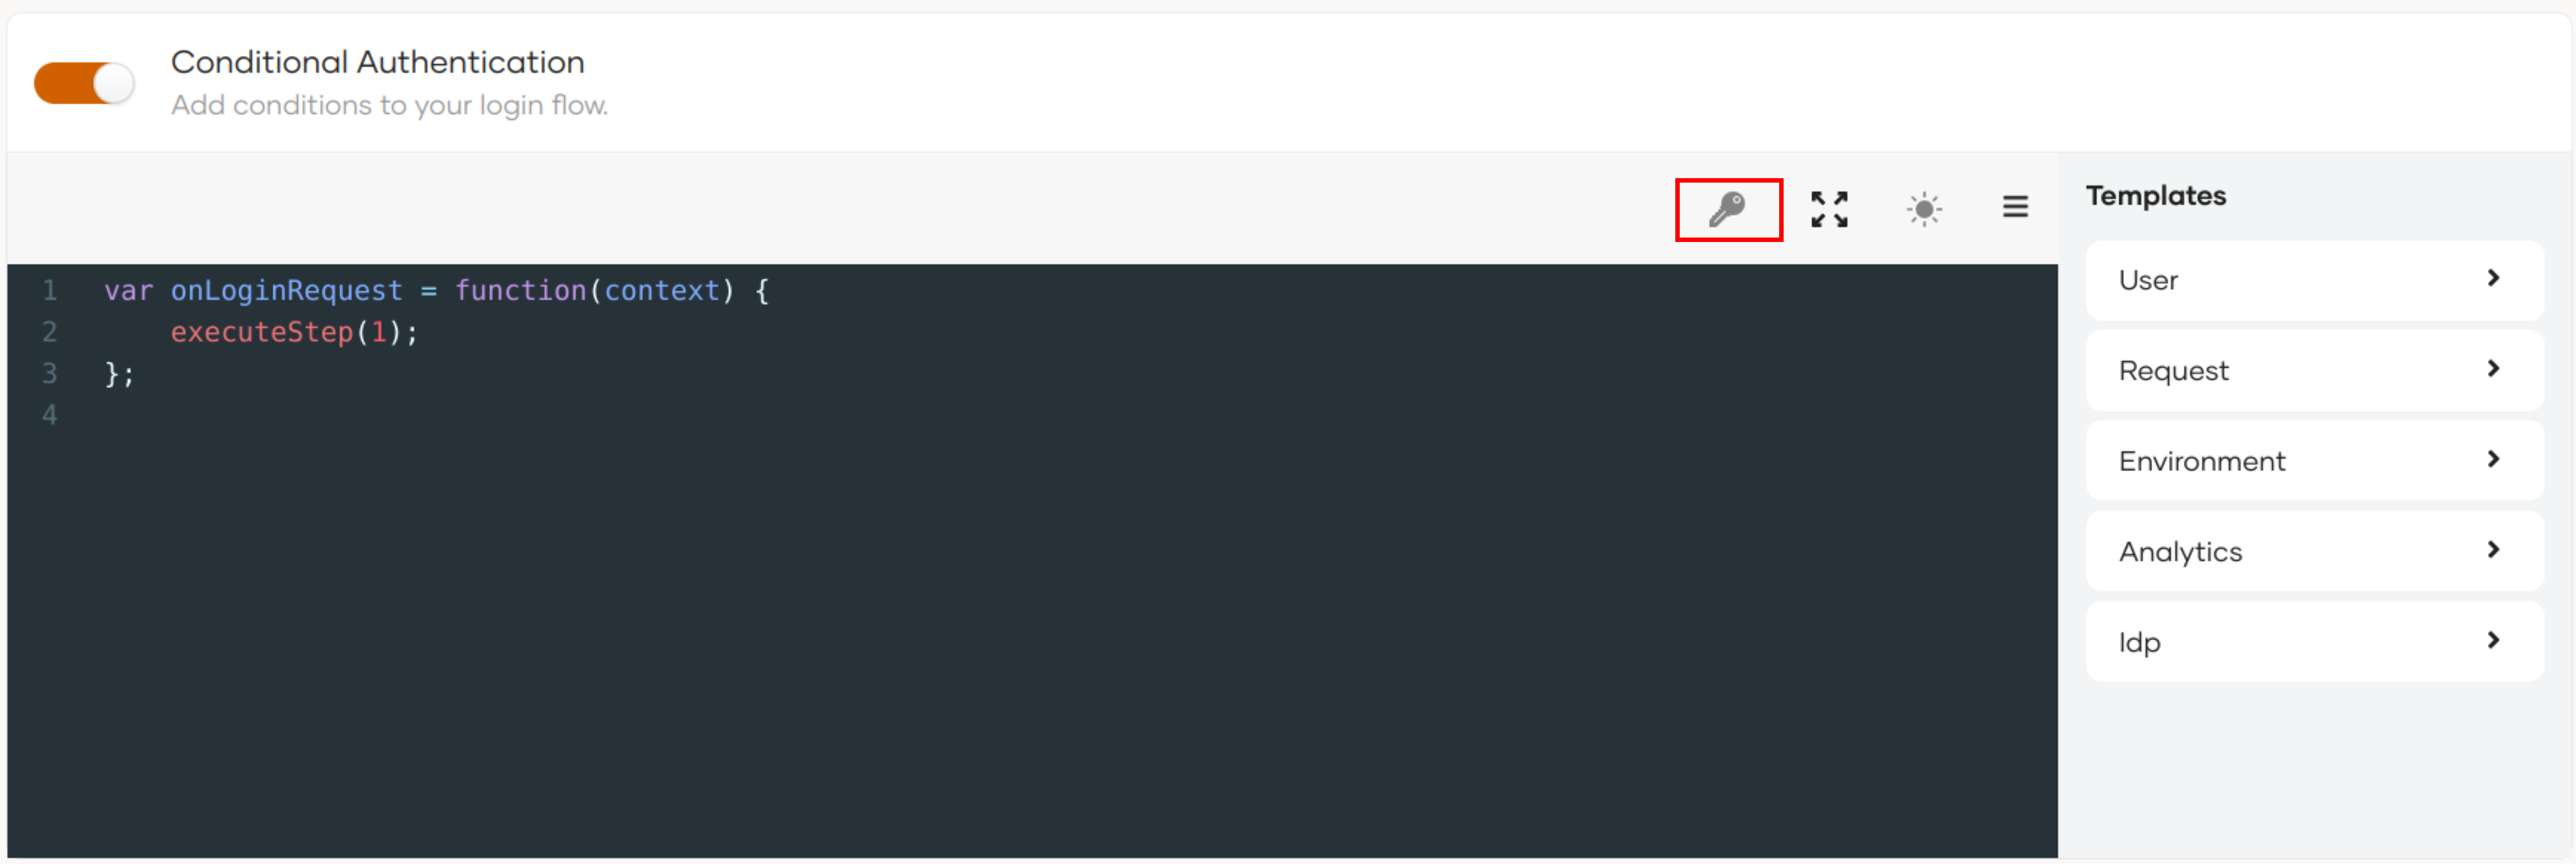
Enable conditional authentication and click the key icon above the script to create a new secret.
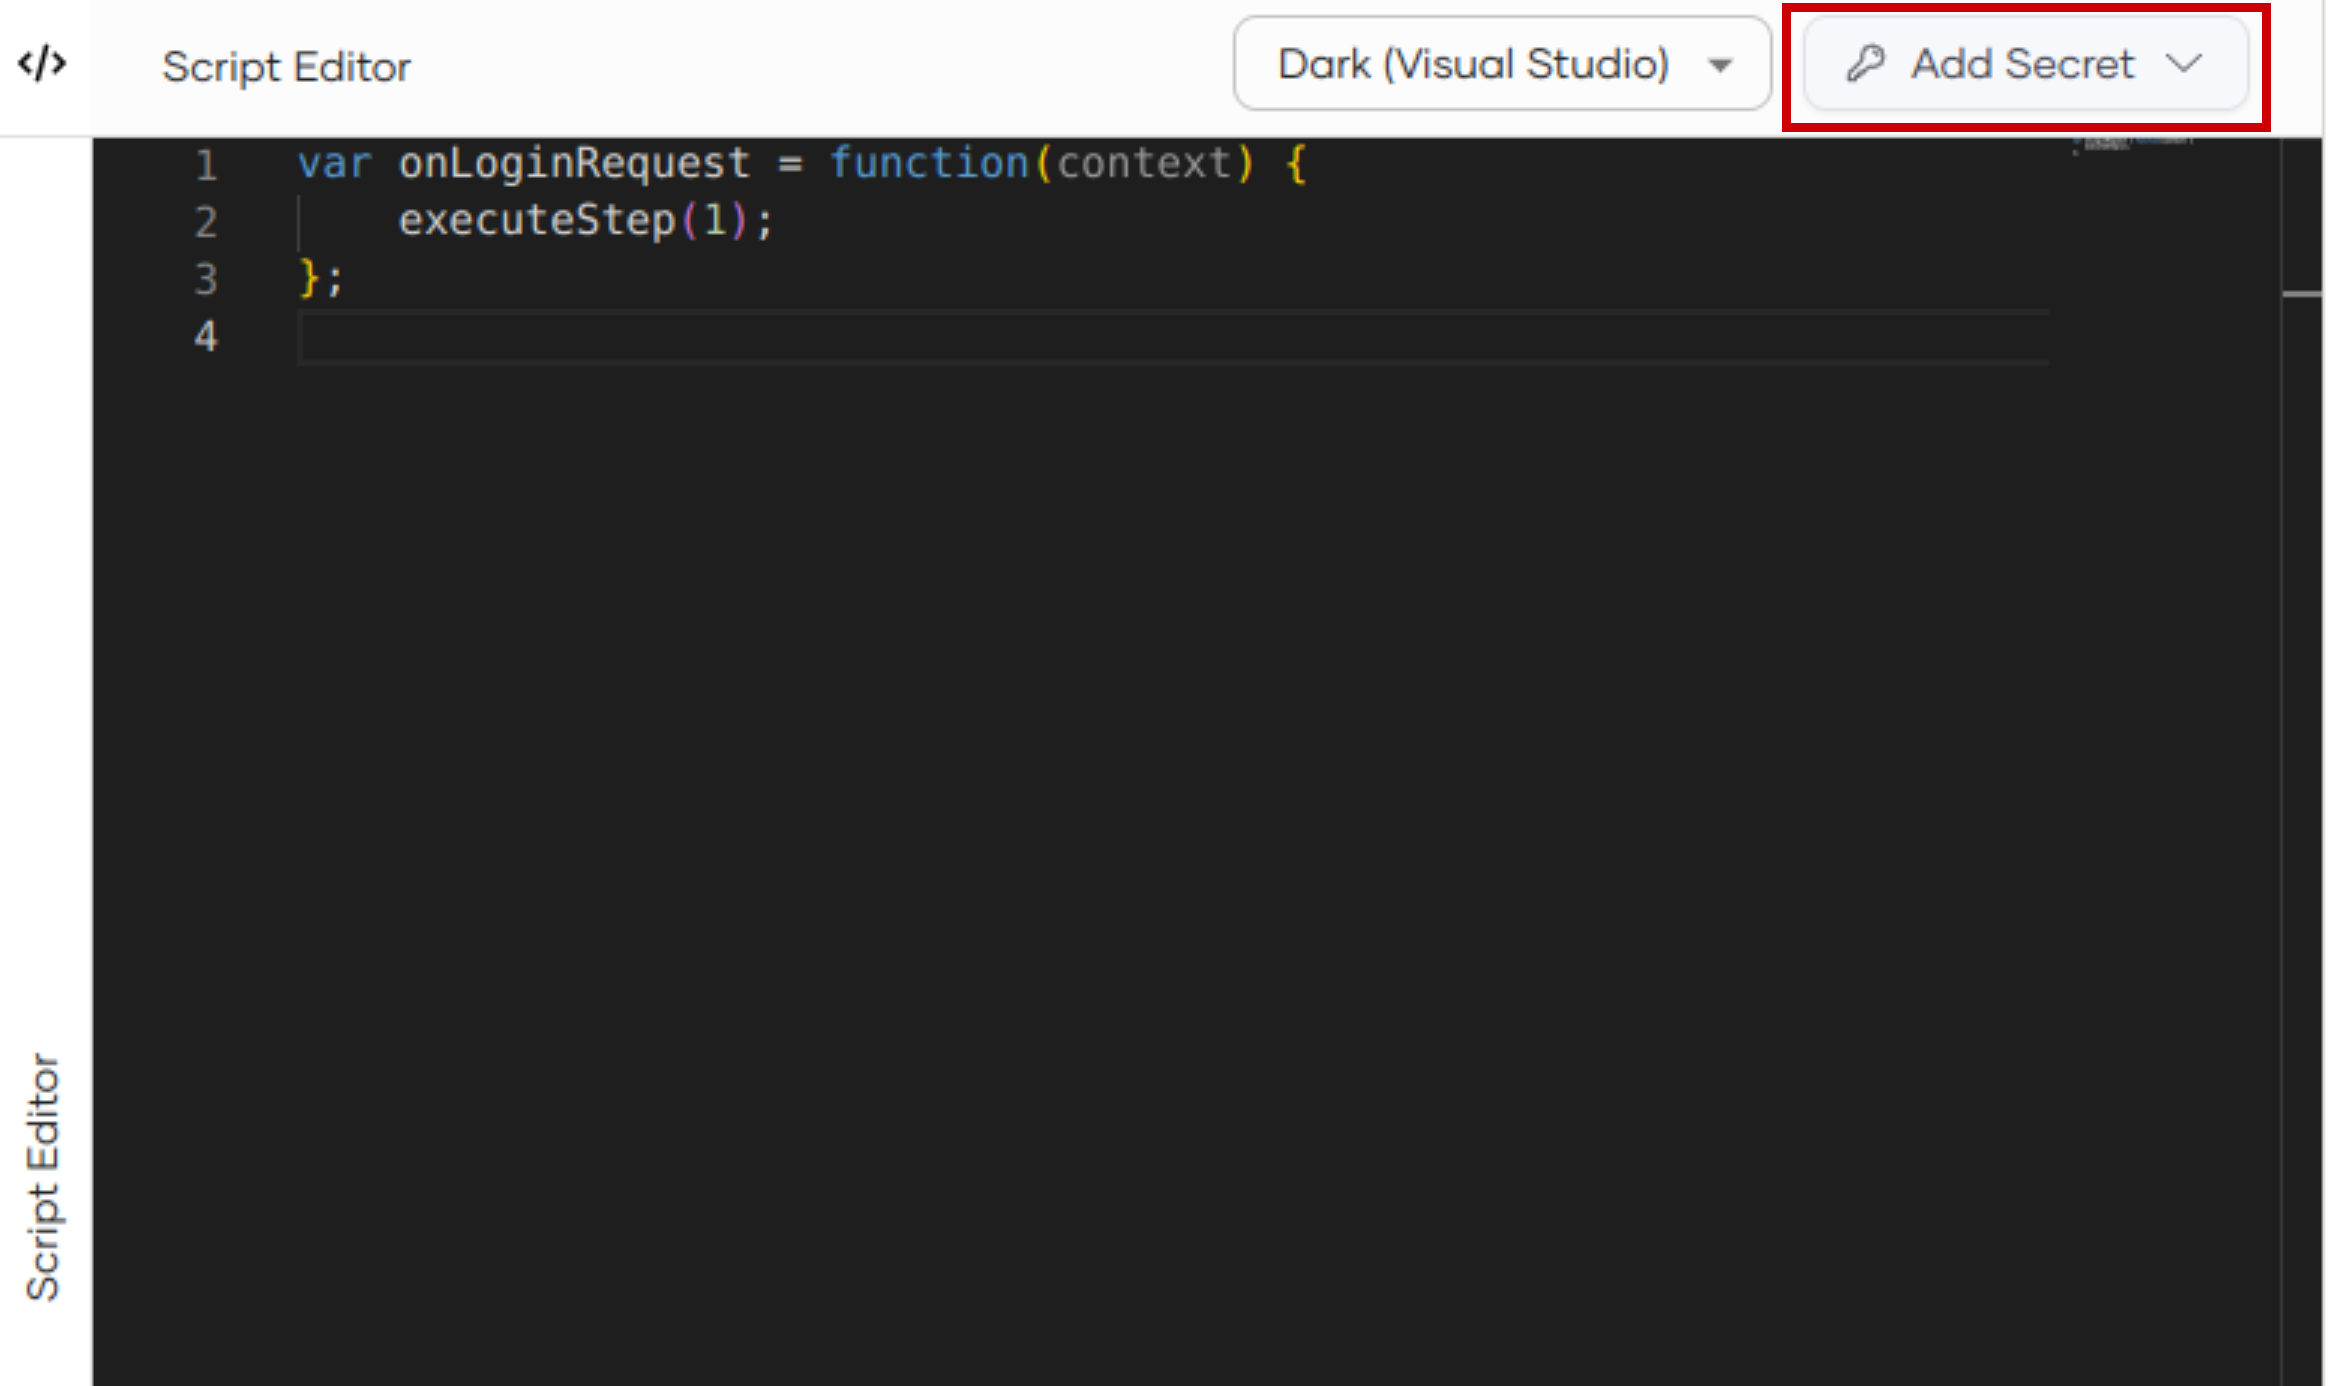
Switch to the Visual Editor tab, expand the Script Editor and click Add Secret.
-
Click Create new secret from the drop-down menu.
-
Enter the following details:
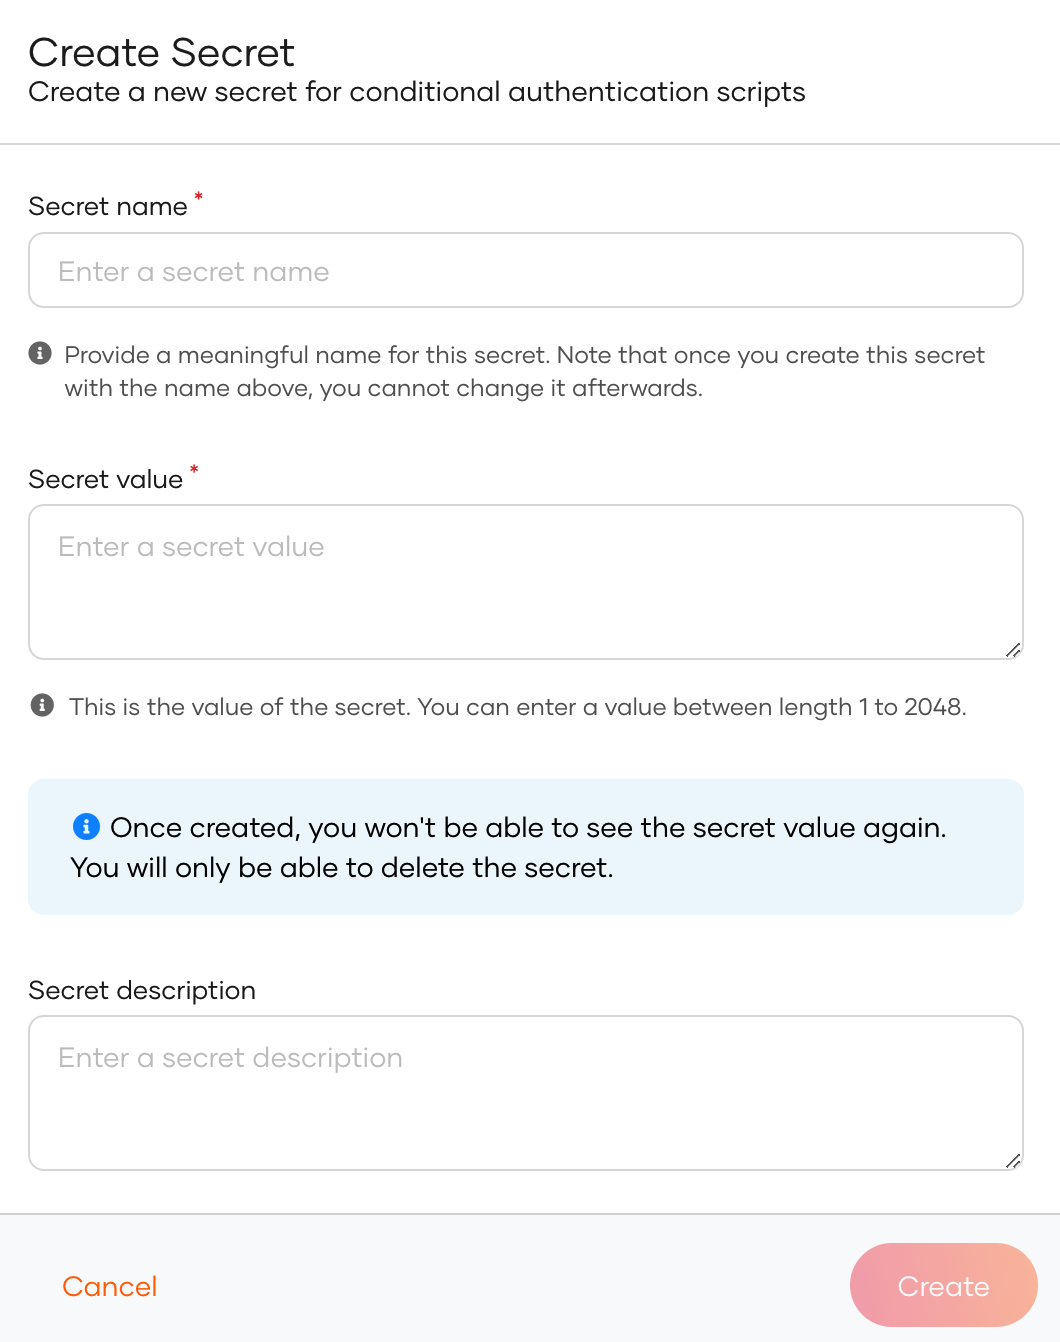
Parameter Description Secret Name A meaningful name for the secret. This name is not changeable and will be used in the script to reference the secret. Secret Value You can enter the secret value that is 1to2048bits in length.Secret Description A short description for the secret. -
Click Finish to complete the creation.
Use secret in the script
You may refer to the previously added secrets in your conditional authentication scripts using the secrets.{secret name} syntax. For example, to retrieve a secret value, you may use:
This allows you to securely access secret values within your authentication scripts, enhancing the security and flexibility of your authentication process.
Delete an existing secret
To delete an existing secret:
-
On the WSO2 Identity Server Console, go to Applications.
-
Select your application and go to the Login Flow tab .
-
Delete the secret by using your preferred editor:
Enable conditional authentication and click the key icon above the script to delete a secret.
Switch to the Visual Editor tab, expand the Script Editor and click Add Secret.
-
Click the trash icon next to the secret you wish to delete.
-
Select the checkbox and confirm your action.