Add login with Microsoft 365
You can connect Microsoft 365 as an authenticator to your applications using WSO2 Identity Server and enable users to log in with their Microsoft 365 accounts.
Follow this guide for instructions.
Register WSO2 Identity Server on Microsoft
You need to register WSO2 Identity Server as an OAuth2.0 application on Microsoft.
Note
For detailed instructions, you can follow the Microsoft documentation.
-
Sign in to the Azure Portal using an account with administrator permission.
Note
You must use an account in the same Microsoft 365 subscription (tenant) with which you intend to register the app.
-
On the Azure portal, go to Azure Services > Microsoft Entra ID.
-
Click Add and select App registration from the list.
-
Provide the required information for app registration.
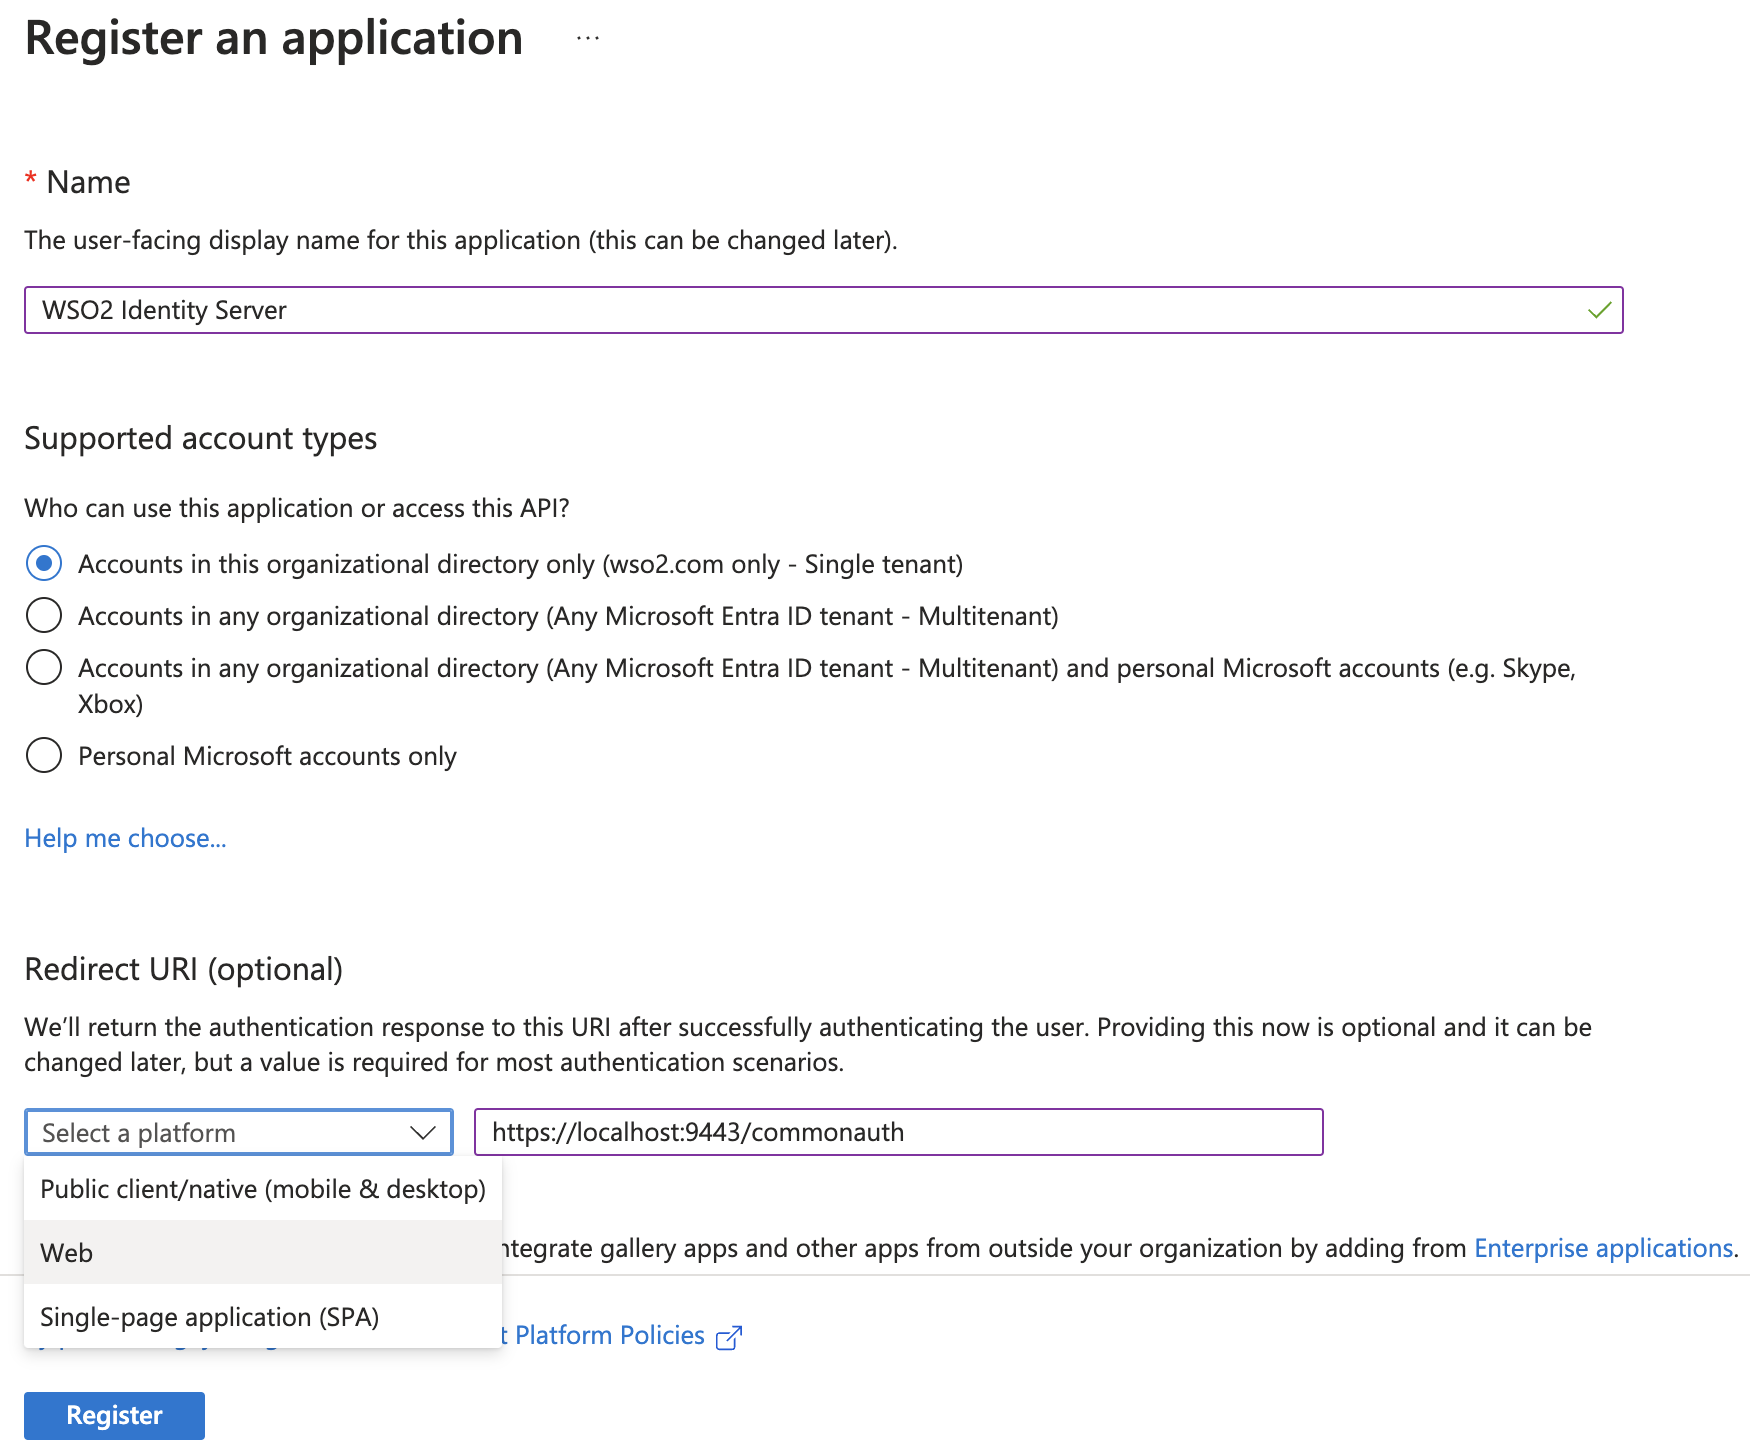
Parameter Description Name Enter a meaningful name for your application. Supported Account Type Select the supported account type. If you wish for users to use only Microsoft 365 accounts, select either the first or the second option. Learn more about account types in the Microsoft documentation. Redirect URI Select Web as the platform and provide the URL to redirect after the login is completed.
Value:https://localhost:9443/commonauth -
Click Register to create the application.
Note
Take note of the client ID after the application is created.
Now, let's generate a client secret for the application.
-
Go to Certificates & secrets on the left navigation and click + New client secret.
-
Enter a description for the client secret and select the expiry time.
-
Click Add to add the client secret.
Important
Take note of the generated Value. Azure will allow copying this value only once. This value is the newly generated client secret for your Microsoft connection in WSO2 Identity Server.
Register the Microsoft 365 IdP
Now, let's register the Microsoft IdP in WSO2 Identity Server.
-
On the WSO2 Identity Server Console, go to Connections.
-
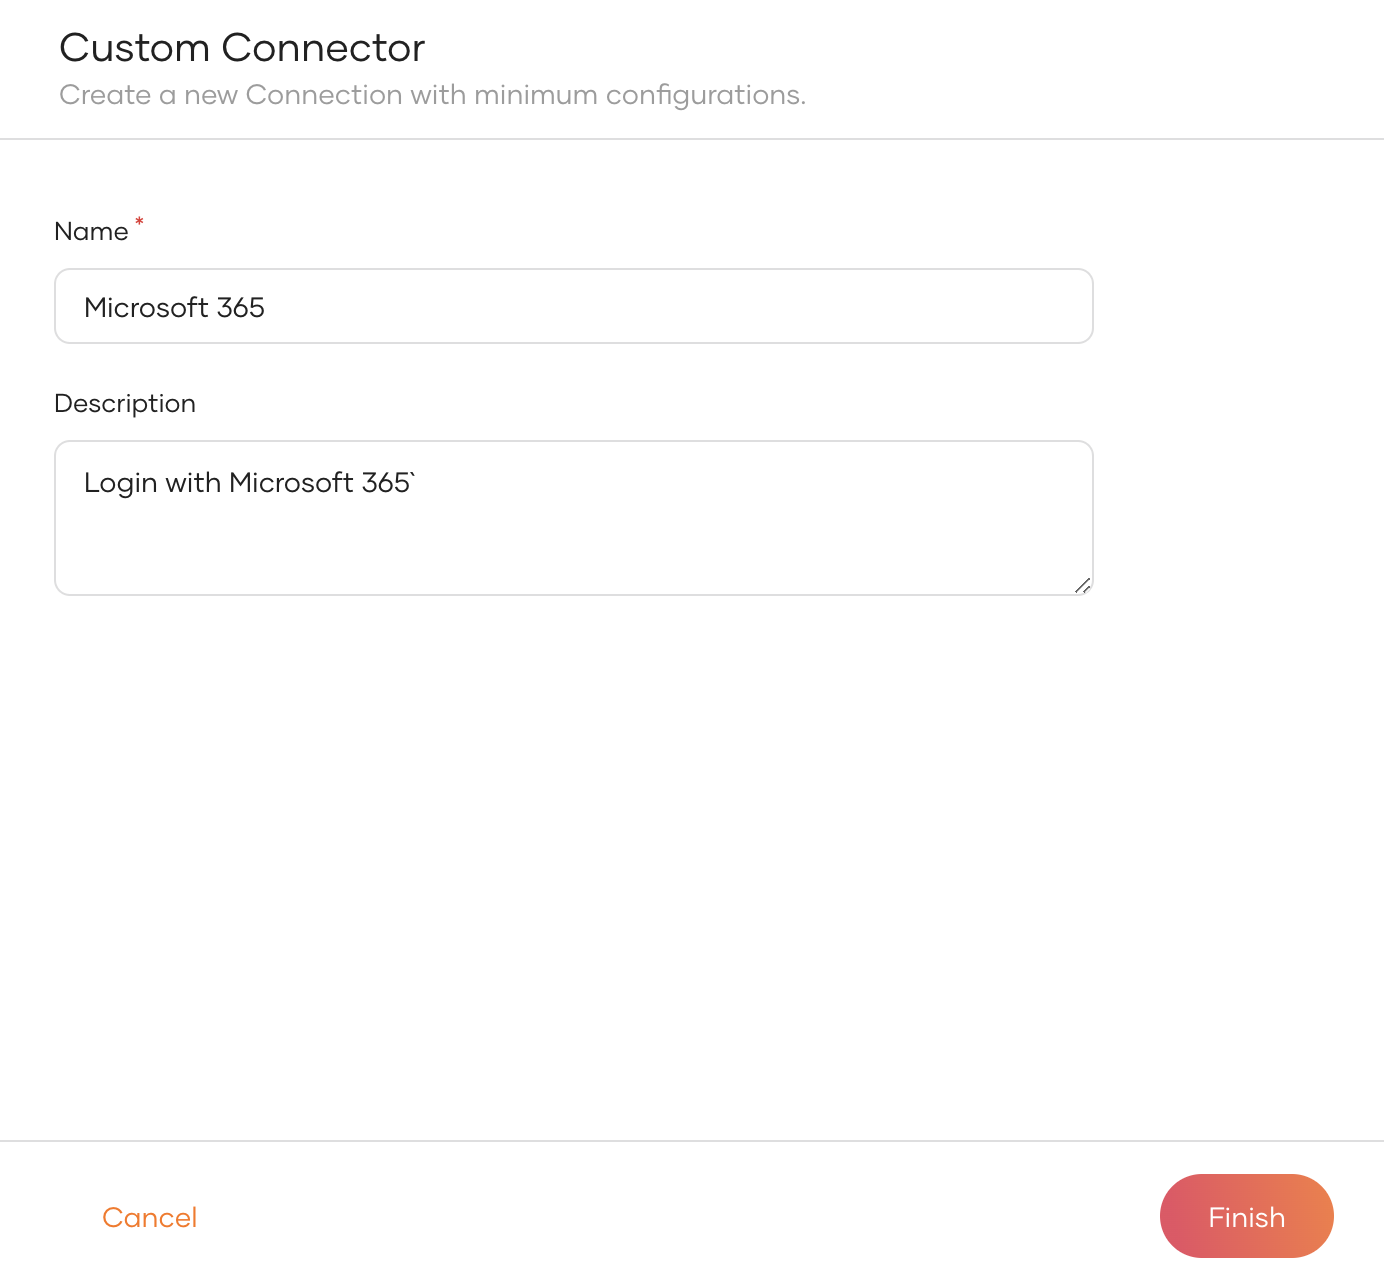
Click Create Connection and select Custom Connector.
-
Provide a name and a description for the connector and click Finish.
-
On the created custom connector, go to the Settings tab.
-
Click New Authenticator, select Office 365 and click Next.
-
Enter the following details of the Microsoft identity provider and click Finish:
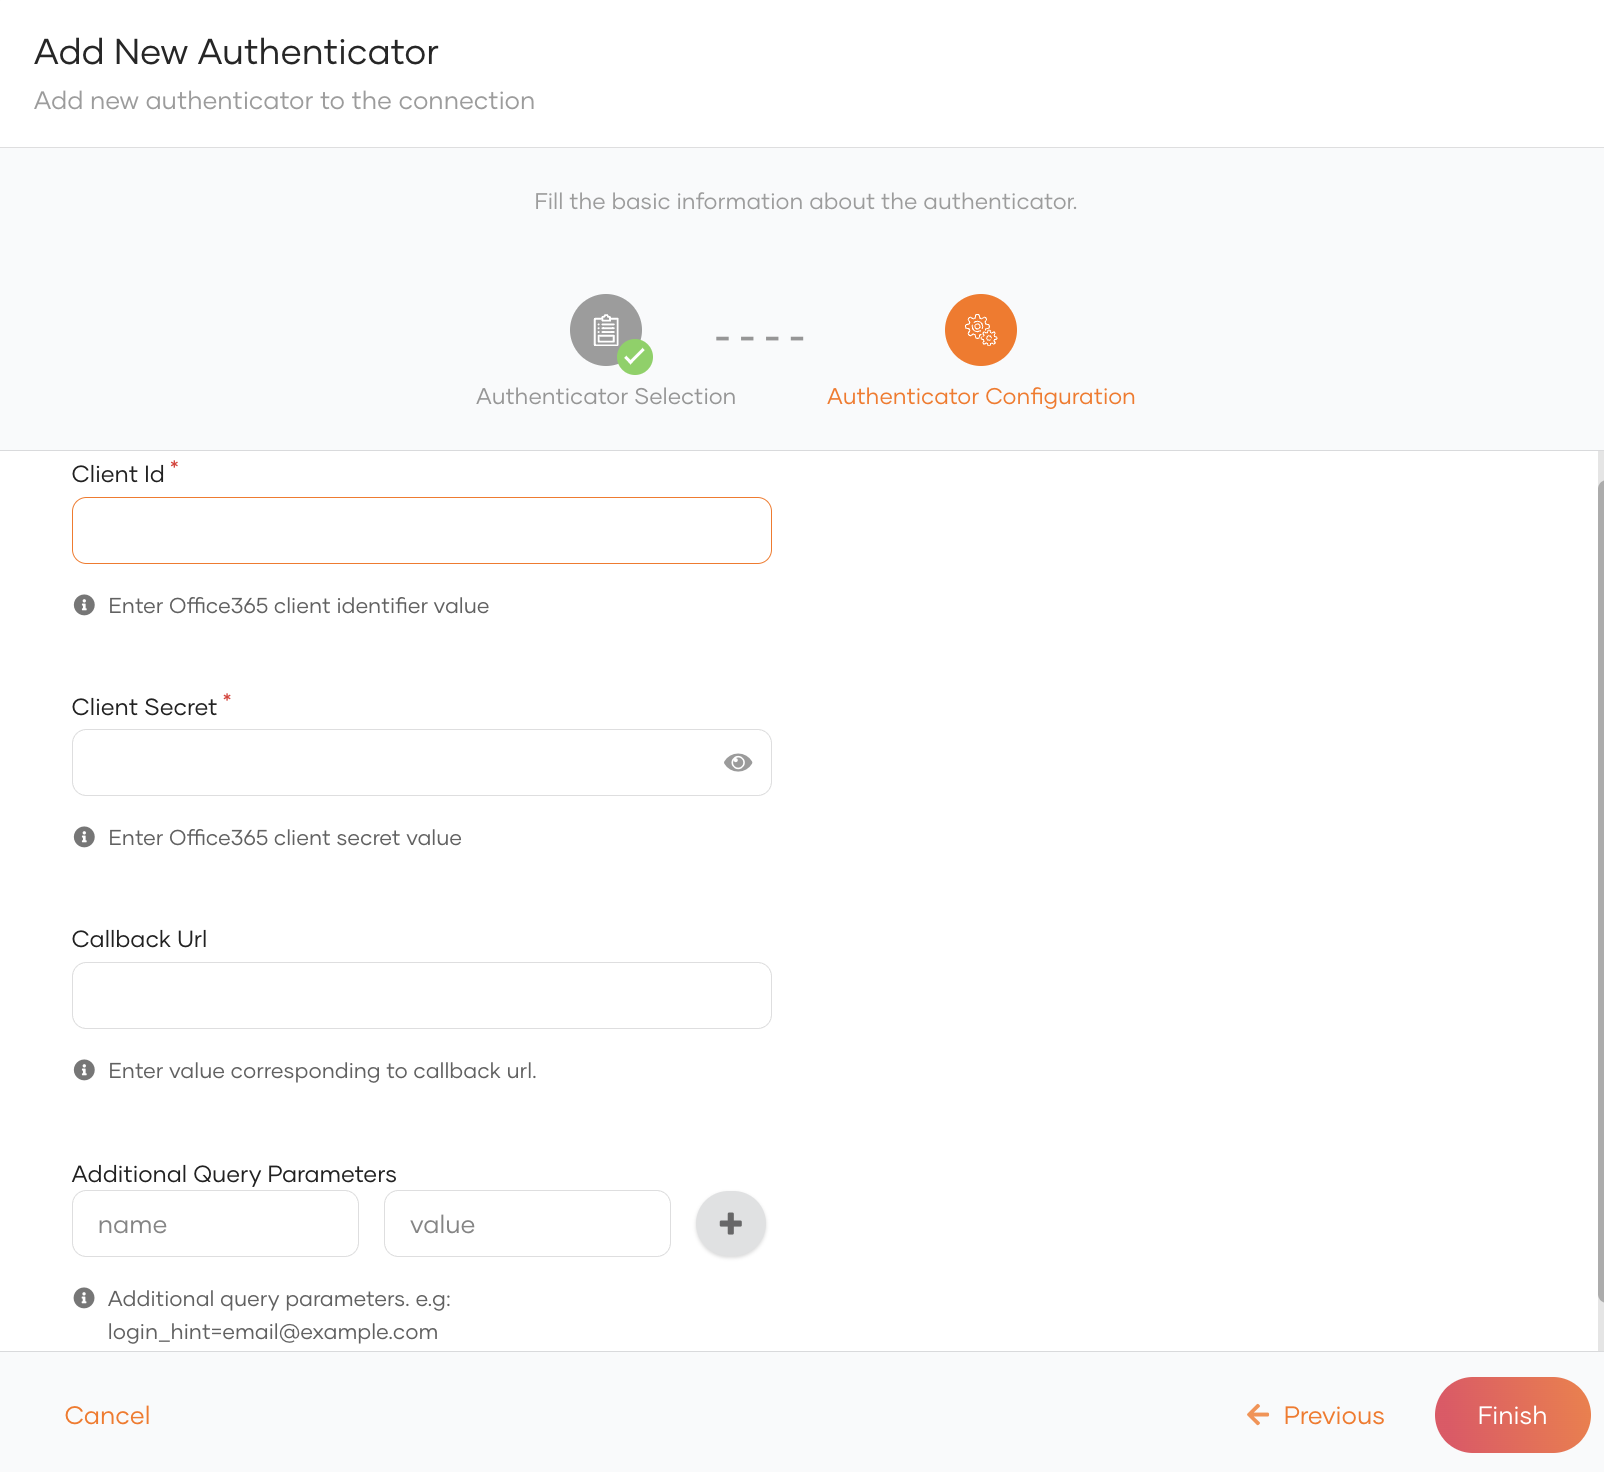
Parameter Description Name A unique name for this Microsoft identity provider. Client ID The client ID obtained from Microsoft. Client secret The client secret obtained from Microsoft. Additional Query Parameters Additional parameters that will be sent in the authorization request. Learn more about URI parameters in the Microsoft documentation.
Enable Microsoft 365 login
Before you begin
You need to register an application with WSO2 Identity Server. You can register your own application or use one of the sample applications provided.
To enable Microsoft login:
-
On the WSO2 Identity Server Console, go to Applications.
-
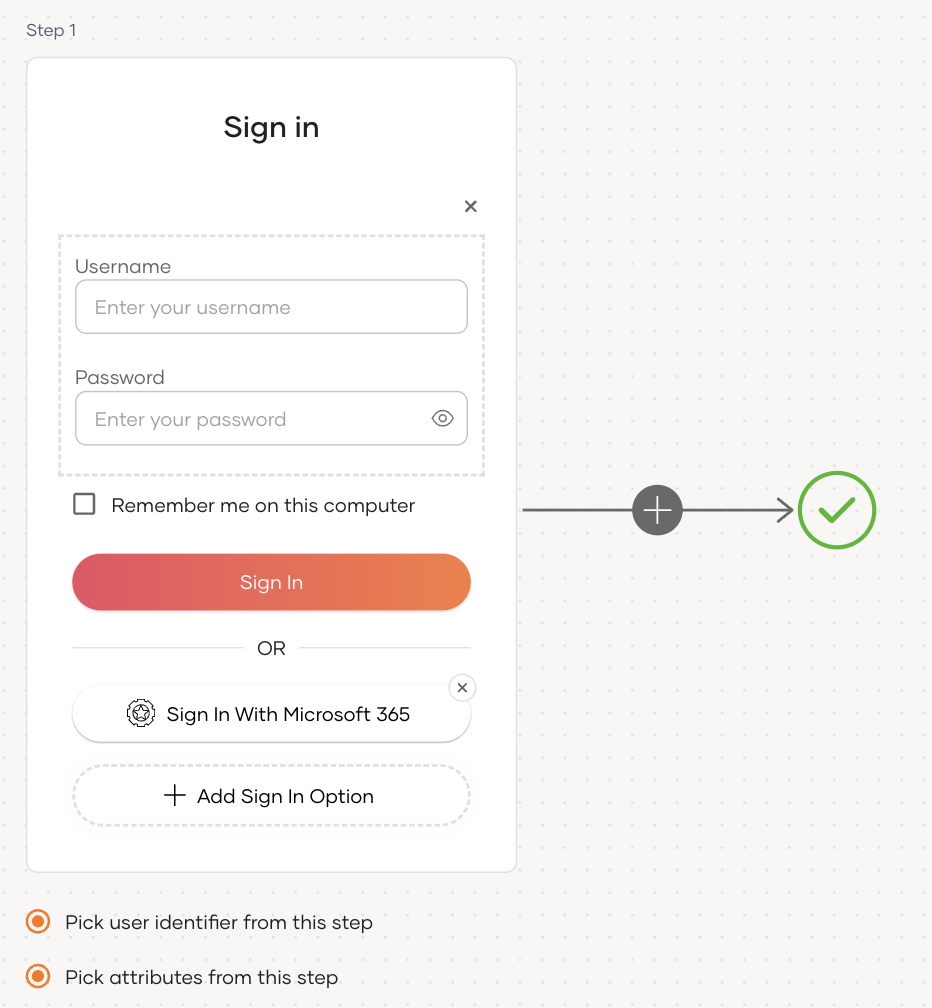
Select your application, go to the Login Flow tab and add Microsoft login from your preferred editor:
-
Go to Predefined Flows > Basic Flows > Add Passwordless login.
-
Select the Microsoft 365 connection.
-
Click Confirm to add Microsoft 365 to the sign-in flow.
Recommendations
It is recommended to add your social and enterprise connections to the first authentication step as they are used for identifying the user.
-
-
Click Update to save your changes.
Try it out
Follow the steps given below.
-
Access the application URL.
-
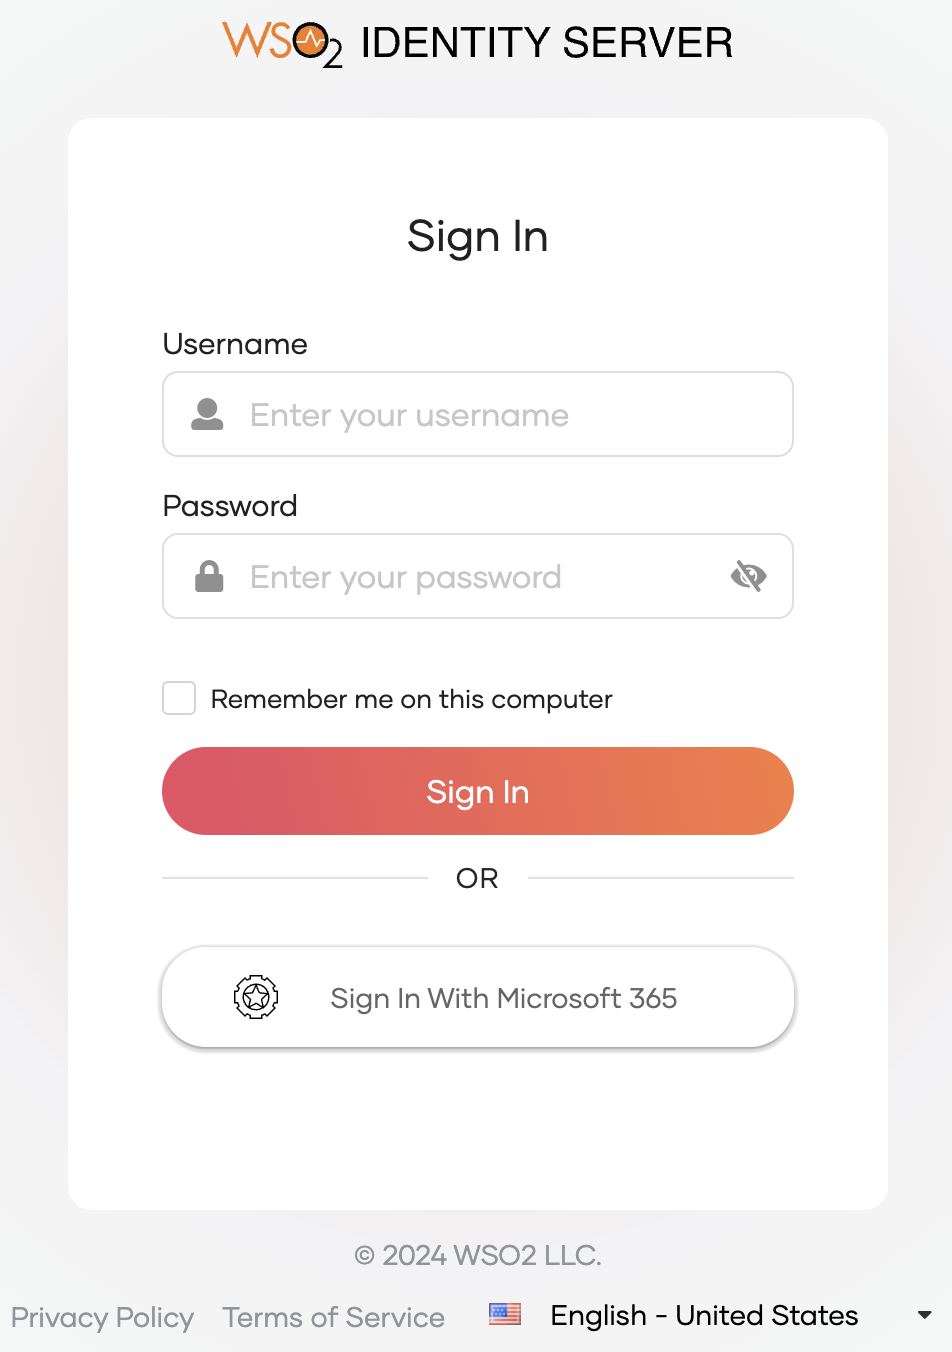
Click Login to open the WSO2 Identity Server login page.
-
On the WSO2 Identity Server login page, Sign in with Microsoft 365.
-
Log in using an existing Microsoft 365 account.
Note
When a user successfully logs in with Microsoft 365 for the first time, a user account is created in the WSO2 Identity Server Console with the Microsoft 365 username. Microsoft will manage this new user account.
Configure user attributes
Configuring attributes for an Identity Provider (IdP) involves mapping the attributes available in the external IdP to local attributes. This is done so that WSO2 Identity Server can identify the user attributes in the response sent from the external IdP.
To do so,
-
On the WSO2 Identity Server Console, click Connections.
-
Select the relevant IdP connection from the list and click Set up.
-
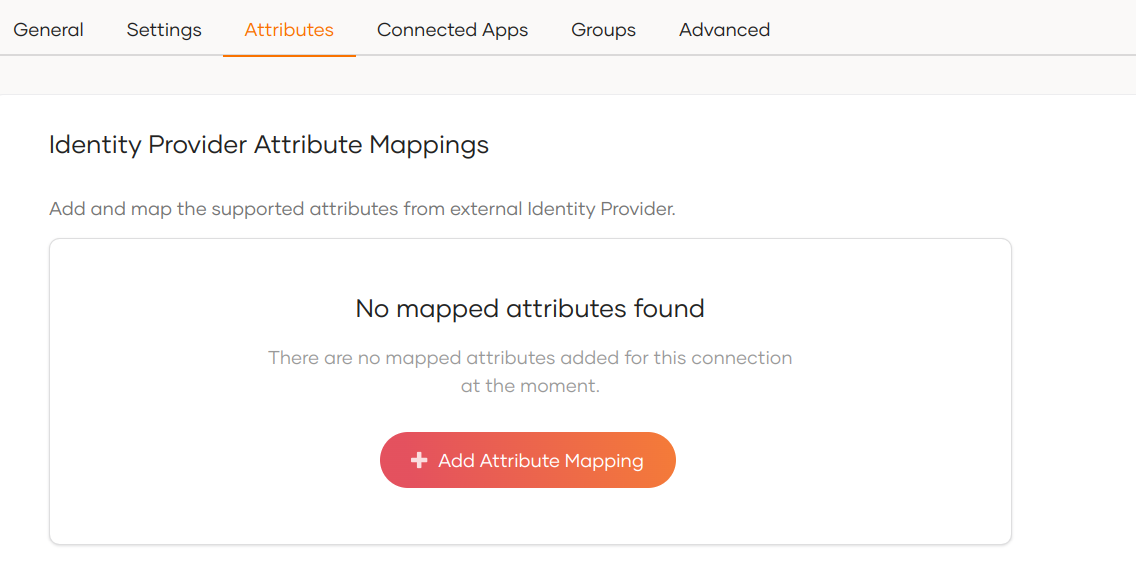
Go to the Attributes tab and under Identity Provider Attribute Mappings, click Add Attribute Mapping.
-
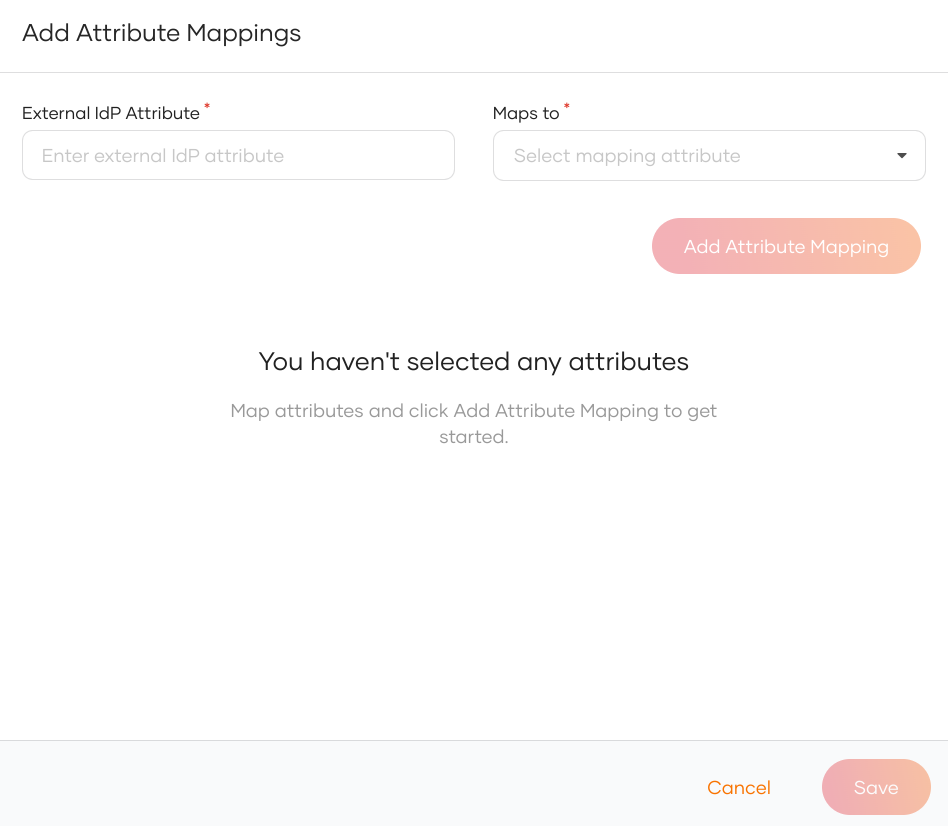
Enter the external attribute, select the corresponding local attribute to which it maps and click Add Attribute Mapping.
-
Click Save to save the entries.
-
Under Subject, select a Subject Attribute that will be used to uniquely identify the user.
-
Under Provisioning Attributes Selection, select the required attributes that needs to be sent in the response to provision the user in WSO2 Identity Server.
-
Click Update to save the changes.
Configure connection
To learn more about other configurations available for the connection, refer to the add federated login documentation.