Enable user attributes for SAML apps
WSO2 Identity Server can share user attributes with applications. The following guide shows how to share user attributes with SAML applications.
Prerequisite
To get started, you need to have an application registered in WSO2 Identity Server. If you don't have an app registered, go to WSO2 Identity Server to register a SAML application.
Configure user attributes to share
Follow the steps below to configure the user attributes from the WSO2 Identity Server Console and share them with the application.
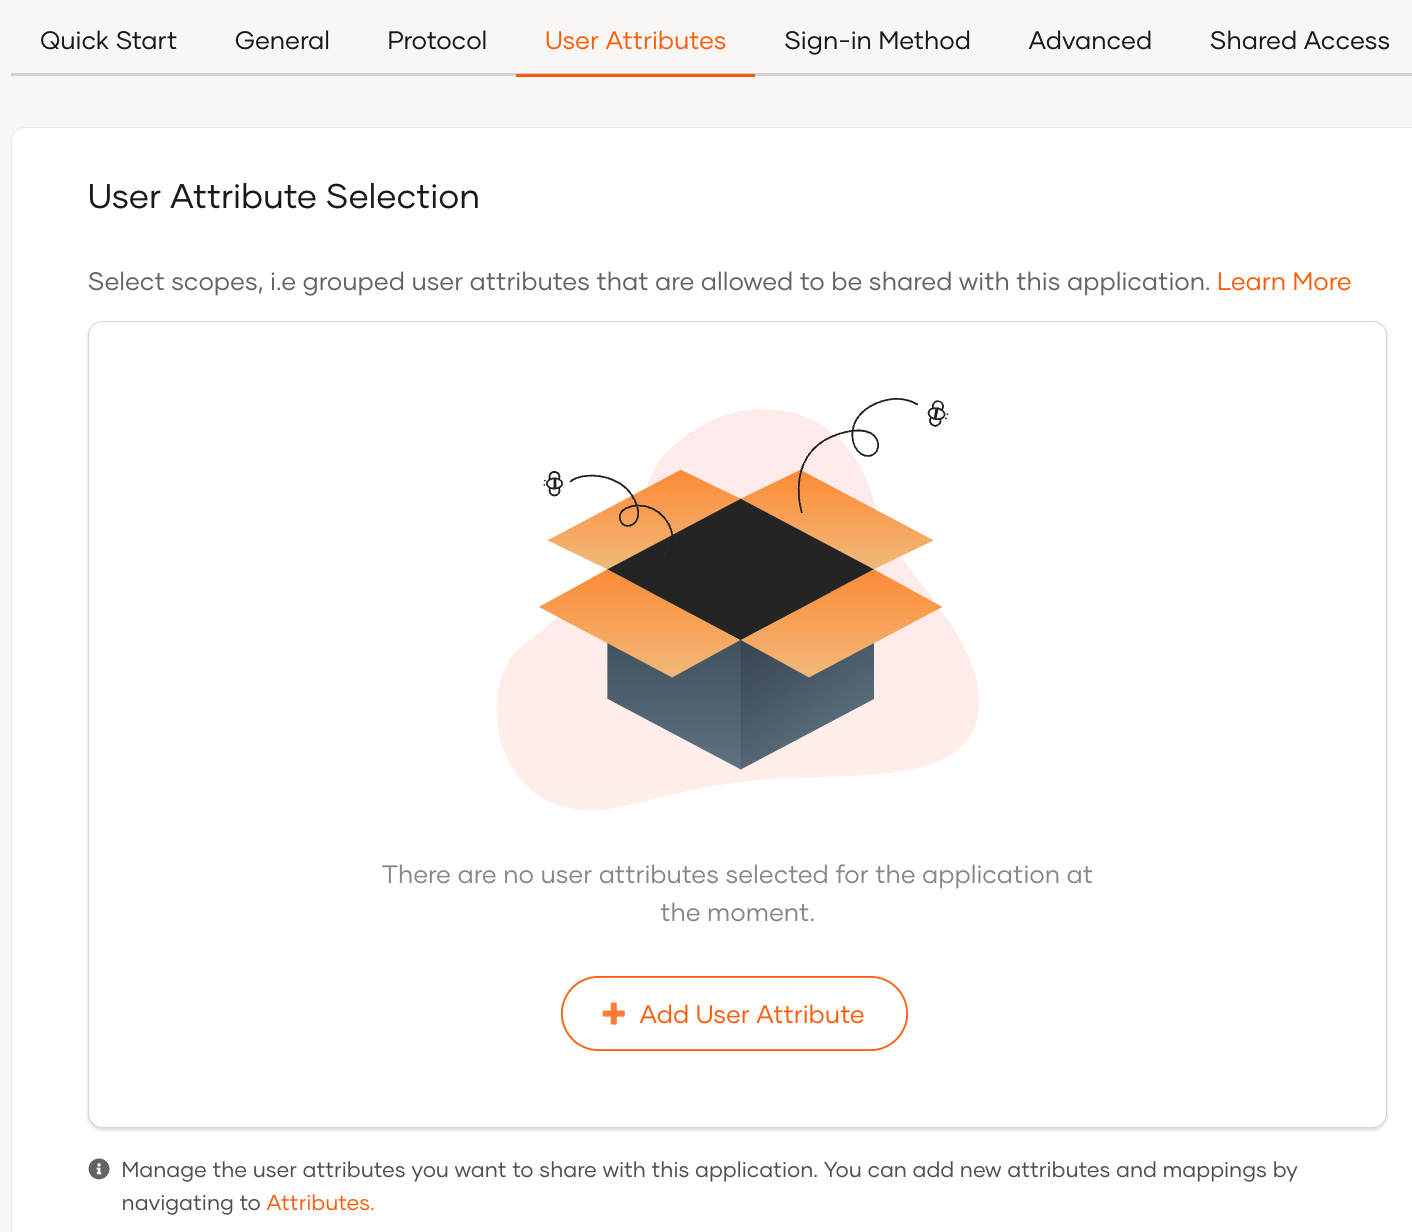
Select user attributes
You need to first specify the user attributes required for an application. This ensures that when a user logs in, the application can only get access to the user information exposed through these attributes.
To add user attributes to the app:
- On the WSO2 Identity Server, go to Applications.
- Select your application, go to the Protocol tab and select Enable attribute profile.
- Click Update and go to the User Attributes tab.
-
Click Add User Attribute if you don't have any attributes already added.
-
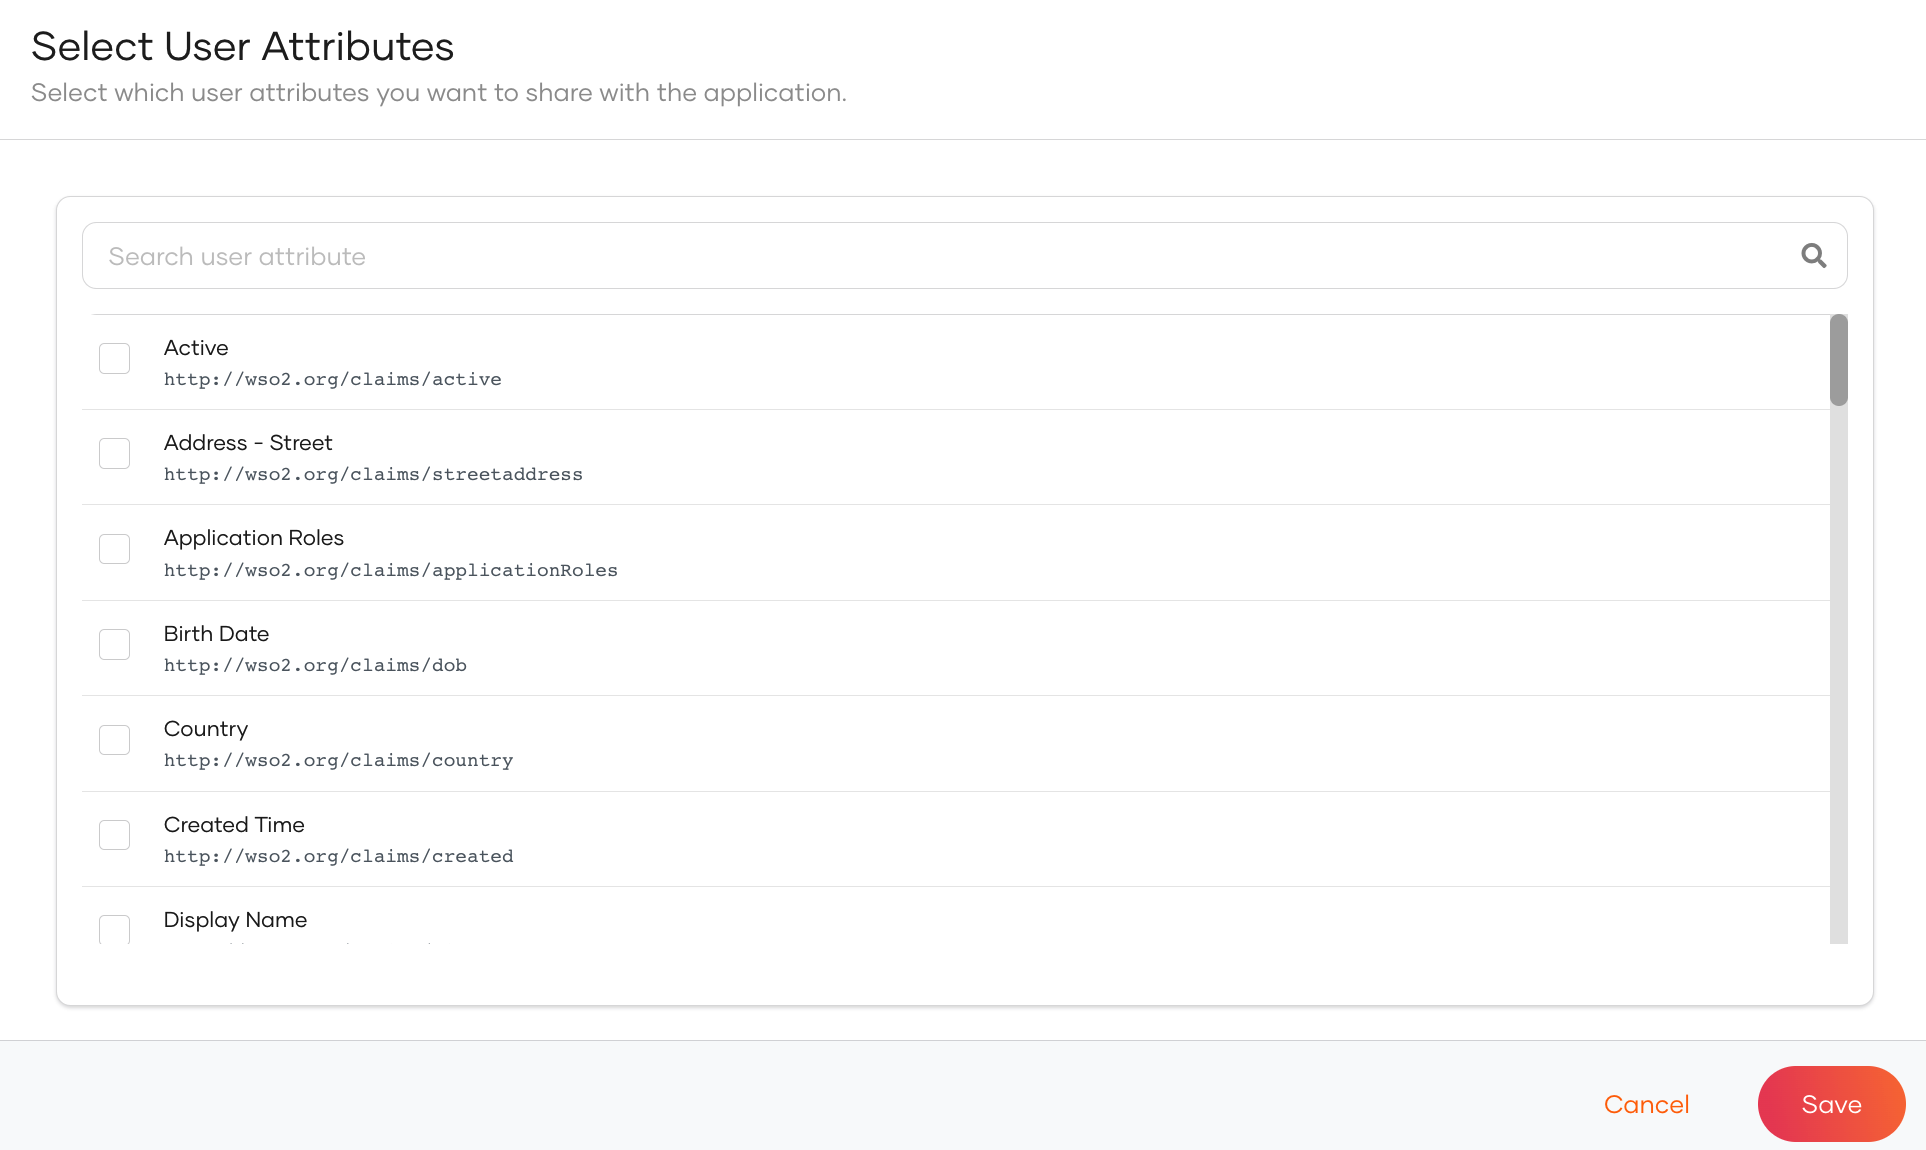
Select the required attributes from the list as shown below.
-
Click Save to return to the User Attributes tab and then click Update.
Map user attributes
In the user attribute configurations, you can either choose default attribute names or define application-specific user attribute names.
To configure application-specific attribute names, you need to map the selected user attributes to application-specific user attributes.
To perform mapping:
- Click Enable Mapping in the User Attributes section.
-
Change the Mapped user attribute for the selected attribute.
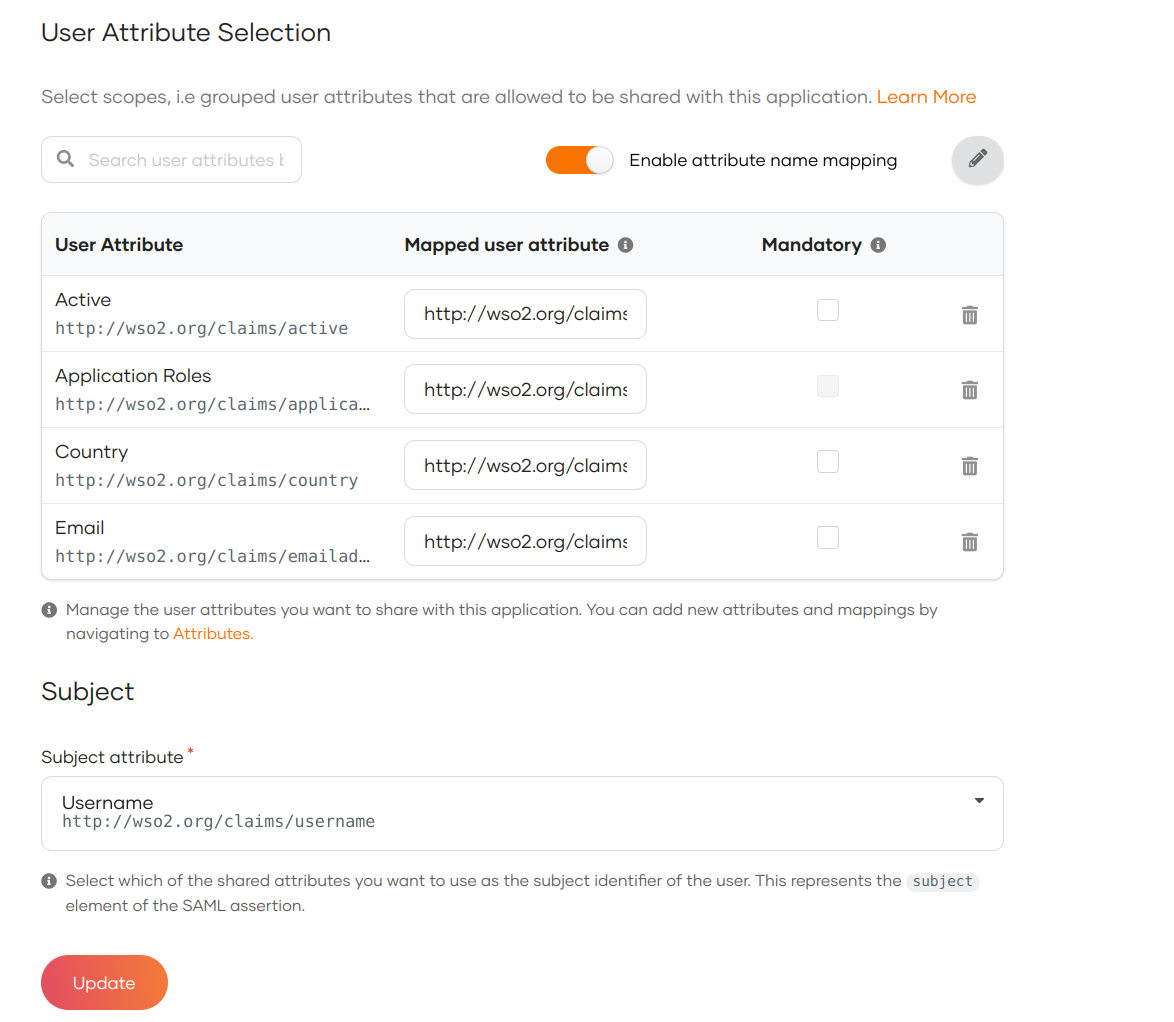
This ensures that the application receives attributes based on the name that is configured.
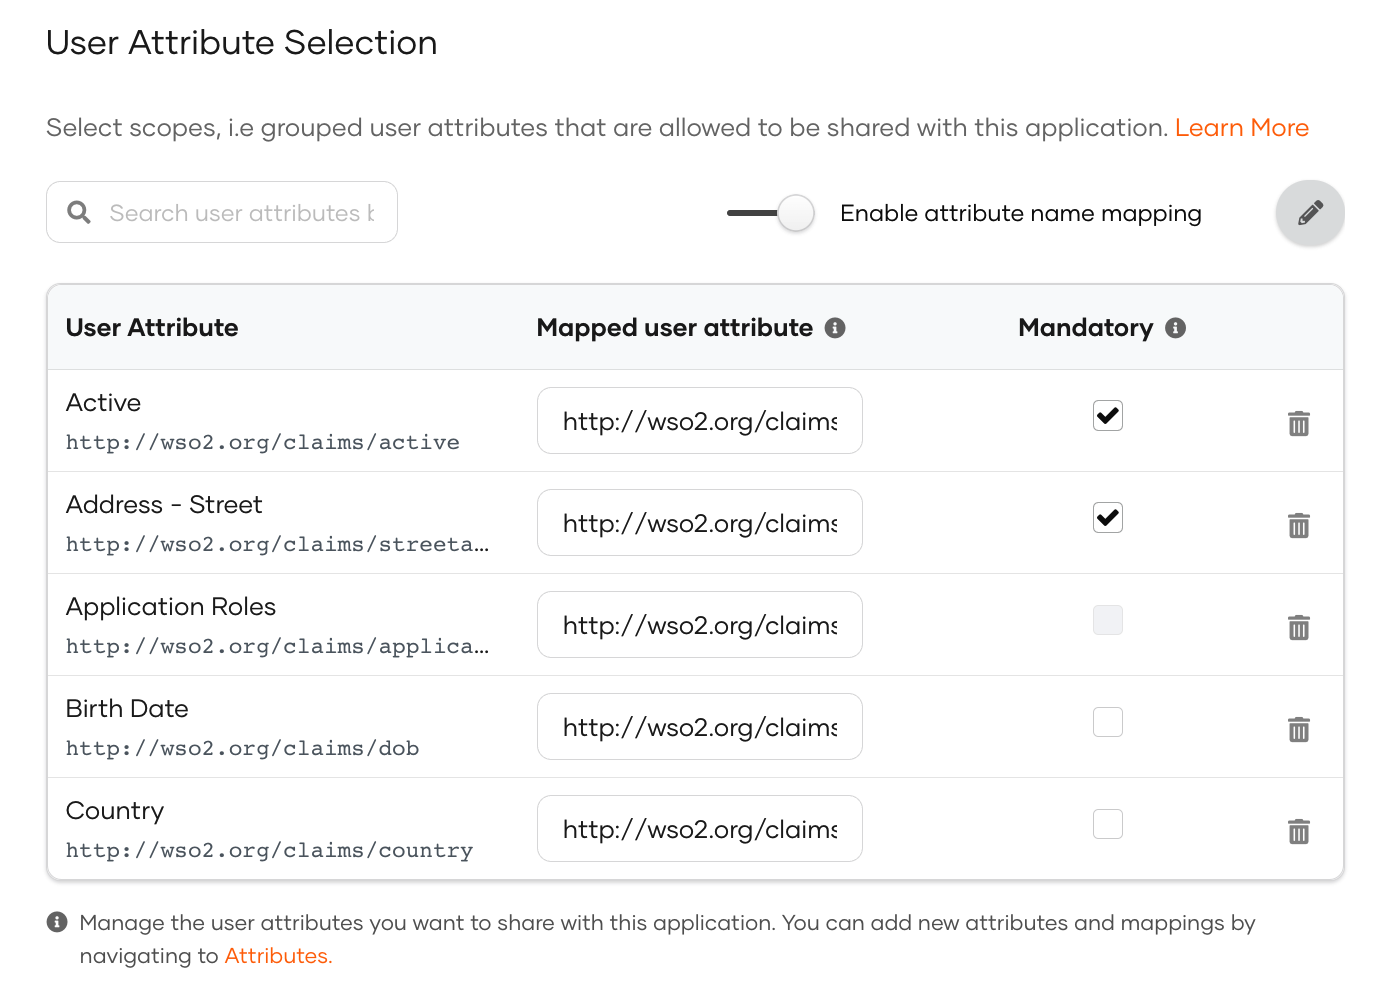
Define mandatory user attributes
If your application needs certain attributes for the successful function of the application, you can make them mandatory attributes. Users logging into the application should then have the mandatory attributes either pre-filled in their profiles or provide the required information when prompted during the login flow.
To make an attribute mandatory:
-
On the WSO2 Identity Server console, go to Applications.
-
Select the application and go to its User attributes tab.
-
Expand the relevant scope and out of the selected attributes for the application, select the mandatory attributes by selecting the Mandatory checkbox next to them.
Select the subject attribute
The subject attribute is used for exchanging information about the user. The subject is represented by the subject attribute in the SAML assertion.
By default, WSO2 Identity Server shares User ID as the subject. You can define any user attribute as the subject.
To define a different attribute as the subject:
- Select it as a user attribute.
-
Go to the Subject section under User Attributes.

-
Select an attribute as the subject from the Subject attribute list.
- Click Update.
How it works
Let's see how this flow works in WSO2 Identity Server.
Once you have configured the user attributes that are required for your application, WSO2 Identity Server implements the following process when a user tries to log in to your app.
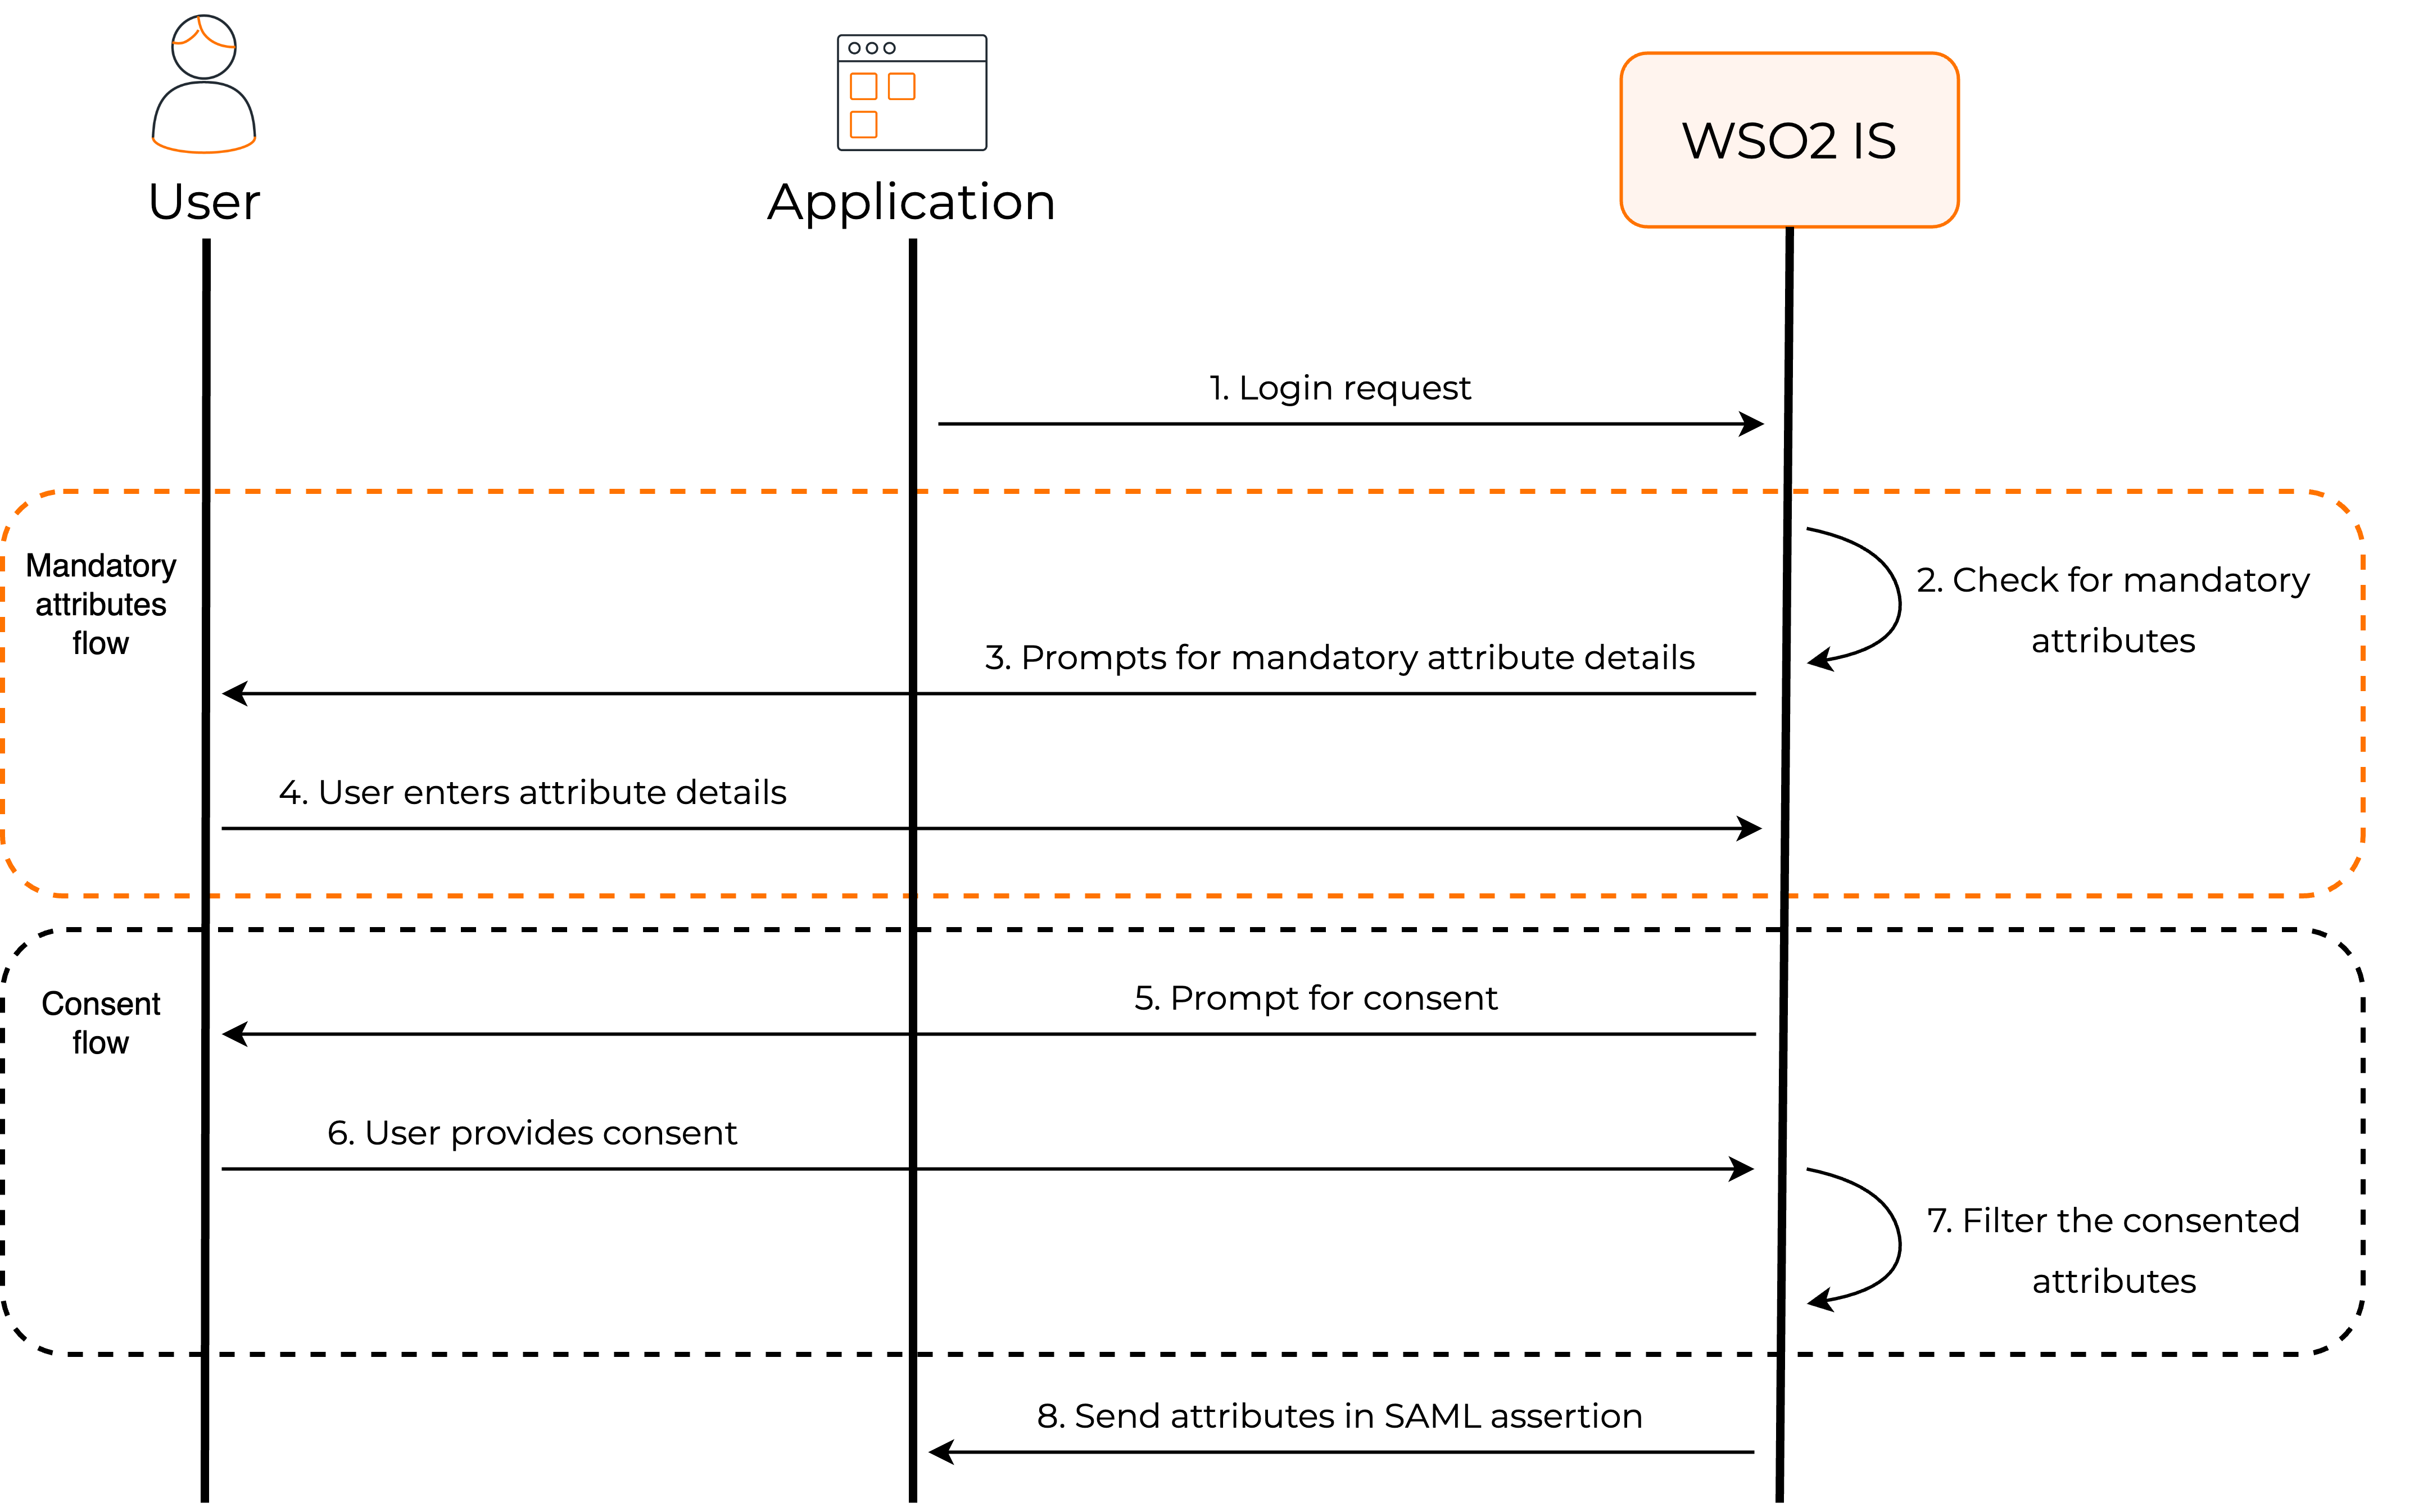
WSO2 Identity Server checks for mandatory attributes
WSO2 Identity Server verifies whether the user's profile has values for all the mandatory attributes that are requested by the application. If there are missing values, WSO2 Identity Server will prompt the user to enter the missing values.
Requests user consent
By default, WSO2 Identity Server requests the user's consent to share the user attributes with the application.
Note
Learn more about managing user consent.
Shares attributes with the app
WSO2 Identity Server will share these user attributes with an application, given the user has provided consent. User attributes, along with the subject attribute, are shared via SAML assertions.
Subject attribute
The subject attribute is shared via the <saml2:Subject> element based on the configured subject attribute.
A sample Subject element found in a SAML assertion is given below:
<saml2:Subject>
   <saml2:NameID Format="urn:oasis:names:tc:SAML:1.1:nameid-format:emailAddress">[email protected]</saml2:NameID>
   <saml2:SubjectConfirmation Method="urn:oasis:names:tc:SAML:2.0:cm:bearer">
         <saml2:SubjectConfirmationData InResponseTo="immfmmacmiaomepphphhlfokfggpffkleokajfbg"
                                 NotOnOrAfter="2021-07-13T06:09:33.594Z"
                                 Recipient="http://localhost:8081/sample-app/home.jsp"
                                 />
   </saml2:SubjectConfirmation>

</saml2:Subject>
Attribute statement
If the user gives consent to share attributes with the application, WSO2 Identity Server returns the requested user attributes via the <saml2:AttributeStatement> element.
A sample attribute statement element found in a SAML assertion is given below:
<saml2:AttributeStatement>
        <saml2:Attribute Name="http://wso2.org/claims/country"
                         NameFormat="urn:oasis:names:tc:SAML:2.0:attrname-format:basic"
                         >
            <saml2:AttributeValue xmlns:xsi="http://www.w3.org/2001/XMLSchema-instance"
                                  xsi:type="xsd:string"
                                  >Sri Lanka</saml2:AttributeValue>
        </saml2:Attribute>
        <saml2:Attribute Name="http://wso2.org/claims/emailaddress"
                         NameFormat="urn:oasis:names:tc:SAML:2.0:attrname-format:basic"
                         >
            <saml2:AttributeValue xmlns:xsi="http://www.w3.org/2001/XMLSchema-instance"
                                  xsi:type="xsd:string"
                                  >[email protected]</saml2:AttributeValue>
        </saml2:Attribute>
</saml2:AttributeStatement>
Attribute statement with attribute mapping
If you have done any custom attribute mapping via the Enable mapping setting, the attributes will contain those application-specific names in the SAML assertion.
A sample attribute statement element with custom attribute mapping is given below:
<saml2:AttributeStatement>
            <saml2:Attribute Name="country"
                             NameFormat="urn:oasis:names:tc:SAML:2.0:attrname-format:basic"
                             >
                <saml2:AttributeValue xmlns:xsi="http://www.w3.org/2001/XMLSchema-instance"
                                      xsi:type="xsd:string"
                                      >Sri Lanka</saml2:AttributeValue>
            </saml2:Attribute>
            <saml2:Attribute Name="emailaddress"
                             NameFormat="urn:oasis:names:tc:SAML:2.0:attrname-format:basic"
                             >
                <saml2:AttributeValue xmlns:xsi="http://www.w3.org/2001/XMLSchema-instance"
                                      xsi:type="xsd:string"
                                      >[email protected]</saml2:AttributeValue>
            </saml2:Attribute>
</saml2:AttributeStatement>