Adding and Configuring a Service Provider
This topic provides instructions on how to add a new service provider. You must provide configuration details to add this service provider in the WSO2 Identity Server so that the authentication and/or provisioning happens as expected. For more information on how the service provider fits into the WSO2 IS architecture, see Architecture.
The responsibility of the service provider configuration is to represent external service providers. The service provider configurations cover the following:
- Define how the service provider talks to the Identity Server
inbound authenticator
This is via inbound authenticators. When you register a service provider, you need to associate one or more inbound authenticators with it. - Define how to authenticate users.
This can be via a local authenticator, request-path authenticator or federated authenticator. Based on this configuration, the Identity Server knows how to authenticate the user when it receives an authentication request (via an inbound authenticator) and based on the service provider who initiates it. - Maintain claim mapping.
This is to map the service provider's own set of claims to the Identity Server's claims. For example, WSO2 Identity Server (WSO2 IS) has a claim called work email (http://wso2.org/claims/emails.work) but your service provider application expects to receive a value named email. If the service provider application receives a value named work email, it does not recognize it as it does not recognize it. Therefore, to ensure that the values sent by WSO2 IS is understood and recognized by the service provider application, you can use claim mapping.
When the authentication framework hands over a set of claims (which it gets from the local user store or from an external identity provider) to the response builder of the inbound authenticator, the framework talks to the service provider configuration component, find the claim mapping and do the claim conversion. See Configuring Inbound Authentication for a Service Provider for more information about response builder. Now the response builder will receive the claims in a manner understood by the corresponding service provider. Read more about claim management.
Adding a service provider
Note
This section describes how to add and configure a service provider manually using the Management Console. You can also do the following:
- Export an existing service provider and import it using the management console. For instructions, see Importing or Exporting a Service Provider.
- Add a new service provider using a configuration file instead of using the management console. For instructions, see Configuring a SP and IdP Using Configuration Files.
- Sign in to the Management Console.
-
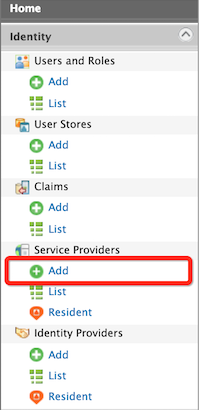
On the Main menu, click Identity > Service Providers > Add.
-
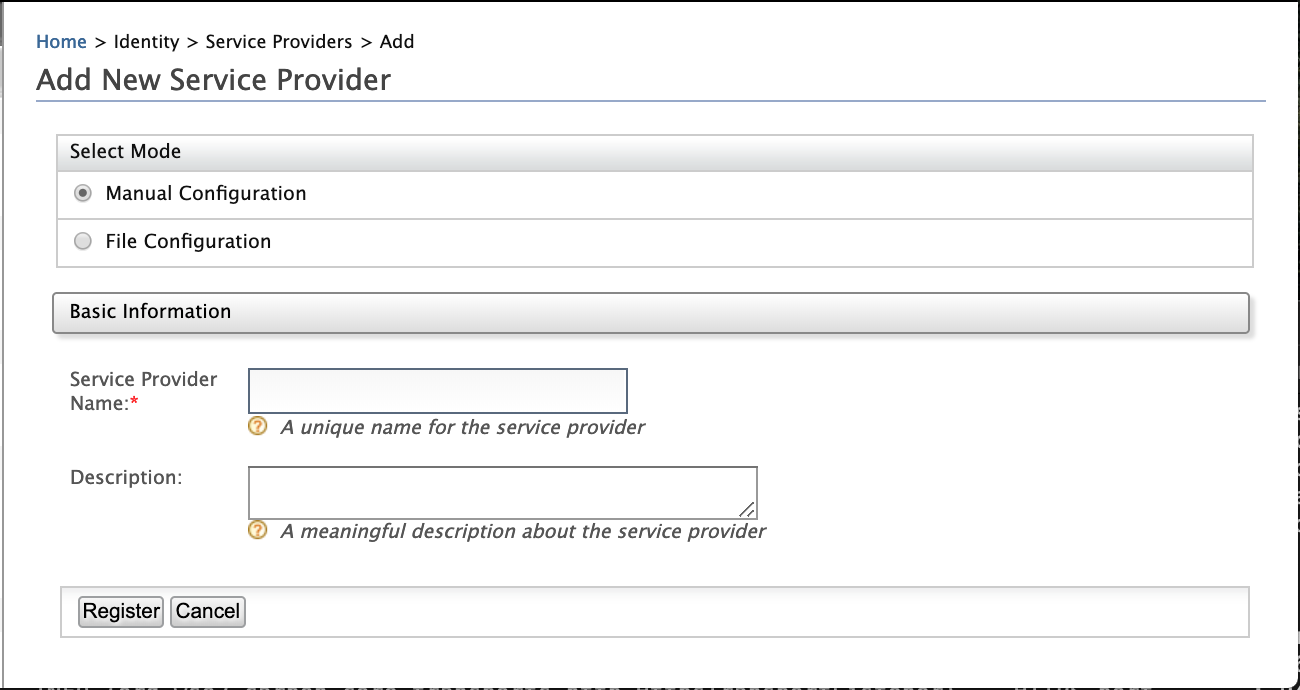
Fill in the Service Provider Name and provide a brief Description of the service provider. Only Service Provider Name is a required field.
-
Click Register to add the new service provider.
Note
When a service provider is created, it is assigned to a "APPLICATION" role (for instance, if you add Travelocity as the service provider, then the role will look like "Application/travelocity"). Users who wish to manage the created service provider should have this application role assigned. See Configuring Roles for guidance on how to do this.
-
The Service Providers screen appears. Paste the application's certificate to the Application Certificate field.
When is this certificate used
This certificate is used to validate the signatures of the signed requests from the application (service provider) to WSO2 IS. Therefore, the certificate is used for the following scenarios:
- Configuring single sign-on - the certificate is used to validate the signature of the SAML2 authentication requests and the SAML2 logout requests that are sent by the service provider.
- Passing OIDC authentication request
parameters -
the certificate is used to:
- Encrypt the
id_tokensent to the service provider in the OIDC Authentication Response. - Validate the signed
RequestObjectsent in the OAuth2/OIDC Authorization Request.
- Encrypt the
Format of the certificate
WSO2 IS expects the certificate to be in PEM format.
PEM is a Base64 encoded format, therefore contains ASCII character and easier to deal with rather than a binary encoded certificate.
How to obtain the PEM encoded certificate
The PEM content of a certificate in a JKS file, can be obtained by following the steps below:
1. Export the certificate from the keystore. The exported certificate will be in binary format.
keytool -export -keystore <keystore-path> -alias <alias-of-the-certificate> -file <path-of-the-expected-certificate-file>

e.g. keytool -export -keystore wso2carbon.jks -alias wso2carbon -file wso2carbon.crt
2. Convert the above binary encoded certificate to a PEM encoded certificate
openssl x509 -inform der -in <path-of-binary-certificate> -out <path-of-expected-pem-content>

e.g. openssl x509 -inform der -in wso2carbon.crt -out wso2carbon.pem
Note
You can paste the public certificate in to the given text area or upload file in PEM format. If the Application Certificate field is left blank, WSO2 IS is backward compatible and follows the previous implementation to locate the certificates in the keystore.
This means that if it is a SAML SSO flow, the certificate alias mentioned in SAML inbound authentication configuration is used when the certificate is not updated via the management console. If it is an OIDC request object signature validation, the certficate will be retrived from default keystore, aliase to consumer key of the auth application.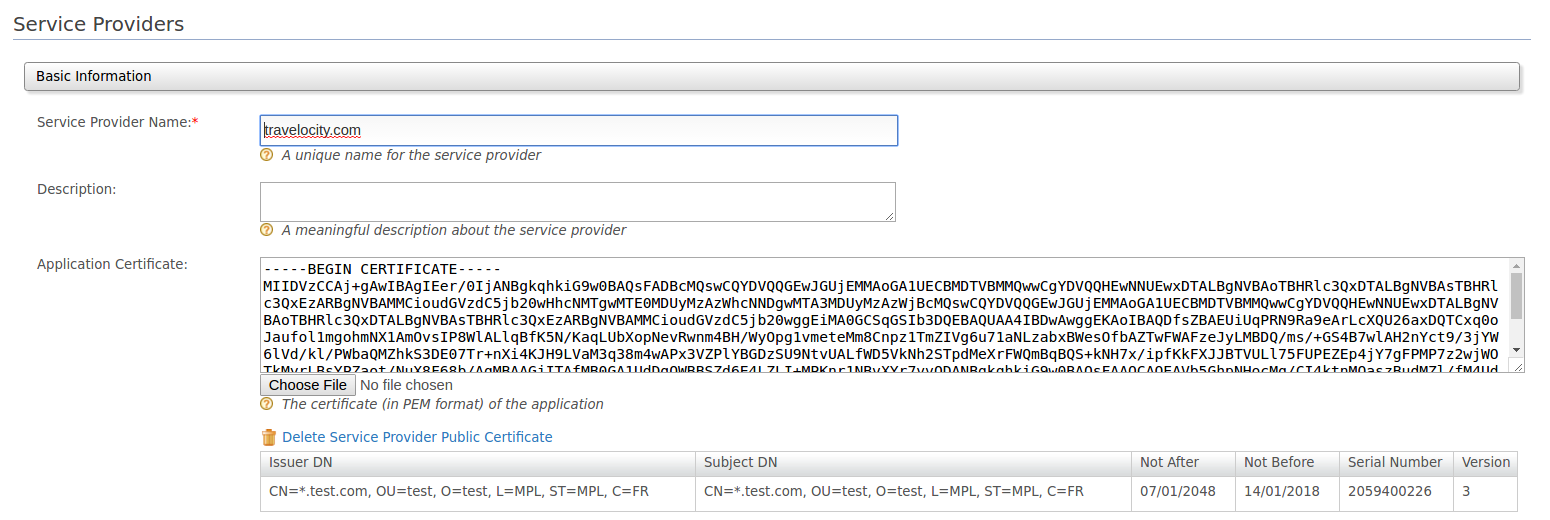
-
Select if the service provider is a SaaS Application or not using the Saas Application checkbox. The SaaS Application configuration defines which users you want to be able to log into your web application.
Tip
By default, the SaaS Application check box is disabled, which means the web application is not shared among tenants so only users in the current tenant (the one you use to define the service provider) will be allowed to log into the web application. Alternatively, if you enabled the SaaS Application check box, that means this web application is shared among tenants so users from any tenant will be allowed to log into the web application. For example, if there are three tenants, namely TA, TB and TC and the service provider is registered and configured only in TA.
-
If the SaaS Application configuration is disabled, only users in TA are able to log into the web application.
-
If the SaaS Application configuration is enabled, all TA, TB, TC users are able to log into the web application.
-
For more information on creating and managing tenants, see Creating and Managing Tenants .
-
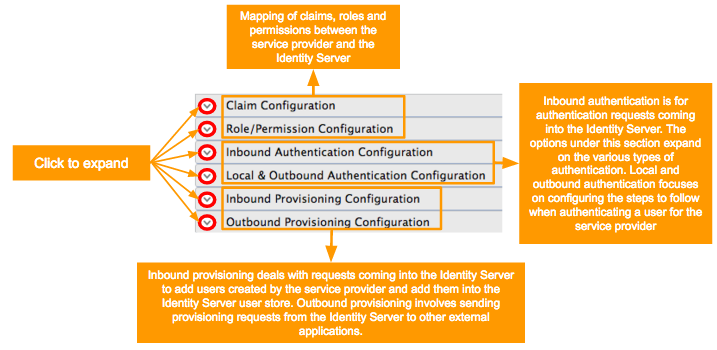
In the resulting screen, click the arrow buttons to expand the forms available to update.
-
See here for details on how to configure claims.
-
See here for details on how to configure roles and permissions.
-
See here for details on how to configure inbound authentication.
-
See here for details on how to configure local and outbound authentication.
-
See here for details on how to configure inbound provisioning.
-
See here for details on how to configure outbound provisioning.
Configuring a resident service provider
WSO2 Identity Server can mediate authentication requests between service providers and identity providers. At the same time, the Identity Server itself can act as a service provider and an identity provider. When it acts as a service provider it is known as the resident service provider.
The Identity Server mainly acts as a resident service provider while adding users to the system. You can enable provisioning configurations for the resident service provider. For example, if you try to add users to the system via the SCIM API ( You must use a privileged local account to invoke the API to authenticate with HTTP Basic Authentication ), the system will read the provisioning configurations from the resident service provider.
At the same time, if you want to configure outbound provisioning for any user management operation done via the management console, SOAP API or the SCIM API , you must configure outbound provisioning identity providers against the resident service provider. So, based on the outbound configuration, users added from the management console will also be provisioned to external systems like Salesforce and Google Apps.
Follow the instructions below to configure a resident service provider in the WSO2 Identity Server.
- Sign in. Enter your username and password to log on to the Management Console .
- Click Resident under the Service Providers on the Main
tab.

- The Resident Service Provider page appears.
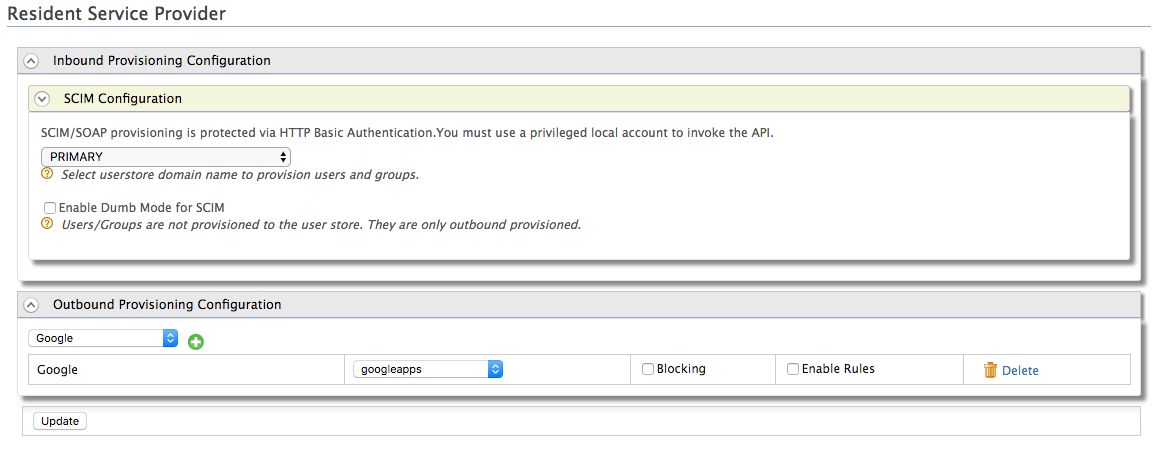
- Select the user store domain to provision users and groups for inbound authentication for SCIM or SOAP requests.
- For outbound provisioning configurations, select the identity
provider from the dropdown list available and click the plus
button to add this identity provider for provisioning. For an
identity provider to appear on this list you have to add the
identity
provider in the
Identity Server. The following are the names that would appear
for each type of provisioning connector.
- Google provisioning connector - Google and googleapps
- Salesforce provisioning connector - salesforce.com and salesforce
- SCIM provisioning configuration - scim
- SPML provisioning configuration - spml
- Click Update.
Managing service providers
This topic provides instructions on how to manage service providers once they are created.
Viewing service providers
Follow the instructions below to view the list of service providers added in the WSO2 Identity Server.
- Sign in. Enter your username and password to log on to the Management Console.
- In the Main menu under the Identity section, click List under Service Providers. The list of service providers you added appears.

Note
You can search for a specific service provider using the search functionality. For example, if you want to view all the service providers whose name starts with SP, you can search for this using the filter, SP*.
Editing service providers
Follow the instructions below to edit a service provider's details.
- Sign in. Enter your username and password to log on to the Management Console.
- In the Main menu under the Identity section, click List under Service Providers. The list of service providers you added appears.
- Locate the service provider you want to edit and click on the
corresponding Edit link.

- You are directed to the edit screen.
Deleting service providers
Follow the instructions below to delete a service provider.
- Sign in. Enter your username and password to log on to the Management Console.
- In the Main menu under the Identity section, click List under Service Providers. The list of service providers you added appears.
- Locate the service provider you want to delete and click on the
corresponding Delete link.

- Confirm your request in the WSO2 Carbon window. Click the Yes button.
Related Topics
See the following topics for information on configuring service providers using different specifications.
- See the Single Sign-On topic for details on how to configure a service provider for single sign-on using different specifications.
- See Identity Provisioning for information on configuring inbound and outbound provisioning with a service provider.
See the following topics to configure different applications as service providers in Identity Server.