Password Recovery
This section guides you through setting up password recovery for users to recover a lost or forgotten password. There are two methods of password recovery:
Note
WSO2 IS validates whether the user account is locked or disabled prior to account recovery. In addition, if any customization prior to account recovery such as checking the eligibility of the user for account recovery by validating certain conditions/ user claims is needed, WSO2 Identity Server provides an extension for that.
WSO2 IS triggers the PRE_ACCOUNT_RECOVERY event prior to user account recovery using the WSO2 IS eventing framework. A custom event handler can be written upon which the PRE_ACCOUNT_RECOVERY event is triggered. For more information on how to write a custom handler and trigger an event, see Writing a custom handler.
Recovery using notifications
WSO2 Identity Server supports password recovery using email-based notifications. The flow of this method is as follows:
- The user initiates the password recovery flow by clicking on "Forgot Password" at the point of login.
- The user enters the username and selects Recovery with Email.
- An email is sent to the user with a URL which directs the user to a screen where he/she can enter a new password.
Follow the steps given below to set up and try out password recovery with email notification.
-
Enable the email sending configurations of the WSO2 Identity Server as explained here.
Tip
The email template used to send this email notification is the PasswordReset template.
You can edit and customize the email template. For more information on how to do this, see Customizing Automated Emails.
-
Start the WSO2 Identity Server and log in to the management console.
- Click on Resident found under the Identity Providers section on the Main tab of the management console.
-
Expand the Account Management Policies tab, then the Account Recovery tab and select the Enable Notification Based Password Recovery checkbox.
For more information on the fields seen on this screen, see Account Recovery REST API .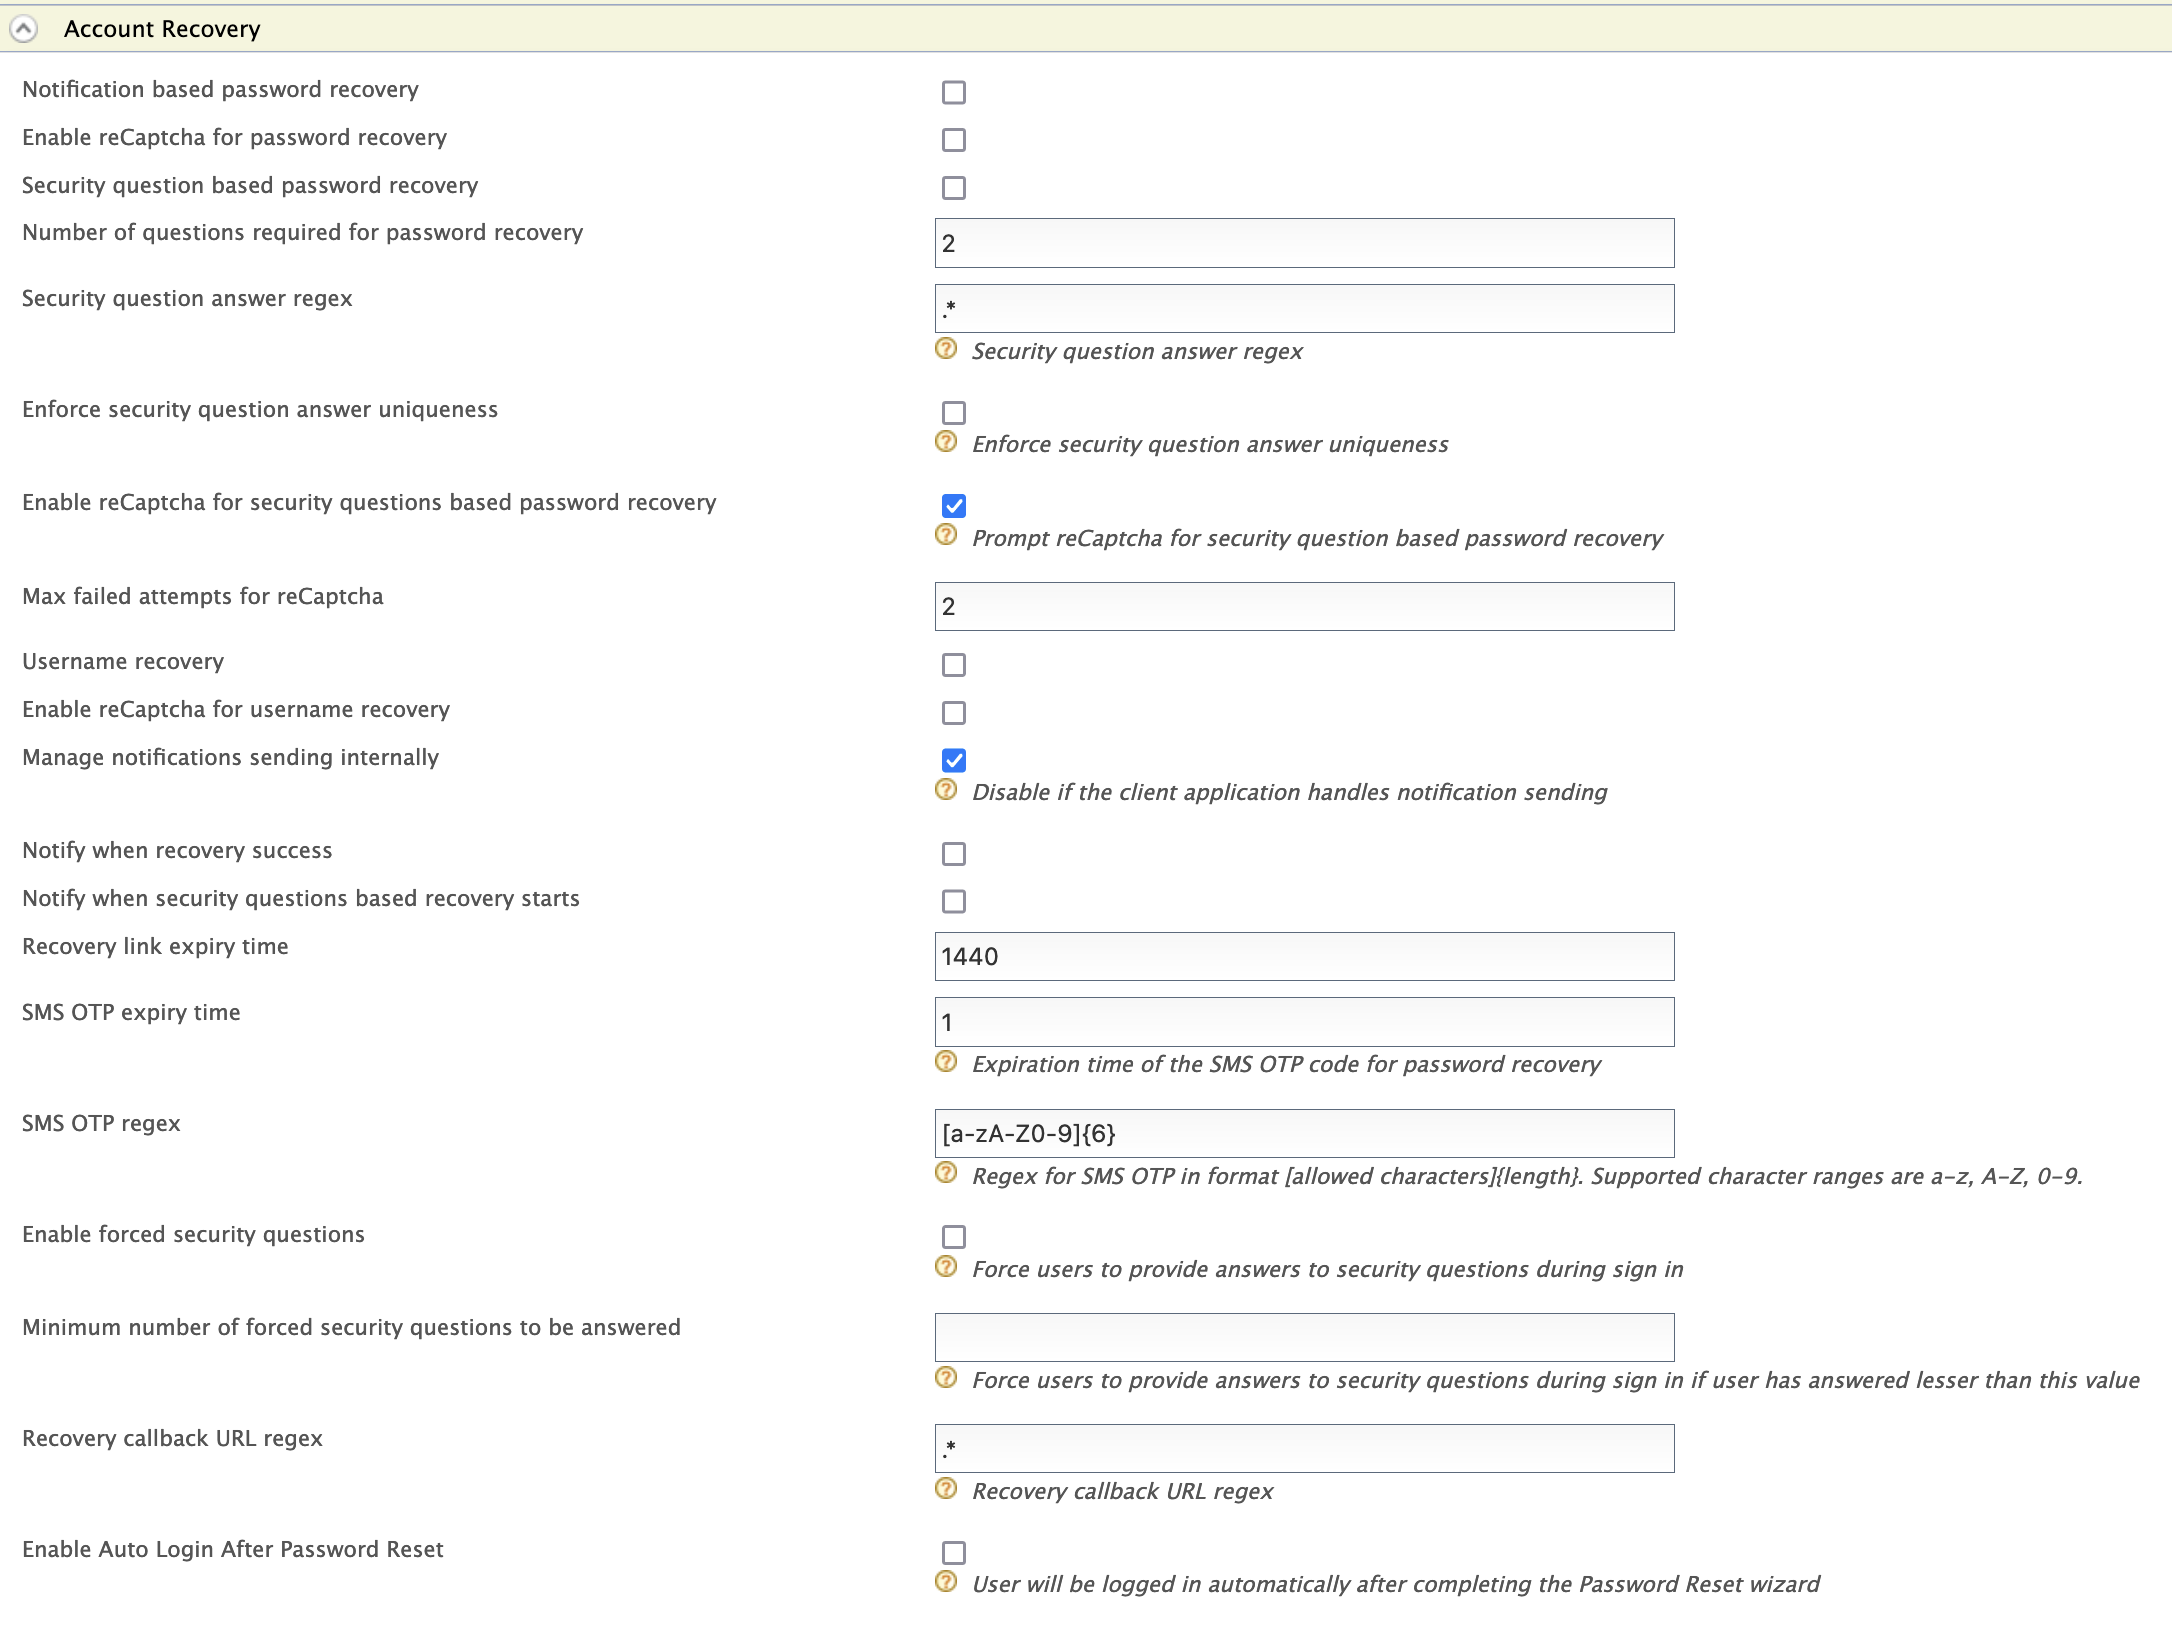
Note
The recommended Recovery callback URL regex to use when testing the product is
^https:\/\/localhost:9443\/.*. However, users should modify it to meet their requirements when they deploy the product.Info
-
To enable password recovery with reCaptcha verification, select the Enable reCaptcha for Password Recovery checkbox. For more information, see Configuring reCaptcha for Password Recovery.
-
To enable auto-login after password reset, select the Enable Auto Login After Password Reset checkbox. Alternatively, you can enable this server-wide by adding the following configuration to the
<IS_HOME>/repository/conf/deployment.tomlfile.
[identity_mgt.recovery] enable_auto_login=true -
-
To enable sending a confirmation email to the user's registered email address after the password reset, select the Notify when Recovery Success checkbox.
Tip
The email template used to send the confirmation email notification is the passwordResetSuccess template.
You can edit and customize the email template. For more information on how to do this, see Customizing Automated Emails
-
To allow the users to be redirect to a certain location after the password recovery request is complete, change the default configuration in Recovery callback URL regex to a specific regular expression that will match the redirect URL that the user needs to be redirected to.
Note
If you are using a Google mail account, note that Google has restricted third-party apps and less secure apps from sending emails by default. Therefore, you need to configure your account to disable this restriction, as WSO2 IS acts as a third-party application when sending emails to confirm user registrations or notification for password reset WSO2 IS.
Click here for more information
Follow the steps given below to enable your Google mail account to provide access to third-party applications.
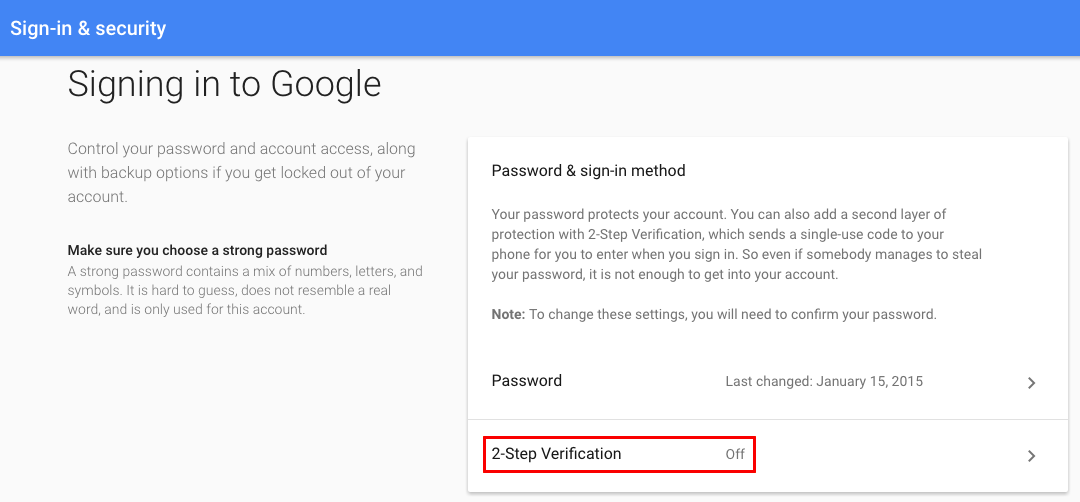
- Navigate to https://myaccount.google.com/security.
- Click Signing in to Google on the left menu and make sure that
the 2-step Verification is disabled or off.
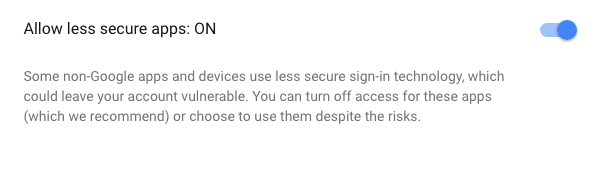
- Click Connected apps and sites on the left menu and enable
Allow less secure apps.
Try out recovery using notification
- Create a user using the management console . Ensure that the user has login permissions.
- Edit the user profile and enter an email address for the user. The email notification for password recovery is sent to the email address given.
- Access the WSO2 Identity Server My Account portal using the following link:
https://localhost:<port_number>/myaccount. - Click the Forgot Password link.
-
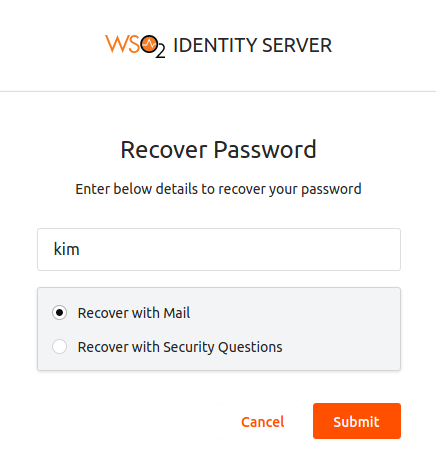
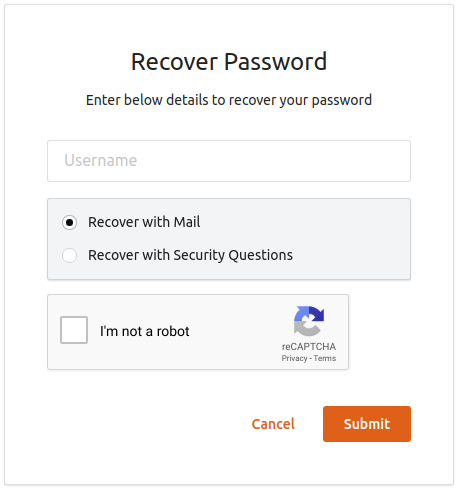
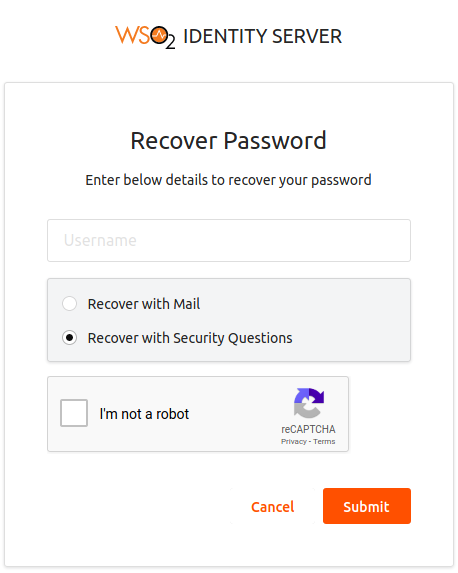
Enter the user's username and select Recover with Mail. Click Submit.
Note
In case you have enabled password recovery with reCaptcha verification, enter the required fields as specified above and select the recaptcha checkbox as well.
-
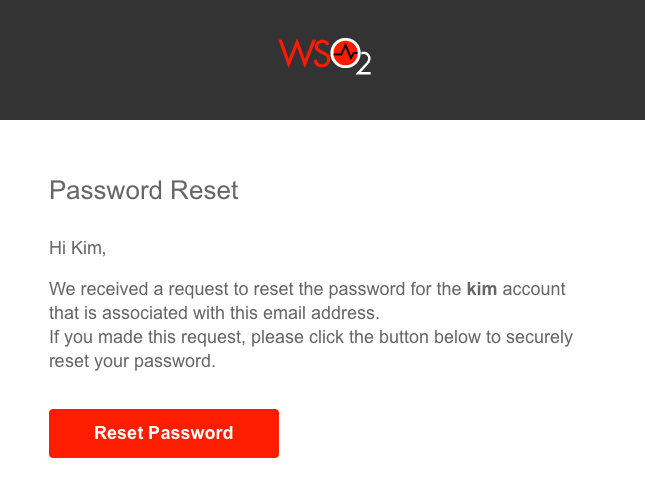
An email notification is sent to the user's email address. Click on the Reset Password button given on the email.
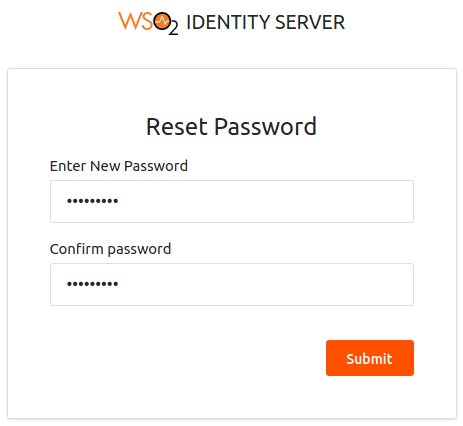
- Enter a new password and click Submit.
Tip
For information on the REST APIs for password recovery, see the swagger docs on Account Recovery REST APIs.
Recovery using challenge questions
The WSO2 Identity Server provides an alternative means of recovering passwords. This is by using challenge questions. If users forget their password, they can recover it by answering challenge questions that were set up for their accounts.
Before setting this up, you must configure the required claims for this feature. To do this, do the following.
- Enter your username and password to log on to the Management Console .
- Click on Resident found under the Identity Providers section on the Main tab of the Management Console.
- Expand the Account Management Policies tab, then the Account Recovery tab and select the Enable the Security Questions Based Password Recovery checkbox.
-
Configure the required number of questions in the Number of Questions Required for Password Recovery.
Optionally, select the Notify when Questions Based Recovery Starts checkbox to send an email notification to the user when the question based recovery starts.Info
-
To enable password recovery with reCaptcha verification, select the Enable reCaptcha for Password Recovery checkbox. For more information, see Configuring reCaptcha for Password Recovery.
-
To enable auto-login after password reset, select the Enable Auto Login After Password Reset checkbox. Alternatively, you can enable this server-wide by adding the following configuration to the
<IS_HOME>/repository/conf/deployment.tomlfile.
[identity_mgt.recovery] enable_auto_login=true -
You can set up challenge questions for users in one of the following ways:
Using the management console
To set up challenge questions or to manage the questions with different locales (languages), see Managing Challenge Questions.
Using the user portal
To try this out, first create a user in the Identity Server.
- On the Main tab in the Management Console, click Add under Users and Roles.
- Click Users. This link is only visible to users with the Admin role.
-
Click Add New User.
-
Log out of the Identity Server.
- The URL for accessing the My Account portal is the following if the hostname is
localhost and the Identity Server is running on port 9443:
https://localhost:9443/myaccount/. Click this link to access the
user portal and log in using the credentials of the user you just
created.
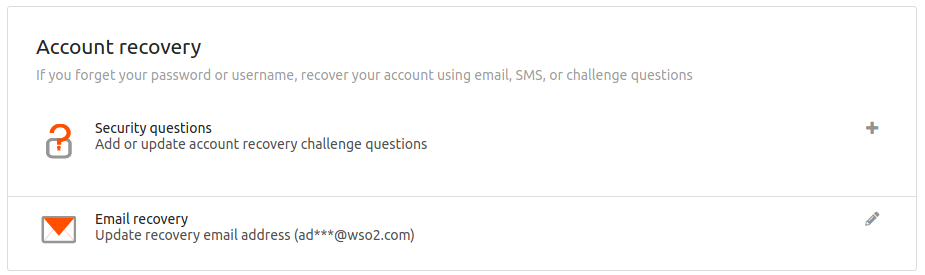
- Go to the Security tab. Click the + button near Security questions under the
Account Recovery section.
- Set challenge questions for the user account. There are two sets of
challenge questions by default. You can pick one question for each
set and give an answer for the question.
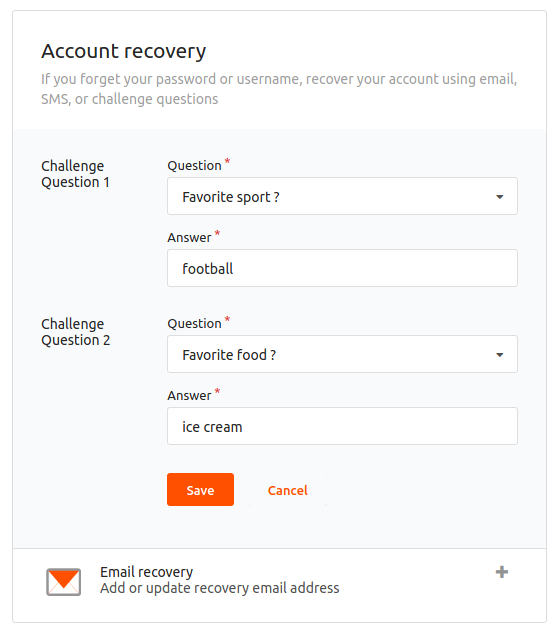
- Click Save.
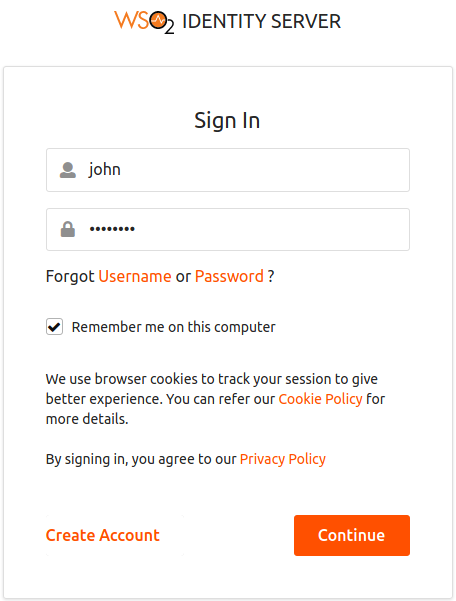
- Sign out of the user portal and click Forgot Password on the login
screen.
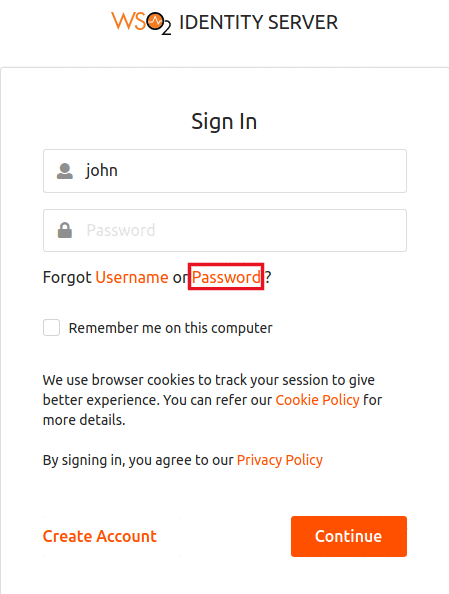
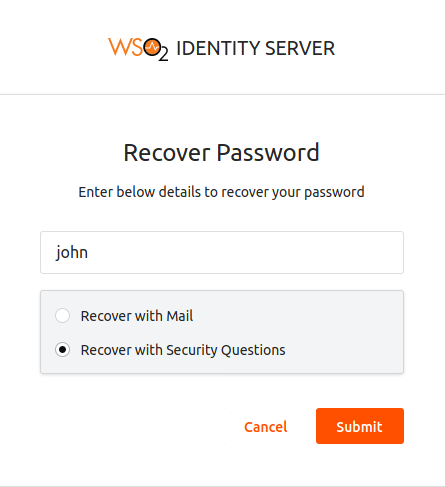
-
Enter the username and select Recover with Security Questions. Click Submit.
Tip
Tip : If you have configured WSO2 IS to use email address as the username, enter the username in the format of "john@ foo.com ". If the user is in the super tenant, this is in the format of "john@ foo.com @carbon.super". If the user is in the tenant bar.com, the format you must enter is "john@ foo.com @ bar.com ".
Note
In case you have enabled password recovery with reCaptcha verification, enter the required fields as specified above and select the recaptcha checkbox as well.
-
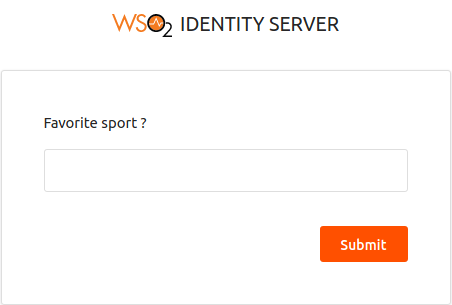
Enter the answers to the challenge questions and click Submit .
-
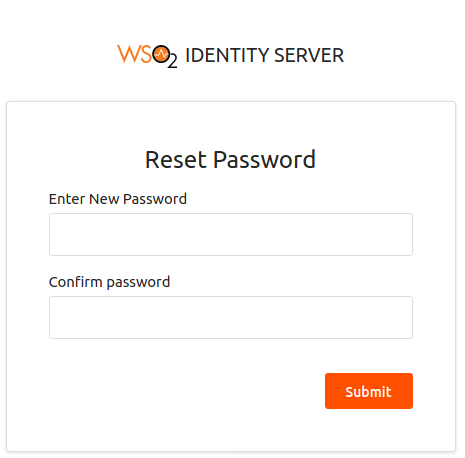
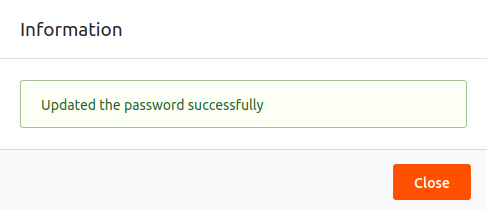
Enter a new password and click Submit. You will receive a notification of successful password reset.
Tip
For information on the REST APIs for password recovery using challenge questions, see the swagger docs on Account Recovery REST APIs.
Related Links
- To set up reCaptcha for password recovery with secret questions, see Configuring Google reCaptcha for Security-Question Based Password Recovery.
- See Configuring Claims for more information on how to store the claim values in the user store.