Configuring OAuth2-OpenID Connect
OAuth 2.0 is an authorization framework that is capable of providing a way for clients to access a resource with restricted access on behalf of the resource owner. OAuth 2.0 is capable of authorizing the flows for web applications, desktop applications, and mobile applications among others.
OpenID Connect is an authentication protocol built on top of OAuth 2.0, which facilitates clients to verify the end-user identity against the authentication performed by an authorization server. At the same time, it provides methods to transfer the end user information through claims.
With OAuth as its base, OpenID Connect allows many types of clients such as web-based clients, mobile clients and javascript clients to verify the users with an authorization server-based authentication.
-
Sign in. Enter your username and password to log on to the Management Console.
-
Navigate to the Main menu to access the Identity menu. Click Add under Identity Providers.
For more information, see Adding and Configuring an Identity Provider. -
Fill in the details in the Basic Information section.
-
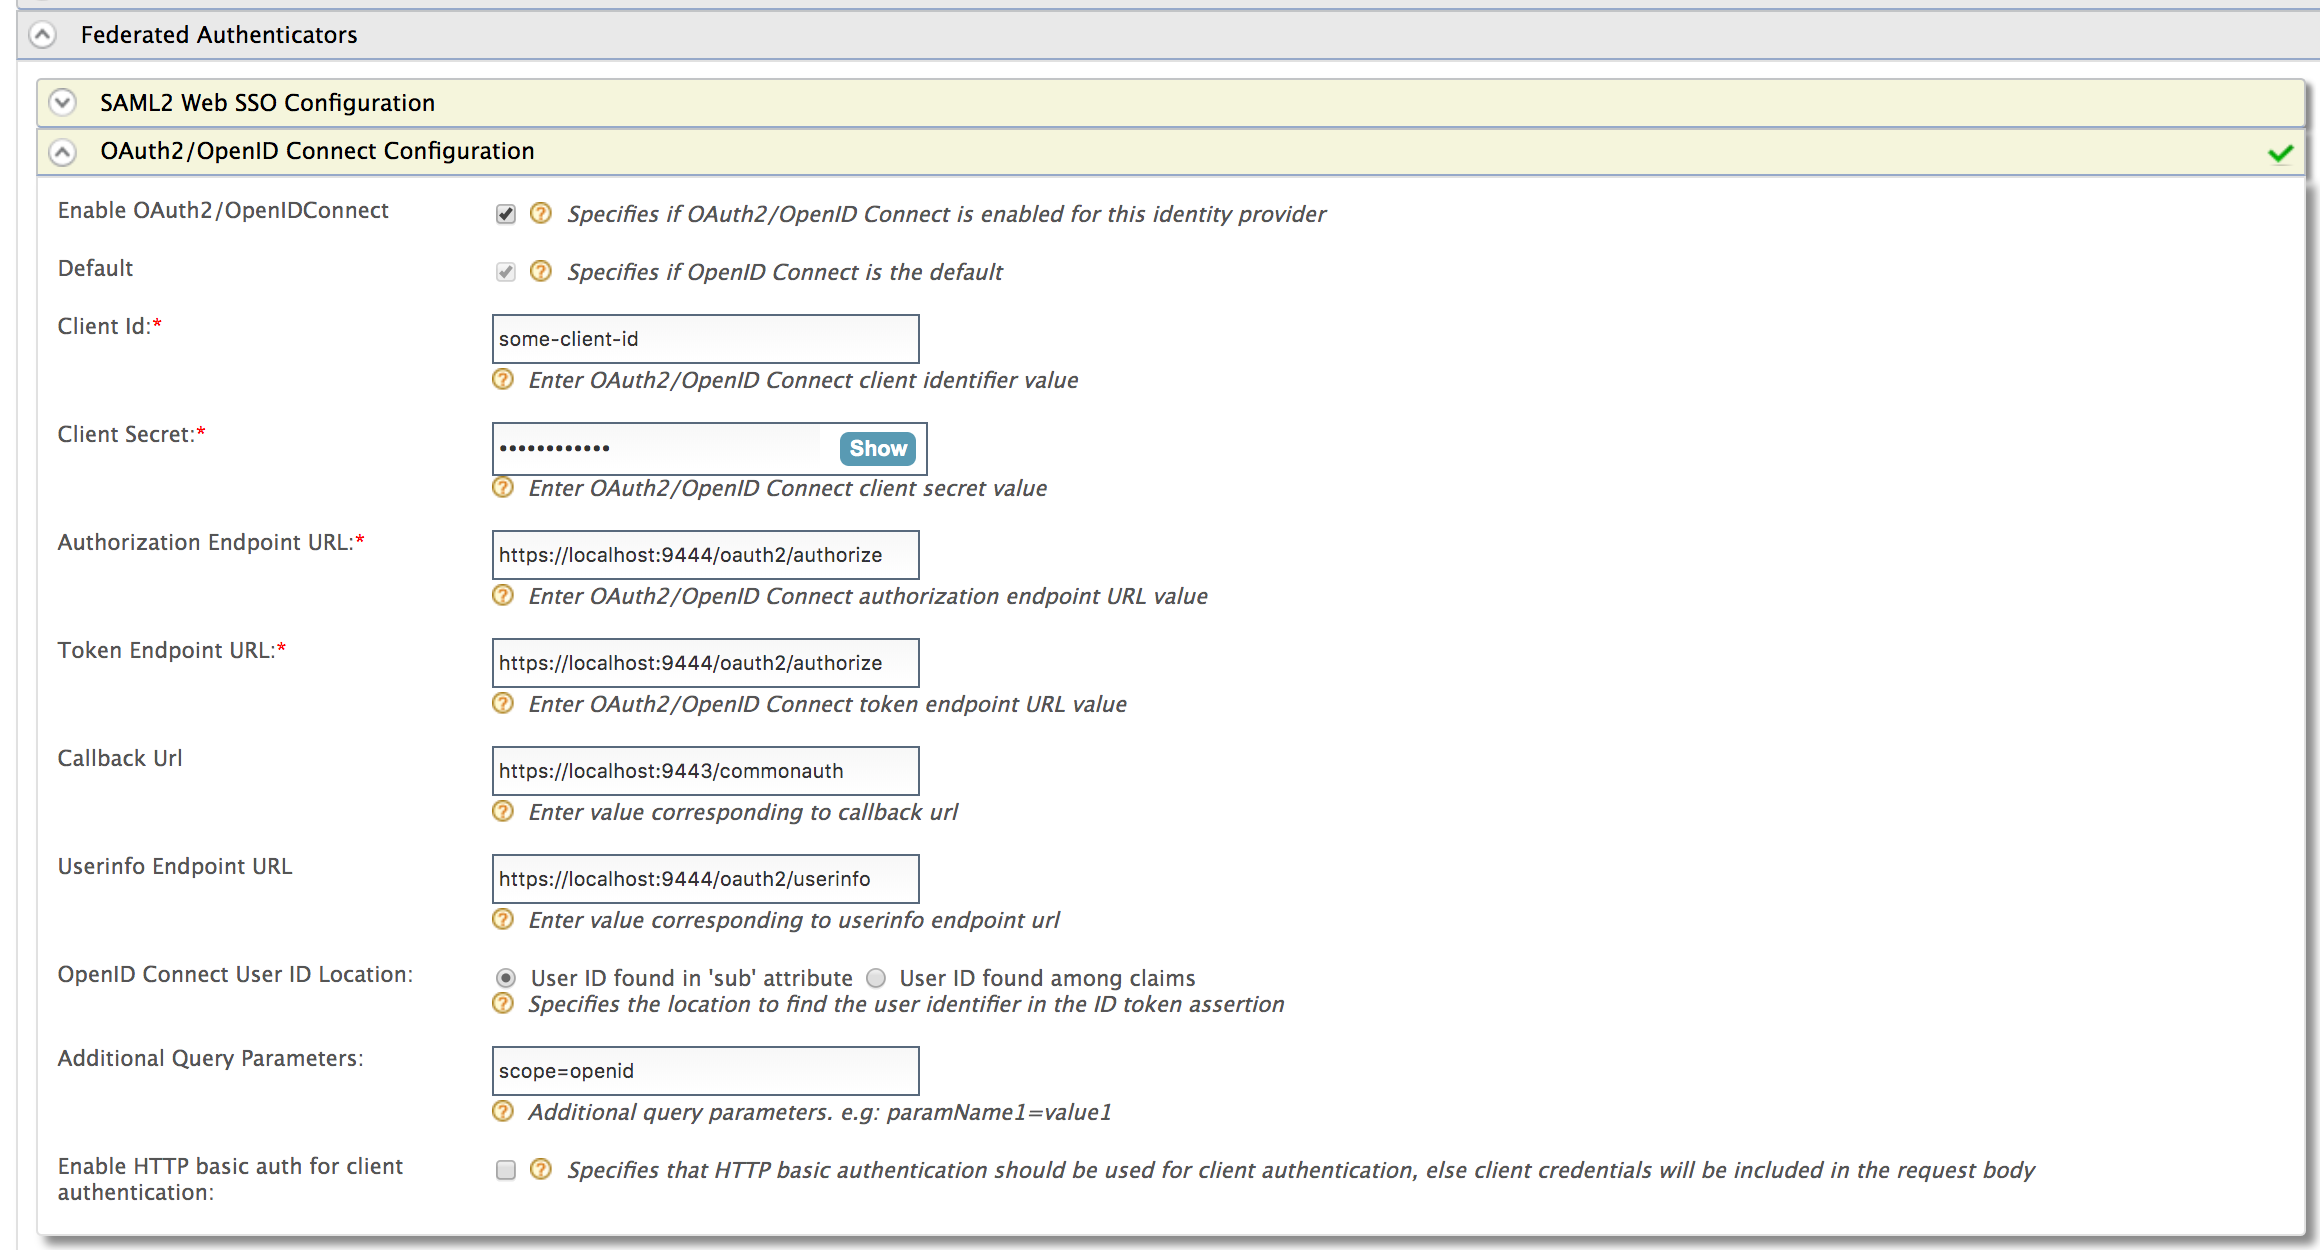
Expand the Federated Authenticators section and then the OAuth2/OpenID Connect Configuration form.
Note
WSO2 Identity Server supports RP-initiated logout requests to OpenID Connect identity providers.
-
Fill in the following fields where relevant.
Prior to this, you need to configure an oauth application in the federated authorization server and get the application information such as client ID and secret. For example, see configuring OAuth2-OpenID Connect single sign-on.
Tip
By default, the Client Id and Client Secret are stored as plain text values, where the Client Secret is generally stored as a random number generated using two UUIDs and HMAC-SHA1 hash function, which is known to resist the strongest attack known against HMAC.
If you want to change the format in which the Client Secret is stored, open the
<IS_HOME>/repository/conf/deployment.tomlfile and add the following configuration.
For information on possible values that you can specify based on your requirement, see Supported token persistence processors.[oauth] hash_tokens_and_secrets = true hash_token_algorithm = "SHA-256" token_storage_method = "hashed"Once you configure a required token persistence processor, be sure to restart the server for the changes to be applied to WSO2 Identity Server.
Field Description Sample Value Enable OAuth2/OpenIDConnect Selecting this option enables OAuth2/OpenID Connect to be used as an authenticator for users provisioned to WSO2 Identity Server. Selected Default Selecting the Default check box signifies that the OAuth2/OpenID Connect credentials are the main/default form of authentication.
This removes the selection made for any other Default checkboxes for other authenticators.Selected Authorization Endpoint URL This is a standard OAuth Authorization Endpoint URL of the federated IDP. https://localhost:9443/oauth2/authorize/Token Endpoint URL This is a standard OAuth Token Endpoint URL of the federated IDP. https://localhost:9443/oauth2/token/Client Id Client ID of the identity provider application. 1421263438188909Client Secret Client Secret of the identity provider application. Click the Show button to view the value you enter. 12ffb4dfb2fed67a00846b42126991f8Callback URL This is the URL to which the browser should be redirected after the authentication is successful. It should be the commonauthendpoint of Identity serverhttps://localhost:9443/commonauthOpenID Connect User ID Location Select whether the User ID is found in the 'sub' attribute that is sent with the OpenID Connect request or if it is found among claims. User ID found in 'sub' attribute Additional Query Parameters This is necessary if you are connecting to another Identity Server or application. Sometimes extra parameters are required by this IS or application so these can be specified here. Note
WSO2 Identity Server supports sending additional information to your OIDC external IdP in the form of query parameters. You can configure three types of query parameters:
1. Fixed query parameters
Send a fixed value to the external identity provider.
Example:
[email protected]2. Dynamic query parameters from the initial request
If you wish to send query parameters that need to be updated dynamically with each OIDC request, the value needs to be defined with the format
${paramName}. This value should be the key of the query parameter sent in the OIDC request URL.Format:
login_hint=${paramName}ordomain=${fidp}Sample OIDC request:
https://localhost:9443/oauth2/authorize?scope=openid&response_type=code&redirect_uri=<redirect_uri>&client_id=<client_id>&[email protected]If the application does not send the query parameter in the login request, the particular parameterized query parameter will not be sent to the external OIDC identity provider.
3. Dynamic query parameters from adaptive authentication scripts
Use the following format to send query parameters that are resolved using an adaptive authentication script:
$authparam{paramName}Format:
login_hint=$authparam{userIdentifier}Sample adaptive authentication script:
executeStep(1, {
onSuccess: function(context) {
    var emailAddress = context.steps[1].subject.username;
    executeStep(2, {
        authenticatorParams: {
            common: {
                'userIdentifier': emailAddress
            }
        },
        authenticationOptions: [{
            idp: 'AzureB2C'
        }]
    }, {});
}
});
Multiple parameters can be defined by separating query parameters using the ampersand (&) character.
Example:
login_hint=${paramName}&scope=openid email profileparamName1=value1
Related Topics
- Identity Federation is part of the process of configuring an identity provider. For more information on how to configure an identity provider, see Configuring an Identity Provider.
- See Log into Identity Server using another Identity Server - OAuth2 for a sample of using OAuth2/OpenIDConnect for federated authentication.