Log in to the Identity Server using another Identity Server - SAML2
This topic demonstrates a scenario where two WSO2 Identity Server instances with different user stores can be used for federated authentication.
The scenario uses the following software
- WSO2 Identity Server as the Identity Provider
- Apache Tomcat to run the client application
Follow the instructions in the sections below to set up and configure this scenario:
Setting up the WSO2 Identity Server instances
- Download the WSO2 Identity Server from here.
- Extract the file to a dedicated directory. For the purposes of this
scenario, this is referred to as
<IS_HOME_PRIMARY>in this topic. - Make a copy of this folder in the same location and rename it. For
the purposes of this scenario, this is referred to as
<IS_HOME_SECONDARY>in this topic. - By default, the HTTPS port of the primary IS instance is 9443. Let
this be left as it is. Go to the
<IS_HOME_SECONDARY>/repository/confdirectory and open thedeployment.tomlfile. Change theoffsetvalue to 1. This changes the HTTPS port in the secondary IS instance to 9444 to avoid conflicts with the primary IS instance. - Install and run the two Identity Server instances.
- Go to
<IS_HOME_PRIMARY>/binand<IS_HOME_SECONDARY>/binin your command line and type the following command for each instance.- On Windows:
wso2server.bat --run - On Linux/Solaris:
sh wso2server.sh
- On Windows:
- Go to
- The Management Console for the primary Identity Server can be accessed using the following URL: https://localhost:9443/carbon
- The Management Console for the secondary Identity Server can be accessed using the following URL: https://localhost:9444/carbon
Configuring the secondary IS as IdP in the primary IS
The next step in this scenario is to configure the secondary Identity Server as an identity provider (IdP) in the primary Identity Server.
- Go to the Management Console of the primary IS.
- Navigate to the Identity Providers section in the Main menu and click Add.
- Enter “Secondary" as the Identity Provider Name for this scenario.
-
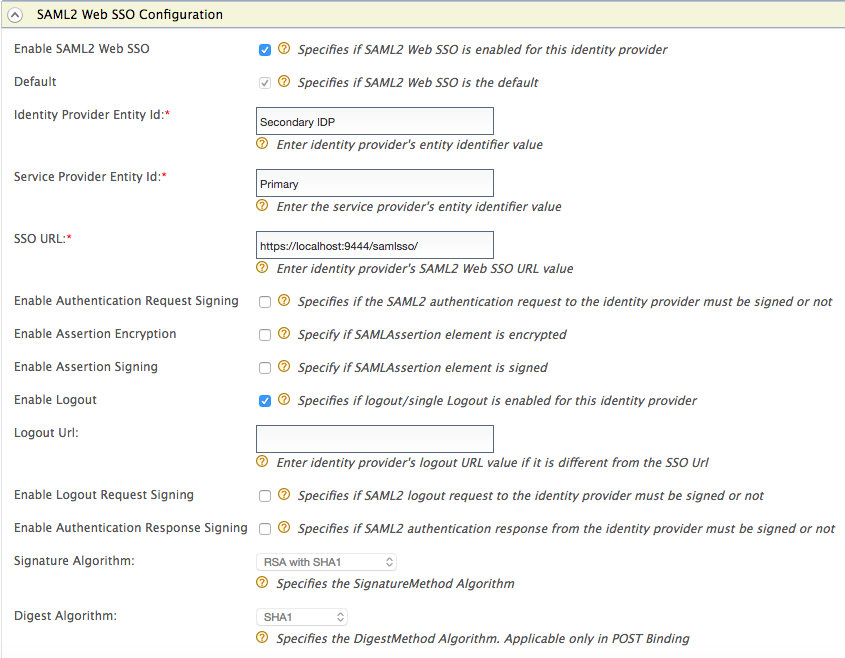
Expand the Federated Authenticators section and then expand the SAML2 Web SSO Configuration section.
-
Make the following changes.
- Select the Enable SAML2 Web SSO check box.
- Enter
Secondary IDPas the Identity Provider Entity Id. - Enter
Primaryas the Service Provider Entity Id. -
Enter
https://localhost:9444/samlsso/as the SSO URL. This is the SAML2 SSO URL of the secondary IS. -
Select the Enable Logout check box.
-
Click Register. The new identity provider named 'Secondary' is listed under List (go to Main menu and click List under Identity Providers ).
Configuring the primary IS as an SP in the secondary IS
Now that the secondary Identity Server is added as an IdP in the primary Identity Server, the primary IS should be added as service provider(SP) in the secondary IS instance.
-
Log in to the management console of the secondary IS instance using the following URL: https://localhost:9444/carbon
-
Navigate to the Main menu and click Add under Service Providers. Enter service provider name as 'PrimaryIDP' for this sample scenario.
-
Click Register.
-
In the form that appears, expand the Inbound Authentication Configuration and SAML2 Web SSO Configuration sections.
-
Click Configure.
-
Enter the following details in the form.
-
Enter
Primaryas the Issuer. -
Enter
https://localhost:9443/commonauthas Assertion Consumer URL. -
Select Enable Response Signing.
-
Select Enable Single Logout.
-
-
Click Update and then click Register. The primary Identity Server instance is added as the service provider in the secondary Identity Server instance.
Setting up an application as the SP in the primary IS
The client application in this scenario is the travelocity sample application.
-
Deploy travelocity application and configure it as a service provider in the primary Identity Server instance.
-
After adding the client application as a service provider in the primary Identity Server instance, navigate to the Main menu and click List under Service Providers. Click Edit next to the service provider you created.
-
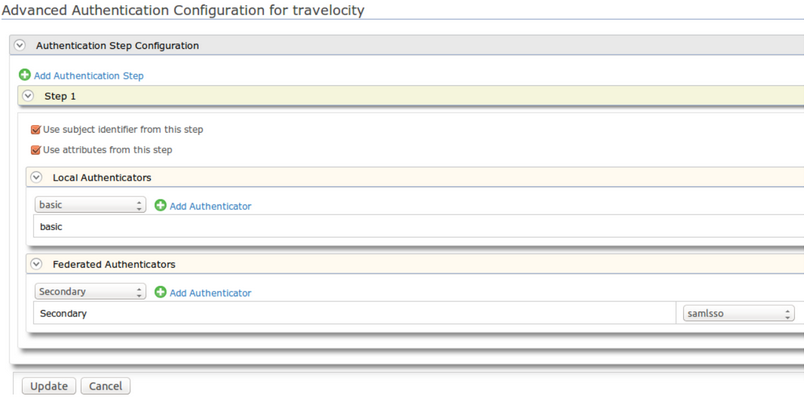
Expand the Local & Outbound Authentication Configuration section. Here we set the travelocity client to use the primary IS instance and the identity provider named 'Secondary' also as its identity provider. For this we have to add authentication steps.
-
Click Advanced Configuration and from next UI, click Add Authentication Step.
-
Under Local Authenticators add the “ basic ” authenticator by selecting it from the combo box and clicking Add Authenticator.
-
Under Federated Authenticators select “Secondary” and add it.
-
Click Update to save your changes.
-
-
Click Update to save changes to your service provider configurations. Now when you log in to the client application it can select either the primary IS instance or secondary IS instance as the identity provider and therefore has access to both user spaces.
-
Go to https://localhost:9443/carbon, the primary IS instance, and create a user named 'primaryuser' and set the password as 'primepass'.
-
Go to https://localhost:9444/carbon, the secondary IS instance and create a user named 'secondaryuser' and set the password as 'secondpass'.
-
Test your application.
-
After copying the "travelocity.war" file to the
<TOMCAT_HOME>/webappsdirectory, run the Tomcat server. -
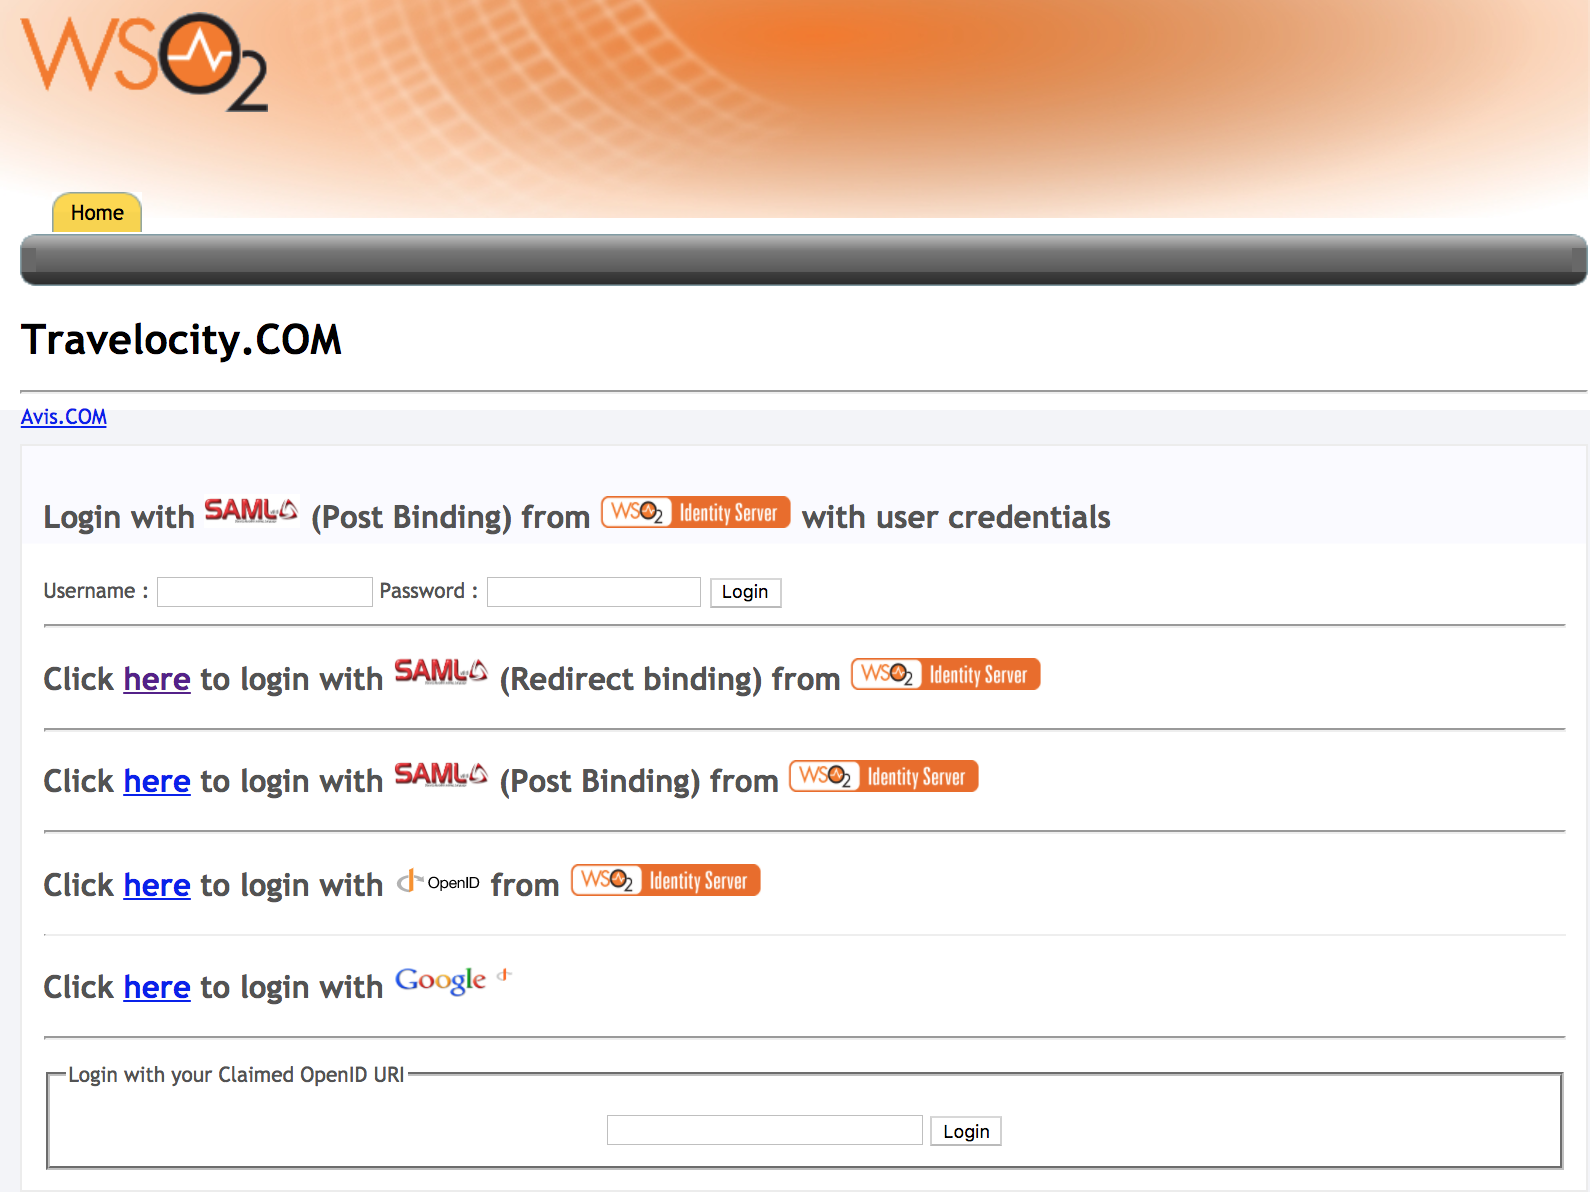
Go to http://wso2is.local:8080/travelocity.com . This is the client application.
-
Since we are using SAML for authentication, click the link in the first line.
-
In the resulting screen, log in with the username 'primaryuser' and the password 'primepass' for authentication as a local user in the primary IS instance.
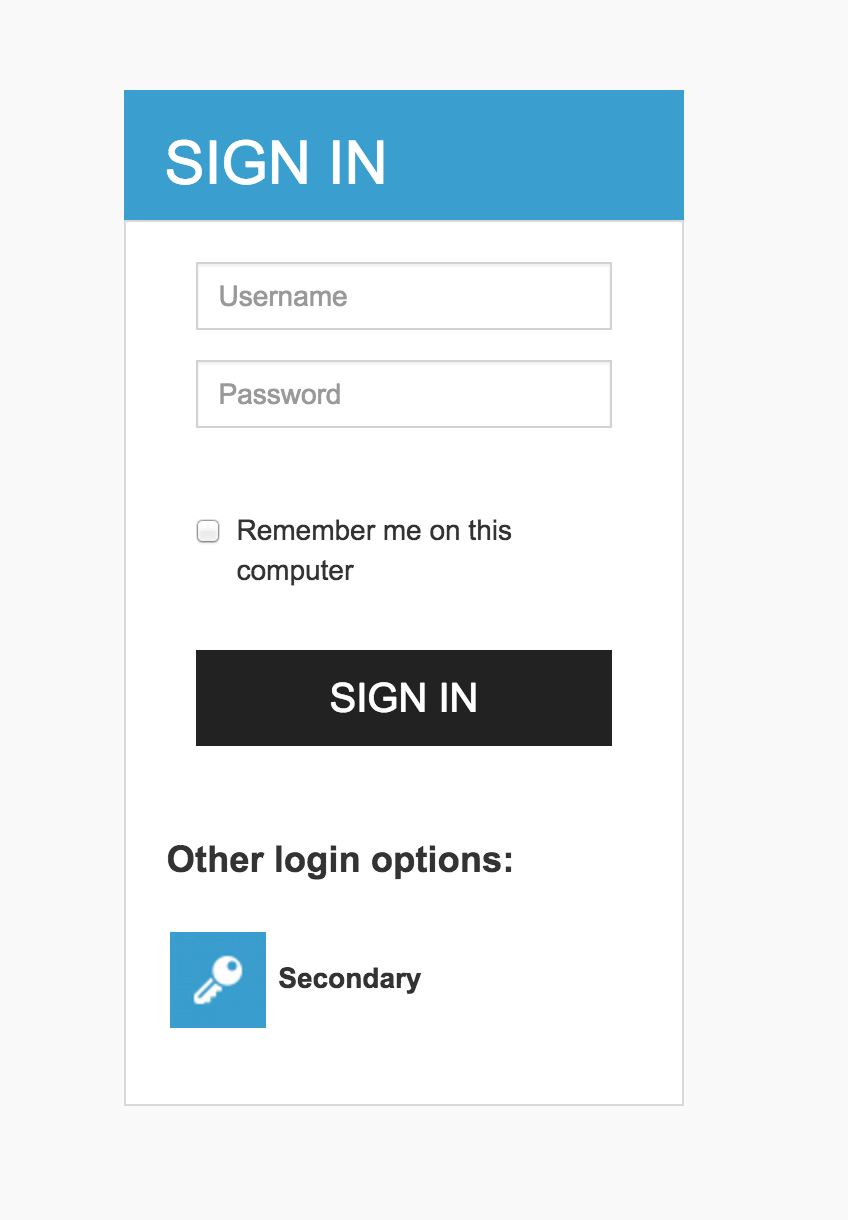
If you wish to authenticate a user in the secondary IS instance which is the secondary IdP, click “Secondary” under Other login options. In the resulting screen, log in using the username “secondaryuser' and password 'secondpass'. These credentials were created in the secondary IS instance.
-