Logging in to WordPress using the Identity Server
WordPress is a popular open-source content management system. This topic provides instructions on configuring WordPress and WSO2 Identity Server (WSO2 IS) to enable users to log in to WordPress using your WSO2 IS credentials.
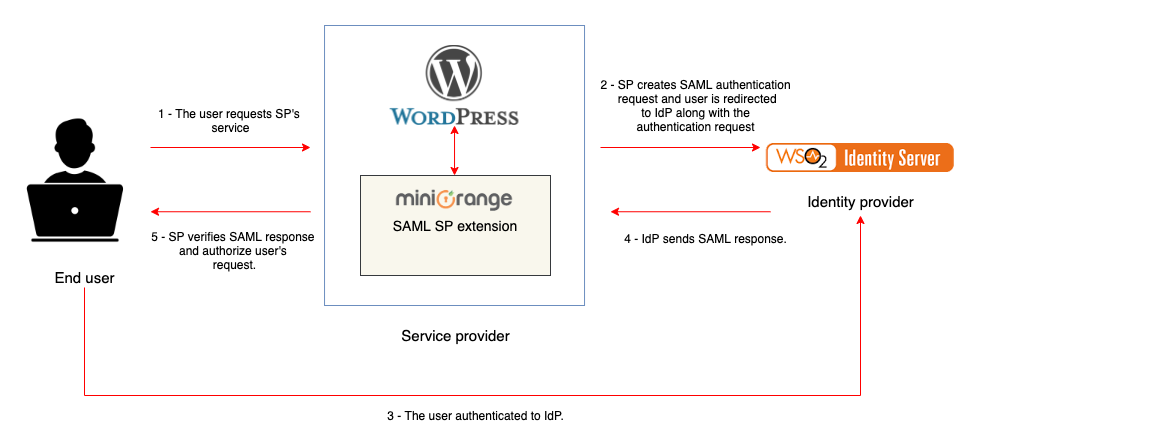
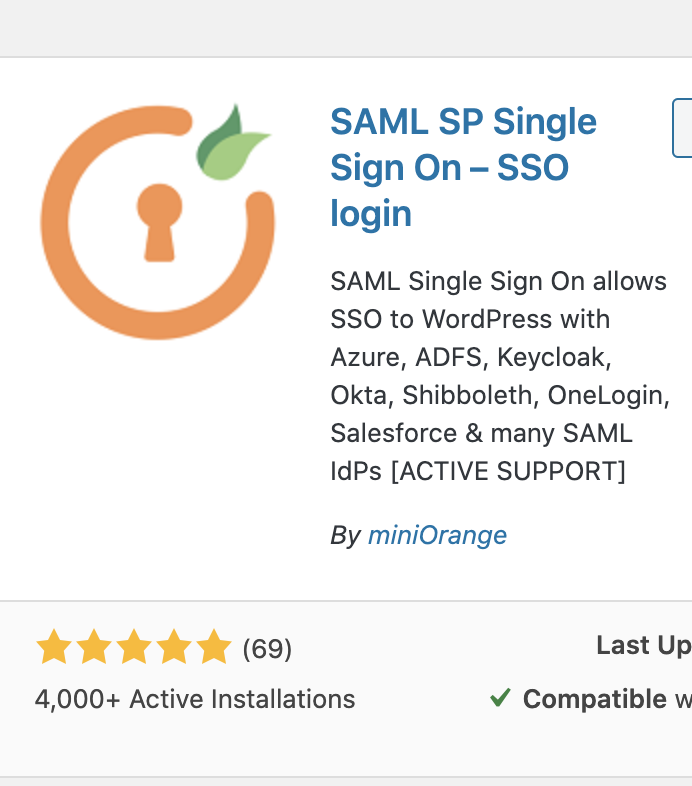
In this tutorial, WSO2 Identity Server acts as the identity provider and the miniOrange SAML Single Sign on (SSO) third party plugin acts as the SAML 2.0 service provider which can be configured to establish the trust between the plugin and WSO2 IS to securely authenticate the user to the WordPress site.
The flow
The diagram below demonstrates the flow of how WordPress uses WSO2 Identity Server as a SAML2 federated authenticator to authenticate a user.
Before you begin!
You need to have WordPress installed. Refer: https://wordpress.org/support/article/how-to-install-wordpress/
Let's get started!
Configure SAML SSO extension in WordPress
-
In the WordPress admin dashboard, on the left navigation panel click Plugins > Add New.
-
Install miniOrange SSO using SAML 2.0 extension.
-
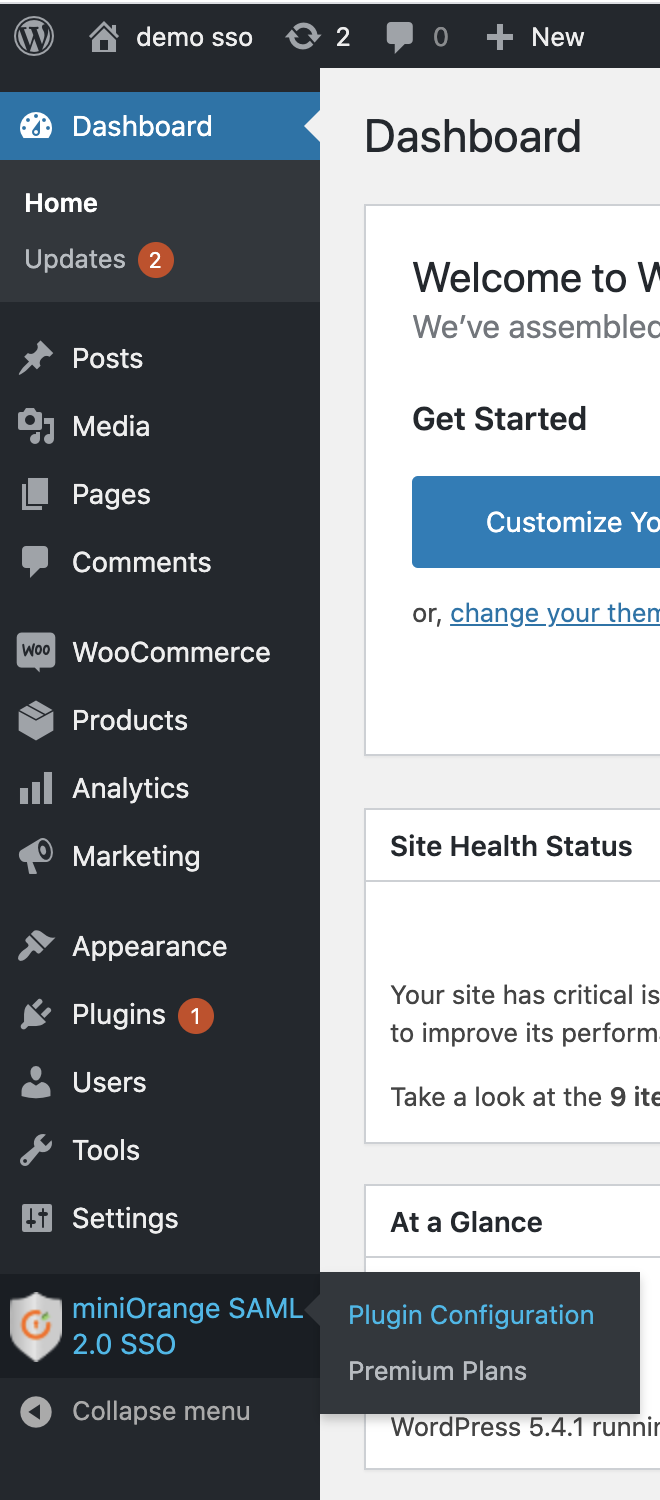
On the left navigation panel, click miniOrange SAML 2.0 SSO > Plugin Configuration.
-
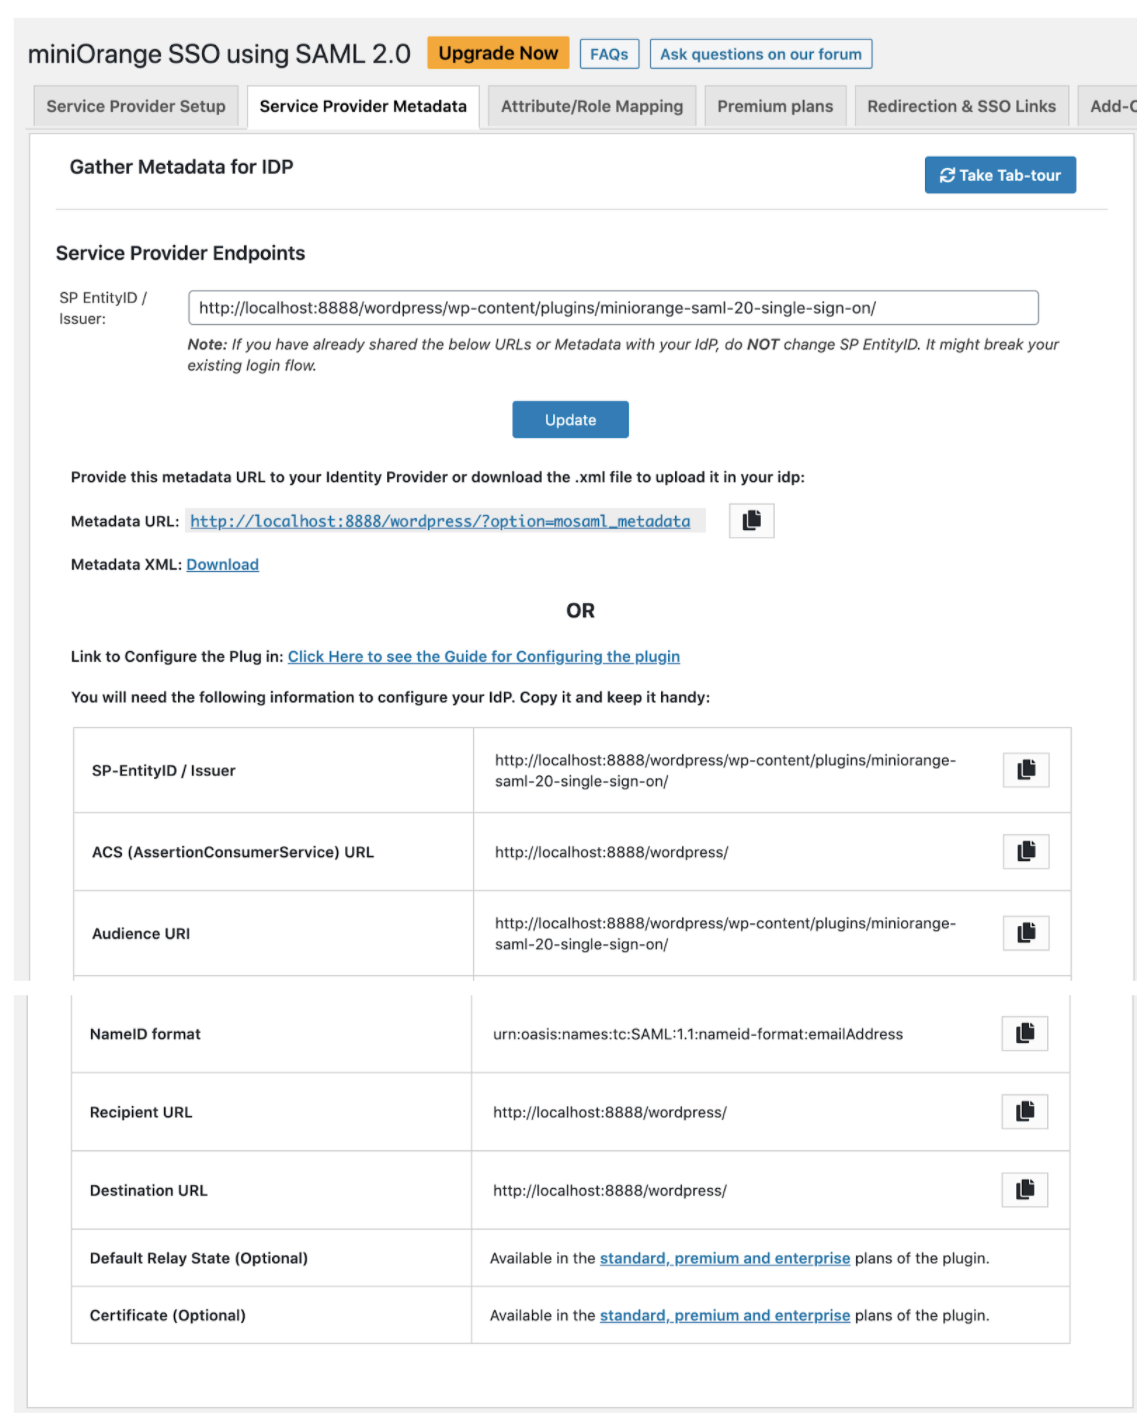
Navigate to Service Provider Metadata tab. Here you will see the configuration details which will be needed later for Identity Provider configurations.
-
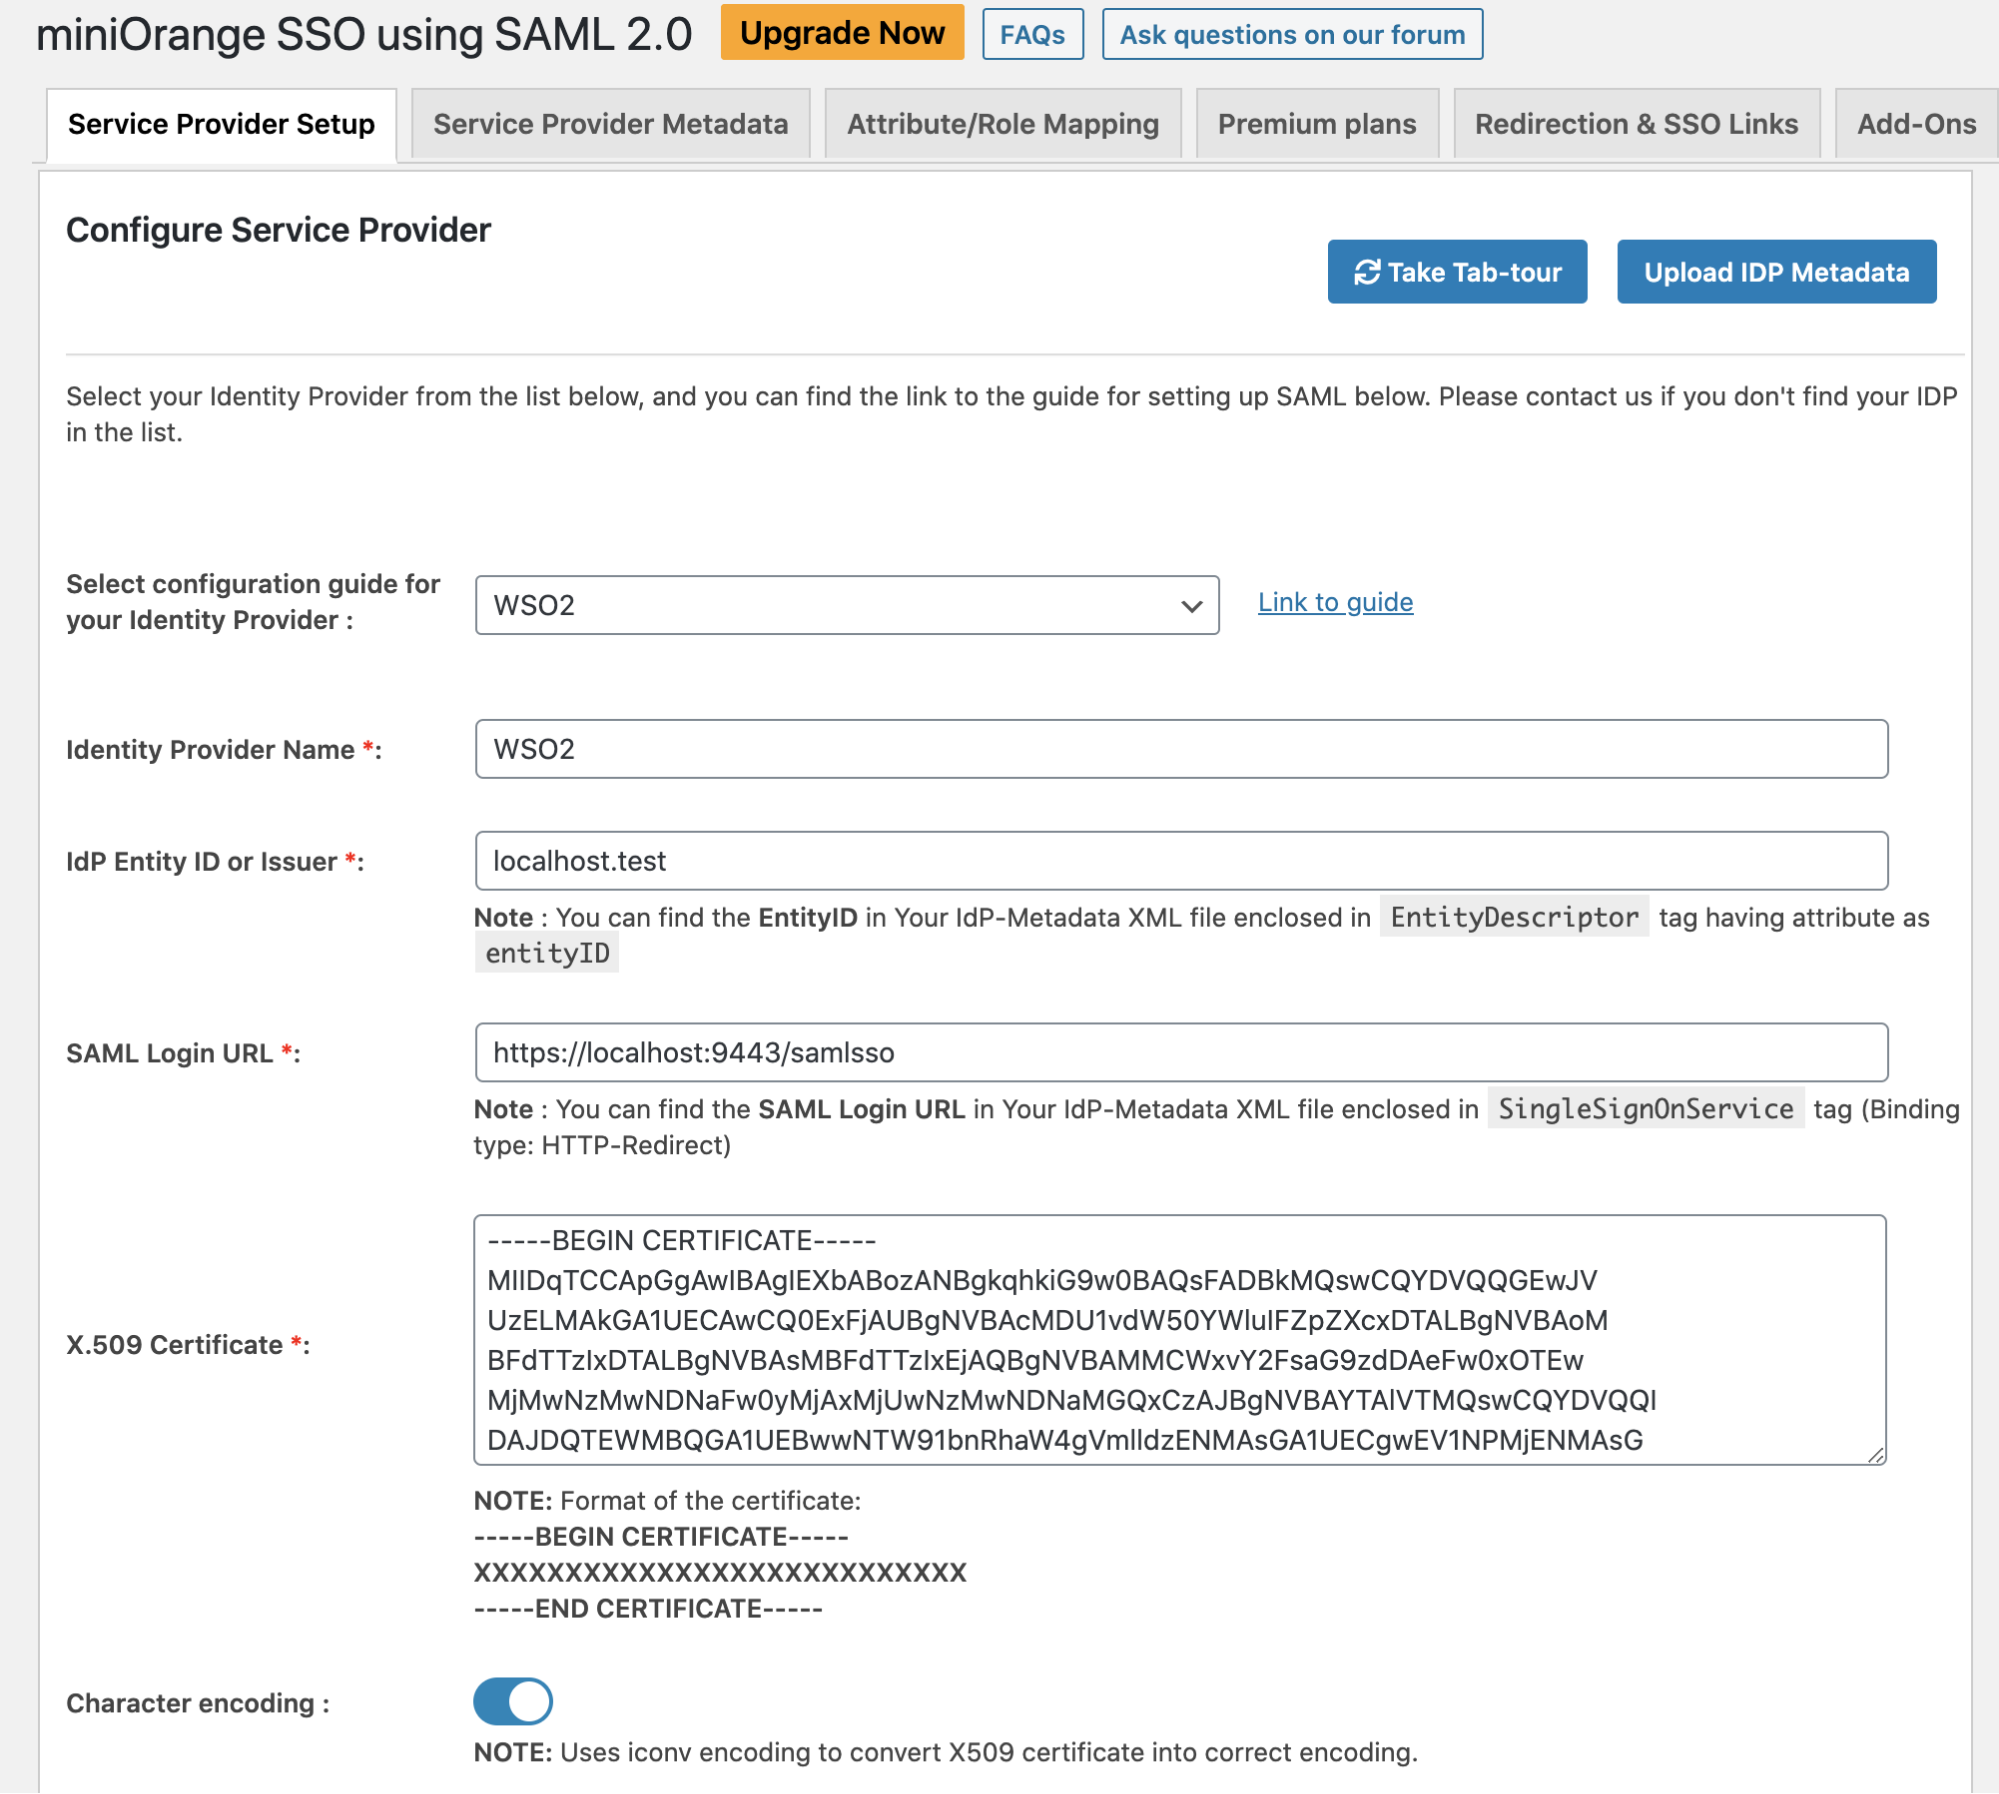
In the Service Provider Setup tab, click Upload IDP Metadata and enter the following values.
- Identity Provider Name: WSO2
- Enter metadata URL: https://localhost:9443/identity/metadata/saml2
Note
Browse
<IS_HOME>/repository/resources/conf/templates/repository/conf/identity/identity.xml.j2file and add the following configuration as a sub tag ofResourceAccessControltag.<Resource context="(.*)/identity/metadata/(.*)" secured="false" http-method="all"/> -
Click on Fetch Metadata.

Given below is the fetched IdP metadata information.
-
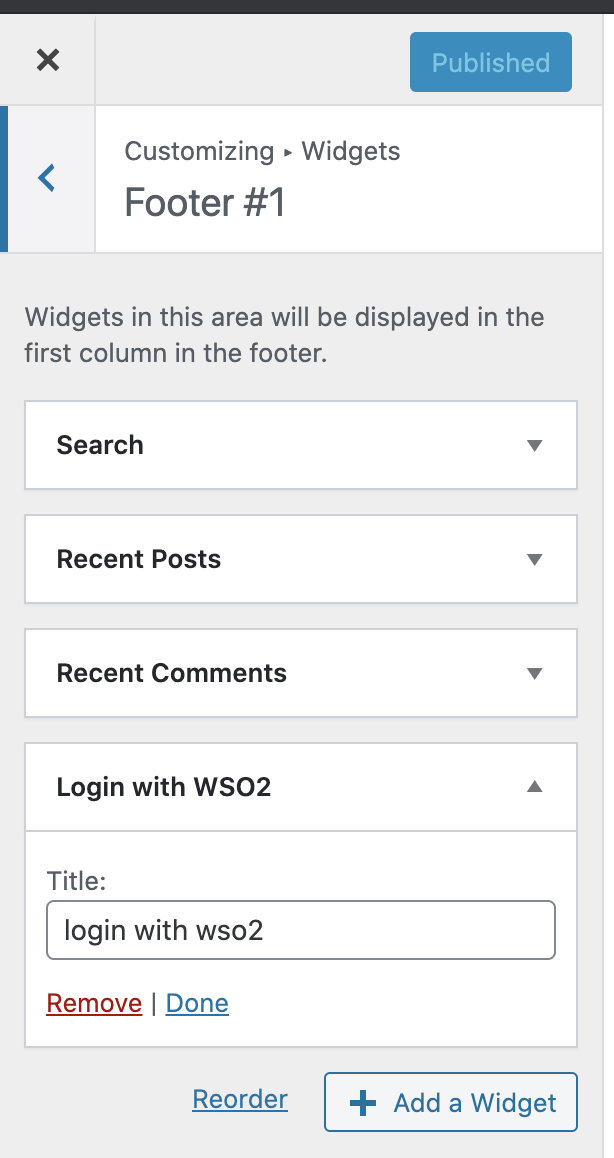
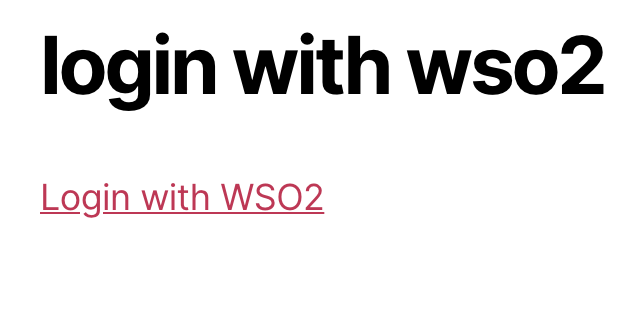
To add the SSO widget to WordPress site, login as admin and click on Customize from the menu in the top left corner.
-
Select Widgets and add the SSO widget to any preferred location of the site.
-
Publish the changes.
Configuring the service provider in WSO2 Identity Server
-
Sign in to the WSO2 Identity Server Management Console.
-
On the Main menu, click Identity > Service Providers > Add.
-
Fill in the Service Provider Name and provide a brief Description of the service provider. Only Service Provider Name is a required field and you can use WordPress-SP as the name for this example.
-
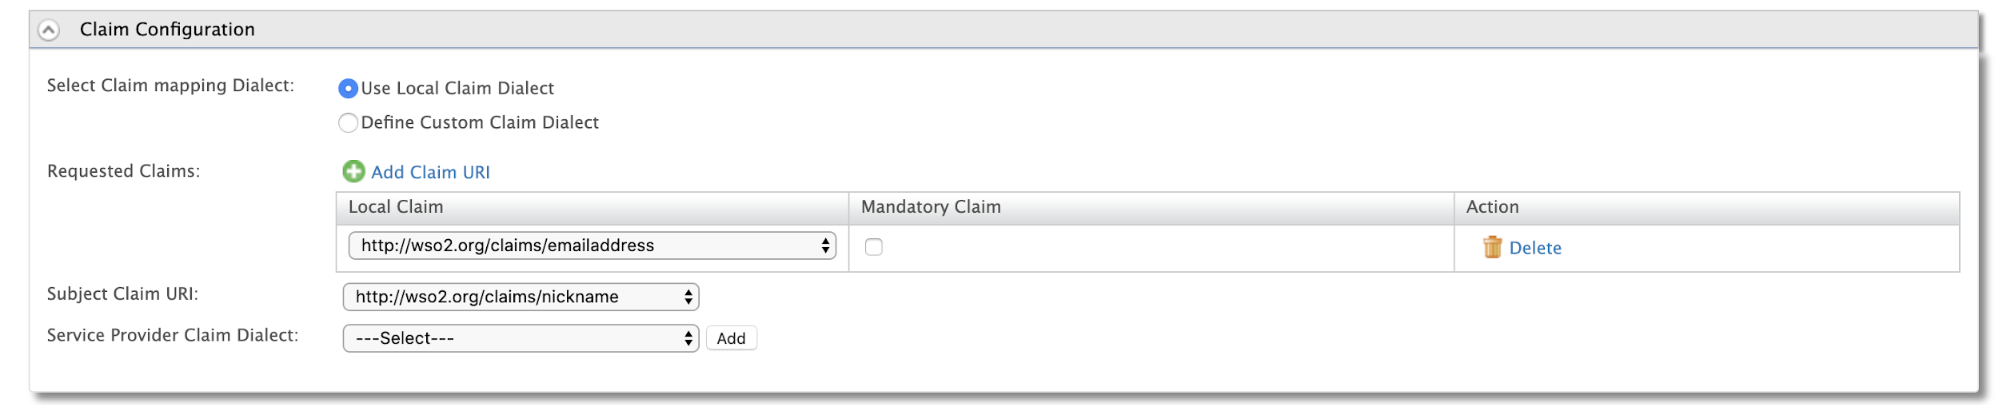
Expand Claim Configuration.
- Select Use Local Claim Dialect.
- For Requested Claims, add
https://wso2.org/claims/emailaddressclaim URI. - Set Subject Claim URI to
https://wso2.org/claims/nickname.
-
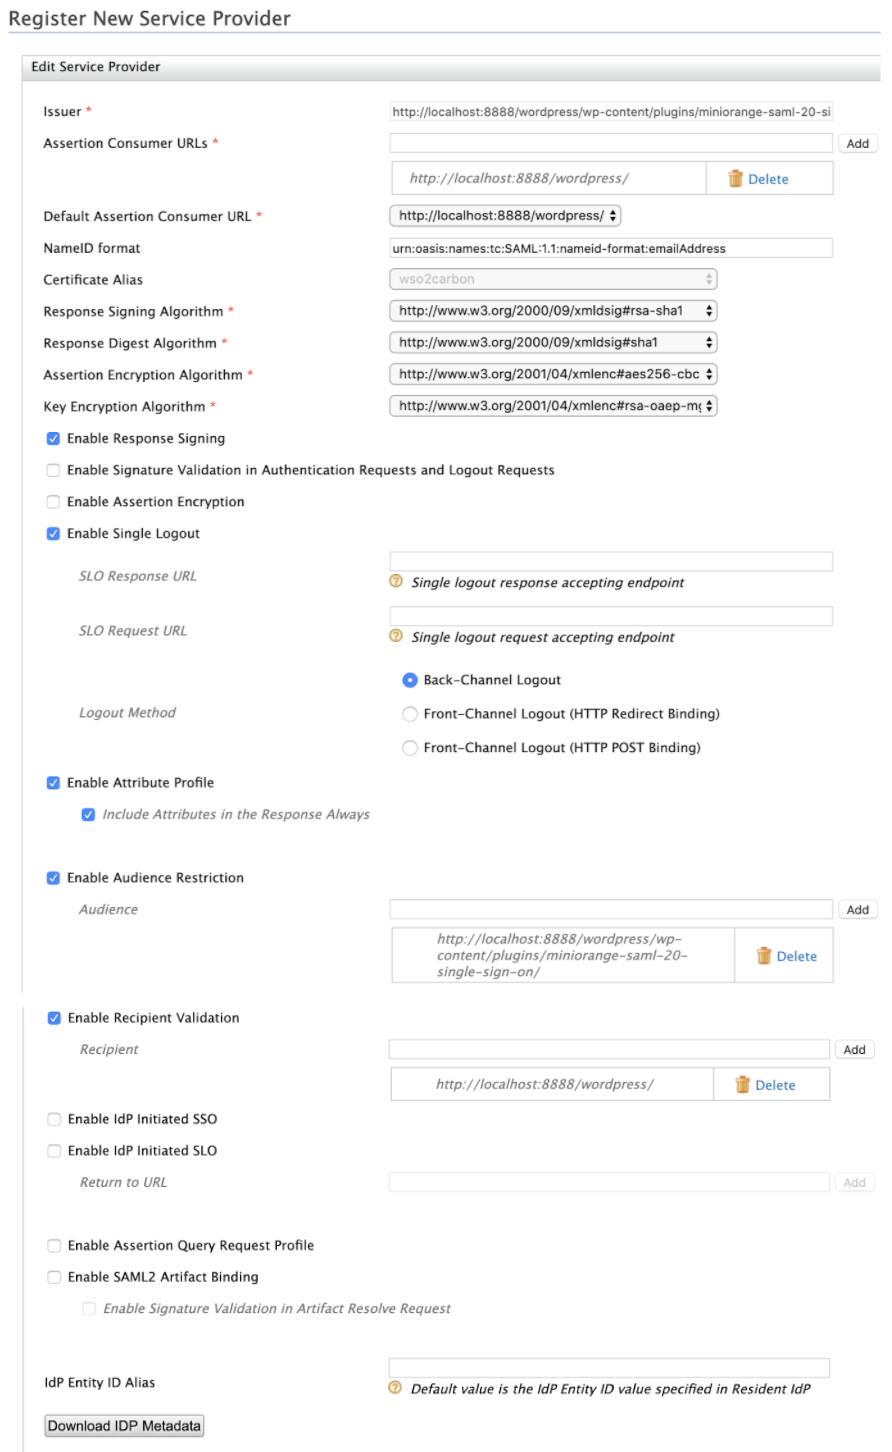
Expand the Inbound Authentication Configuration > SAML2 Web SSO Configuration section and click Configure. In the form that appears, fill out the following configuration details required for single sign-on. For more details on these attributes, refer SAML2 Web SSO Configuration.
- For the value of Issuer, provide the SP Entity ID obtained as Service Provider Metadata when configuring SAML SSO extension in WordPress.
- For the value of Assertion Consumer URL, provide the ACS Url obtained as Service Provider Metadata when configuring SAML SSO extension in WordPress.
- Uncheck Enable Signature Validation in Authentication Requests and Logout Requests.
- Check Enable Attribute Profile and Include Attributes in the Response Always.
- Check Enable Audience Restriction. Enter the Audience URL obtained as Service Provider Metadata when configuring SAML SSO extension in WordPress and click Add Audience.
- Check Enable Recipient Validation. Enter the Recipient URL obtained as Service Provider Metadata when configuring SAML SSO extension in WordPress and click Add Recipient.
- Save the configuration.
Try it out
-
Visit the WordPress site and click on the SSO widget.
-
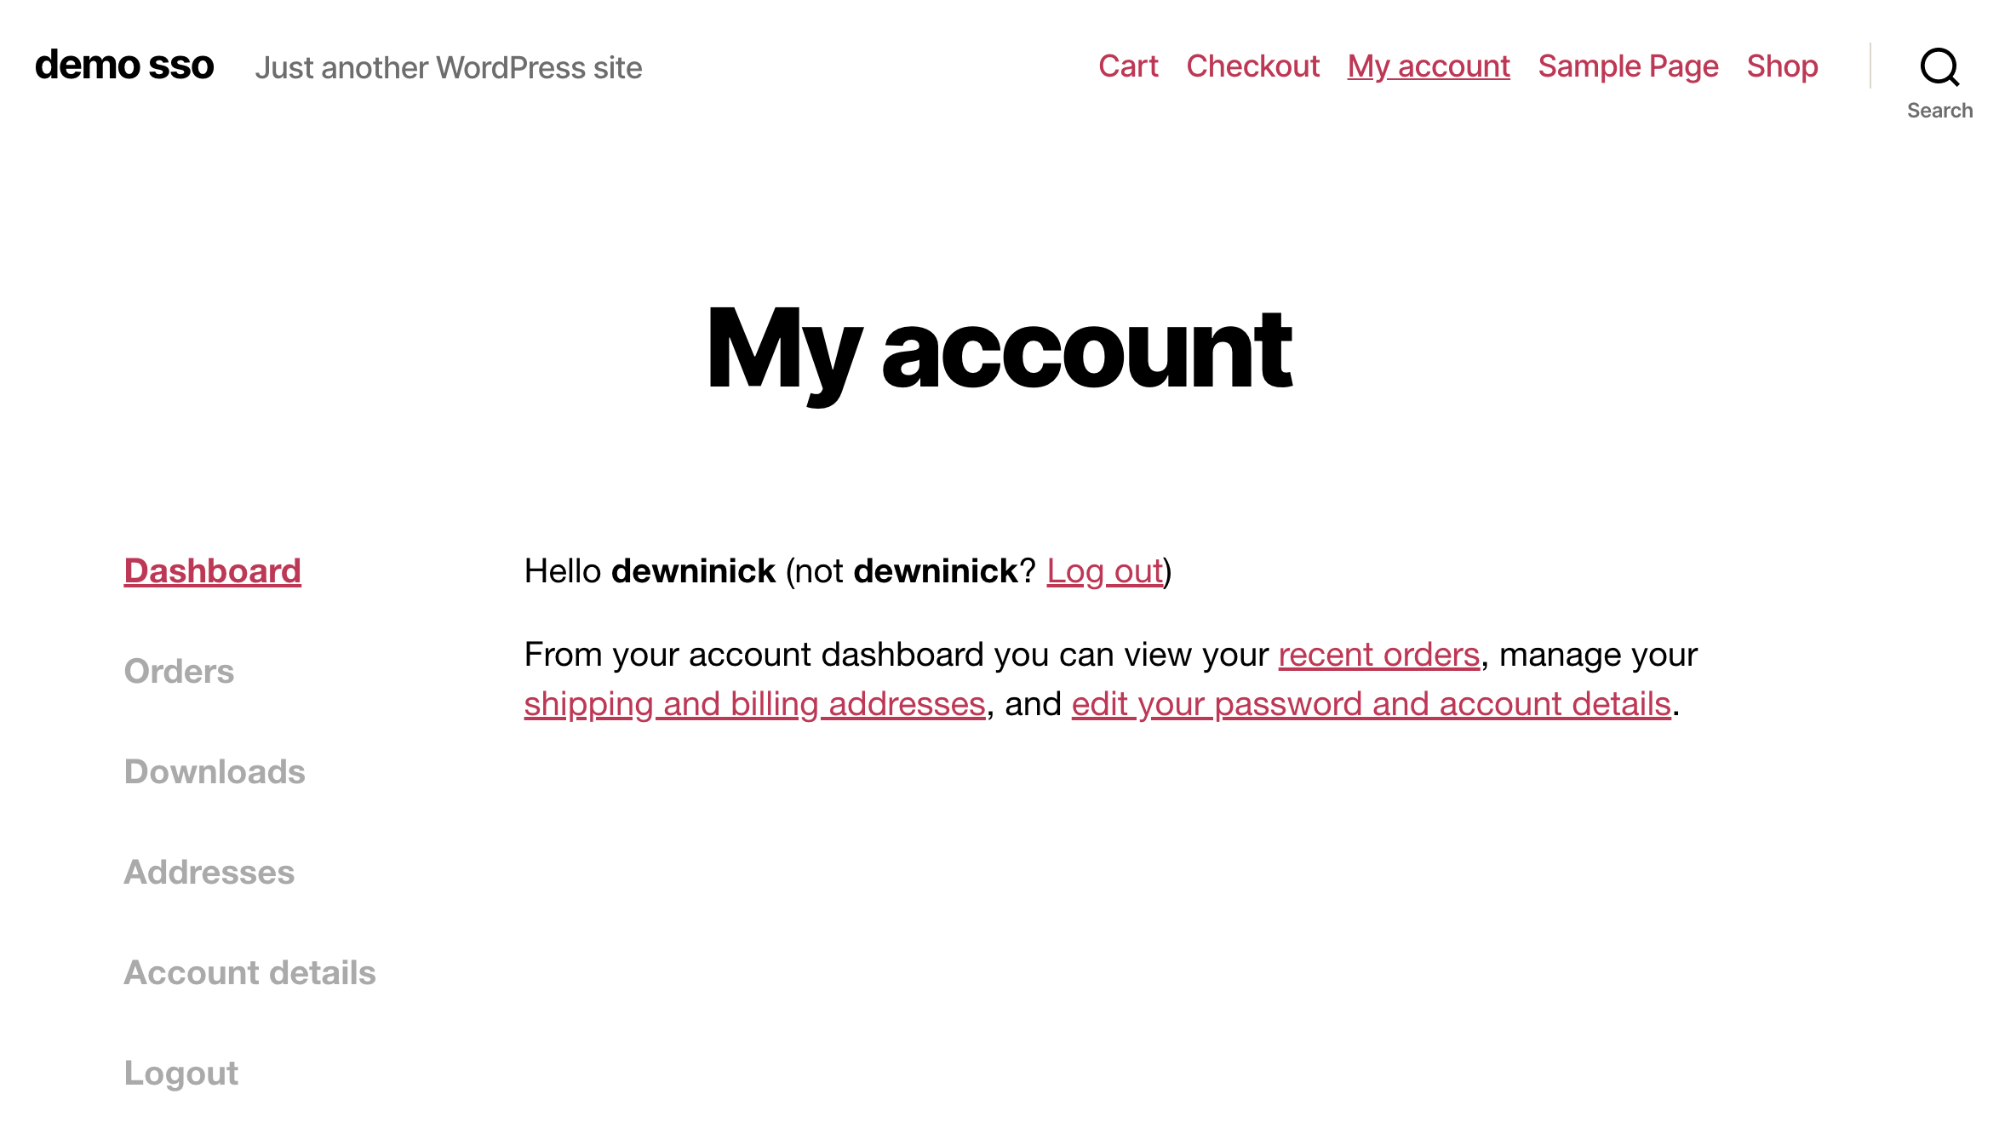
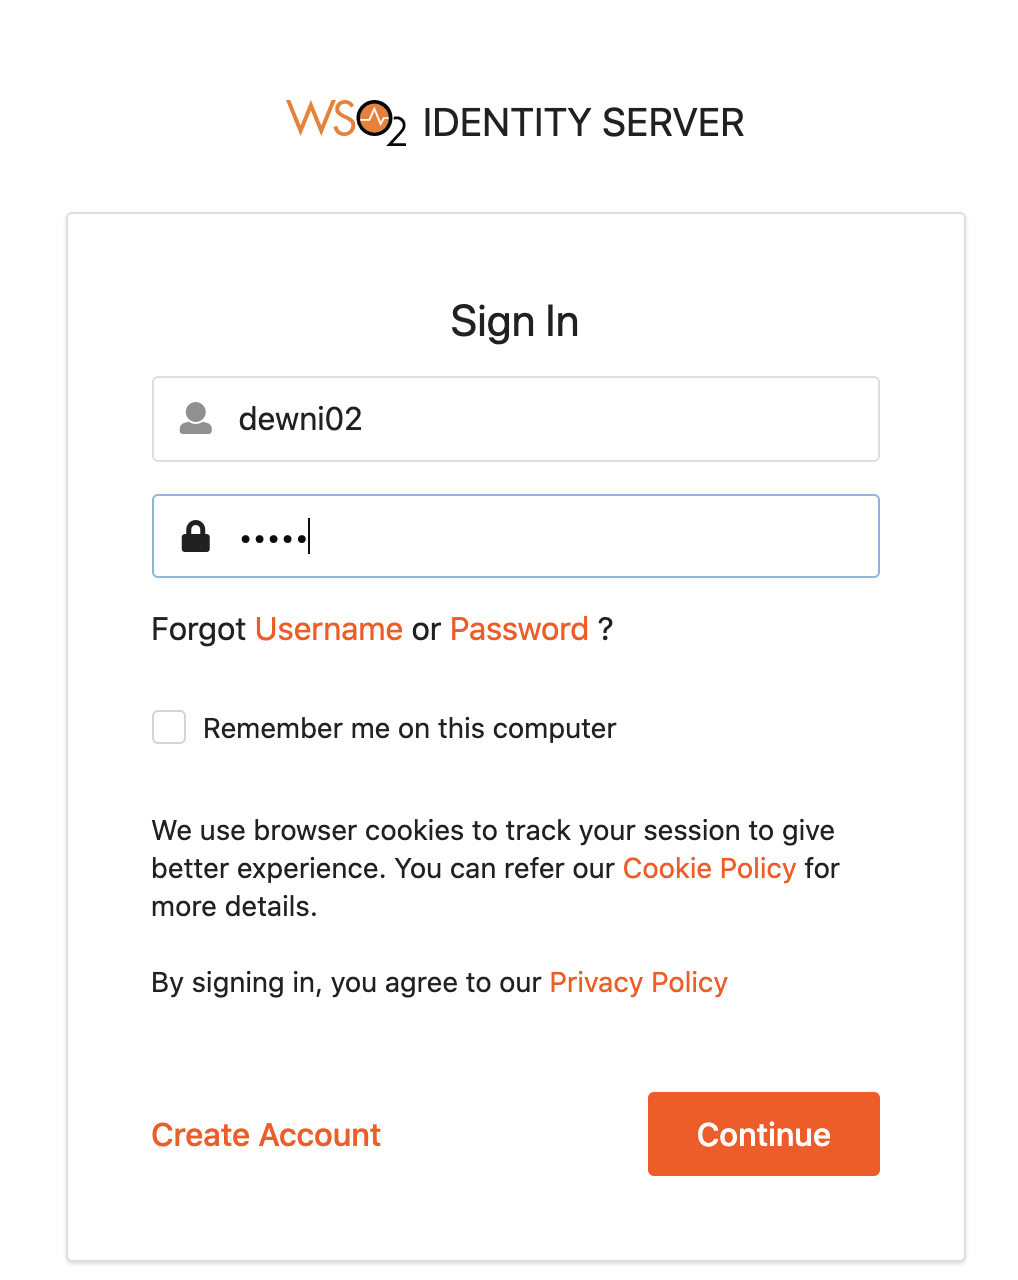
You will be redirected to WSO2 Identity Server login page. Login by providing credentials of a user in WSO2 IS.
-
Upon successful login you will be logged in to WordPress.